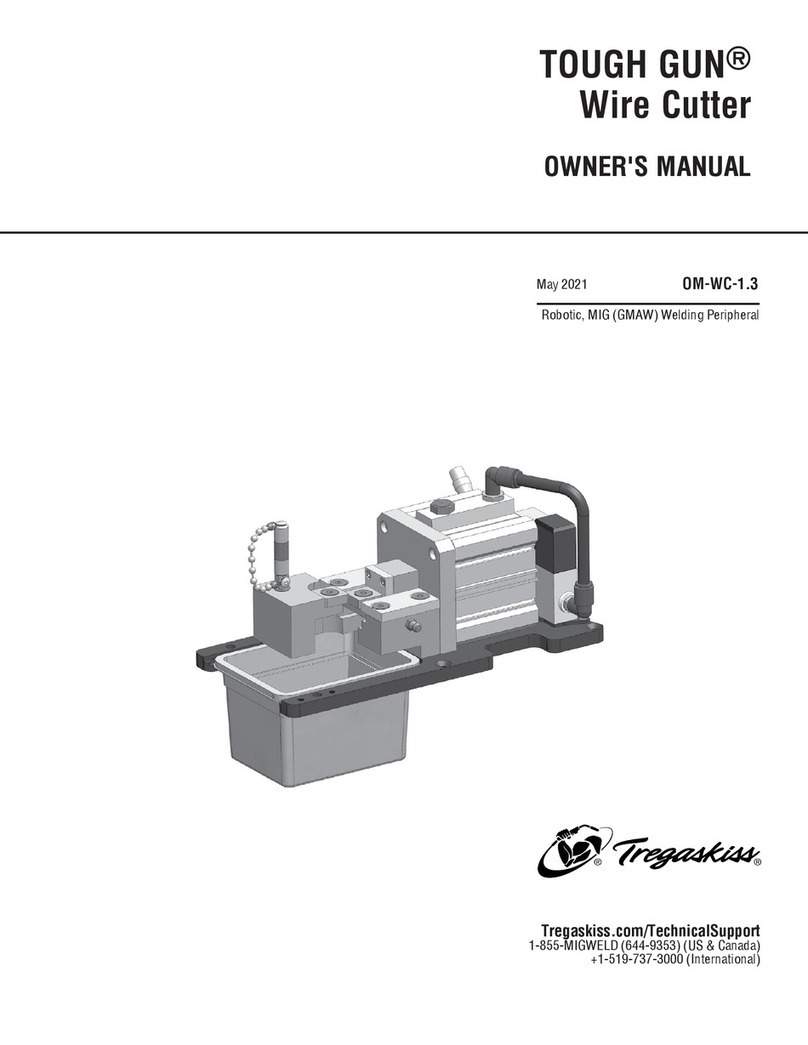
Tregaskiss TOUGH GUN User manual

OM-WC-1.1 August 2016
Processes
MIG (GMAW) Welding
Description
Robotic, MIG (GMAW) Welding
Peripheral
TOUGH GUN™ Wire Cutter
OWNER’S MANUAL
Tregaskiss
2570 North Talbot Road
Windsor, Ontario N0R 1L0
Canada
Phone: 1-855-MIGWELD (644-9353) (US & Canada)
+1-519-737-3000 (International)
Fax: 519-737-1530
For more information, visit us at Tregaskiss.com

Thank You for Choosing Tregaskiss
Thank you for selecting a Tregaskiss product. The TOUGH GUN™ Wire Cutter you have purchased has been designed and engineered
to be a reliable tool to support high production within a robotic cell. Before installing, compare the equipment received against the
invoice to verify that the shipment is complete and undamaged. It is the responsibility of the purchaser to le all claims of damage or
loss that may have occurred during transit with the carrier.
The owner’s manual contains general information, instructions and maintenance to help better maintain your product. Please read,
understand and follow all safety precautions.
While every precaution has been taken to assure the accuracy of this owner’s manual, Tregaskiss assumes no responsibility for errors
or omissions. Tregaskiss assumes no liability for damages resulting from the use of information contained herein. The information
presented in this owner’s manual is accurate to the best of our knowledge at the time of printing. Please reference Tregaskiss.com for
updated material.
For customer support and special applications, please call the Tregaskiss Customer Service Department at
1-855-MIGWELD (644-9353) (US & Canada) or +1-519-737-3030 (International) or fax 1-519-737-2111. Our trained Customer
Service Team is available between 8:00 a.m. and 5:30 p.m. EST, and will answer your product application or repair questions.
Tregaskiss manufactures premium robotic MIG (GMAW) welding guns, peripherals and consumables. For more information on other
premium Tregaskiss products, contact your local Tregaskiss distributor or visit us on the web at Tregaskiss.com.
2
For additional support materials such as spec sheets, troubleshooting information, how-to guides
and videos, animations, online congurators and much more, please visit Tregaskiss.com.
Scan this QR Code with your smart phone for immediate access to
Tregaskiss.com/TechnicalSupport

3
TABLE OF CONTENTS
Subject to Change – The information presented in this manual is accurate to the best of our knowledge at the time of printing.
Please visit Tregaskiss.com for the most up-to-date information.
SECTION 1 - SAFETY PRECAUTIONS - READ BEFORE USING ...................................................................... 4
1-1 Additional Safety Warnings for Installation, Operation and Maintenance ....................................................................................4
1-2 California Proposition 65 Warnings.............................................................................................................................................5
1-3 Principal Safety Standards ..........................................................................................................................................................5
1-4 Commercial Warranty..................................................................................................................................................................5
SECTION 2 - SPECIFICATIONS .......................................................................................................... 6
2-1 System Components ...................................................................................................................................................................6
SECTION 3 - INSTALLATION / SET UP ................................................................................................. 7
3-1 Installing TOUGH GUN™ Wire Cutter (TOUGH GUN TT3 Reamer)...............................................................................................7
3-2 Installing TOUGH GUN™ Wire Cutter (TOUGH GUN TT3E Reamer).............................................................................................7
3-3 Wiring Interface Connections (TOUGH GUN TT3 Reamer) ..........................................................................................................8
3-4 Inversing Logic............................................................................................................................................................................8
3-5 Positioning Gun...........................................................................................................................................................................8
3-6 Programming Events Sequence ..................................................................................................................................................9
3-7 Manual Operation ........................................................................................................................................................................9
SECTION 4 - MAINTENANCE........................................................................................................... 10
4-1 Replacing the TOUGH GUN Wire Cutter Components................................................................................................................10
4-2 Scheduled Maintenance.............................................................................................................................................................10
SECTION 5 - PARTS LIST .............................................................................................................. 11

4
READ INSTRUCTIONS
• Read and follow all labels and the
Owner’s Manual carefully before
installing, operating, or servicing the
unit. Read the safety information at
the beginning of the manual and each
section.
• Use only genuine replacement parts from the manufacturer.
• Perform maintenance and service according to the Owner’s
Manual, industry standards and national, state/provincial and
local codes.
MOVING PARTS can injure
• Keep away from moving parts such as
blades.
• Keep all doors, panels, covers and
guards closed and securely in place.
• Have only qualied persons remove
doors, panels, covers, or guards for
maintenance and troubleshooting as
necessary.
• Reinstall doors, panels, covers or
guards when maintenance is nished
and before reconnecting input power.
• Keep away from pinch points.
SECTION 1- SAFETY PRECAUTIONS- READ BEFORE USING
1-1 Additional Safety Warnings for
Installation, Operation and Maintenance
FIRE OR EXPLOSION hazard
• Do not install or place unit on, over,
or near combustible surfaces.
• Do not install unit near ammables.
• Do not overload building wiring – be
sure power supply system is properly
sized, rated and protected to handle
this unit.
HOT PARTS can burn
• Do not touch hot parts barehanded.
• Allow cooling period before working
on equipment.
• To handle hot parts, use proper tools
and/or wear heavy, insulated welding
gloves and clothing to prevent burns.
NOISE can damage hearing
• Noise from some processes or
equipment can damage hearing.
• Wear approved ear protection if noise
level is high.
FLYING METAL OR DEBRIS can injure or
kill
• Welding, cutting, chipping, wire
brushing and grinding cause sparks
and ying metal. As welds cool, they
can throw off slag.
• Wear approved safety glasses with
side shields even under your welding
helmet.
1-2 California Proposition 65 Warnings
Welding or cutting equipment produces fumes or gases which
contain chemicals known to the State of California to cause birth
defects and in some cases, cancer. (California Health & Safety
Code Section 25249.5 et seq.)
This product contains chemicals, including lead, known to the
State of California to cause cancer, and birth defects or other
reproductive harm. Wash hands after use.

5
1-3 Principal Safety Standards
Safety in Welding, Cutting, and Allied Processes, ANSI Standard
Z49.1, is available as a free download from the American Welding
Society at www.aws.org or purchased from Global Engineering
Documents (phone: 1-877-413-5184, website:
www.global.ihs.com).
National Electrical Code, NFPA Standard 70, from National Fire
Protection Association, Quincy, MA 02269 (phone: 1-800-344-
3555, website: www.nfpa.org and www.sparky.org).
Safety in Welding, Cutting, and Allied Processes, CSA Standard
W117.2, from Canadian Standards Association, Standards Sales,
5060 Spectrum Way, Suite 100, Ontario, Canada L4W 5NS
(phone: 1-800-463-6727, website: www.csa-international.org).
ANSI STANDARD, SAFETY FOR ROBOTS AND ROBOT SYSTEMS,
American National Standards Institute, 1430 Broadway, New
York, NY 10018
Safe Practice For Occupational And Educational Eye And Face
Protection, ANSI Standard Z87.1, from American National
Standards Institute, 25 West 43rd Street, New York, NY 10036
(phone: 212-642-4900, website: www.ansi.org).
OSHA, Occupational Safety and Health Standards for General
Industry, Title 29, Code of Federal Regulations (CFR), Part 1910,
Subpart Q, and Part 1926, Subpart J, from U.S. Government
Printing Ofce, Superintendent of Documents, P.O. Box 371954,
Pittsburg, PA 15250-7954 (phone: 1-866-512-1800) (there are
10 OSHA Regional Ofces – phone for Region 5, Chicago, is 312-
353-2220, website: www.osha.gov).
Applications Manual for the Revised NIOSH Lifting Equation, The
National Institute for Occupational Safety and Health (NIOSH),
1600 Clifton Road, Atlanta, GA 30333 (phone: 1-800-232-4636,
website: www.cdc.gov/NIOSH).
1-4 Commercial Warranty
Seller’s Products specied below shall be free from defects
in material and workmanship for the period specied below
from the delivery to an authorized Buyer provided the
Products are operated, maintained, and repaired properly
and pursuant to Product documentation provided by the
manufacturer. The Warranty against defects does not apply
to: (1) consumable components or ordinary wear items; or
(2) use of the Products with equipment, components or parts
not specied or supplied by Seller or contemplated under the
Product documentation.
Should there be a defect please refer to our Return Merchandise
Policy.
Seller reserves the right to inspect any allegedly defective
Product for the alleged deciencies and that the deciencies
were not caused by accident, misuse, neglect, improper
installment, unauthorized alteration or repair or improper
testing.
In the event of a defect covered by the above warranty, Seller
will, at its option, repair, replace or refund the purchase price
of the defective Product. Product found not defective will be
returned to Buyer at Buyer’s cost after notication by Seller’s
Customer Service Department. Any TOUGH GUN Reamer
component part replaced or repaired pursuant to the warranty
herein shall be further warranted for a period of six months
after delivery of the replacement.
EXCEPT AS SET FORTH ABOVE, SELLER MAKES NO
WARRANTY OF ANY KIND, EXPRESS OR IMPLIED,
INCLUDING, BUT NOT LIMITED TO, THE WARRANTIES
OF MERCHANTABILITY OR FITNESS FOR ANY
PURPOSE. SELLER SHALL NOT BE LIABLE UNDER ANY
CIRCUMSTANCES FOR DAMAGES OF ANY KIND. INCLUDING,
BUT NOT LIMITED TO ANY, DIRECT, INDIRECT, SPECIAL,
INCIDENTAL, OR CONSEQUENTIAL DAMAGES OR LOSS OF
PRODUCTION OR LOSS OF PROFITS RESULTING FROM ANY
CAUSE WHATSOEVER, INCLUDING, BUT NOT LIMITED TO,
ANY DELAY, ACT, ERROR OR OMISSION OF SELLER.
Genuine Bernard and Tregaskiss parts must be used for
safety and performance reasons or the warranty above shall
not be valid. Warranty shall not apply if accident, abuse, or
misuse damages a product, or if a product is modied in any
way except properly and by authorized Seller personnel.
Product Warranty
Tregaskiss TOUGH GUN™ Robotic MIG
Guns and Components
Tregaskiss TOUGH GUN™ Automatic
MIG Guns
1 year
1 year
Tregaskiss TOUGH GUN Reamer
• When factory-equipped with
Lubricator
• When both (i) factory-equipped
with Lubricator and (ii) used only
with Tregaskiss™ TOUGH GARD™
Anti-Spatter Liquid
1 year
2 years when factory
equipped with Lubricator
3 years when both (i)
and (ii)
Tregaskiss TOUGH GUN Robotic
Peripherals (Clutch, Sprayer, Wire
Cutter, Arms)
1 year
Tregaskiss Low-Stress Robotic
Unicables (LSR Unicables)
2 years

6
SECTION 2- SPECIFICATIONS
2-1 System Components
Robotic Peripheral for GMAW Welding
Power Requirements: 24 VDC
Air Supply: 80-100 psi
For complete parts list, please see SECTION 5 - PARTS LIST

7
WARNING: Ensure power supply is off and disconnected before proceeding.
Please follow your facility’s lockout / tagout procedures.
A. To Mount Wire Cutter
1. The wire cutter should be installed within the weld
cell where it is clear of all tooling and convenient for
the robot to access the unit. The base plate has been designed for
mounting on top of the TOUGH GUN Reamer. Be sure to consider
movable xtures and the connes of the robot.
2. Attach the wire cutter base to the top of the Reamer, or other
sturdy platform using three (3) M5x0.8x25 mm long bolts in the
holes provided.
B. To Connect Air Supply
1. Use only ltered lubricated air.
IMPORTANT: Requirements – 80-100 psi at 16 CFM (5.5-7.0 bar
at 450 LPM) at the wire cutter.
2. Use an air supply line with an inside diameter of 1/4” and connect
to 1/8” female NPT inlet located on the side of the valve.
C. To Connect Power Supply
1. The TOUGH GUN TT3E Reamer Ethernet module can support the
wire cutter function and as such can be connected directly to the
Reamer. Once mounted to the top of the Reamer, take the 4-Pin
M12 connector and attach it to the AUX port on the Comm Plate.
(more on page 8)
SECTION 3- INSTALLATION / SET UP
WARNING: Ensure power supply is off and disconnected before proceeding.
Please follow your facility’s lockout / tagout procedures.
A. To Mount Wire Cutter
1. The wire cutter should be installed within the weld
cell where it is clear of all tooling and convenient for
the robot to access the unit. The base plate has been
designed for mounting on top of the TOUGH GUN
Reamer. Be sure to consider movable xtures and the
connes of the robot.
2. Attach the wire cutter base to the top of the
Reamer, or other sturdy platform using three (3)
10-24 x 3/4” bolts (for Reamer Serial numbers up
to 11,299) or three (3) M5 x 0.8 x 25 mm long bolts
(for Reamer Serial numbers 11,300 and up) in the holes
provided.
B. To Connect Air Supply
1. Use only ltered lubricated air.
IMPORTANT: Requirements – 80-100 psi at 16 CFM (5.5-7.0 bar at 450 LPM) at the wire cutter.
2. Use an air supply line with an inside diameter of 1/4” and connect to 1/8” female NPT inlet located on the side of the valve.
3-1 Installing TOUGH GUN™ Wire Cutter (TOUGH GUN TT3 Reamer)
4.75”
4.25”
3-2 Installing the TOUGH GUN Wire Cutter (TOUGH GUN TT3E Reamer)
4.75”
4.25”
AUX Port

8
WARNING: Keep hands clear of xed blade and TCP Locator.
For best cutter performance, the MIG gun should be located so that
the wire to be cut is 0.03” - 0.06” horizontally away from the xed
blade.
The nished wire cut length is the vertical distance from the contact
tip to the bottom of the xed blade.
NOTE: Gun and nozzle not shown in diagram. 0.03” - 0.06”
TCP Locator
Contact Tip
Wire
Fixed
Blade
3-5 Positioning Gun
WARNING: Before start-up ensure that all connections are correct or damage to the wire cutter may occur.
NOTE: The TOUGH GUN Wire Cutter is factory set for Sourcing inputs.
To Switch from Sourcing to Sinking
1. Remove the exhaust and intake ttings.
2. Place the exhaust tting in the port marked (1).
3. Place the air line tting in the port marked (2).
This change allows the solenoid valve to function as normally open. In
this situation, as the input signal drops to zero voltage, the valve passage
opens, charging the cylinder.
WARNING: The following connection should only be performed by qualied technicians. Damage to equipment will
occur if connections are incorrect.
To Interface the wire cutter with the Controller, two (2) electrical connections are required
• BLUE LEAD – 0 VDC supply
• BLACK LEAD – 24 VDC supply 0.5 amp
3-3 Wiring Interface Connections (TOUGH GUN TT3 Reamer)
3-4 Inversing Logic
(1) Intake Port
(2) Exhaust Port
(continued from page 7)
2. If the Reamer is equipped with a nozzle detection system in
addition to the wire cutter, splitter part number TT3E-2343 will be
required, and will receive the 4-Pin M12 connector. Splitter
(TT3E-2343)

9
• Depress the recessed button located on the top of the solenoid valve.
3-7 Manual Operation
3-6 Programming Events Sequence
1. Program the robot to position the MIG gun at a right angle to the blades. Insert the gun to the proper depth and position the
wire between wire cutter blades.
2. Jog the welding wire before cycle start is initiated.
3. Cycle Start – Supply output signal from the robot controller. Pulse output for 0.5 seconds.
4. TOUGH GUN Wire Cutter will perform cutting operation.
5. Upon completion of the cutting operation, program the robot to extract the gun from the wire cutter and continue to weld.
Recessed
Button
Solenoid
Valve

10
WARNING: Ensure power supply is off and disconnected before proceeding.
Please follow your facility’s lockout / tagout procedures.
A. To Replace the Cylinder
1. Remove the air intake and exhaust ttings from the cylinder.
2. Remove both the M6 socket countersunk head cap screws (SCHCS)
holding the xed and moving blades, and the M3 socket head cap
screws (SHCS) holding the backing plate.
3. Remove the M10 SHCS attaching the slide to the cylinder. (Refer to
Section 5 - Item 9 for M10 SHCS diagram)
4. Remove the four (4) M8 SHCS attaching the cylinder to the main body.
(Refer to Section 5 - Item 10 & 11 for M8 SHCS diagram)
5. Slide old cylinder out and slide new cylinder in. Reverse and repeat
steps 1-4 to secure new cylinder.
B. To Replace the Blade(s)
PRO TIP - the blades can be rotated and used on all 4 edges, then the blade can
be ipped over and used on all 4 edges again before replacement is required.
1. Remove the blade by removing two (2) M6 SCHCS.
2. Place the replacement blade back on the wire cutter and attach using the
M6 SCHCS.
3. Manually cycle the cylinder forward to verify proper operation.
C. To Replace the Solenoid Valve
1. Remove the air ttings from the valve.
2. Remove the two (2) M3 SHCS attaching the valve to the base plate.
3. Install new valve in place, reattaching the M3 SHCS and air ttings.
SECTION 4- MAINTENANCE
4-1 Replacing TOUGH GUN Wire Cutter Components
M6 SCHCS
Cutter
Blades
The TOUGH GUN Wire Cutter will require a periodic maintenance program to ensure a reliable service life. The following
schedule is recommended:
DAILY
CHECK The air lines and interface cable for leaks and fraying.
WEEKLY
CHECK The cutter blade. The service life of the cutter blade is dependent on the type of application. In lighter duties
the blade may last indenitely but should be inspected weekly for dullness, looseness and possible breakage.
EMPTY The wire catcher basket.
QUARTERLY
LUBRICATE The sliding surfaces by applying general purpose grease (NLGI Grade 1-2) through the grease ttings located
on the sides of the main body.
4-2 Scheduled Maintenance
Intake
Fitting
Exhaust
Fitting
M3 SHCS
M6 SCHCS
Cylinder
Air Fittings
M3 SHCS
Solenoid Valve

11
SECTION 5 - PARTS LIST
ITEM # PART # DESCRIPTION
1 WC-100-8 Wire Cutter Base Plate
2Not Sellable M6x1x16 mm SCHCS
3 WC-100-20 Wire Catcher Basket
4 WC-100-27 Backing Plate
5Not Sellable M3x0.5x12 mm SHCS
6 WC-100-7 Blade (includes ITEM 2)
7 RR-707-30 TCP Locator
8 WC-100-31 Cylinder
ITEM # PART # DESCRIPTION
9Not Sellable M10x1.5x25 mm SHCS
10 Not Sellable M8x1.25x55 mm SHCS
11 Not Sellable M8x1.25x50 mm SHCS
12 TR-2221 Breather Vent
13 WC-100-24 Solenoid Valve (for TOUGH GUN TT3 Reamer)
WC-100-24E Solenoid Valve (for TOUGH GUN TT3E Reamer)
14 WC-100-26 Mufer
15 WC-100-18 Air Line Kit
16 WC-100-30 TOUGH GUN Reamer Installation Kit
WC-100-30 TOUGH GUN Reamer
wire cutter Installation Kit
(included with Wire Cutter)

For additional support materials such as Spec Sheets, troubleshooting information,
how-to guides and videos, animations, online congurators and much more, please
visit Tregaskiss.com. Scan the QR Code with your smart phone for immediate
access to Tregaskiss.com/TechnicalSupport.
Scan to view TOUGH GUN™ Wire Cutter Manual........................................................
Tregaskiss
2570 North Talbot Road
Windsor, Ontario N0R 1L0
Canada
Phone: 1-855-MIGWELD (644-9353) (US & Canada)
+1-519-737-3000 (International)
Fax: 519-737-1530
For more information, visit us at Tregaskiss.com
Scan to view Tregaskiss Consumables Spec Sheets...................................................
Scan to view TOUGH GUN TT3 Reamer Owner’s Manual...........................................
Scan to view TOUGH GUN TT3E Reamer Owner’s Manual.........................................
Other manuals for TOUGH GUN
2
Table of contents
Other Tregaskiss Cutter manuals