manuals.online logo
Brands
  1. Home
  2. •
  3. Brands
  4. •
  5. TRENDnet
  6. •
  7. Security Camera
  8. •
  9. TRENDnet TV-IP300W User manual

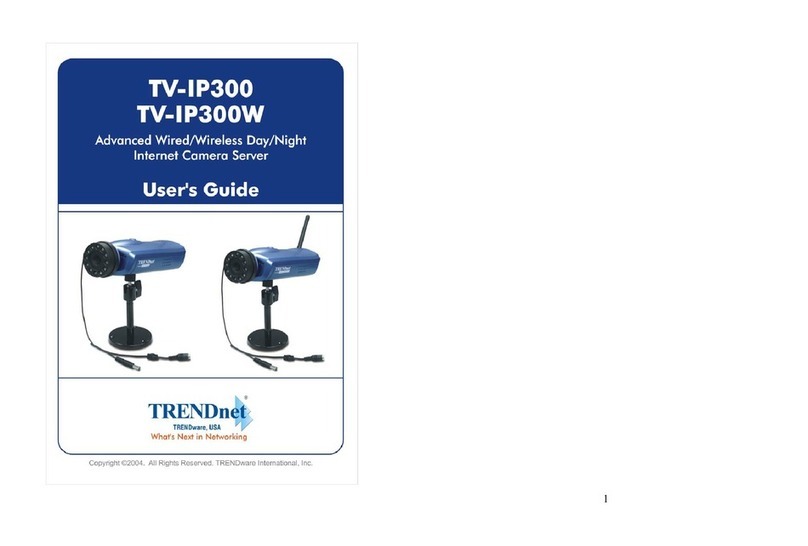
TRENDnet TV-IP300W User manual

Copyright ©2004. All Rights Reserved. TRENDware International, Inc.
TRENDnet
TRENDware, USA
What's Next in Networking
TV-IP300W
Version 1.11.05
Advanced Day/Night Internet Camera Server
Quick Installation Guide
Guide d'installation rapide pour le
Internet Caméra Serveur Avancée Jour et Nuit
Anleitung zur Schnellinstallation des
Infrarot Nachtsicht Farb IP Kamera Server
Guía de Instalación Rápida para
Servidor Avanzado De la Cámara fotográfica Del Internet De Dia/Noche
Table of Contents
English ......................................................................................................
Troubleshooting ........................................................................................
1
1
2
4
5
7
1. Prepare for Installation ......................................................................
2. Install Hardware ................................................................................
3. Configure the Internet Camera ..........................................................
4. Using the Internet Camera Wirelessly ...............................................
Thank you for purchasing the TV-IP300W. This Internet Camera will allow you
to view live images from internal and external networks.
This guide will help you set up and configure your Internet Camera. Following
the installation instructions should be quick and easy. If you run into problems,
please refer to the Troubleshooting section or the more detailed installation
procedures on the CD User's Guide. If you need further technical support,
please visit www.trendnet.com or call our technical support department by
phone.
Verify Package Contents
Please make sure you have everything in the box:
1
1. Prepare for Installation
English QIG
English
System Requirement
1. 10/100Mbps Ethernet
2. CD-ROM Drive
3. CPU: Intel Pentium III 350MHz or above
4. Memory: 128MB or above
5. Web Browser: Microsoft Internet Explorer 5.0 or above
6. VGA Resolution: 800 x 600 or above
TV-IP300W
CD-ROM Quick Installation Guide
AC Power Adapter Metal Stand
Copyright ©2004. All Rights Reserved. TRENDware International, Inc.
TRENDnet
TRENDware, USA
What's Next in Networking
TV-IP300W
Version 1.11.05
Advanced Day/Night Internet Camera Server
Quick Installation Guide
Guide d'installation rapide pour le
Internet Caméra Serveur Avancée Jour et Nuit
Anleitung zur Schnellinstallation des
Infrarot Nachtsicht Farb IP Kamera Server
Guía de Instalación Rápida para
Servidor Avanzado De la Cámara fotográfica Del Internet De Dia/Noche
2
2. Install Hardware
1. Position the metal stand, and mount the Internet Camera to the stand.
2. Connect the RJ-45 network cable to the Internet Camera then connect the
other end of the network cable to a switch or hub.
3. Connect the power adapter to the Internet Camera. Make sure to use the
power adapter supplied with the Internet Camera.
English
TV-IP300W
Note: Using a different power adapter may damage the unit.
32
1
3English
Special I/O Ports Features
1. I/O Connector
The Internet Camera provides the I/O connectors on the rear panel, which
provide the physical interface to send and receive digital signals to variety of
external alarm devices.
2. DIP Switch
AES/AI Switch: When using the Auto Iris Lens, please switch to AI position
Flicker less/Off: If the power frequency used (in NTSC area) is 50Hz, please
switch to Flicker less position.
3. Iris Level
This is used only when the DC-Iris lens is connected to the camera.
4. Reset Button
This resets all the settings in the camera to default factory settings.
Power
Reset switch
RJ-45
Connector
Iris level
I/O connector
DIP switch
4
1. Open Internet Browser Window and enter <http://192.168.0.30> (camera's
default IP address)
2. Click on System Administration to access the configuration page.
3. Enter an IP address, Subnet mask, and Default gateway that corresponds
with your existing network for the camera. Then click on Save button to keep
the changes.
English
3. Configure the Internet Camera
Note: The PC's IP (Example 192.168.0.50) address must correspond
with the Internet Camera's IP address (Default IP: 192.168.0.30) in the
same segment for the two devices to communicate.
Note: If you need to access the configuration remotely, it is
recommended to enter a static IP address and the Internet DNS IP
address.
5English
4. Using the Internet Camera Wirelessly
1. Scroll down in the System Administration configuration page until you see
the Wireless Interface heading.
2. Type in the same SSID of your wireless Access Point or Router into the
ESSID field. Set Wireless Mode to Infrastructure and make sure that the
channel is the same as your wireless Access Point or Router. If your
wireless Access Point or Router has WEP encryption enabled, select Data
encryption and make sure that the Auth mode, Key length, Key format,
and Default key are the same as your wireless Access Point or Router.
6English
3. Scroll down to the bottom of the page and Click Save.
4. Disconnect the CAT5 cable and the power adapter connector from the TV-
IP300W.
5. Reconnect the power adapter connector to the TV-IP300W. Allow 5-10
seconds for the TV-IP300W and the wireless Access Point to communicate
wirelessly. Then type the IP Address that you assigned to the TV-IP300W in
your web browser for verification.
7
Q1.
A1.
Q2.
A2.
Q3.
A3.
Q4.
A4.
The image is blurry, how do I fix this?
You can adjust the Internet Camera's focus by rotating the lens.
Can I replace the camera lens?
The Internet Camera's Lens is replaceable with a standard CS-Mount
type lens.
How do I view the Internet Camera's live images within my Local
Network?
Open a web browser (Internet Explorer or Netscape), type your
Wireless Internet Camera's IP address (i.e.: 192.168.0.30) in the Address
bar, and then hit the Enter key. The Welcome page of the Internet Camera
will appear.
When I enter the IP address of the camera, the image does not load,
why?
Please make sure all the Active X features are enabled for your
Internet Explorer.
1. Go to Tool (on the Tool bar) > Internet options > Security
Troubleshooting
8
2. Click on Custom Level and make sure all ActiveX controls are set to
"Enable" and click OK.
3. Once you save the settings, the browser will load again and the image
should appear.
1. Select Use the following IP address option and enter the IP, Subnet
Mask and Default gateway addresses.
2. Click OK to complete
9
Q5.
A5.
How do I configure my computer's IP address?
For Windows 2000/XP users:
- On the Desktop, right click on My Network Places > select Properties
> right click on the Local Area Connection > select Properties,
the Local Area Connection Properties Window will appear
- Under General tab, select Internet Protocol (TCP/IP) > click on
Properties button, Internet Protocol (TCP/IP) Properties Window will
appear
10
For Windows 98/ME users:
- On the Desktop, right click on Network Neighborhood > select Properties >
right click on the Local Area Connection > select Properties, the Local Area
Connection Properties Window will appear
- Under Configuration tab, select your Network Adapter (TCP/IP protocol) >
click on Properties button, TCP/IP Protocol Properties Window will appear
1. Select Specify an IP address option and enter the IP, Subnet Mask
addresses.
Technical Support Hours
7:00AM ~ 6:00PM, Monday through Friday
Pacific Standard Time (except holidays)
Contact Technical Support
Telephone: +1-310-626-6252
Fax: +1-310-626-6267
Website: www.TRENDNET.com
E-mail: [email protected]
For detailed information about the TV-IP300W's configuration and advanced
settings, please refer to the User's Guide on the included CD-ROM or to
www.TRENDnet.com.
Copyright ©2004. All Rights Reserved. TRENDware International, Inc.
TRENDnet
TRENDware, USA
What's Next in Networking
@
Product Warranty Registration
Please take a moment to register your product online.
Go to TRENDware’s website at http://www.TRENDNET.com
TRENDware International, Inc.
3135 Kashiwa Street
Torrance, CA 90505
http://www.TRENDNET.com

Other manuals for TV-IP300W

1

Other TRENDnet Security Camera manuals
TRENDnet TV-IP110 - SecurView Internet Surveillance... User manual
TRENDnet

TRENDnet TV-IP110 - SecurView Internet Surveillance... User manual

TRENDnet TV-IP200 Instruction Manual

TRENDnet

TRENDnet TV-IP200 Instruction Manual

TRENDnet TV-IR500 User manual

TRENDnet

TRENDnet TV-IR500 User manual

TRENDnet TV-IP311PI User manual

TRENDnet

TRENDnet TV-IP311PI User manual

TRENDnet TV-IP212W - Wireless Internet Camera Server User manual

TRENDnet

TRENDnet TV-IP212W - Wireless Internet Camera Server User manual

TRENDnet TV-IP312 User manual

TRENDnet

TRENDnet TV-IP312 User manual

TRENDnet TV-IP1328PI User manual

TRENDnet

TRENDnet TV-IP1328PI User manual

TRENDnet TV-IP312 User manual

TRENDnet

TRENDnet TV-IP312 User manual

TRENDnet TV-IP1313PI User manual

TRENDnet

TRENDnet TV-IP1313PI User manual

TRENDnet TV-IP420P User manual

TRENDnet

TRENDnet TV-IP420P User manual

TRENDnet TV-H400 User manual

TRENDnet

TRENDnet TV-H400 User manual

TRENDnet TV-IP400 User manual

TRENDnet

TRENDnet TV-IP400 User manual
TRENDnet TV-IP422 User manual

TRENDnet

TRENDnet TV-IP422 User manual

TRENDnet TV-IP311PI User manual

TRENDnet

TRENDnet TV-IP311PI User manual

TRENDnet TV?IP450PI User manual

TRENDnet

TRENDnet TV?IP450PI User manual

TRENDnet TV-IP851WC User manual

TRENDnet

TRENDnet TV-IP851WC User manual

TRENDnet TV-IP440PI User manual

TRENDnet

TRENDnet TV-IP440PI User manual

TRENDnet TV-IP310PI User manual

TRENDnet

TRENDnet TV-IP310PI User manual

TRENDnet TV?IP450PI User manual

TRENDnet

TRENDnet TV?IP450PI User manual

TRENDnet TV-IP501W User manual

TRENDnet

TRENDnet TV-IP501W User manual

TRENDnet TV-IP200W User manual

TRENDnet

TRENDnet TV-IP200W User manual

TRENDnet TV-IP602WN User manual

TRENDnet

TRENDnet TV-IP602WN User manual

TRENDnet TV-IP551WI User manual

TRENDnet

TRENDnet TV-IP551WI User manual
TRENDnet TV-IP743SIC User manual

TRENDnet

TRENDnet TV-IP743SIC User manual

Popular Security Camera manuals by other brands

Interlogix TruVision TVP-5201 Configuration manual

Interlogix

Interlogix TruVision TVP-5201 Configuration manual

Axis Q6000-E user manual

Axis

Axis Q6000-E user manual

Spypoint TINY-WBF quick start guide

Spypoint

Spypoint TINY-WBF quick start guide

Assa Abloy Yale SV-DAFX-B EU Series manual

Assa Abloy

Assa Abloy Yale SV-DAFX-B EU Series manual

Cymbol G3 Series user guide

Cymbol

Cymbol G3 Series user guide

Baumer EXG03 user guide

Baumer

Baumer EXG03 user guide

JVC VN-V225VPU Specifications

JVC

JVC VN-V225VPU Specifications

Foscam X5 user manual

Foscam

Foscam X5 user manual

Key Digital KD-CAMUSB Quick setup guide

Key Digital

Key Digital KD-CAMUSB Quick setup guide

JAI RM-2030GE user manual

JAI

JAI RM-2030GE user manual

Panasonic GPMF622 - MACHINE VISION CAMER operating instructions

Panasonic

Panasonic GPMF622 - MACHINE VISION CAMER operating instructions

Foscam FI8918 user manual

Foscam

Foscam FI8918 user manual

Allied AVT Bigeye G Technical manual

Allied

Allied AVT Bigeye G Technical manual

Axis Q3708-PVE user manual

Axis

Axis Q3708-PVE user manual

Orno OR-AK-1204 Operating and instalation instructions

Orno

Orno OR-AK-1204 Operating and instalation instructions

Digital Watchdog MEGApix Ai DWC-PDS10Wi28A user manual

Digital Watchdog

Digital Watchdog MEGApix Ai DWC-PDS10Wi28A user manual

COP-USA CD129H-SL Contact information

COP-USA

COP-USA CD129H-SL Contact information

avertX HD354IR user manual

avertX

avertX HD354IR user manual

manuals.online logo
manuals.online logoBrands
  • About & Mission
  • Contact us
  • Privacy Policy
  • Terms and Conditions

Copyright 2025 Manuals.Online. All Rights Reserved.