manuals.online logo
Brands
  1. Home
  2. •
  3. Brands
  4. •
  5. TREX
  6. •
  7. Automobile Accessories
  8. •
  9. TREX ZROADZ Series User manual

TREX ZROADZ Series User manual

GRILLE Assembly - Complete
Page 1
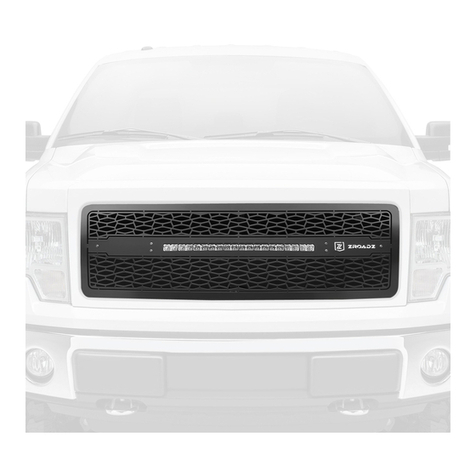
The ZROADZ Series Grilles comes into 2 different configurations. One style features the LED Light Bar mounting hidden on the backside, while
the other style has exposed mounting provisions on the face side of the grille. Please note this and identify your ZROADZ Grille Series configuration and follow the
instruction version that corresponds with your grille.
START HERE
STEP 1
STEP 2
STEP 3
STEP 4
STEP 1
STEP 2
STEP 3
STEP 4
GRILLE CONFIGURATION STYLE 2
EXPOSED LED LIGHTHIDDEN LED LIGHT
GRILLE CONFIGURATION STYLE 1
ZROADZ Grille series - LED Installation Guide
FIG 1 FIG 2
FIG 1
FIG 5
FIG 7
FIG 1
FIG 5
FIG 7
FIG 3 FIG 3
FIG 2
FIG 6
FIG 8
FIG 2
FIG 6
FIG 8
FIG 4 FIG 4
Lay out your parts. From the backside of the grille, put
into place the ZROADZ Logo Backing Plate.
Put into place one of the Bracket Tabs and seucre with
provided Hardware as seen in Fig. # 2-4 and then from the
backside of grille position LED Light Bar.
With LED Light placement set, put into position the
remaining bracket and the finally tighten LED and all
Mounting Brackets into their final secured position.
Lay out your parts. From the backside of the grille, put
into place the ZROADZ Logo Backing Plate.
Put into place one of the Bracket Tabs and seucre with
provided Hardware as seen in Fig. # 1-4.
From the face side of grille slip the LED Light bar into
place. On the opposite side, position the remaining
bracket and finally tighten LED and Brackets into position.
There is a final step for both styles of ZROADZ Grilles. See
both of the Figure #8 Images and note that there is an
exposed hole. Use the Provided Hardware Button Head
Screw and fill the hole and tighted down with Nut. This
will create symetrical look from side to side.
Continued on page 2
TOOLS REQUIRED:
Flat Head Screwdriver
Phillips Screwdriver
Cutting Wheel
10mm Socket
Ratchet & Extensions
3/6” Drill Bit
Drill
Z312111
2015 GMC Sierra
2500/3500 HD
2015 GMC Sierra 2500/ 3500 HD
ZROADZ Series LED Grille Insert
Z312111
2015 GMC Sierra
2500/3500 HD
PARTS LIST
(8) - #8 screw 3/4”
(8) - #8 Flat Nuts
(2) - Bracket Mounts
Step 1
Open hood and remove the 12 plastic push clips
securing the plastic radiator shroud to the radiator
core. Carefully use a at head screwdriver to release
the clip up, you can now remove the clips. Once all
clips have been removed the plastic radiator shroud
can be removed.
(Fig 1)
PLEASE READ AND UNDERSTAND ALL INSTRUCTIONS BEFORE INSTALLATION.
Auto makers offer varied models
to each vehicle and occasionally manufacture more than one body style of the same model. To assure your part is correct;
our tech department can be contacted at [email protected] to verify tment or assist with tech questions. All other inquires
can be directed to [email protected]. In the event you do not have internet access please call 1-800-287-5900.
Fig 1
page 1
Step 2
Using your 10mm socket and ratchet remove the four
(4) 10mm bolts securing the upper grille assembly to the
radiator support.
(Fig 2)
Fig 2
NOTE:
- We recommend painting all areas exposed behind grille black
prior to installing for best results.
Continued on page 3 page 2
Z312111
2015 GMC Sierra
2500/3500 HD
Z312111
2015 GMC Sierra
2500/3500 HD
Step 4
Using a cutting wheel carefully cut away the center
section of the grille assembly. Afterwards use a le or
sandpaper to clean up any sharp or jagged edges.
(Fig 4)
Fig 4
Step 3
Gently lift the top of grille assembly up while pulling
back at the same time. Depress the four (4) release tabs
located on the inside of the factory grille assembly with
your at head screwdriver. Firmly grasp the grille pulling
away from the vehicle to remove it.
(Fig 3)
Fig 3
Step 5
Flip grille face down and place billet grille into grille
opening. Align the tabs to the inner grille shell.
Carefully drill a 3/16” hole, use the pre drilled holes on
the grille tabs as guides . (Fig 5)
Fig 5
Continued on page 4 page 3
Z312111
2015 GMC Sierra
2500/3500 HD
Z312111
2015 GMC Sierra
2500/3500 HD
Step 7
Your installation is now complete. Reattach the grille/
bumper assembly back to the vehicle in reverse order
of removal. Make sure you reconnect all disconnected
wiring harness and reattach all clips and screws.
Wire
the LED Light Bar via our optional wiring harness kit
(part# 639HAR1) or custom wiring harness. Light bars
are installed ush with the grille from the factory. This
may or may not be ideal for each light depending on
the conguration of your vehicle and its options and
or modications. To adjust the angle of your Light Bar,
rotate the Light Bar to adjust the angle, then tighten
the hardware once the desired angle is achieved
(please be careful not to over tighten the mounting
hardware or scratch the nish of the grille). It is best to
adjust the angle with the vehicle on level ground with
lights facing a wall, garage door or other solid barrier.
We recommend checking from a distance of 25’.
(Fig 7)
Fig 7
Step 6 “DENALI HD ONLY”
Secure the grille assembly with the screws and U nuts.
(Fig 6)
Fig 6
Step 6 “STANDARD HD”
Secure the grille assembly with the screws and U nuts.
The outer tabs use the grille brackets and additional
screws secure to the inner grille shell as shown. (Fig 6)
Fig 6

This manual suits for next models

1

Other TREX Automobile Accessories manuals

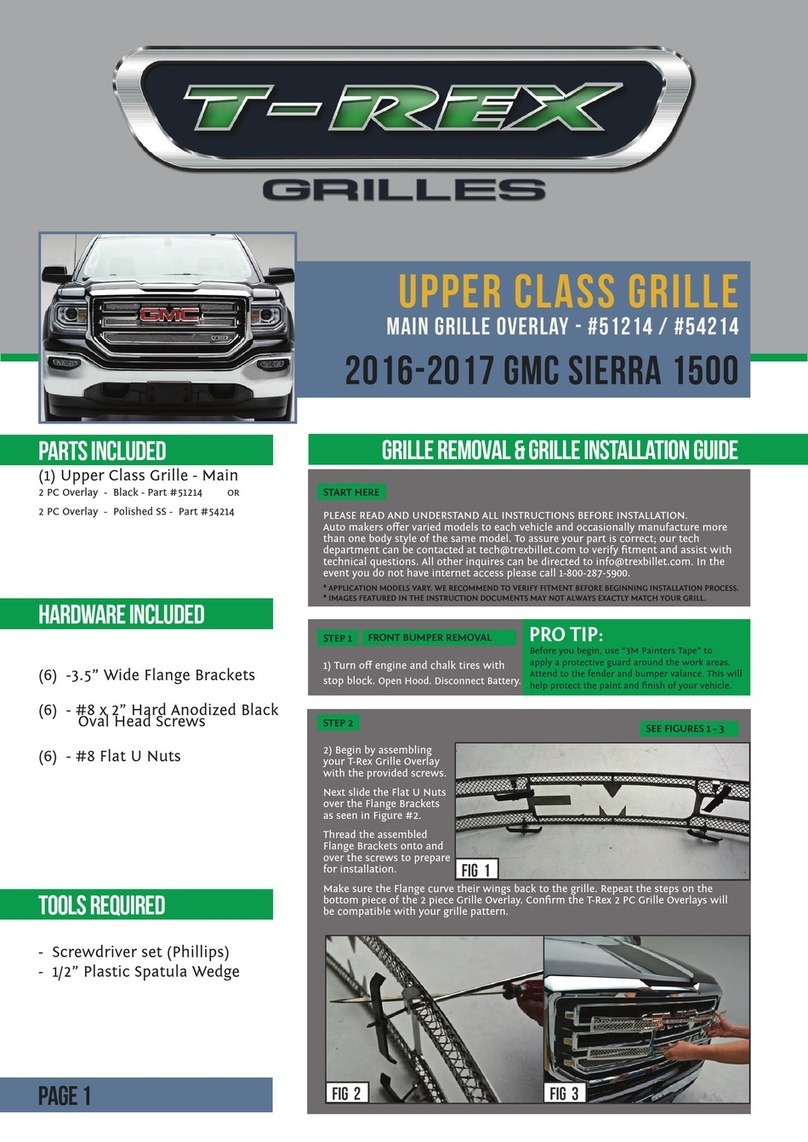
TREX 51214 User manual

TREX

TREX 51214 User manual

TREX ZROADZ  Series User manual

TREX

TREX ZROADZ Series User manual

TREX 20567 User manual

TREX

TREX 20567 User manual

TREX TEX-51127 User manual

TREX

TREX TEX-51127 User manual

TREX 20568 User manual

TREX

TREX 20568 User manual

TREX BILLET Series User manual

TREX

TREX BILLET Series User manual

TREX Upper Class Series User manual

TREX

TREX Upper Class Series User manual

TREX Upper Class Grille User manual

TREX

TREX Upper Class Grille User manual

TREX ZROADZ Series User manual

TREX

TREX ZROADZ Series User manual

TREX 6311271 User manual

TREX

TREX 6311271 User manual

Popular Automobile Accessories manuals by other brands

Caliber RampPro HD  13528 Assembly instructions

Caliber

Caliber RampPro HD 13528 Assembly instructions

Metra Electronics 99-5800 installation instructions

Metra Electronics

Metra Electronics 99-5800 installation instructions

Curt Manufacturing 13337 Installation

Curt Manufacturing

Curt Manufacturing 13337 Installation

Alpine i509-WRA-JK installation manual

Alpine

Alpine i509-WRA-JK installation manual

Rhino-Rack 43104 Fitting instructions

Rhino-Rack

Rhino-Rack 43104 Fitting instructions

MARDER SCHRECK 16277 operating instructions

MARDER SCHRECK

MARDER SCHRECK 16277 operating instructions

Westfalia 305 407 300 107 Installation and operating instructions

Westfalia

Westfalia 305 407 300 107 Installation and operating instructions

HaWeKo OPR155 installation manual

HaWeKo

HaWeKo OPR155 installation manual

Joie every stage instruction manual

Joie

Joie every stage instruction manual

Twinny Load A 26 Fitting instructions

Twinny Load

Twinny Load A 26 Fitting instructions

Pyle PLCM4235 user manual

Pyle

Pyle PLCM4235 user manual

Directed Directechs DB3 installation guide

Directed

Directed Directechs DB3 installation guide

Thule 1479 instructions

Thule

Thule 1479 instructions

Safe Fleet Prime Design FBM-1029 quick start guide

Safe Fleet

Safe Fleet Prime Design FBM-1029 quick start guide

Bestop HighRock 4x4 42950 installation instructions

Bestop

Bestop HighRock 4x4 42950 installation instructions

Roadmaster 155 installation instructions

Roadmaster

Roadmaster 155 installation instructions

Yakima ROC 4 manual

Yakima

Yakima ROC 4 manual

Gilis BebeStars MACAN 920 user manual

Gilis

Gilis BebeStars MACAN 920 user manual

manuals.online logo
manuals.online logoBrands
  • About & Mission
  • Contact us
  • Privacy Policy
  • Terms and Conditions

Copyright 2025 Manuals.Online. All Rights Reserved.