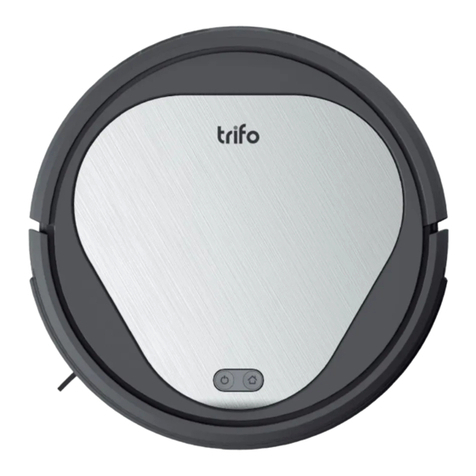
Trifo Ironpie m6+ User manual

Ironpie m6+
USER MANUAL

Safety Instructions
NOTE: CAUTION:
Before using this product, please read and follow all the following safety instructions, and keep this manual for future reference.
Failure to follow the instructions and safety precautions in this manual may cause damage to the product.
1.Only authorized technicians can disassemble this product. Do not disassemble
the product by yourself.
2.This product is only compatible with the power adapter provided by the
manufacturer.
3.Do not touch wires, sockets or power adapters when your hands are wet.
4.Do not place this product near cigarette butts, lighters and other smoldering fires.
5.Do not bend wires excessively or place heavy or sharp objects on the robot.
6.The Ironpie m6+ is for indoor use only.
7.Do not sit on the robot.
8. Do not run the robot in wet and humid environments such as bathrooms.
9.Before using this product, please remove all vulnerable items (e.g., glasses,
lamps, etc.) on the ground as well as items (e.g., wires, paper sheets,
curtains) that may entangle the side brushes and the suction passage.
10.Do not place the robot on a table or a chair where it might fall off.
11.Please carefully check whether the power adapter is connected to the
socket before use, otherwise the battery may be damaged.
12.Please inform other family members when it starts operating to prevent slips
and trips.
13.Please empty the dustbin when it is full.
14.Please operate at room temperature. Do not expose the product or its batteries
to freezing or extreme heat.
15.Please remove the battery if it is damaged.
16.Unplug the robot before replacing the battery.
17.Please recycle the discarded batteries safely.
1.Only use rechargeable battery packs approved by the manufacturer.
2. Do not use this product near any source of heat or open flame.
3.It is forbidden to use this product in extremely hot (above 40°C/ 104°F) or extremely
cold (below 0°C/ 32°F).
4.Remove small or fragile objects from the cleaning area before use. Remove objects
on furniture that can fall if the furniture is bumped as well.
5.Move any power cords as well as cords for blinds and curtains out of the way to
reduce the risk of objects being pulled down.
6.Do not use this product to pick up large debris, liquid spills, bleach, paint, petrol, or
any flammable materials such as cigarettes, matches, and ashes.
7.Do not block the suction port of the product. Keep suction port free of lint, hair and
other matter.
8. Do not drag the power cord or place it near any source of heat. Doing so may result
in damage to the cord, leading to fire or electric shock.
9. Stop using the product if the chargingstation is damaged.
10.Do not burn the product. It can lead to battery explosions.
1

Table of Contents
Pause, Recharge, and Shutdown
In the Box
About Your Ironpie
Get Started
Charging
Start Cleaning 8
8
App Installation 9
Water Tank 11
Dustbin Cleaning 12
Water Tank and Cleaning Cloth Care 15
Brush Care and Cleaning 16
Charging Contacts, Cliff Sensor, and Wheels 17
Troubleshooting 18
Indicator Lights 20
Specifications 21
3
4
6
7
Customer Service 23
2

Ironpie m6+ Charging Station
Side Brushes
Cleaning Brush
High Efficiency Filter
3
Power Adapter
Dustbin
In the Box
Water Tank
Cleaning Cloth

4
About Your Ironpie
Power Button
Surface Cover
Omnidirectional Lens
Recharge Button
Camera
Cliff Sensor
Side Brushes
Drive Wheels
Dustbin
Charging Contacts
Front Wheel
Main Brush Assembly
Battery
Dustbin Release Button
Front View Back View

5
High Efficiency Strainer
Filter Door
Signal Indicator
DC Plug
Charging Contacts
Dustbin Side Cover
Dustbin Conductive Sheet
Primary Filter Strainer
Dustbin Metal Sheet
Dustbin Charging Station

6
Get Started
Remove Protection
To get started, remove the protective strips on the robot and the protective film on the charging station.
Remove the protective strips Remove the protective film

7
Charging
1. The charging station should be placed against the wall and on
a flat ground. Place your charging station in a clutter free area
leaving the following distances around it.
2. Plug the adapter into a standard electrical outlet and into
Ironpie’s charging port.
3. Put on side brushes in accordance to the L (Left) and R (Right) marks.
Attention:
4.Place the robot on the charging station to start charging.
1. Do not expose the charging station to direct sunlight or mirrors.
2. In order to ensure the normal working hours of the robot, please
fully charge it before use. The charging takes about 5 hours.
The robot will automatically return to the charging station when
the battery is low. You can also hit the Recharge button on the
robot or through Trifo Home app to charge the robot manually.
• At least 1.5 feet (0.5 meters) on each side of the charging station
• At least 5 feet (1.5 meters) in front of the charging station
0.5m
1.5ft
0.5m
1.5ft
1.5m
5ft

8
Start Cleaning
Pause, Recharge, and Shutdown
The Ironpie m6+ creates a logical zigzag cleaning pattern to cover your entire floors.
To wake up the robot, long press the Power button until you hear the startup sound. Short press the Power button once again to start cleaning.
Pause: Press the Power button to pause the operation.
Recharge: Short press the Precharge button to start recharging when the robot is operating or paused. To stop recharging, short press the
Power button.
Shutdown: Long press the Power button until the indicator light goes out.
* Always store the robot on the charging station so it’s charged and ready to clean when you need it.

9
App Installation
Download“Trifo Home”app from Google Play or Apple's App Store.
Connect your mobile device to a 2.4GHz and 802.11b/g/n bands Wi-Fi network.
3. Select the product model you
want to add;
1. Create an account with your
email address or your phone
number;
4. Please first make sure the
system is on, then press and
hold the recharge button for
at least 5 seconds until you
hear the voice of entering
network configuration and the
light is blinking yellow and
green, then click “Next”;
2. Click “+” to add device;

10
7. Please wait for the connection
process. It will take about 2
minutes;
5. Enter the Wi-Fi password,
then click “Next”;
8. Name your robot and you’re
all set!
6. A QR code will be generated
on your phone. Use the
camera on the robot to scan
the QR code. Wait until you
hear “Connection successful”
before you click “Next”;

11
Water Tank
** When mopping, do not use the Ironpie m6+ in areas where wetness can damage carpets, rugs, or unfinished/ unsealed floors.
** When mopping is finished, empty any remaining fluid from the water tank and remove the cleaning cloth.
1. Fill the tank with water. 3. Install the water tank.
2. Put on the cleaning cloth. 4. Press the Power button tostart mopping.

Dustbin Cleaning
A.Press the dustbin release button.
B. Open the side cover of the dustbin. D. Open the filter door.
C. Empty the dustbin.
12

E.Take out the High Efficiency Strainer and the Primary
Filter Strainer before you remove the debris.
F.Rinse the Primary Filter Strainer only. Do not rinse
the High Efficiency strainer.
G.Scrub the dustbin with a cloth.
13

H. Dry the dustbin and filters, and keep it dry to maximize its lifespan.
I. Put the High Efficiency Strainer and the Primary Filter Strainer back.
J. Close the filter cover and put the dustbin back.
Note: We recommend rinsing the Primary Filter Strainer 15 to 30 days after first use.
The maximum lifespan of the High Efficiency Strainer is 3 months.
Note: 1. Make sure they are both dry.
2. Do not expose both strainers directly under sunlight.
Note: Make sure no water seeps in through the suction port while cleaning.
14

Water Tankand Cleaning Cloth Care
1. Remove the water tank.
4. Wash the cleaning cloth.
2. Remove the cleaning cloth.
5. Dry the cleaning cloth.
3. Empty the water tank.
6. Air dry or towel dry the water tank.
15

Brush Care and Cleaning
1. Open the main brush cover.
3. Clean the tangled hair.
2. Take out the main brush shaft.
Clean main brush
Clean side brushes
16

Clean the charging contacts.
Clean the cliff sensor.
Clean the drive wheels and the caster wheel.
Tips: Please use a dry cloth to clean the charging contacts, the cliff sensor and the bumper to avoid damage to sensitive electronic components.
Charging Contacts, Cliff Sensor, and Wheels
* If you do not use the robot for a long time, please fully charge it
before long-term storage. Recharge it every three months to protect
the battery from over-discharging. Please contact us if the battery
is over-discharged. Do not disassemble the product yourself.
17

Transport robot back to dock Make sure the charging station is plugged in, then place the robot on the
charging station to charge.
Side brush stuck
Main brush stuck Check if the main brush gets entangled with hair or debris and clean it up.
Make sure the dustbin is in the robot and properly seated in position.
Gently tap the bumper several times to dislodge any debris that may be
trapped underneath.
Check if the fan gets entangled with hair or debris. Also check if the filter
is installed correctly.
Check if the side brush gets entangled with hair or debris and clean it up.
Bumper stuck
Blower motor error
Dustbin missing
Prompt Tone What To Do
Charging error
Make sure the original battery is installed.
Make sure the robot can be powered on.
Make sure both the robot and the charging station are placed correctly.
Troubleshooting
18

Front wheel stuck Check if the front wheel can move freely. If not, unscrew the front wheel
and clean it up.
Ensure the robot is connected to a 2.4GHz and 802.11b/g/n bands.
Connection failed
Connection failed, password error Double check that you filled in the correct Wi-Fi password.
19
Table of contents
Other Trifo Vacuum Cleaner manuals


