Trigon Electronics T.A.C. 500 User manual

255 Glider Circle • Corona, CA 92880
www.TrigonElectronics.com
March 1, 2004
INSTALLATION
and
OPERATION INSTRUCTIONS
Multi-Number Telephone Entry System
T.A.C. 500

Page 2
T. A . C. 500
TABLE OF CONTENTSTABLE OF CONTENTS
TABLE OF CONTENTSTABLE OF CONTENTS
TABLE OF CONTENTS
INTRODUCTION ..................................................................................... 3
PRODUCT OVERVIEW .......................................................................... 3
MOUNTING .............................................................................................. 4
WIRING ..................................................................................................... 4
WIRING DIAGRAM ................................................................................ 5
SYSTEM SETUP
Enter Program Mode Locally.................................................................. 6
Enter program Mode Remotely............................................................... 6
Initial Set-up............................................................................................ 6
Enter Resident Code length.................................................................. 6
Enter Ring Count.................................................................................. 6
Enter Gate Interval ............................................................................... 6
Enter Call Length ................................................................................. 6
Enter Dial Mode ................................................................................... 6
Enter Latch Enable / Disable................................................................ 6
PROGRAMMING
Programming After Set-up ...................................................................... 7
Adding Telephone Numbers.................................................................... 7
Deleting Telephone Numbers ................................................................... 7
Programming Entry Codes ..................................................................... 7
Changing the Program Code ....................................................... ........... 7
Deleting Entry Codes ............................................................................... 7
EnteringAccess Cards .............................................................................. 8
Deleting Cards .......................................................................................... 8
Programming Site ID Code ..................................................................... 8
Programming Tamper Code .................................................................... 8
Programming (Optional) Time-of-Day Clock......................................... 8
Programming Primary Relay “On” time ................................................. 9
Programming Secondary Relay “On” time (Option)................................ 9
Master Erase............................................................................................ 9
OPERATION
Calling a Tenant....................................................................................... 10
Direct Entry Codes .................................................................................. 10
Granting Visitor Entry ............................................................................. 10
Denying Visitor Entry ............................................................................. 10
Latching/Unlatching Relays.................................................................... 10
Site Identification .................................................................................... 10
Remote Operation Time-out.................................................................... 11
Remote Function Tests ............................................................................ 11
Printer Operation (OPTIONAL) ............................................................. 11
TROUBLE SHOOTING........................................................................... 12
CONDENSED GUIDE TO USE AND PROGRAMMING.................... 12/13
SPECIFICATIONS / FEATURES ............................................................ 14

Page 3
T. A . C. 500
Thismanual contains the information required to install
and program the T.A.C. 500. If you are using this
manual to install this unit, it is very important to read
all the sections in order.
You should read these instructions before you begin
installation. This will insure that everything is done
efficiently.
Hookup Specifications
If you are using this manual as a programming guide
after the initial installation, you may find the TABLE
OF CONTENTS useful in locating the particular
programming procedure you need.
The T.A.C. 500 is a multi-number Telephone Entry
System for resident/visitor control. Visitors contact the
desired tenant by entering a simple directory code. The
resident then grants or denies access.
The T.A.C. 500 has a capacity of up to 400 telephone
numbersand up to 400personal entry codes, andis PBX
compatible. Itis constructed for ruggedoutdoor use.The
T.A.C. 500 is equipped with valuable features and has
several options available that provide a wide range of
guest and resident control options—doors, gates,
security lighting, and more.
PRODUCT OVERVIEWPRODUCT OVERVIEW
PRODUCT OVERVIEWPRODUCT OVERVIEW
PRODUCT OVERVIEW
INTRODUCTIONINTRODUCTION
INTRODUCTIONINTRODUCTION
INTRODUCTION
Figure 1
110VAC
40VAC
Transformer
12 vac
Power Cabling
Shielded or Twisted
2-Conductor
18AWG up to 250'
16AWG up tp 500' Telephone Line-22 AWG
Shielded or Twisted
2=Conductor
Primary Relay
(Optional)
Second Relay
Camera
Light
or
(Optional) RS-232 Serial Printer Connection
(18 AWG; shielded, 3 conductor)
(Optional) Card Reader Connection
(18 AWG; shielded, 4 to 6 Conductor)

Page 4
T. A . C. 500
MOUNTINGMOUNTING
MOUNTINGMOUNTING
MOUNTING
Arrangements must be made for the installation of a
standard voice-grade telephone line (touch-tone or
rotary, telco or PBX Port), as close to the unit mounting
location as possible. The telephone company may
require the following information.
FCC Registration No..................1Z8898-62546-DI-T
Ringer Equivalence..............................................0.8B
Connector............................................Terminal Block
When selecting a mounting location, Trigon
recommends some shelter be provided from direct rain
and sunlight. An overhang is usually sufficient. If a
heater element is installed, be sure to use a bi-metal
thermal switch to prevent over-heating during the
summer months.
Pull the wiring through the access hole in the lower
portion of the back plate (Fig. 2). Bolt the plate to the
surfacethrough the four.312" mounting holesprovided.
At this time, the wiring should NOT be energized.
Note: If used in extreme weather, a bead of silicon
sealant should be run around the outside top two thirds
of the unit, after the front case is secured. (Fig. 2b).
WIRINGWIRING
WIRINGWIRING
WIRING
1.Use the wiring diagram on pg. 5 for wire connection
information.
2.Do not energize wires until installation is completed.
3. Do not power any other device from the T.A.C.’s
12 VAC transformer. If a substitute transformer is
used, be sure it is rated 12 VAC, 20VA, UL Class 2
listed. The 12 VAC input power wires should be
18AWG, 600V, insulated wire. This should be
sufficient for distances up to 200 feet.
4. Ground the unit by attaching a separate 12 AWG
ground wire to the ground location on the terminal
block. This ground wire should go to a grounding
rod or grounded metal conduit.
5. Trigon recommends that an EMI filter (Cornell-
Dubilier ModelAPF 1021 or equivalent) be mounted
between the 12 VAC transformer output and the unit.
EMI/RFI filters are available from Trigon. Mount
the filter as close to the unit as possible. Ground the
filter to the same point as unit ground.
6. Shielded cable is recommended for both the power
and telephone cabling. Ground the cable's shield to
the same point as the unit and filter. To avoid ground
loops, do not ground the shield at both ends. Use
600V insulated wire for this installation.
7. Isolate the phoneline from 12 VAC power wires.
This will prevent 60 Hz hum from occurring on the
phoneline. Use 22 AWG wire on Telco line run
distances of up to 2400 feet. Consult the factory for
distances greater than 2400 feet.
8.Primary Relay is a dry contact, Form C type, rated
for 5 AMPS @ 30 VDC/ 250VAC.
9. The Shunt relay is a low-power (4 watt) reed relay.
It can be used for temporary alarm switch bypass,
video camera activation, etc. The Shunt relay
activates with the output relay, and deactivates thirty
seconds after relay release.
10.(OPTIONAL) Connect printer wiring to the RS-
232 port (Printer IN to RS-232 OUT, Printer BUSY
to RS-232 DSR, Printer COM to RS-232 COM).
11. If all wiring and grounding is completed, mount the
faceplate onto the backbox.
12. Apply power to the unit.
Figure 2b
Seal top 2/3 of case
to mounting surface.
Side View
Figure 2
Figure 2b
5.60"
8 Holes
.312" Dia
marked as 'K'.
6 Holes
.875" Dia.
(knock-out)
marked as 'J'
BOTTOM
BACK
T.A.C. 500 Back & Bottom Plate
2 x 3.0
2x 3.62
5.380
3.50
1.75
1.75
11.90
6.00
.875
3.50
1.05
2.10
4 x 2.75
J
J
JJ
JJ
KK
KK
KK
K
K

Page 5
T. A . C. 500
Figure 3
WIRING DIAGRAMWIRING DIAGRAM
WIRING DIAGRAMWIRING DIAGRAM
WIRING DIAGRAM
12345678910
Input
Power Main
Relay Gnd
Alarm
Shunt
Rela y Telco

Page 6
T. A . C. 500
SYSTEM SETUPSYSTEM SETUP
SYSTEM SETUPSYSTEM SETUP
SYSTEM SETUP
General Programming Information:
The “Initial Setup” for the T.A.C. 500 has been
programmedat the factory.These factory defaultsettings
may be changed to better suit your particular application.
If you decide to alter these settings, follow the
instructionsbelow. It is important that eachprogramming
step be taken in order. When reprogramming a specific
feature, you must always enter the programming mode
first.Youmay then go tothe appropriate proceduralsteps
for the changes desired.
Note: It is recommended that you read thru all of the
following sections first, before any change is attempted.
This will familiarize you with the procedure required.
Recordany programmed informationyouwish to change
in the spaces ( ) provided. Factory default is displayed
in brackets [ ].
(A) To Enter Program Mode Locally:
1. Press button for dialtone.
2. Enter “
✽
“ then enter the unit’s Program Code.
If the unit is new, use the preset factory code. (Factory
code is 5269). You should hear two beeps
-OR-
(B) To EnterProgram Mode Remotely:
1. Call the telephone number of the unit.
2. Listen for a single tone.
3. Enter “
✽
“ then the unit’s Program Code.
If the unit is new, use the preset factory code. (Factory
code is 5269). You should hear two beeps
(C) To Run Initial Setup:
1. Unit must be in programming mode (see
above).
2. Enter “#, 0”. This tells the unit that you want to
run SETUP. No beeps will be heard.
Enter Resident Code Length:
This will be the number visible on the directory used by
a visitor to locate a resident.
Note:Residentcodes may befrom1 to 4digitsin length.
All resident codes must be of the same length.
3. Enter the resident code length. 1 for one digit, 2
for two digits etc.( ) [ 3 ]
Enter Ring Count:
“Ring Count” refers to the number of incoming rings
the T.A.C. 500 will wait before it auto-answers. This
count is adjustable from 1 to 9.
4. Enter the number that indicates the number of
rings desired. ( ) [ 3 ]
Forexample: Enter “1” forone 5-second interval. Enter
“2” for two 5-second intervals (10 seconds). Enter “6”
for six 5-second intervals (30 seconds) etc.
Note: Nine is the maximum.
5. Enter the number of 5-second intervals
desired. ( ) [ 3 ]
Note: A “0” here will allow the output relay to engage
for a one second pulse
Enter Call Length:
“Call Length” refers to the maximum time (in minutes)
that the unit will allow a conversation to last.
6. Enter the number (1 thru 4) that corresponds to
the call length time (in minutes) that is
desired. ( ) [ 3 ]
Note: A “0” here allows indefinite call length, however
the unit will auto disconnect after 30 seconds of voice
silence.
Enter Dial Mode:
“Dial Mode” refers to the type of signal the unit uses to
dial a telephone number. The T.A.C. 500 is capable of
dialing rotary/pulse or touch-tone.
Enter “0” if touch-tone is desired.
Enter “1” for rotary.
Enter “2” for Touch-tone dialout and active
DTMF keypad after dialout.
Enter “3” for Rotary dialout and active DTMF
keypad after dialout.
7. Enter dial mode desired ( ) [ 0 ].
Note: Adding TWO to the Dial Mode selection allows
the keypad of the T.A.C. 500 to remain active for use
with voice-mail/automated attendant systems, after the
initial call is placed and answered.
Enter Latch Enable/Disable:
“LatchEnable/Disable” refers to theabilityof theT.A.C.
500 to latch (hold closed) the #1 relay, from a remote
location.
Enter “ 1 “ to enable the latch feature for relay #1.
Enter” 0 “ to disable this feature.
8. Enter latch mode desired ( ) [ 0 ].
You will hear two beeps. . . .setup complete.
9. Enter “# #” to exit Program Mode, otherwise,
continue programming by entering the desired
function code.
.
Enter Gate Interval:
“Gate Interval” refers to the length of time the output
relay (parking gate, front entry, etc.) will stay engaged
after the command has been issued.
Note: Entering a ring count of '0' will cause the T.A.C.
500's speaker to emit a "ringing" sound when the
unit is called. This call may be answered by
pressing the 'start' button.

Page 7
T. A . C. 500
PROGRAMMINGPROGRAMMING
PROGRAMMINGPROGRAMMING
PROGRAMMING
(A) Programming after Set-up:
In order to program the unit, it must be in the Program
Mode. Ifyou came fromSETUPand didn’texit or reset,
go on to (B), “Adding Telephone Numbers”.
Otherwise:
1. Press button for dial tone and enter “
✽
“
2. Enter the Program Code (5269 if unit is new).
You will hear two beeps. The unit is now ready to
program.
(B) Adding Telephone Numbers:
1. Unit must be in Program Mode (see section A).
2. Enter Resident Code that you wish to file the
telephone number under. (The number may be set
from 1 to 4 digits in length.)
You should hear one beep when you have entered the
correct number of digits.
3. Enter the telephone number. (The telephone
number can be up to twelve digits in length.)
4. Press “#” to complete the entry.
You will hear two beeps.Three beeps indicates memory
full.
Repeat the above steps until you are finished.
5. Enter “# #” to exit Program Mode, otherwise,
continue programming by entering the desired
function code.
(C) Deleting Telephone Numbers:
1. Unit must be in Program Mode (see section A).
2. Enter the Resident Code you wish to delete.
You will hear one beep.
3. Enter “#” .
Two beeps indicate Erasure complete.
Repeat steps 2 and 3 until you are finished.
4. Enter “# #” to exit Program Mode, otherwise,
continue programming by entering the desired
function code.
Note: If you wish to change a telephone number under
an existing Resident Code, use the instructions for
Programming Telephone Numbers and enter the new
number in place of the old one. The old number will be
overwritten.
(D) Programming Entry Codes:
Entry Codes make it possible for the resident to enter a
Code (P.I.N. number) at the unit and gain access without
placing a call.
1. Unit must be in Program Mode (see section A).
2. Enter “# 1”.
3. Enter any 4-digit number between 0000 and
8999.
You will hear two beeps, indicating the number has been
recorded in the T.A.C. 500’s memory.
Repeat steps 2 and 3 until you are finished.
Note: Three beeps indicate the code already existed.
4. Enter “# #” to exit Program Mode, otherwise,
continue programming by entering the desired
function code.
(E) Changing the Program Code:
This feature allows you to change the Program Code to
something other than the factory preset of 5269.
1. Unit must be in Program Mode (see section A).
2. Enter “# 7”
3. Enter 4 digits for new Program Code.
You will hear two beeps.
4. Enter “# #” to exit Program Mode, otherwise,
continue programming by entering the desired
function code.
Note: The 5269 Code (or any other previous code) is
now invalid, so keep a good, safe record of your new
Program Code for future use.
Note: If you lose the ability to access the Program Mode
after performing this step, call TRIGON service. We
have the ability to remotely reset the Program Code back
to default.
(F) Deleting Entry Codes:
1. Unit must be in Program Mode (see section A).
2. Enter “# 2”
3. Enter the Entry Code that you want to delete.
You will hear two beeps. Erasure complete.
Three beeps indicate no Code match found.
4. Enter “# #” to exit Program Mode, otherwise,
continue programming by entering the desired
function code.

Page 8
T. A . C. 500
PROGRAMMING (Continued)
(G) EnteringAccess Cards:
This function requires the installation of the Card Reader
Interface option and a card reader. Card access makes it
possible for the user to use an access card at the unit and
gain entry. Each card entered is converted to a standard
4 digit Entry Code and goes into “Keyless Entry Code
memory”.
1. Unit must be in program mode (see section A).
2. Enter “# 1”. (You are in ‘Batch Mode).
3. Pass a card through the card reader.
You will hear one beep.
This indicates card number accepted. Three ‘beeps’
indicates card not accepted.
For next card repeat step 3 until all cards have been
entered .
Note: If 3 beeps are heard, that card cannot be used
because it already appears in memory. Batch Mode is
terminated on this or any fault.
4. Enter “#” when card programming is complete,
to return to main Program Mode.
5. Enter “# #” to exit Program Mode, otherwise,
continue programming by entering the desired
function code.
(H) Deleting Cards:
If the 4 digit value assigned to the card is known, it can
be removed from memory with the same procedure as
deleting Direct Entry Codes. Otherwise, from Program
Mode:
1. Unit must be in program mode (see section A).
2. Enter “#2” and pass the card to be deleted
through the reader.
You will hear one beep.
This indicates successful removal.
Note: Three beeps indicates that the card was not in
memory, and the Batch Mode is aborted.
3. Enter “#2” to re-enter Batch Mode.
- or -
If the card has been successfully removed
4. Enter “#” to return to normal Program Mode
then, continue programming by entering the
desired function code.
5. Enter “# #” to exit Program Mode, otherwise,
continue programming by entering the desired
function code.
(I) Programming Site Identification Code:
In the case of multi-unit installations, the Site
Identification Code makes it possible for the party
receiving a call from a T.A.C. 500 to identify which
“gate” is calling.
1. Unit must be in Program Mode (see sectionA).
2. Enter “# 8” and the 4 digit number.
You will hear two beeps.
3. Enter “# #” to exit Program Mode, otherwise,
continue programming by entering the desired
function code.
(J) Programming Tamper Code:
This feature can be used to alert a manager if the unit is
being tampered with. (Four unsuccessful or invalid
attempts to enter the programming mode constitutes a
tamper.) The unit looks up the Resident Code stored in
“tamper” and dials the phone number associated with
that resident code.
1. Unit must be in Program Mode (see sectionA).
2. Enter “ # 6” and the Resident Code that you
have chosen.
You will hear two beeps.
3. Enter “# #” to exit Program Mode, otherwise,
continue programming by entering the desired
function code.
(K) Programming Time-of-Day Clock (Optional):
Thetime of dayclock option allows automaticoperation
of the output relay.
1. Unit must be in Program Mode (see sectionA).
2. Enter “ # 3 “ .
3. Enter the Month. (01=Jan., 02=Feb.,... 12=
Dec). Be sure to include the zeros when setting the
clock.
4. Enter the Monthly Date. (01 thru 31).
5. Enter the last two digits of the Year.
6. Enter the Hour. Use military time; 00 thru 23 hrs.
7. Enter the Minutes. (00 thru 59).
8. Enter the Day of Week. (1= Mon., 2=Tues, ...
7=Sun.).
You should hear two beeps.
Note: Military time format (24 hour clock) is used in
clock programming .
9. Enter “# #” to exit Program Mode, otherwise,
continue programming by entering the desired
function code.

Page 9
T. A . C. 500
PROGRAMMING (Continued)
(L) Programming Primary Relay on/off schedule:
This feature allows time clock control of Primary Relay.
You may set the relay to activate at a certain time of day
and deactivate at a later time of the same day. Also,
you may set this daily on\off action to happen within a
certain part of the week; i.e. Tuesday through Friday.
Note: (TIME Clock Option required) Military time
format (24 hour clock) is used in clock programming.
To program Primary Relay, do the following:
1. Unit must be in Program Mode (see section A).
2. Enter “# 4”
3. Enter Start Time (Use military format of
hours:minutes, i.e. “0600” , “1500”). Entry must be
four digits.
4. Enter End Time (same four digit format as above).
5. Enter Start Day and End Day (“1 thru 7” means
Monday through Sunday). For example, entering 24
would set the clock for Tuesday through Thursday.
You will hear two beeps.
Note: Day entries must be 2 digits (start and end day).
Note: To program the relay to operate only one day a
week, enter the digit for that day twice (“6 6” means
Saturday only).
6. Enter “# #” to exit Program Mode, otherwise,
continue programming by entering the desired
function code.
(M) (Requires Time Clock Option)
Programming Secondary Relay on/off schedule:
This feature allows time clock control of optional
Secondary Relay. You may set the relay to activate at a
certain time of day and deactivate at a later time of the
same day. Also, you may set this daily on\off action to
happen within a certain part of the week; i.e. Tuesday
through Friday.
Note: Military time format (24 hour clock) is used in
clock programming .
To program Secondary Relay, do the following:
1. Unit must be in Program Mode (see section A).
2. Enter “# 5”
3. Enter Start Time (Use military format of
hours:minutes, i.e. “0600” , “1500”). Entry must be
four digits.
4. Enter End Time (same four digit format as above).
5. Enter start day and End Day (“1 thru 7” means
Monday through Sunday). For example, entering 24
would set the clock for Tuesday through Thursday.
You will hear two beeps.
Note: Day entries must be 2 digits (start and end day).
Note: To program the relay to operate only one day a
week, enter the digit for that day twice (“6 6” means
Saturday only).
6. Enter “# #” to exit Program Mode, otherwise,
continue programming by entering the desired
function code.
(N) Master Erase:
This procedure allows selective or complete deletion of
all data in theT.A.C. 500’s memory. Also, it is possible
to reset the T.A.C. 500 back to its factory defaults
(presets).
Note: Use caution when performing these steps.
1.Unit must be in Program Mode(see section A),
2. Enter “ #
✽
“.
3. Enter “0” if you wish to erase all data and reset
unit back to factory defaults.
4. Enter “1” if you wish to erase all Entry Codes
only.
5. Enter “2” if you wish to erase all Resident Code/
telephone numbers only.
6. Enter “3” if you wish to reset the unit back to
factory defaults, leaving all other memory intact.
Upon completion of the full master erase sequence, you
will hear a long series of beeps.
Note:Master Erase time will vary greatly depending on
memory type, usage and capacity.
7. Enter “# #” to exit Program Mode, otherwise,
continue programming by entering the desired
function code.

Page 10
T. A . C. 500
OPERATIONOPERATION
OPERATIONOPERATION
OPERATION
Figure 5
Figure 4
Site Identification:
The Site I.D. number must be programmed into the unit
before the feature can be used. See “Programming Site
Identification Number”
1. Answer or place call to unit.
2. Enter #.
This instructs the unit to transmit the four digits (tones)
of its site I.D. code. The tones may be decoded by using
a TRIGON DECODER.
Calling a Tenant:
1. Press button for dialtone.
3. Enter the Resident Code.
You will hear tenant answer.
Granting Visitor Entry:
Answer telephone and identify visitor. You may choose
from the following options: (fig.4)
1. Enter “0” to activate Primary Relay and
disconnect.
Note: On rotary telephones “5” or higher can be used to
activate the Primary Relay.
2. (Option) Enter “8” to activate Secondary Relay
and disconnect.
Denying Visitor Entry (disconnect):
To deny entry
1. Enter “7” to force disconnect. Hang up
telephone.
Note: It is important that the tenants recognize the
responsibility to hang up theTrigon unit by pressing the
appropriate key on their telephone’s keypad. Otherwise,
thevisitormay walk away leavingtheunitactive. Shortly,
the loud off-hook indicator tone from the telephone
company will be heard for the remaining duration of the
call length.
Latching/Unlatching Relays:
This feature must be enabled in the initial SETUP of the
unit’s programming. Refer to the SETUPsection in this
manual. To latch (hold closed) a relay, place a telephone
call to the T.A.C. 500. The T.A.C. 500 will auto-answer
and you will hear a brief tone in the speaker. Refer to
Fig. 5 for options:
1. Enter “3” to latch primary relay.
2. Enter “4” to unlatch primary relay.
(OPTIONAL)
3. Enter “5” to latch secondary relay.
4. Enter “6” to unlatch secondary relay.
5. Press “7” to hang unit up.
Direct Entry Codes:
1. Press button for dialtone.
2. Enter “ #“ and your four digit Entry Code
(PIN Number).
12
ABC
3
DEF
4
GHI
5
JKL
6
MNO
7
PRS
8
TUV
9
WXY
*0#
Open Door / Gate and
disconnect from call
Activate Secondary device (camera etc.)
and disconnect from call
Activate Secondary device (camera etc.)
and continue conversation
Hang up from gate call
Calls from the gate
12
ABC
3
DEF
4
GHI
5
JKL
6
MNO
7
PRS
8
TUV
9
WXY
*0#
Latching Keys Latch Door / Gate open
Unlatch Door / Gate
Latch secondary
device (camera etc.)
Unlatch secondary
device (camera etc.)
Hang up call
(Optional)

Page 11
T. A . C. 500
OPERATION (Continued)
Remote Operation Time-out:
If you call the unit to operate it remotely, you have 30
seconds until auto-termination. Any tone instruction
will restart this 30 second timer. If you find that you
need more than 30 seconds:
1. Enter “8” on your telephone’s keypad to extend
your call time to three minutes.
Remote Function Tests:
The TRIGON T.A.C. 500 has the ability to run a series
of self-tests to verify its functionality.
Call the unit. When it answers choose from the
following.
1. Enter “0” for touch tone echo test.
Unit will “echo” any touch tone you send with your
phone.
2. Press “ # “ to escape from this test.
3. Enter “1” for memory test. (One tone = good;
two tones = bad).
4. Enter “2” for touch tone sequence. (Unit
answers by transmitting touch tones 1 through 9,
✽
, and #).
Printer Operation: (Optional)
The T.A.C. 500 can support an audit log output to a
remote serial printer up to 300 feet away.
The printer must be a SERIAL type with a standard
RS232 interface connector. The settings of the printer
are:
300 Baud, 8 bits, No parity, 1 stop bit.
Serial linkage requires a minimum of three wires that
carry “DATA, COMMON, and BUSY”.

Page 12
T. A . C. 500
TROUBLE SHOOTING GUIDETROUBLE SHOOTING GUIDE
TROUBLE SHOOTING GUIDETROUBLE SHOOTING GUIDE
TROUBLE SHOOTING GUIDE
CONDENSED GUIDE TO USE and PROGRAMMINGCONDENSED GUIDE TO USE and PROGRAMMING
CONDENSED GUIDE TO USE and PROGRAMMINGCONDENSED GUIDE TO USE and PROGRAMMING
CONDENSED GUIDE TO USE and PROGRAMMING
NO DIALTONE
1. Check (check fuse) input power at unit. Should be
12 VAC.
2. Check that unit is properly grounded to a good
Earth ground.
3. Current starved. Increase AC input wire size.
4. Remove power, wait 5 seconds, restore power.
Check for dial tone.
5. Check for phone line. Voltages across terminals
should be 48-52 VDC (on hook), 6-12 VDC(off
hook).
6. Check VOLUME adjustment on PC board.
7. Check handset connections to PCB.
8. Verify that contacts and wires are clean and
tight.
CANNOT PROGRAM
1. Incorrect/lost program code.
2. Not entering “*” before program code.
3. Try ‘NO DIAL TONE’troubleshooting
procedures.
4. Keypad damaged. Check for vandalism.
5. Check that the Program Prom/Microprocessor is
fully seated.
LOSES MEMORY
1. Electrical noise on power line. Install EMI/RFI
filter.
2. Excessive electrical noise from strike. Use low
current strike.
3. Unit transformer shared with another device (i.e.
door strike).
RESIDENT CANNOT ACTIVATE STRIKE/GATE
1. Tenant not pressing correct number on phone.
2. Strike/gate operator not wired correctly.
3. Missing or incorrect power to strike or gate
operator.
4. Current starved. Increase wire size.
5. Tone may be too brief in duration (cordless
phones, etc.).
AC HUM IN SPEAKER
1. Phone wires running in same conduit as AC
power.
2. Unit not properly grounded.
3. Defective microphone.
RESIDENT CANNOT HEAR VISITOR
1. Defective handset/microphone.
2. Too much background or street noise. Relocate
unit.
Legend:
dDay of the week (1, 2,…7; Monday= 1)
DD Date (01, 02,…31)
eeee Entry Code (always use four digits)
hh Hour (01, 02,…23)
iiii Site ID Code (always use four digits)
mm Minute (01, 02,…59)
MM Month (01, 02,…12)
nnn nnnn Resident Phone Number (up to 12 digits)
pppp Program Access Code (4 digits)
rrrr Resident Code (may be 1, 2, 3, or 4 digits)
YY Year (01, 02,…99)
✽The “star” key of the telephone
# The “pound sign” key of the telephone
☎Tones returned by the unit
Programming at the Unit:
Enter the Program Mode: Acquire dial tone.
Press “ *, Program Access Code”.
You will hear two beeps.
Set Unit Parameters:
Press “#, 0”, then;
{3} Set Resident Code Length (1 - 4 digits)
{3} Set Ring Count (1 - 9, 0= unlimited)
{3} Set Gate Interval (1 - 9 five second intervals,
0=1 second pulse)
{3} Set Call Length (1 - 4 minutes, 0= no time-
out)
{0} Set Dial Mode (1= Rotary, 0= Tone) (+{2}=
active DTMF keypad after dial out)
{0} SetLatch Enable Mode(0= disable, 1=enable)
(☎☎)

Page 13
T. A . C. 500
General:
Data between [ ] is a mandatory program key stroke
sequence. Data between { } is to be supplied by the
programmer. Unit responses are shown between ( ).
Program Phone Number(s):
Press [{rrrr ☎nnn nnnn #}](☎ ☎)
(☎ ☎ ☎= memory full)
Add Entry Code:
Press [#1{eeee}] (☎ ☎ ☎= already in memoryl)
Delete Entry Code:
Press [#2{eeee}] (☎ ☎ ☎= not in memory)
Set Clock ( Optional ):
Press [#3{MMDDYYhhmmd}] ( ☎ ☎ )
Set Primary Relay on/off schedule:
Press [#4{hhmm hhmm d d}] (☎ ☎) –start and stop
time, FROM day, and TO day.
Set Secondary Relay on/off schedule ( Optional ):
Press [#5{hhmm hhmm d d}] (☎ ☎) –start and stop
time, FROM day, and TO day.
Set Tamper Code:
Press [#6{rrrr}] (☎☎☎= error)
Set Program Code:
Press [#7{pppp}](☎ ☎)
Set Site ID Code:
Press [#8{iiii}](☎ ☎)
Erase Mode:
Press [#✽{t}], (where 0= all data, 1= Entry Codes,
2= Phone Numbers, 3= Defaults, 4=Clean
Memory)
Exit Program Mode:
Press [##]
Verify programming:
[✽0] Verify Setup Parameters (ssssss ☎)
[✽1] Verify unit capacity (cccc ☎)
[✽2{rrrr}] Verify phone number for Resident Code
rrrr (☎☎☎= none listed)
[✽3] Verify Clock (MM-DD-YY-hh-mm-d),
(☎☎☎= none installed)
[✽4] Verify Relay One Schedule (hhmm hhmm
d d) (☎☎☎= not set)
[✽5} Verify Secondary relay schedule
[✽6] Verify Tamper Code (rrrr ☎) (☎☎☎ = not
set)
[✽7] Verify Program Code (pppp )
[✽8] Verify Site ID Code (iiii ☎). (☎☎☎= not
set)
[✽9] List all entry Codes. Press {✽} to continue,
{##} to stop.
[✽✽]List all Phone Numbers. Press {✽} to
continue, {##} to stop.
[✽#] List Audit Data. Press {✽} to continue.
Press {##} to stop.
Remote Operation:
When the unit is called and auto-answers, press [X] to:
[0] Echo Tone Test (Press {#} to stop.)
[1] Memory Test (☎= good,☎☎= bad)
[2] Send Tone Sequence (1 - 9, *, #)
[3] Latch Primary Relay (☎☎= feature
enabled).
Latch Primary Relay (☎☎☎= error, not
enabled)
[4] Unlatch Primary Relay (☎☎= feature
enabled).
Unlatch Primary Relay (☎☎☎ = error,not
enabled)
[5] Latch Secondary Relay
[6] Unlatch Secondary relay
[7] Force Unit to hang up.
[8] Extend time-out to 3 minutes (30 sec.
Default)
[9] Toggle Sound (☎= on,☎☎= off)
[✽{pppp}] Enter Program Mode (☎☎= accepted)
[#] Send Site ID Code (iiii) (☎☎☎= error, not
set)
Note: Warning tone occurs 10 seconds before auto
hang up.

Page 14
T. A . C. 500
Design- Handsfree telephone with programmable
internal auto dial capability and remote control
of relays.
Capacity - 24, 50, 125, 300, or 400 residents.
Capacity includes 1 to 4 digit directory code, 4
digit direct entry code, and up to 12 digit tele-
phone number for each resident.
System Security- Program access code and
tamper code.
Dial Mode - Allows active DTMF keypad after
dial out.
Site ID - Programmable 4 digit code.
Call Length - Unrestricted, or limited from 1 to
4 minutes.
Programming - Directly on keypad or remotely
by DTMF tones.
Power - 120VAC/12VAC, 40VA, Class 2, trans-
former included.
Relay Ratings -
Primary Relay: 5 AMPS @ 30 VDC/250VAC;
1/8 HP 120VAC
Alarm Shunt Relay: 250ma @ 12VAC
Relay Activation - Keypad direct entry, postal
lock box, push-to-exit button, or tenant.
Relay Output Duration - Programmable;
momentary to 45 seconds, or latched.
Telephone Line - Standard touch-tone or rotary.
Dedicated or extension line.
Mounting- Surface, withflushor pedestal mount
options.
Construction -PCB mounted in a high impact
plastic module.
Operating Temperature - +32°F to +120°F
SPECIFICATIONS / FEATURESSPECIFICATIONS / FEATURES
SPECIFICATIONS / FEATURESSPECIFICATIONS / FEATURES
SPECIFICATIONS / FEATURES

Page 15
T. A . C. 500

Page 16
T. A . C. 500
Table of contents
Other Trigon Electronics Intercom System manuals
Trigon Electronics
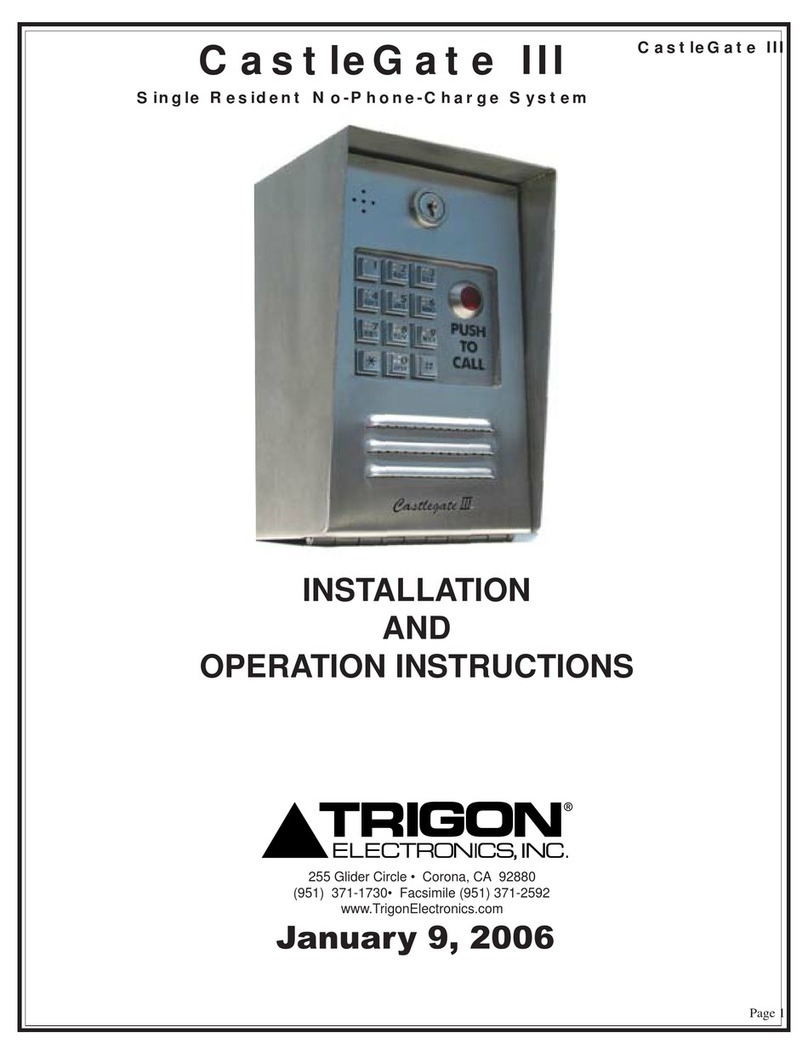
Trigon Electronics CastleGate III User manual
Trigon Electronics
Trigon Electronics Minipak User manual
Trigon Electronics
Trigon Electronics 02A00311 Quick start guide
Trigon Electronics
Trigon Electronics MiniGuard IID Series Technical specifications
Trigon Electronics
Trigon Electronics Miniguard HF-2 Series Quick start guide
Trigon Electronics
Trigon Electronics MiniGuard IID Operating instructions
Trigon Electronics
Trigon Electronics Minipak User manual

Trigon Electronics
Trigon Electronics MiniGuard IID Technical specifications
