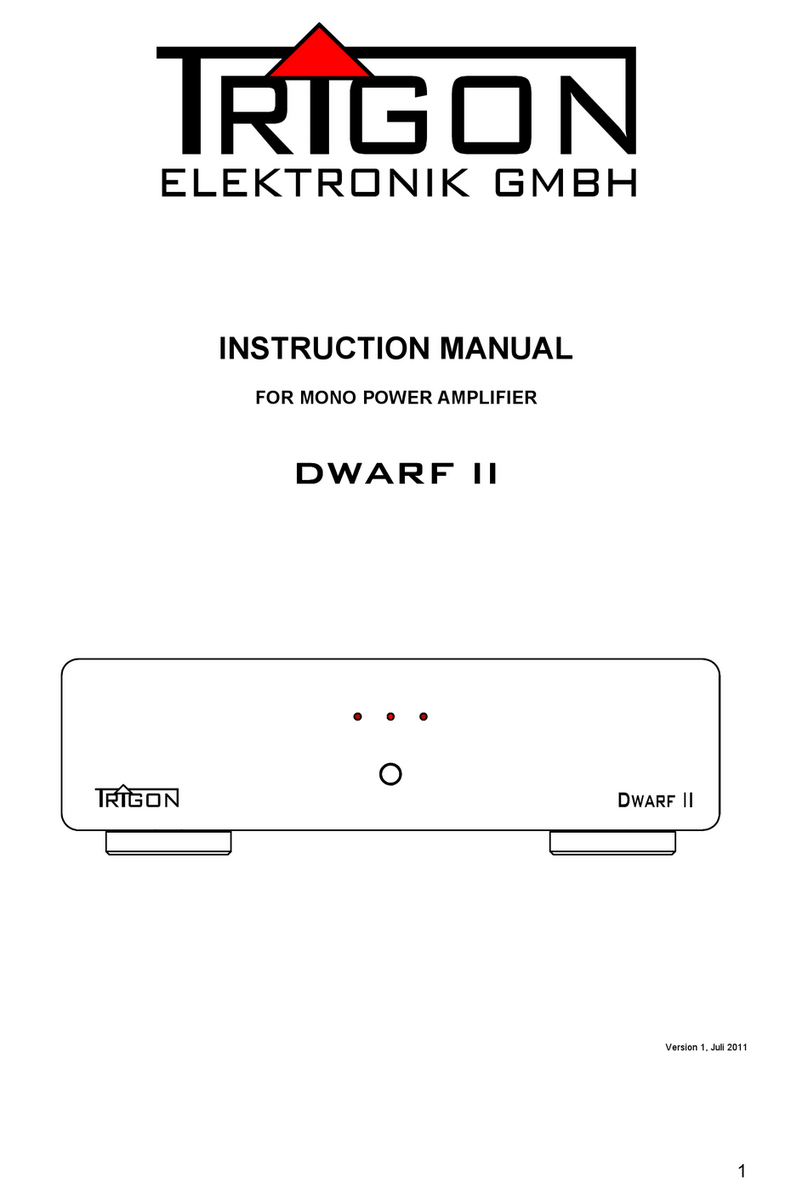
Trigon Monolog User manual

OWNERS MANUAL
MONAURAL POWER AMPLIFIER
Monolog
MonologMonolog
Monolog
DOT
BAR
OFFSET
TEMP
32dB
26dB
20dB
BAL
UNBAL TRIGGER
10V DC
dB
-13
-16
-19
-22
-25
-28
-31
-34
-37
-40
-10 -7 -5 -3 -1 0
+1
+2
+3
Monolog

TABLE OF CONTENT
1. Introduction
2. General technical description
2.1 Safety considerations
2.2 Installation
2.3 Warranty and service
3. Operation
3.1 Front panel controls
3.2 Rear panel controls and connections
4. What if...
4.1 ... nothing happens ?
4.2 ... there's no sound ?
4.3 ... it hums ?
5. Specifications

1. Introduction
Dear
Trigon
owner,
Thank you for purchasing a
Monolog
high-performance mono power amplifier
from the
Trigon Premium Line
. Our
Premium Line
defines the best seat
in the house of authentic music reproduction,
Monolog
stands for the way music
is played, with authority.
This audio component positions
Trigon
at the state-of-the art of performance and craftsmanship. Timelessly elegant finish in
aluminium and chrome, innovative circuitry and design, highest grade components
and built quality are the hallmark of our
Premium Line
.
These mono-blocs of the
Premium Line
offer enough power to meet every
musical challenge with virtually any loudspeaker. Owing to their outstanding power
bandwidth they will flawlessly reproduce the pace and full dynamics of music signals.
The inherent optimal channel separation ensures a 3-dimensional soundstage and a
holographic image of the musical event, without any electronic limitation. The
Monolog's
uncompromising circuit design approach doesn't stop at effortlessly
rendering large scale performances. With maximum control of loudspeakers and
exceptional resolution of even the finest details these precision instruments are
equally at ease at low level listening, faithfully rendering musical textures and
dynamics.
While we understand that you may be in a hurry to experience your music through
your new
Trigon Monolog
power amplifiers, we recommend that even the
most experienced HIFi lovers carefully read the manual to fully understand these fine
audio components and thereby maximize the return on your investment.
The
Trigon
team wishes you much joy and great musical pleasure with your new
Monolog
power amplifiers.

2. General technical description
The
Monolog
is a high-performance audio component for domestic indoor use.
This power amplifier is configured as a monobloc, therefore two components are
needed for stereo applications. One of the significant advantages of this concept is
the possibility to install each amplifier physically close to the corresponding
loudspeaker and therefore minimize the length of the speaker cable. The use of short
speaker cables along with longer line-level signal cables minimize loss of detail and
maximizes control of the speakers by the amplifiers. This concept further enhances
channel separation and therefore optimizes the rendering of the spatial qualities of
sound reproduction. This principal also ensures that each amplifier has its own
independent power supply which excludes any interference between channels
through a shared power supply. Each monobloc amplifier has two 500 VA power
transformers and over 80000µF storage capacity to ensure that sufficient energy is
available to supply the output stages with ample current and stable voltages
throughout the amplifiers entire design envelope.
The output stage is realized in bridged topology, which means that there are two
completely independent amplifiers are contained within one monobloc amplifier
housing. These amplifiers are configured in fully differential mode, with one amplifier
driving one phase of the signal while the other is driving the opposite phase. The load
is connected between the two amplifiers and acts as a “bridge“ to complete the
circuit. The advantage of this configuration lies in the fact that each pole of the
loudspeaker is actively controlled by the electronic circuitry. This allows a much
tighter control of the individual drivers to achieve a more linear impulse response and
better contouring of the sound.
The amplifiers rear panel has two inputs, balanced and single-ended, switch able via
an input selector “BAL/UNBAL”. The amplifier can be remotely turned on or off via a
trigger input (RJ-45 connector, ca. 4-10V DC). This function is enabled via the
“AUTO”switch also located on the rear panel.
A digital voltmeter on the front panel indicates the current mains input voltage. This
function can also be switched off by a rear panel disabled switch.
A large VU-meter on the front panel displays the current output power. This meter is
LED-based and very quick. This display can also be changed and/or disabled by a
dedicated switch on the rear panel.
2.1 Safety considerations
Trigon Elektronik GmbH
will not be liable for any damage caused by
improper handling or by lack of observing the following safety instructions and
warnings.
The
Monolog
amplifier must not be installed close to heat sources such as
heaters, radiators, light fixtures, fireplaces, stoves or open fire.

- The
Monolog
amplifier must not be exposed to shocks or strong vibration.
- The
Monolog
amplifier must not be powered up after being moved from a
cold location into a warm environment. Condensation may form and could
damage the appliance. Please wait until the unit is at room temperature and all
possible humidity has evaporated before connecting the component to AC
mains.
- The
Monolog
amplifier should not be exposed to direct sunlight.
Do not spill any liquid on the
Monolog
amplifier. No liquid should ever be
present inside the unit.
- Never attempt to operate the component when any part of the chassis is
removed.
- Before opening the chassis always disconnect the unit from AC mains
and wait until all circuits are void of electrical charge.
-Never bypass any fuse. Replace any defective fuse only with the original
type and value.- Do not attempt to service the unit. All maintenance or
repair work may only be performed by authorized and specially trained
personnel. Any repair, modification or tampering by un unauthorized personnel
will automatically void all warranty.
- Always power down the unit before connecting or disconnecting signal and/or
speaker cables.
- Under all circumstances avoid electrically shorting the output connectors. A
short circuit may lead to immediate destruction of the amplifier. Any damage
caused by shorting the output is not covered by warranty.
- Loudspeakers with an impedance less than 2 Ohms are not recommended and
should not be connected to this amplifier.
- Use only appropriate accessories recommended by the manufacturer.
The
Monolog
can be operated with AC mains voltages between 210 and 245
Volts, normal value is 230 Volt. For specific markets the amplifier can be adapted in
the factory for 115V or 100V Ac mains respectively. In this case, please contact your
dealer, distributor or
Trigon Elektronik G.m.b.H.
directly.
2.2 Installation
After unpacking please check the unit for any transport damage. In this unlikely event
please contact your dealer immediately.
Inspect the contents of the package. Included with your
Monolog
amplifier you
should find these items:
-
Trigon
Volt
AC mains cable
-
Monolog
owners manual (1x per pair)
- Warranty card
Install the unit level in a dry and well ventilated location. For sonic considerations we
recommend the use of a proper audio equipment rack or amplifier base. Strong

magnetic fields as produced by halogen light transformers among others may induce
audible hum. Allow ample distance between the amplifier and any source of electro-
magnetic fields. Signal cables should not be run in parallel to AC lines. Hum can
likewise be induced by fluorescent lights. A minimum distance of 1 meter (3 ft.)
should be allowed. Avoid installing your
Monolog
amplifier in locations exposed
to direct sunlight and in proximity to sources of radiant heat.
2.3 Warranty and service
Choosing a
Monolog
power amplifier you have acquired a carefully designed
and technologically thorough product. At Trigon we pride ourselves to monitor every
production phase to ensure that a product bearing our name has met countless
quality control stages and all our components undergo rigorous final testing before it
leaves the factory. Trigon Elektronik GmbH offers a 3 year warranty in the unlikely
event, that, against all odds, one of our products does not perform flawlessly. This
warranty is limited to the repair of any defective component and the involved labour
cost. Any repair under this warranty is usually performed by Trigon Elektronik GmbH.
The warranty does not cover any damage caused by improper handling and/or
installation, user error, abuse as well as repairs, modifications or tampering by non-
authorized personnel or third party. Altered serial numbers automatically void any
warranty. Also excluded is transport damage, accidents as well as any liability
beyond the repair of manufacturing defects.
Please make sure that the included warranty card is fully completed. The warranty
takes effect at the time of delivery by an authorized dealer. Keep all transaction
records and proof of delivery with the warranty card.
3. Operation and safety tips
Upon first unpacking the unit we recommend to power it up without hooking up any
other device.
After a brief power up sequence (flashing Status LED (1)) you will hear the soft
clicking of a few relays. The
Monolog
amplifier is ready when the front panel
display is lit. Now is a good time to familiarize yourself with the features and functions
of its various controls and connectors. Select the appropriate input (BAL or UNBAL)
that you will be using later to hook up the preamplifier.
Once you are familiar with all functionalities of the
Monolog
amplifier (see also
ch. 3.1 and 3.2) you are ready to start the hook up.
CAUTION!!! Before beginning the hook up you should – as always – verify that the
Monolog
amplifier and all other components are powered off! Under all
circumstances avoid to connect a cable to the UNBAL INPUT of the
Monolog
amplifier while the unit is powered up, since this type of connector makes contact first
on the signal (hot) side before the ground, which can lead to a loud hum that could

damage the amplifier and/or your speakers! The
Monolog
being a high power
device, it is strongly recommended to act with great care. Please make sure that
there are no potential shorts circuits in the speaker cables.
An integrated protection circuit checks the output of the amplifier when it is powered
up. Should the load impedance be lower than 2 Ohms, this circuit will prevent turning
on the amplifiers main power supply, and the Status LED
(
1)will flash. In this case
the power amplifier should be turned off and all speaker connections should be
checked for short circuits. If everything seems in good order, please refer to the
speaker manufacturer. In the event that the loudspeakers have an impedance rating
below 2 Ohms, they cannot be used with the
Monolog
amplifier.
For technical reasons the impedance check cannot be performed during normal
operation of the amplifier once the unit is powered up, meaning that there will not be
another impedance check before the unit is turned off ant powered up again. Shorts
that occur during normal operation will not be recognized and could lead to damage
or destruction of the amplifier. Once all connections are established, always turn on
the preamplifier first and the power amplifier last. The power down sequence should
be done in reverse order with the
Monolog
amplifiers being switched off first.
This will prevent any audible pop from the preamplifier from being amplified, which
could damage the speakers, given the high power output capability of the
Monolog
amplifier.
To ensure optimum longevity of the output relays, it is recommended to power the
amplifier on or off without any programme material being played. This measure will
prevent sparking in the relays and thus save the relay contacts from premature wear.
Please bear in mind: the higher the output level, the greater the intensity of the spark.
Such sparks will increase the contacts serial resistance with time and thus lower the
amplifiers effective damping factor.
For cleaning purposes we recommend to use only a slightly damp lint-free cloth. If
necessary, use a mild alcohol-free household cleaner. Avoid strong cleaning agents
or detergents as they may degrade the finish. For safety reasons always disconnect
the unit from AC mains and check all connections before restoring power to your
Monolog
amplifier.
CAUTION! Always make sure that no liquids are penetrating inside the chassis!

3.1 Front panel controls
The Monolog- Display
DOT
BAR
OFFSET
TEMP
32dB
26dB
20dB
BAL
UNBAL TRIGGER
10V DC
dB
-13
-16
-19
-22
-25
-28
-31
-34
-37
-40
-10 -7 -5 -3 -1 0
+1
+2
+3
Monolog
2
3
78
6
5
4
1
A single control is found on the
Monolog
front panel: the STANDBY/POWER
switch. This push button controls the microprocessor driven logic circuitry which in
turn starts the soft power-up circuit limiting the rush-in current, the main power relays
and the output stages. If you desire to use the AUTO-POWER function (see 3.2
“AUTO“ switch), you need to depress the corresponding push button. When turned
off, the
Monolog
amplifier is electrically disconnected from AC mains, thus it will
not use any power.
[ 1 ] Status LED
This LED will light to indicate that the unit is turned on and functioning normally. A
flashing Status LED (1) indicates a malfunction. Should the operating temperature of
the unit reach its maximum permissible value the output relays will be automatically
de-activated (no sound) and the TEMP LED (5) will be lit while the Status LED (1)
blinks. Once the temperature returns to normal design parameters, the output relays
will re activated, the Status LED (1) will be constant and the TEMP LED (5) dims. If
the DC-protection circuit detects DC present at the output terminals, the Status LED
(1) flashes, the OFFSET LED (5) brightens and the output relays will be de-activated
to protect the loudspeakers. In this case the amplifier must be switched off to reset
the protection circuit. The
Monolog
can be powered up again after approx. 10
seconds. If the OFFSET-LED (5) is still rightly lit and the Status-LED (1) is flashing,
there may be a defect in the output stage and the unit must be sent in for service.

If the Status-LED (1) keeps flashing after the amplifier is powered up, the initial
impedance check has measured a load less than 2 Ohms at the output terminals
(speaker system and cable combined) – There may even be a short circuit!
Since any value below 2 Ohms is outside the design parameters, the unit’s power
supply will not turn on.
Please turn off the
Monolog
amplifier and verify all connections.
CAUTION! The impedance check is always performed when the unit is turned on.
This test takes only one second and cannot e performed during normal operation.
Should a short occur during operation it could cause the failure of output transistors.
Never change or work on any cables connected to the
Monolog
cables when the
amplifier is turned on!
If all measures within specs, the unit will power up within seconds and the Status-
LED (1) will be lit solid.
[ 2 ] VU METER
The
Monolog
amplifier has an integrated VU-Meter which indicates the output
level over a range from -40bB to +3dB. This LED VU Meter (2) inherently differs from
a mechanical device since it is mass less. Thus even very short peaks can be
displayed.
This feature allows to set the maximum acceptable level on he associated
preamplifier (if available). The maximum allowable level at the amplifiers input is
reached when the last LED is lit. Any further level increase will overdrive he amplifier
and potentially cause clipping of the output signal.
For the protection of your loudspeakers it is recommended not to exceed the
maximum safe output level, since especially tweeters are sensitive to high-order
distortion. The VU selector (9) toggles between display modes on the LED VU
Meter on the VU Mode Indicator (4). BAR Mode displays the current signal level as
bar-graph. Depressing the VU SWITCH (9) puts the LED VU Meter (2) in DOT
Mode. In this mode a single dot indicating signal peaks is added to the bar-graph.
The dot “lingers” somewhat longer at maximum excursion than the bar-graph,
facilitating the readout of peak levels. Depressing the VU selector (9) once more
turns the LED VU Meter off altogether.
[ 3 ] Mains Voltage Display
This gives a digital readout of the current AC mains voltage with a precision of
approx. 3%. Every second the mains voltage is measured 3 times. Subsequently the
displayed value may vary somewhat. The Mains Voltage Display (3) can be
disabled with the Display Switch (10).
[ 4 ] VU Mode Indicator
The BAR Mode displays the current signal level as bar-graph. Depressing the VU
selector (9) puts the LED VU-Meter in DOT Mode.In this combined mode a single
dot indicating signal peaks is added to the bar-graph. The dot “lingers” somewhat

longer at maximum excursion than the bar-graph, facilitating the readout of peak
levels. The VU selector (9) on the rear panel of the
Monolog
amplifier toggles
between display modes. When the LED VU Meter is disabled, both VU Mode
Indicators (9) will be dimmed.
[ 5 ] LED display TEMP and OFFSET
Should the operating temperature of the unit reach its maximum permissible value
the output relays will be automatically de-activated (no sound) and the TEMP LED
(5) will be brightly lit. Once the temperature returns to normal design parameters, the
output relays will reactivate and the TEMP LED (5)will dim.
The OFFSET LED (5)brightens and the output relays will be deactivated to protect
the loudspeakers when the DC-protection circuit detects DC present at the output
terminals. In this case the amplifier must be switched off to reset the protection
circuit. The
Monolog
amplifier can be powered up again after approx. 10
seconds.
If the OFFSET LED (5) is still brightly lit after the reset, there may be a defect in the
output stage and the unit must be sent in for service. Please contact your authorized
dealer, distributor or Trigon Elektronik GmbH directly. Since there may be a more
serious problem, at hand, the unit must be verified by a qualified service technician.
[ 6 ] Gain LED 20dB, 26dB and 32dB:
The push button labelled GAIN (11) located at the rear of the amplifier allows to set
the appropriate gain for your system. Three levels of gain are available.
The 20dB setting should be tried first. This amount of gain (amplification factor) is the
lowest and usually offers the best noise figures. Since most current preamplifiers
output levels are high enough to be compatible with this setting, it is not necessary
to run the amplifier with increased gain, since higher voltage gain will not only
increase output levels, but can also lead to increased background noise.
We recommends to always starting with his lowest gain setting (20dB). The amplifier
gain should only be increased if it is not possible to drive the amplifier to maximum
output with the preamplifier. This can be easily verified with the LED VU Meter (2).
The selected gain setting is shown by the Gain LED (6)
[ 7 ] LED Display BAL and UNBAL
This display shows the input selected with the BAL/UNBAL Selector (12).
To prevent switching noise in the loudspeakers, the output relays will be temporarily
disabled while inputs are being switched.

[ 8 ] LED Display TRIGGER and 10V DC
This indicates whether one of the available automatic power options has been
enabled. The desired mode can be selected from the pushbutton labelled “AUTO“
(13) located on the rear panel.
With TRIGGER mode selected, the
Monolog
amplifier will turn on as soon as an
audio signal is present at the input terminals. At very low sound levels it may happen
that the signal cannot be recognized. In this case it will be necessary to increase the
volume setting at the preamplifier.
In 10V DC mode the
Monolog
amplifier will turn on when DC (approx. +4V to
+10V) is present at the REMOTE 10V DC (21) terminal on the rear panel. Such DC
trigger outputs are featured on some preamplifiers. This option offers the advantage
that power amplifiers will be turned on or off whenever the preamplifier is switched on
or off.
Note: If one of the AUTO power options is selected, the main power switch on the
Monolog
amplifier has to remain in the ON position.

3.2 Rear panel controls and connections
Monolog rear panel controls and connections
CONSUMPTION 5 - 1000VA
handmade by
in GERMANY
MONO POWER AMPLIFIER MONOLOG
SPEAKER
-
+
MAIN POWER
GAIN
INPUT
UNBAL
INPUT
OUTPUT
DISPLAYVU
18 19
22
17
21
16
20
15
9 10 11 12 13
14
BAL/UN BAL AUTO
REMOTE 10V DC
CAUTION
[ 9 ] VU selector
Allows to toggle between LED VU meter display modes. The selected mode is
displayed by the VU Mode Indicator (4).
[ 10 ] DISPLAY switch
This pushbutton enables/disables the front panel display. In disabled mode, only the
Status LED (1) is active.
[ 11 ] GAIN selector
Selects the voltage gain of the amplifier. Three gain settings are available
(20dB/26dB/32dB). The selected value is displayed by the Gain LED (6).
Hint: We recommend to always starting with his lowest gain setting (20dB), since
most current preamplifiers offer output levels high enough to work well with this
setting. The amplifier gain should only be increased if it is not possible to drive the
amplifier to maximum output with the preamplifier. This can be easily verified with
the LED VU Meter (2).
It is not advisable to run the amplifier with higher gain than necessary, since higher
voltage gain will increase background noise from upstream components.

[ 12 ] BAL/UNBAL input selector
Selects the appropriate input BAL on XLR/UNBAL on Cinch (RCA). The selected
input is displayed by the BAL/UNBAL LED Display (7).
[ 13 ] “AUTO“ Switch
Activates the automatic power mode. With TRIGGER mode selected, the
Monolog
amplifier will turn on as soon as a sufficiently strong (loud) audio signal
is detected at the input terminals.
In 10V DC mode the
Monolog
amplifier will turn on when DC (approx. +4V to
+10V) is present at the REMOTE 10V DC (21) terminal on the rear panel. Such DC
trigger outputs are featured on some preamplifiers. This option offers the advantage
that power amplifiers will be turned on or off whenever the preamplifier is switched on
or off. The selected automatic power mode is indicated by the TRIGGER / 10V DC
LED Display (8)
Note: If one of the AUTO power options is selected, the main power switch on the
Monolog
amplifier has to remain in the ON position.
Hint: We recommends to preferably using the 10V DC Mode (if available). This
makes sure that not even the quietest opening passages are being missed.
[ 14 ] UNBAL Input
To connect unbalanced (single-ended) audio sources (e.g. preamplifiers). This input
can be activated with the BAL/UNBAL input selector (12). The UNBAL LED on the
front panel display (7)will be lit.
[ 15 ] BAL Input
To connect balanced (differential) audio sources (e.g. preamplifiers). This input can
be activated with the BAL/UNBAL input selector (12). The BAL LED on the front
panel display (7)will be lit.
PIN1 = Ground
PIN2 = Signal +
PIN3 = Signal -

[ 16 ] OUTPUT Connector
Can be used to connect to the input of another power amplifier. This allows to hook
up several power amplifiers in parallel (so-called “Daisy-chain” array) to a single
source (e.g. for Bi- or Tri-amping).
Note: In multi-amplification the individual drivers of a loudspeaker system need to
have separate inputs.
E.g. Bi-amping in stereo requires four monoblocs, i.e. one for the bass and one for
the mid/high frequency modules for each channel.
PIN1 = Ground
PIN2 = Signal +
PIN3 = Signal -
[ 17 ] Speaker terminal –
Connector for the negative (
–
) side of the load (loudspeaker). Please remember that
the
Monolog
is a bridged topology amplifier, which means that the negative (
–
)
terminal is not neutral but connected to a “hot” pole of an amplifier stage inside the
Monolog
. This terminal must never be connected to the amplifier chassis or
electrical ground.
CAUTION! The load impedance must not be inferior to 2 Ohms!
[ 18 ] SPEAKON OUTPUT
This socket may be used to connect the speaker with a SPEAKON plug. This
alternative hook up with an appropriately terminated cable has the advantage of
offering a secure and relatively quick means of connecting a loudspeaker to the
amplifier. Accidental shorts are fairly unlikely to occur with this type of locking
connection. The SPEAKON connector has 4 poles (contacts). PIN1+ and PIN2+ are
connected to the red (+) speaker terminal, PIN1- and PIN2- are connected with the
black (-) speaker terminal.
CAUTION! The load impedance must not be inferior to 2 Ohms!
[ 19 ] Speaker terminal +
Connector for the positive (
+
) side of the load (loudspeaker).
CAUTION! The load impedance must not be inferior to 2 Ohms!
[ 20 ] AC input socket with mains switch and fuses
Connect the included AC mains cable. The red dot indicates the hot pole. Please
make sure that this pole is connected to the hot AC-mains phase. (This can readily be
verified with a circuit tester).

The rocker switch establishes the connection of the AC mains input to the front panel
power switch.
In the event that the main fuse needs changing, the AC mains connector must be
removed to access the fuse compartment.
CAUTION! Replace fuses only with the same type to avoid possible damage!
[ 21 ] REMOTE 10V DC input connector
The
Monolog
power amplifier will turn on if a trigger voltage between +4V and
+10V DC is applied to this connector with AUTO power mode 10V DC enabled. As
soon as the trigger voltage is turned off, the
Monolog
power amplifier will shut
down.
[ 22 ] REMOTE 10V DC output connector
This connector outputs a 10V DC trigger voltage when a trigger signal is applied to
the REMOTE 10V DC input connector (21).
This feature allows to simultaneously turning on or off any number of
Monolog
power amplifiers from one trigger.
4. What if...
In this chapter you will find some useful tips on troubleshooting basic problems.
4.1 ... nothing happens?
- Is the unit plugged in correctly? - Make sure that the AC mains cable is properly
seated and plugged in.
- Is the power outlet active or may a circuit breaker be tripped? - Verify the circuit
breaker(s).
-Is the main AC rocker switch on the rear panel in the ON position? - Turn on the
main AC rocker switch.
- Is the internal fuse burned out? - Replace the fuse with a new one of the same type.
If all else fails, send the unit for servicing.
4.2 ... there's power but no sound?

- Is the proper input selected? - Select active input.
- Is there a signal present form the source? – If there is a signal coming from the
source and the proper input is selected, the VU meter will display that signal. If this is
the case, please check the connections to the loudspeakers otherwise check the
signal cables. Often, if the problem occurs only with one channel, chances are that a
signal cable is defective and needs to be replaced.
- Has there been an electrostatic discharge to the unit? – It can happen, especially
during winter when the ambient air is very dry, that fabrics (clothing, carpets) build up
a static electrical charge which may be discharged to the amplifier chassis by simply
touching the unit. This kind of static discharge can cause the microprocessor
controlling the Monolog amplifier to “crash”, similar to a computer “crashing”. This
may cause the Monolog's logic circuits to deactivate the output relays or to simply
stop responding. Switch off the power to the Monolog from the power switch located
on the unit’s front panel for 30 to 60 seconds. Generally the amplifier will resume
functioning normally once power is restored.
4.3 ... it hums?
Are the signal cables securely connected? - Check the input cables.
In some cases the electrical grounding of multiple components can cause so-called
ground-loops that induce humming. Troubleshooting these may require some
experience. Please contact your dealer for assistance.
Hum is present only when a tuner (radio or TV), a VCR, DVD recorder or a video
display is connected to the preamplifier. - These types of components are usually
hooked up to an antenna or cable feed, which may in turn be grounded separately.
This can also cause a ground loop. In this case a so-called ground breaker may
solve the problem. They are usually inexpensive and can be readily purchased from
well stocked HiFi, radio or television specialty stores.

5. Specifications
Power Rating : 650 Watts into 4 Ohms, 400 Watts into 8 Ohms
Inputs / Impedance : 1x Cinch / 47 KOhm, 1x XLR / 47KOhm
Input sensitivity : 1.2 Veff for 32dB gain
Distortion (THD + N) : < 0.03%
Frequency response : 0.5 Hz – 250 kHz -3dB
Noise unbal : 100µV (A-weighted) 140µV (unweighted)
bal : 150µV (A-weighted) 220µV (unweighted)
Signal to Noise ratio : -103 dB at 1 Watt into 4 Ohms
Noise floor : -106 dB at 1 Watt into 4 Ohms
Weight : 23.5Kg
Dimensions : 300 x 160 x 450 mm (BxHxT)
Specifications subject to change
Designed and crafted by:
TRIGON ELEKTRONIK GmbH
Korbacher Straße 185
34132 Kassel
Germany
Tel. +49 (0) 561/474462
Fax +49 (0) 561/474463
e-mail:
web:
www.trigon-audio.de
Table of contents
Other Trigon Amplifier manuals
