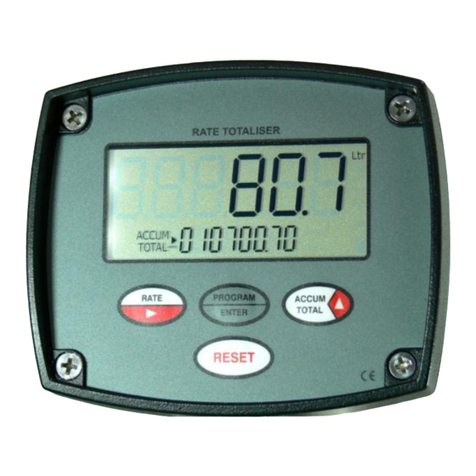
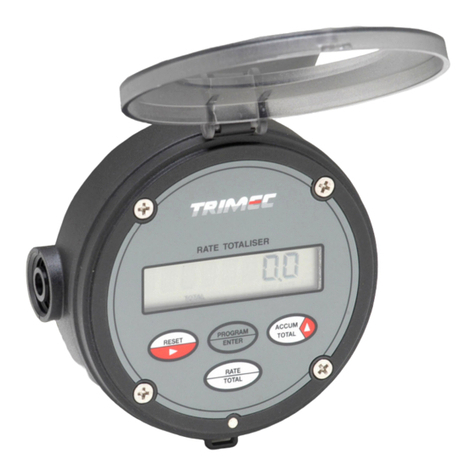
Trimec RT12 Series User manual

IMBT000-3210
I N S T R U C T I O N M A N U A L
BATTERY TOTALISER
Universal Mount Series
Declaration of Conformity
Trimec Industries Pty Ltd declares under sole responsibility that the products :
Flow Rate Totaliser model : RT12…, and Totaliser mod el : BT11
to w hich this declaration relates are in conformity with the standards noted below :
EN 50014 : 1997 +Amds. 1 & 2 I. S. Intrinsically safe electronics (optional) & there are no changes
required to enablecompliance to the replacement standards EN 60079-0:2006 and EN 60079-1:2004.
EN 50020 : 2002 I.S. Intrinsically safe electronics (optional).
In addition & also applying to the model EB Batch Controller are the follow ingstandards:
EN 60529 : 1991 Degrees of protection (IP)
EN 61326 : 1998 Industrial electromagnetic immunity & emissions
2002/96/EC Waste electrical & electronic equipment (WEEE).
Issued at Taren Point 28th
January 2010. Signed for and on behalf of Trimec Industries Pty Ltd.
Wayne Fuller, Director

Page 1
TABLE OF CONTENTS
1. INTRODUCTION
1.1 Description of elements 2
1.2 Specifications 3
1.3 Overview 4
1.4 LCD displays 4
2. OPERATION
2.1 Resettable total 5
2.2 Accumulative total 5
2.3 Keypad function matrix 5
2.4 Battery replacement 5
2.5 Processor reset button 5
3. INSTALLATION
3.1 Mounting - integral meter mounting 6
- panel mounting 6
- wall / surface mounting 7
- pipe mounting 7
3.2 Flow meter connections - un-powered sensors 8
- powered sensors 9
3.3 Wiring connections - Terminal designation 10
- Interface board layout 10
- Wiring practice 10
- NPN pulse output 11
- PNP pulse output 11
4. PROGRAM PARAMETERS
4.1 PIN number protection 12
4.2 Resetting accumulative total 12
4.3 Engineering units 12
4.4 K-factor (scale factor) 12
4.5 Pulse output 12
5. PROGRAMMING FLOW CHART 13
5.1 Program detail record 14
6. TROUBLESHOOTING 14
7. ALPHABETICAL INDEX 15
To review software version No’s press &
hold program key

2 Introduction
1. DESCRIPTION OF ELEMENTS
Introduction 3
1.2 Specifications
Dis play : 5 digit resettable LCD totaliser 7.5mm ( 0.3”) high with s econd
line 8 digit accumulative total display & text 3.6mm ( 0.15”) high.
3 programmable decimal points with both display lines.
Signal Inputs : Universal pulse-frequency input compatible with Reed switch,
Hall effect, Coil-sine (20mV P-P min.), Voltage or current pulse &
Nam ur proxim ity detectors . Maxim um input frequency is 5Khz for
coils, 2.5Khz for Hall effect & current pulse inputs, 2Khz for voltage
pulse devices & 500Hz for a Namur proximity sensor.
Powering : 3.6Vdc Ultra Lithium battery or I.S. battery pack supplied, life
expectancy can be up to 7~10 years . Battery life reduces when
connected with a coil input from turbine flowmeters. The
instrument may be externally powered from a regulated 8~24Vdc
supply (see page 14 for special instructions regarding ghosting).
Pulse output : Scaleable or non-scaleable NPN-PNP selectable field effect output
transistor. Non scaleable pulse is particularly suitable for pre-
amplifying pick-off coil inputs from turbine meters ( 5Khz. Ma x.).
The scaleable pulse output has a fixed pulse width of 60ms and
therefore has a frequency limit of 8hz . Both pulse outputs have a
50mA maximum drive capability.
Physical : A) IP66/67 high impact, glass reinforced nylon enclosure.
B) Self drill cable gland entry at bas e & rear of the enclos ure.
C) Overall 85mm diameter x 45mm deep x 175g (0.4lb).
D) Operating temperature -20ºC ~ +80ºC ( -4ºF ~ +176ºF).
Configuration
Functions : Accumulated & Resettable totals, pre-amplifier pulse output & a
scaleable pulse output. Low battery indication.
Configuration : Flow chart entry of data with English text prom pts.
User selectable 4 digit PIN number program protection.
Programmable engineering units, decimal points and K-factors.
All programmed data protected with the battery.
K-factor range : Entered as pulses / litre, gallon, lb etc. Programm able range is
0.001~9,999,999.999 with a floating decimal point during K-factor
(scale factor) entr y.
Puls e output range : Entered as engineering units/pulse. Range is 0.1~9999.9
units /pulse.
Engineering units : Selectable Ltr, Gal, m3, kgs, lbs, MLtr & Mgal or no units of display.
Clear bezel
cover
Bezel
Facia
Processor
Body
Non I.S. battery
Factory P/No. 1312007
I.S. battery
factory P/No. 1412028
Factory supplied batteries :
Replacement Batteries:
Suitable batteries also available from :
R S Components
Stock No. 596-602
Farnell Components
Order code 206-532
3.6V x 2.4Ah AA
Lithium Thionyl Chloride
non - rechargeable cell
+
-

4 Introduction
1.3 Overview
The instruments are specifically designed for computing & displaying totals from flowmeters
with pulse or frequency outputs. They are battery powered or can be powered by an external
8~24Vdc regulated or I.S. certified supply.
The instrument will display Resettable Total and an Accumulated Total in engineering units as
programmed by the user. Simple PIN protected flow chart programming with English prompts
guide you through the programming routine greatly reducing the need to refer to the manual.
Special Features
Standard : PIN Protection. Amplified non-scaled repeater or scaleable pulse output.
: NPN/PNP selectable pulse output.
Optional : Display backlighting (needs external dc power for this option to illuminate).
: Intrinsic Safety Certification to IECEx scheme and ATEX directive.
Environments
The instrument is designed to suit harsh indoor and outdoor industrial and marine
environments. The robust housing is weatherproof to IP676 / IP67 standards, UV resistant,
glass reinforced nylon with stainless steel screws & viton O-ring seals.
Installation
Specifically engineered to be directly mounted on a variety of flowmeters, wall, surface or pipe
mounted in the field or control room. Various mounting kits are available. The instrument is
self powered using one 3.6Vdc lithium battery or I.S. battery pack, the pulse output option
requires 8~24Vdc.
1.4 LCD display
Operation 5
2. OPERATION
2.1 Resettable Total
Pressing the RESET key will cause the large 5 digit total to reset to zero. The reset function is
possible at any time during counting.
2.2 Accumulative Total
There are 8 digits in the accumulative total display, these can only be reset in the program
mode or can be protected by enabling the PIN protection feature at the front end of program
mode.
2.3 Keypad functions
2.4 Battery replacement
The instrument draws very little power and will run for many years* without the need to
replace the battery. A battery condition indicator on the LCD display will appear when the
battery is low, if the low battery is not replaced the programmed detail & totals will be lost.
When changing the battery a small capacitor within the instrument will maintain the
programmed detail & totals in memory for up to 10 seconds providing sufficient time for the
battery change to take place. Changing the battery whilst flow is taking place could cause loss
of the programmed detail. It is advisable to record program details prior to battery change.
* The battery can last 7~10 years depending on application & environment.
2.5 Processor reset button
Should the instrument be corrupted by an electrical hit the processor can be reset by pressing
the black re-boot button located above the red DIP switch block on the input interface board
(refer page 10). This procedure does not effect totals or programmed data.
Full LCD display test feature illuminates all
characters and script text displays for 5
seconds when entering the program mode.
The 5 digit Total display is front panel
resettable and can be programmed for
up to 3 decimal places.
The 8 digit Accumulative Total display
can be programmed for up to 3 decimal
places. Reset is only possible when in
the program mode which can be PIN
protected for security.
Engineering units are selected during
the initial programming routine.
Battery condition indicator shows only
when battery is low, battery life can last
up to 7~10 years.
KEY
FUNCTION IN OPERATING MODE
FUNCTION IN PROGRAM MODE
Resets the 5 digit resettable
total display to zero.
Resets the 8 digit accumulativ e
total display to zero. Resets internal K-f actor
(scale f actor) to zero
1. Pressing the Program & Reset keys f or 5
seconds enters y ou into the program mode.
2. Display s model & software rev ision No.
1. Each press steps you through each lev el of
the program chart.
2. Holding f or 3 seconds f ast tracks to the END
of the program f rom any program lev el.
No function
Selects the digit to be set, the selected digit
will be “f lashing ” indicating that it can be
incremented.
No function
Increments the selected digit each time
that it is pressed.
RESET
PROGRAM
ENTER

Installation 7
Integral meter mounting
6
3. INSTALLATION
3.1 Mounting
Panel mounting
Cut a 75mm ( 3”) dia. hole in
panel. Existing O-ring seals
against panel face
If using the cable gland supplied
carefully drill a 12.5mm (½”) hole at
bottom or rear of housing as shown
on housing footprint detail on page 7
42.6 mm
( 1.7 ” )
18 mm
( 0.7 ” )
80 mm ( 3.15 ” )
Wall - surface mount using optional bracket kit ( P/No. AWM )
Pipe mounting ( P/No. APM )
APM adaptor pipe
mount kit is suitab le
for vertical or
horizontal pipes
If using the cable gland
supplied carefully drill a
12.5mm (½”) hole at
the underside or from
the inside rear of
housing
Surface mount footprint
Use only the 4
special length
self tapping
screw s supplied
( 1.67 ” )
Cable diameter range
is 2.9~6.4mm (⅛~¼”)
42.6mm

8 Installation
3.2 Flowmeter connections ( un-powered sensors )
For Intrinsically Safe installations refer to I.S. supplement manual.
Installation 9
3.2 Flowmeter connections ( powered sensors )
For Intrinsically Safe installations refer to I.S. supplement manual.
8~24Vdc
external
pow er
+Vdc
+∏
-gnd
Namur proximity
input
DIP switch 2 in
the ON position
( 250 hz max.)
ON
1 2 3
gnd
+
-
-
+
NOTE : Voltage not to exceed 13.4 Vdc
through an approv ed barrier if when using
an intrinsically saf e NAMUR proximity in a
hazardous area ( EEx Ia 11C ). Ty pically
these proximity ’s are limited to 8.2 Vdc
-
+
NAMUR
Inductive Proximity
4
5
6
1
2
3
Ground screen at 3
8~24Vdc
external
power
+Vdc
+∏
-gnd
Hall effect input
( NPN open collector )
DIP switch 1 in
the ON position
ON
1 2 3
gnd
+
-
-
+
Hall
effect
-0V gnd
+ ∏
+Vdc
NOTE: For an input
>800hz position a ¼
watt resistor across
terminals 1 & 4,
12Vdc: 1Meg Ω
24Vdc: 2Meg Ω
4
5
6
1
2
3
Ground screen at 3
8~24Vdc
external
pow er
+Vdc
+∏
-gnd
4
5
6
Modulated current
pulse input (4~20mA)
All DIP switches
to be in the OFF
position
ON
1 2 3
gnd
+
-
-
+
Coil w ith pre-amp
current modulated
-
+
B
A
NOTE: Position a 100 ohm,
¼ watt resistor across
terminals 1 & 3 as shown
1
2
3
Ground screen at 3
+Vdc
+∏
-gnd
4
5
6
Coil input from
turbines or paddle
DIP switch 1 in
the ON position
( 5 Khz max.)
ON
1 2 3
gnd
+
-
tw isted pair
Screen grounded at
amphenol shroud or
terminal box
and terminal 3
1
2
3
+Vdc
+∏
-gnd
4
5
6
Reed switch input
DIP switches
1 & 3 (de-bounce)
in the ON position
( 40 hz max.)
ON
1 2 3
gnd
+
-
Ground screen at 3
1
2
3
Note: DIP sw itch 3 is to be
OFF for reed switch input
frequencies greater than 40 hz.
+Vdc
+∏
-gnd
4
5
6
Voltage pulse
input (pulse wire)
ON
1 2 3
gnd
+
-
S
N
green
yellow
1
2
3
Ground screen
at 3
All DIP switches
to be in the OFF
position

10 Installation
3.3 Wiring connections
Installation 11
3.3 Wiring connections - pulse outputs (for I.S. installations refer to I.S. manual.)
Current Sinking outputs ( NPN )
Current sinking derives its name from the fact that it “sinks current from a load”. The current flows from
the load into the appropriate output (terminal 5).
Driving a logic input The output voltage pulse is typically the internal voltage of the load.
The load w ould normally have an internal pull up resistor on its input.
Driving a coil - - - - - - - The NPN style of output is to be used w hen driving a coil. The coil load is
obtained by dividing the coil voltage by coil impediance ( Ω ), is expressed in amps & is not to exceed
0.1A. The coil voltage is connected across, & must match, the BT supply voltage & the output (5).
Current Sourcing outputs ( PNP )
Current sourcing gets its name from the fact that it “sources current to a load”. The current flows from the
output (terminal 5) into the load. When w ired as below the output voltage pulse is the supply voltage of
the load. The load w ould normally have an internal pull dow n resistor on its input.
Terminal designation
1 + I/P Flow input pulse signal
2 - Vref. Flow input ( coils & voltage type inputs )
3 gnd GND Flow input ( pulse type inputs )
4 +Vdc +Vdc External power , +8~24Vdc (see P14)
5 + ∏ O/P Output pulse ( J1 & J3 selectab le )
6 -gnd GND External power
Wiring practice
Use multi-core screened tw isted pair instrument cable ( 0.5mm2 ) for electrical connection
between the instrument and any remote flow meter or receiving instrument. The screen needs to
be earthed to the signal ground or the receiving instrument, this is to protect the transmitted
signal from mutual inductive interference. Do not earth the screen at both ends of the cable.
Instrument cabling is not be run in a common conduit or parallel w ith power and high inductive
load carrying cables, power surges & power line frequencies may induce erroneous noise
transients onto the signal. Run instrument cables in a dedicated low energy, low voltage conduit.
Interface board layout
Processor
reset button
Output jumpers
J1 NPN- PNP selection
J3 Output pulse selection:
F/O non-scaled frequency
P/O scaleable pulse
Input DIP
switches
1 = 1MΩ pull up resistor
2 = 820Ω pull dow n resistor
3 = 0.01µf de-bounce & noise capacitor
( limits max. input freq. to 40hz)
Battery jumper
battery engaged
battery isolated
0
0
0
0
+Vdc
+∏
-gnd
ON
1 2 3
gnd
+
-
4
5
6
1
2
3
I/P
Vref
O/P
SW 6
SW 5
0
0
0
0
0
0
0
0
J1
J3
J2
NPN
PNP
F/O
P/O
+
-
8~24Vdc external power
coil
NPN output pulse
( 50mA max.)
_
logic
input
+
(load)
1
2
3
+Vdc
+∏
-gnd
4
5
6
J1
J3
NPN
PNP
NPN
0
0
0
J1
J1 in the
NPN position
0
0
0
0
0
0
F/O
P/O
pulse output
( 5Khz max.)
scaleable
pulse output
0
0
0
J3
non-scaled freq.
( 8hz max.)
+
-
8~24Vdc
external pow er
J1
J3
NPN
PNP
PNP
0
0
0
J1
J1 in the PNP
position
0
0
0
0
0
0
F/O
P/O
pulse output
( 5Khz max.)
scaleable
pulse output
0
0
0
J3
non-scaled freq.
( 8hz max.)
PNP output pulse
( 50mA max.)
logic
input
(load)
_
+
1
2
3
+Vdc
+∏
-gnd
4
5
6

12 Programming
4. PROGRAM PARAMETERS
4.1 PIN No. Program Protection
The option exists to protect the programmed detail & Accum. Total with a user selected four
digit PIN No. ( 0000 represents no PIN protection ). If activated the user must input the correct
PIN No., failure to do so will deny access to change any of the program parameters or reset
the Accumulative Total but will allow the user to step through and view the program details.
Only one PIN number may be set but this can be changed at any time after gaining access
through PIN entry. A second back up PIN number is installed at the factory should the
programmed PIN be lost or forgotten. ( refer page 14 for the back up PIN No. )
4.2 Resetting Accumulated Total
Resetting the accumulated total can only be done within the program mode.
4.3 Engineering Units ( refer clause 1.4 )
Select from available Eng. units to right of the display. The BT can display in engineering units
not available on the LCD display by programming to “no eng. units” and a suitable K-factor.
4.4 K-factor (scale factor)
Enter K-factor starting with the most significant number, up to 8 prime numbers & 3 decimal
numbers can be entered. Trailing decimal numbers move into view as digits to the rig ht are
progressively selected, any significant digits which may move from view remain functional.
4.5 Pulse output
The pulse output is NPN-PNP link selectable via jumper J1. It is also selected at jumper J3 to
act as a non-scaled pre-amplified pulse output or scaleable pulse output, maximum load is
50mA.
Non-scaled pulse output:
The un-scaled repeater pulse output represents one pulse out for each input pulse from the
primary measuring element (flowmeter). This output acts as an input signal pre-amplifier
particularly suitable for pick-up coil inputs up to 5Khz. The duty cycle of the output adopts the
duty cycle of the input. The instrument needs to be externally powered for this feature to
operate (see page 11).
Scaleable pulse output :
The fully scaleable pulse output is programmable as the number of litres / gallons etc. per
output pulse Eg. 0.1 litres/pulse, 10 litres/pulse, 100 gallons/pulse. Range is 0.1 ~ 9999.9
Eng. unit/pulse. The instrument needs to be externally powered for this feature to operate
( p11 ).
The scaleable pulse output is suitable only for remote integration due to the spasmodic nature
of its output frequency, it is limited to 8hz. Should the potential incidence of this output exceed
8hz it can continue to count after flow has stopped until such time as the processor buffer has
completed integration. Most scaleable pulse output requirements are low frequency due to
down scaling and therefore not effected by the buffer count effect.
Programming 13
5. PROGRAMMING FLOW CHART
if incorrect
PIN No. is entered
PROG
K-factor (scale factor) is the
number of pulses per unit
v olume or unit mass eg:
20.465 pulses/litre, gal, kg etc.
v iew program
details only
NO
PROG
PROG
PROG
PROG
PROG
PROG
press Program key to adv ance
through each program lev el. Use
arrowed key s to enter parameters
Note: The BT will def ault
out of the program
mode if no entries are
made within 4 mins.
PROG
PROG
if PIN
protected
hold Program & Reset
keys f or 5 seconds to
enter the program mode
PROG
R ES ET
PROG
Important: record program details overleaf
PROG

14 Programming flow chart
5.1 Program detail record
If not powered for more than 10 seconds the programmed detail & Accumulated Total will
be lost from the processor memory, it is advisable to record your programmed detail
below. Specific instructions on changing the battery without loss of program detail are
given at clause 2.4, page 5.
6. TROUBLESHOOTING
# No display.
Check position of the battery jumper J2 ( see interface board layout page 10 ) & check
battery contact connections. Replace battery.
# Display ghosting under external power.
The LCD display will “ghost” when the instrument is powered from an external 24Vdc
power supply, this is corrected by including two ¼ watt resistors (1.2K & 3.3K) on the
input power source as shown below.
Troubleshooting 15
# Display shows software number at all times.
example
The instrument has not been fully programmed after power up, enter the program mode &
enter program parameters, be sure to exit the program mode before the 4 minute no data
entry time out or the instrument will revert back to model number display.
# Display ghosting under external power.
The LCD display will “ghost” when the instrument is powered from an external 24Vdc
power supply, this is corrected by including two ¼ watt resistors (1.2K & 3.3K) on the
input power source as shown below.
# Scaleable pulse output counts on after flow has stopped.
The scaled pulse output has exceeded its output limit of 8Hz. Allow the memory buffer to
catch up or increase the pulse value - number of litres etc. per pulse, (clause 4.5, p12.)
# Display shows random characters.
The instrument may have taken an electrical “hit”, press the processor reset button (p10).
Your back up 4 digit PIN number is 0220
0220 is referenced to the base model BT, “B” is the 2nd (02) & “T” the 20th
letter of the alphabet.
Cut from manual for increased security
Factory default settings
Pencil your program details here
K =
User selected PIN No.
K-factor (scale factor)
Engineering units
0 0.0 0.00 0.000
Decimal for Accum. total
Output pulse value
Decimal for reset total
0000
litres
1.000
0.0
0.0
0001.0
0 0.0 0.00 0.000
+Vdc
+∏
-gnd
4
5
6
BT11
ON
1 2 3
gnd
+
-
1
2
3
24Vdc
external
power
-
+
3.3K
1.2K

Index 16
7. ALPHABETICAL INDEX
Notes
F
Flowmeter connections
8,
9
E
Engineering units
12
External DC powering
3,
3
L
LCD display
4
N
NPN pulse output
3,
11
M
Model number designation
2
Mounting options
6,
7
K
Keypad functions
5
K-factor (scale factor)
12,
14
O
Operation
5
Overview & Options
4
A
Accumulative total
5
Decimal points
Displays
D
DC power ( powering )
3
12
4
S
Scale factor (K-factor)
Scaleable pulse output
12
Specifications
12
3
W
Wiring connections
8 ~
11
Wiring practice
10
PNP pulse output
3,
11
P
PIN number protection
12
Program detail record
14
Programming
12,
13
Pulse output
3,
11
Processor reset button
5
R
Resettable total
5
Resetting accumulative total
5,
12
Resetting the processor
5
T
Terminal designation
Terminal layout
10
Troubleshooting
14,
10
15
B
Battery jumper
Battery replacement
5
10
Interface board
Installation
6 ~
I
Input signal
8,
9
10
11
Battery condition indicator
4
This manual suits for next models
1
Table of contents
Other Trimec Measuring Instrument manuals
Popular Measuring Instrument manuals by other brands
SAT-Kabel
SAT-Kabel AMS-FS433 operating instructions

HT
HT HT22D user manual
Futech
Futech QUATTRO manual

Precision Digital Corporation
Precision Digital Corporation PD6801-0K1-M20 instruction manual

Agilent Technologies
Agilent Technologies 89410A Getting started guide
Altana
Altana BYK wave-scan 3 operating instructions
