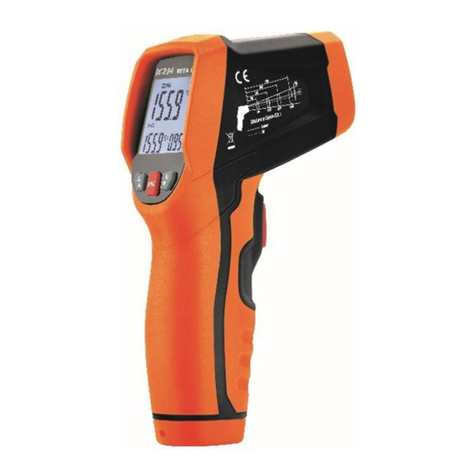
TriMedika TRITEMP TR1 User manual

Non-contact thermometer
INSTRUCTIONS FOR USE
www.trimedika.com
Part No CWC017 Revision 0720
Final TriTemp IFU Manual V3 - 0817 ENG-D.qxp_Layout 1 12/09/2017 12:24 Page 1
TriMedika Ltd, Unit 3
e3 Building, Springvale Campus
398 Springfield Road, Co Antrim
Belfast, Northern Ireland
BT12 7DU, United Kingdom
Email: [email protected]
Tel: +44 2890 265140
www.trimedika.com
Contact us at
Final TriTemp IFU Manual V3 - 0817 ENG-D.qxp_Layout 1 12/09/2017 12:24 Page 64
EN


English

5

TRITEMP™Non-contact thermometer EN
5
Contents
I. Introduction
II. Features
III. Safety Precautions
IV. Symbols
V. About the thermometer
VI. Overview of the thermometer
VII. Getting Started
VIII. Inserting Batteries
IX. How to take measurement of the patient
X. How to take measurement of an object
XI. Adjustment of settings
XII. Review previous measurements
XIII. Changing the batteries
XIV. Troubleshooting and Error messages
XV. Guidelines
XVI. Cleaning the thermometer
XVII. Calibration check of the thermometer
XVIII. Disposal of the thermometer
XIX. Warranty guarantee
XX. TechnicalSpecications
XXI. Electromagnetic Compatibility Information

TRITEMP™Non-contact thermometer
EN
6
7
I. Introduction
TriMedika TRITEMP™ Non-contact
thermometer is a hand held, battery
powered device used for detecting
the body temperature of people of
any age. It measures the infrared
energy emitted from the skin surface
of the forehead requires zero contact,
and zero consumables which offers
signicanttimeandcostsavingsfor
any healthcare organisation.
This manual was prepared for the
operator of TriMedika TRITEMP™
thermometer. It is intended to guide
the user on how to set up, operate,
maintain and troubleshoot the
device.
This thermometer is designed for
use by trained healthcare personnel
only and must be used in accordance
with the instructions in this manual.
All users must familiarise themselves
with the safety instructions and
guidance detailed in this manual
before operating the device.
Initial Set Up
Remove the thermometer, batteries
and other accessories from the
unit box and visually examine the
contents to ensure no damage has
occurred. If there is any damage
evident to the device, contact
TriMedika Customer Support.
On initial use, the TRITEMP™
thermometer will show factory
settings of ‘Body’ mode and the
Celsius (°C) temperature unit. It is
recommended that a Biomedical
technician check these settings
before use.
(see Section XI. Adjustment of settings).

TRITEMP™Non-contact thermometer EN
6
7
II. Features
• Fast BODY temperature
measurement at a 3-5cm distance
from the forehead, meeting ASTM
E1965-98.
• ZERO consumables and ZERO
stocking and disposal of plastic
probe covers.
• Never touches the patient for
optimal infection control.
• Reliable and stable measurement of
infrared energy.
• Screen colour indicator which
appears in BODY mode
o GREEN
≤37.3°C (99.1°F)
Normal range
o ORANGE
37.4–37.9°C (99.3-100.2°F)
Slight fever
o RED
≥38°C (100.4°F)
Febrile
• Audible alarm if temperature
is >38°C (100.4°F)
• Temperature can be displayed
in °C or °F
• Turns off automatically after
30 seconds not in use.
• Low battery indicator.
• Practical and easy to use.
• Thermometer can be easily wiped
clean with common cleaning agents
(See section XVI. Cleaning the device)
• Body temperature measurement
between 32°C -42.9°C
(89.6°F-109.2°F).

TRITEMP™Non-contact thermometer
EN
8
9
III. Safety Precautions
This thermometer is designed for use
by trained healthcare personnel only
and must be used in accordance with
the instructions in this manual. All
users must familiarise themselves with
the safety instructions and guidance
detailed in this manual before
operating the device.
Warnings and cautions can appear on
the thermometer, the packaging, the
shipping carton, or in the user manual.
Failure to understand and observe
warnings in this manual could lead to
patient injury and/or damage to the
thermometer which could affect the
accuracy of the device.
• TRITEMP™ is a precision device
and must be handled carefully and
not used if dropped.
• The thermometer is not water proof
and must be stored in a clean dry
area and never submerged in water
or any other liquid.
• Do not expose the thermometer to
direct sunlight.
• Do not autoclave the thermometer.
• Do not point the thermometer at a
heat source before use as it could
raise the sensor temperature and
produce erroneous results.
• The thermometer should only be
used for the purposes described
in this manual.
• The thermometer should not be
exposed to electric shocks.
• Body temperature measurements
are determined for forehead
readings only and accuracy is not
guaranteed for other locations on
the body.
• The device must be used in ambient
temperatures ranging from 10°C
(50°F) to 40°C (104°F). Do not
expose to extremes of temperature
>55°C (131°F) or <-20°C (-4°F).
• Do not use at a relative humidity
higher than 85%.
• Do not touch the sensor with your
ngersandonlycleansensorin
accordance with the instructions
in this manual.
• Always ensure the sensor is clean
and free from all dust, debris and
moisture before use to ensure
accurate readings.
• Ensure the thermometer is between
3-5cm(2ngerswidth)fromthe
forehead before taking a reading.
Accuracy cannot be guaranteed
outside this recommended range.

TRITEMP™Non-contact thermometer EN
8
9
• Removal of batteries is
recommended if the thermometer is
not used for an extended period.
• Rechargeable batteries should not
be used in the thermometer.
• New batteries with the required
specicationshouldalwaysbeused
in the thermometer.
• Always remove old batteries as
leakage or outgassing will cause
damage to the thermometer. Always
use protective gloves to remove
leaking batteries. Keep batteries out
of reach of children.
• Anymodicationstothe
thermometer are not permitted and
will invalidate the warranty.
• If the tamperproof sticker on the
back of the thermometer box is
broken on delivery please contact
your supplier.
• Thermometers no longer in use
must be disposed of according to
the institutional guidelines.
Patient Safety
• If the accuracy of the thermometer
is in question, use an alternative
method to determine the patient’s
temperature and then ask your
Biomedical technician to check the
device is working properly.
• The TRITEMP™ infrared
thermometer is intended for
intermittent measurement of
patient temperature only.
• Both the patient and thermometer
should be kept at the same
temperature for 15 to 20 minutes
before any measurement.
• Manyfactorscaninuence
body temperature so avoid taking
temperatures for 30 minutes after
physical activity, eating, drinking or
spending time outdoors as it may
affect the body temperature.
• Ensure the site for taking
temperature is exposed and is free
from hair and sweat.
• Ensure 3-5 seconds between
temperature readings.
Contraindications
There are no contraindications
identiedfortheTRITEMP™
non-contact thermometer.

TRITEMP™Non-contact thermometer
EN
10
11
TriTemp™ Non-contact thermometer
8
IV. Symbols
ENG
WARNING
Meets essential requirements of European
Medical Directive 93/42/EEC
Consult operating instructions
WEEE Directive (2002/96/EC)
IEC 60529 Ingress Protection
Fragile
Keep Dry
Serial Number
IEC 60417-5034 Direct Current
IEC 60417-5333, Type BF applied part
Final TriTemp IFU Manual V3 - 0817 ENG-D.qxp_Layout 1 12/09/2017 12:24 Page 10
XIV Dépannage et messages d’erreur
• En cas de problèmes lors de l’utilisation
de cet appareil, veuillez consulter ce
guide. Si le problème persiste, veuillez
contacter votre fournisseur ou votre
service client TriMedika.
• L’appareil peut à l’occasion afcher les
messages d’erreur suivants :
Lo s’afche à l’écran lorsque la température
corporelle mesurée est en deça de la plage
de mesure ou <32 °C (89,6 °F).
HI s’afche à l’écran lorsque la température
corporelle mesurée est au-delà de la plage
de mesure ou >42,9 °C (109,2 °F).
65
TriTempTM Non-contact thermometer F
Raisons pour lesquelles « Lo » apparaît Que faire
Cheveux ou transpiration sur le front Retirer les cheveux ou autre obstacle
avant de prendre la température
Courant d’air ou changements rapides de Veiller à ce qu’il n’y ait pas de soufe d’air
la température ambiante direct sur la zone d’utilisation.
Les prises de mesure sont trop Patienter 3 à 5 secondes entre les relevés
rapprochées de température.
Le thermomètre est trop loin du front La température doit être prise à une
distance de 3 à 5 cm (2 largeurs de doigt)
du front.
Mesure prise après application d’une La température ambiante doit être de 10 à
compresse froide, la prise de 40 °C
médicaments ou un bain.
Raisons pour lesquelles « HI » apparaît Que faire
Lorsque la température du corps est Veiller à ce qu’il n’y ait pas de source d’air
supérieure à 42,9 °C (109,2 °F) chaud en utilisation. Consulter
immédiatement un médecin.
La température ambiante est supérieure Veiller à ce que la température de
à 40 °C (104 °F) fonctionnement soit comprise entre 10 °C
et 40 °C (50 °F et 104 °F).
Lorsque la température de surface est Température dépassant la plage de
supérieure à 60°C (140 °F) mesure de température de 0° C à 60 °C
(32 °F à 140 °F).
IV. Symbols
WARNING
Meets essential requirements of European
Medical Directive 93/42/EEC
Consult operating instructions
WEEE Directive (2002/96/EC)
IEC 60529 Ingress Protection
Fragile
Keep Dry
Serial Number
IEC 60417-5034 Direct Current
IEC 60417-5333, Type BF applied part

TRITEMP™Non-contact thermometer EN
10
11
V. About the thermometer
TRITEMP™ is a clinical grade
thermometer that measures body
temperature and requires ZERO
consumables, ZERO contact and is
manufactured in Europe.
What are the advantages of using Infra-
red thermometer?
1. It is easy to use and fast, saving time
and allowing more measurements.
2. It enables temperature measurement
without touching the patient and
therefore offer optimal infection
control.
3. Measurements can be taken
when the patient is asleep and offers
maximum patient comfort.
4. Low energy device - with an auto
switch off after 30 secs and a short-
read time of 1 second only, offers
extended battery life.
What to remember when using an IR
thermometer:
1. The forehead must be optically
visible to the IR thermometer. Any
obstacle such as hair, sweat, dust,
etc., will affect the measurement.
2. The sensor must be protected from
dust, liquids and other particles.
3. The thermometer must be pointed
directly at the forehead and NOT at
an angle.
How does it work?
All objects emit energy in the form
of radiation and the intensity of
the energy varies according to its
temperature. This radiation is outside
the visible wavelength range and
cannot normally be seen with the
naked eye. This area lies within the red
area of visible light and has therefore
been called “infra”-red.
The thermometer design consists of a
lens to focus the infrared (IR) energy
on to a detector, which converts the
energy to an electrical signal that can
be displayed in units of temperature
after being compensated for
ambient temperature variation. This
congurationfacilitatestemperature
measurement from a distance
without contact with the object to be
measured. Temperature taken from the
forehead measures the heat generated
fromarterialowandisagood
indication of the body temperature.

TRITEMP™Non-contact thermometer
EN
12
13
TriTemp™ Non-contact thermometer
10
VI. Overview of the
thermometer
ENG
Body Temp Mode
Speaker
ON
° Celsius
POWER button
READ button
Display
ADJUST button
Lanyard
attachment
slot
Fig 1. Button Functions
Fig 2. LCD Display
° Fahrenheit
Memory
Battery
Surface Temp Mode
Final TriTemp IFU Manual V3 - 0817 ENG-D.qxp_Layout 1 12/09/2017 12:24 Page 12
• Pour passer du mode Température
de surface à Température corporelle
o Appuyer sur le bouton de mise sous
tension et le maintenir enfoncé
pendant 2 secondes.
o Relâcher le bouton de mise sous
tension, et °C se met à clignoter à
l’écran.
o Appuyer sur le bouton de mise
sous tension deux fois de plus
pour passer au mode de lecture.
Les mots SURFACE TEMP
(température de surface) clignotent
à l’écran.
o Appuyer sur Bouton de réglage
pour revenir à la température
corporelle.
o Appuyer sur le bouton de mise sous
tension 2 fois pour passer d’un
MODE à l’autre ou éteindre
l’appareil.
RÉGLAGE DU DÉCALAGE (-3 à +3°)
o Le décalage (OFFSET) est réglé
par défaut sur 0,0. Cette fonction
est parfois utilisée lorsqu’un
utilisateur souhaite comparer
l’appareil avec un autre (par ex. un
thermomètre à mercure). Elle
leur permet d’utiliser une valeur
de compensation prédénie
permettant d’arriver à un résultat
comparable. Elle n’est pas
recommandée dans toute autre
application.
o Appuyer sur le bouton de mise sous
tension et le maintenir enfoncé
pendant 2 secondes.
o Relâcher le bouton de mise sous
tension et °C se met à clignoter à
l’écran.
o Appuyer sur le bouton de mise
sous tension trois fois de plus pour
passer au mode décalage (OFFSET).
La valeur 0,0 clignote à l’écran.
o Appuyer sur le Bouton de lecture
pour augmenter la compensation
le décalage de 0,1°. À chaque fois
que l’on appuie sur le Bouton de
lecture, on augmente le décalage
de 0,1°. Le décalage maximum
possible est de +3°.
o Pour diminuer le décalage, appuyer
sur le bouton de réglage pour le
faire diminuer de 0,1° à chaque fois.
Le décalage minimum possible est
de -3°.
o Appuyer sur le bouton de mise sous
tension 1 fois pour éteindre
l’appareil.
63
TriTempTM Non-contact thermometer F
TriTemp™ Non-contact thermometer
11
VII. Getting Started
VIII. Inserting the Batteries
• Remove the 2 x AAA batteries from
the plastic lm.
• Remove the battery cover from the
rear of the TriTemp™ device.
• Insert the 2 x AAA batteries into the
device as shown below. Check the
orientation of the batteries using the
guide on the interior of the device.
• When the batteries are inserted put
the battery door back on the device
and click into place.
ENG
Fig 3. Inserting the batteries
+
+
i
Final TriTemp IFU Manual V3 - 0817 ENG-D.qxp_Layout 1 12/09/2017 12:24 Page 13
FTriTempTM Non-contact thermometer
RÉGLAGE DU SON - (ACTIVÉ/DÉSACTIVÉ)
• Éteindre le son
o Appuyer sur le bouton de mise sous
tension et le maintenir enfoncé
pendant 2 secondes.
o Relâcher le bouton de mise sous
tension, et °C se met à clignoter à
l’écran.
o Appuyer de nouveau sur le bouton
de mise sous tension pour passer en
mode audio. Le mot ON (activé)
clignote à l’écran.
o Appuyer sur le Bouton de réglage
pour éteindre de nouveau le son.
o Appuyer sur le bouton de mise sous
tension 3 fois pour passer d’un
MODE à l’autre ou éteindre
l’appareil.
• Activer le son
o Appuyer sur le bouton de mise sous
tension et le maintenir enfoncé
pendant 2 secondes.
o Relâcher le bouton de mise sous
tension, et °C se met à clignoter à
l’écran.
o Appuyer de nouveau sur le bouton
de mise sous tension pour passer en
mode audio. Le mot OFF
(désactivé) clignote à l’écran.
o Appuyer sur le Bouton de lecture
pour activer le son.
o Appuyer sur le bouton de mise sous
tension 3 fois pour passer d’un
MODE à l’autre ou éteindre
l’appareil.
RÉGLAGE DU MODE LECTURE
• Température corporelle/de surface
o Le mode BODY (température
corporelle) est paramétré par défaut
et utilisé pour mesurer la
température du corps d’un patient.
La plage de mesure est de 32 °C à
42,9 °C (89,6 °F à 109,2 °F).
o Le mode Température de surface
est utilisé pour mesurer la
température d’un objet ou d’un
liquide, et ne DOIT PAS être
utilisé chez les patients. Les
mesures de température de surface
vont de 0 °C à 60 °C (32 °F à 140
°F).
• Pour passer du mode Température
corporelle à Température de surface
o Appuyer sur le bouton de mise sous
tension et le maintenir enfoncé
pendant 2 secondes.
o Relâcher le bouton de mise sous
tension et °C se met à clignoter à
l’écran.
o Appuyer sur le bouton de mise
sous tension deux fois de plus pour
passer au mode de lecture. Le mot
BODY (température corporelle)
clignote à l’écran.
o Appuyer sur le Bouton de lecture
pour passer à la température de
surface (SURFACE TEMP).
o Appuyer sur le bouton de mise sous
tension 2 fois pour passer d’un
MODE à l’autre ou éteindre
l’appareil.
62
VI. Overview of the
thermometer
TriTemp™ Non-contact thermometer
11
VII. Getting Started
VIII. Inserting the Batteries
• Remove the 2 x AAA batteries from
the plastic lm.
• Remove the battery cover from the
rear of the TriTemp™ device.
• Insert the 2 x AAA batteries into the
device as shown below. Check the
orientation of the batteries using the
guide on the interior of the device.
• When the batteries are inserted put
the battery door back on the device
and click into place.
ENG
Fig 3. Inserting the batteries
+
+
i
Final TriTemp IFU Manual V3 - 0817 ENG-D.qxp_Layout 1 12/09/2017 12:24 Page 13
FTriTempTM Non-contact thermometer
RÉGLAGE DU SON - (ACTIVÉ/DÉSACTIVÉ)
• Éteindre le son
o Appuyer sur le bouton de mise sous
tension et le maintenir enfoncé
pendant 2 secondes.
o Relâcher le bouton de mise sous
tension, et °C se met à clignoter à
l’écran.
o Appuyer de nouveau sur le bouton
de mise sous tension pour passer en
mode audio. Le mot ON (activé)
clignote à l’écran.
o Appuyer sur le Bouton de réglage
pour éteindre de nouveau le son.
o Appuyer sur le bouton de mise sous
tension 3 fois pour passer d’un
MODE à l’autre ou éteindre
l’appareil.
• Activer le son
o Appuyer sur le bouton de mise sous
tension et le maintenir enfoncé
pendant 2 secondes.
o Relâcher le bouton de mise sous
tension, et °C se met à clignoter à
l’écran.
o Appuyer de nouveau sur le bouton
de mise sous tension pour passer en
mode audio. Le mot OFF
(désactivé) clignote à l’écran.
o Appuyer sur le Bouton de lecture
pour activer le son.
o Appuyer sur le bouton de mise sous
tension 3 fois pour passer d’un
MODE à l’autre ou éteindre
l’appareil.
RÉGLAGE DU MODE LECTURE
• Température corporelle/de surface
o Le mode BODY (température
corporelle) est paramétré par défaut
et utilisé pour mesurer la
température du corps d’un patient.
La plage de mesure est de 32 °C à
42,9 °C (89,6 °F à 109,2 °F).
o Le mode Température de surface
est utilisé pour mesurer la
température d’un objet ou d’un
liquide, et ne DOIT PAS être
utilisé chez les patients. Les
mesures de température de surface
vont de 0 °C à 60 °C (32 °F à 140
°F).
• Pour passer du mode Température
corporelle à Température de surface
o Appuyer sur le bouton de mise sous
tension et le maintenir enfoncé
pendant 2 secondes.
o Relâcher le bouton de mise sous
tension et °C se met à clignoter à
l’écran.
o Appuyer sur le bouton de mise
sous tension deux fois de plus pour
passer au mode de lecture. Le mot
BODY (température corporelle)
clignote à l’écran.
o Appuyer sur le Bouton de lecture
pour passer à la température de
surface (SURFACE TEMP).
o Appuyer sur le bouton de mise sous
tension 2 fois pour passer d’un
MODE à l’autre ou éteindre
l’appareil.
62

TRITEMP™Non-contact thermometer EN
12
13
TriTemp™ Non-contact thermometer
10
VI. Overview of the
thermometer
ENG
Body Temp Mode
Speaker
ON
° Celsius
POWER button
READ button
Display
ADJUST button
Lanyard
attachment
slot
Fig 1. Button Functions
Fig 2. LCD Display
° Fahrenheit
Memory
Battery
Surface Temp Mode
Final TriTemp IFU Manual V3 - 0817 ENG-D.qxp_Layout 1 12/09/2017 12:24 Page 12
• Pour passer du mode Température
de surface à Température corporelle
o Appuyer sur le bouton de mise sous
tension et le maintenir enfoncé
pendant 2 secondes.
o Relâcher le bouton de mise sous
tension, et °C se met à clignoter à
l’écran.
o Appuyer sur le bouton de mise
sous tension deux fois de plus
pour passer au mode de lecture.
Les mots SURFACE TEMP
(température de surface) clignotent
à l’écran.
o Appuyer sur Bouton de réglage
pour revenir à la température
corporelle.
o Appuyer sur le bouton de mise sous
tension 2 fois pour passer d’un
MODE à l’autre ou éteindre
l’appareil.
RÉGLAGE DU DÉCALAGE (-3 à +3°)
o Le décalage (OFFSET) est réglé
par défaut sur 0,0. Cette fonction
est parfois utilisée lorsqu’un
utilisateur souhaite comparer
l’appareil avec un autre (par ex. un
thermomètre à mercure). Elle
leur permet d’utiliser une valeur
de compensation prédénie
permettant d’arriver à un résultat
comparable. Elle n’est pas
recommandée dans toute autre
application.
o Appuyer sur le bouton de mise sous
tension et le maintenir enfoncé
pendant 2 secondes.
o Relâcher le bouton de mise sous
tension et °C se met à clignoter à
l’écran.
o Appuyer sur le bouton de mise
sous tension trois fois de plus pour
passer au mode décalage (OFFSET).
La valeur 0,0 clignote à l’écran.
o Appuyer sur le Bouton de lecture
pour augmenter la compensation
le décalage de 0,1°. À chaque fois
que l’on appuie sur le Bouton de
lecture, on augmente le décalage
de 0,1°. Le décalage maximum
possible est de +3°.
o Pour diminuer le décalage, appuyer
sur le bouton de réglage pour le
faire diminuer de 0,1° à chaque fois.
Le décalage minimum possible est
de -3°.
o Appuyer sur le bouton de mise sous
tension 1 fois pour éteindre
l’appareil.
63
TriTempTM Non-contact thermometer F
TriTemp™ Non-contact thermometer
11
VII. Getting Started
VIII. Inserting the Batteries
• Remove the 2 x AAA batteries from
the plastic lm.
• Remove the battery cover from the
rear of the TriTemp™ device.
• Insert the 2 x AAA batteries into the
device as shown below. Check the
orientation of the batteries using the
guide on the interior of the device.
• When the batteries are inserted put
the battery door back on the device
and click into place.
ENG
Fig 3. Inserting the batteries
+
+
i
Final TriTemp IFU Manual V3 - 0817 ENG-D.qxp_Layout 1 12/09/2017 12:24 Page 13
FTriTempTM Non-contact thermometer
RÉGLAGE DU SON - (ACTIVÉ/DÉSACTIVÉ)
• Éteindre le son
o Appuyer sur le bouton de mise sous
tension et le maintenir enfoncé
pendant 2 secondes.
o Relâcher le bouton de mise sous
tension, et °C se met à clignoter à
l’écran.
o Appuyer de nouveau sur le bouton
de mise sous tension pour passer en
mode audio. Le mot ON (activé)
clignote à l’écran.
o Appuyer sur le Bouton de réglage
pour éteindre de nouveau le son.
o Appuyer sur le bouton de mise sous
tension 3 fois pour passer d’un
MODE à l’autre ou éteindre
l’appareil.
• Activer le son
o Appuyer sur le bouton de mise sous
tension et le maintenir enfoncé
pendant 2 secondes.
o Relâcher le bouton de mise sous
tension, et °C se met à clignoter à
l’écran.
o Appuyer de nouveau sur le bouton
de mise sous tension pour passer en
mode audio. Le mot OFF
(désactivé) clignote à l’écran.
o Appuyer sur le Bouton de lecture
pour activer le son.
o Appuyer sur le bouton de mise sous
tension 3 fois pour passer d’un
MODE à l’autre ou éteindre
l’appareil.
RÉGLAGE DU MODE LECTURE
• Température corporelle/de surface
o Le mode BODY (température
corporelle) est paramétré par défaut
et utilisé pour mesurer la
température du corps d’un patient.
La plage de mesure est de 32 °C à
42,9 °C (89,6 °F à 109,2 °F).
o Le mode Température de surface
est utilisé pour mesurer la
température d’un objet ou d’un
liquide, et ne DOIT PAS être
utilisé chez les patients. Les
mesures de température de surface
vont de 0 °C à 60 °C (32 °F à 140
°F).
• Pour passer du mode Température
corporelle à Température de surface
o Appuyer sur le bouton de mise sous
tension et le maintenir enfoncé
pendant 2 secondes.
o Relâcher le bouton de mise sous
tension et °C se met à clignoter à
l’écran.
o Appuyer sur le bouton de mise
sous tension deux fois de plus pour
passer au mode de lecture. Le mot
BODY (température corporelle)
clignote à l’écran.
o Appuyer sur le Bouton de lecture
pour passer à la température de
surface (SURFACE TEMP).
o Appuyer sur le bouton de mise sous
tension 2 fois pour passer d’un
MODE à l’autre ou éteindre
l’appareil.
62
VII. Getting Started
VIII. Inserting the Batteries
TriTemp™ Non-contact thermometer
11
VII. Getting Started
VIII. Inserting the Batteries
• Remove the 2 x AAA batteries from
the plastic lm.
• Remove the battery cover from the
rear of the TriTemp™ device.
• Insert the 2 x AAA batteries into the
device as shown below. Check the
orientation of the batteries using the
guide on the interior of the device.
• When the batteries are inserted put
the battery door back on the device
and click into place.
ENG
Fig 3. Inserting the batteries
+
+
i
Final TriTemp IFU Manual V3 - 0817 ENG-D.qxp_Layout 1 12/09/2017 12:24 Page 13
FTriTempTM Non-contact thermometer
RÉGLAGE DU SON - (ACTIVÉ/DÉSACTIVÉ)
• Éteindre le son
o Appuyer sur le bouton de mise sous
tension et le maintenir enfoncé
pendant 2 secondes.
o Relâcher le bouton de mise sous
tension, et °C se met à clignoter à
l’écran.
o Appuyer de nouveau sur le bouton
de mise sous tension pour passer en
mode audio. Le mot ON (activé)
clignote à l’écran.
o Appuyer sur le Bouton de réglage
pour éteindre de nouveau le son.
o Appuyer sur le bouton de mise sous
tension 3 fois pour passer d’un
MODE à l’autre ou éteindre
l’appareil.
• Activer le son
o Appuyer sur le bouton de mise sous
tension et le maintenir enfoncé
pendant 2 secondes.
o Relâcher le bouton de mise sous
tension, et °C se met à clignoter à
l’écran.
o Appuyer de nouveau sur le bouton
de mise sous tension pour passer en
mode audio. Le mot OFF
(désactivé) clignote à l’écran.
o Appuyer sur le Bouton de lecture
pour activer le son.
o Appuyer sur le bouton de mise sous
tension 3 fois pour passer d’un
MODE à l’autre ou éteindre
l’appareil.
RÉGLAGE DU MODE LECTURE
• Température corporelle/de surface
o Le mode BODY (température
corporelle) est paramétré par défaut
et utilisé pour mesurer la
température du corps d’un patient.
La plage de mesure est de 32 °C à
42,9 °C (89,6 °F à 109,2 °F).
o Le mode Température de surface
est utilisé pour mesurer la
température d’un objet ou d’un
liquide, et ne DOIT PAS être
utilisé chez les patients. Les
mesures de température de surface
vont de 0 °C à 60 °C (32 °F à 140
°F).
• Pour passer du mode Température
corporelle à Température de surface
o Appuyer sur le bouton de mise sous
tension et le maintenir enfoncé
pendant 2 secondes.
o Relâcher le bouton de mise sous
tension et °C se met à clignoter à
l’écran.
o Appuyer sur le bouton de mise
sous tension deux fois de plus pour
passer au mode de lecture. Le mot
BODY (température corporelle)
clignote à l’écran.
o Appuyer sur le Bouton de lecture
pour passer à la température de
surface (SURFACE TEMP).
o Appuyer sur le bouton de mise sous
tension 2 fois pour passer d’un
MODE à l’autre ou éteindre
l’appareil.
62
• Remove the 2 x AAA batteries from
theplasticlm.
• Remove the battery cover from the
rear of the TRITEMP™ device.
• Insert the 2 x AAA batteries into the
device as shown below. Check the
orientation of the batteries using the
guide on the interior of the device.
• When the batteries are inserted put
the battery door back on the device
and click into place.

TRITEMP™Non-contact thermometer
EN
14
15
IX. How to take a
measurement of patient
• Allow the device to equilibrate to
room temperature for 15-20 minutes
before use. This is necessary to ensure
the sensor is at room temperature.
• Press the POWER button (See Fig 1.
Button Functions) and release
immediately to turn on the device.
The screen will light Green and
current settings will be displayed.
• Check the screen settings are the
required parameters i.e. Body
Temperature, °C and the speaker
symbol is visible (for audio). If the
settings are not those required (See
Section XI. Adjustment of settings) for
adjustment of the settings.
• Ensure the site for taking
temperature is exposed and is
free from hair, sweat, etc.
• Remove any covering (e.g. hat, dressing,
etc.) that would insulate the forehead
and prevent release of infra red.
• Point the TRITEMP™ straight
onto the forehead (not at an angle)
approximately3-5cm(2nger
widths) from the skin and press the
READ button. The device will ‘bleep’
to indicate a temperature has been
taken and the reading is displayed
on screen in 1 second.
• Screen colour indicator appears
o GREEN
≤37.3°C (99.8°F)
Normal range
o ORANGE
37.4–37.9°C (100 -100.2°F)
Slight fever
o RED
≥38°C (100.4°F)
Febrile
• The device has a HIGH temperature
alarm which will sound if the Body
temperature is 38°C (100.4°F) or
above.
• The device will automatically switch off
in 30 seconds to preserve the battery.
• If you press the POWER button and
hold until there is an audible bleep,
°Cwillstartashingonthegreen
screen. You are now in the MODE
settings Menu.
• If you inadvertently enter the MODE
settings menu, continue to press and
release the POWER button a further
4 times to scroll through the options
and turn off the device.
• To restart the device, press and
release the Power button to turn the
Thermometer ON.
Please refer to Section XI. Adjustment
of MODE setting ‘SETTING THE
READ MODE’
X. How to take the
measurement of an object
TriTemp™ Non-contact thermometer
8
IV. Symbols
ENG
WARNING
Meets essential requirements of European
Medical Directive 93/42/EEC
Consult operating instructions
WEEE Directive (2002/96/EC)
IEC 60529 Ingress Protection
Fragile
Keep Dry
Serial Number
IEC 60417-5034 Direct Current
IEC 60417-5333, Type BF applied part
Final TriTemp IFU Manual V3 - 0817 ENG-D.qxp_Layout 1 12/09/2017 12:24 Page 10
XIV Dépannage et messages d’erreur
• En cas de problèmes lors de l’utilisation
de cet appareil, veuillez consulter ce
guide. Si le problème persiste, veuillez
contacter votre fournisseur ou votre
service client TriMedika.
• L’appareil peut à l’occasion afcher les
messages d’erreur suivants :
Lo s’afche à l’écran lorsque la température
corporelle mesurée est en deça de la plage
de mesure ou <32 °C (89,6 °F).
HI s’afche à l’écran lorsque la température
corporelle mesurée est au-delà de la plage
de mesure ou >42,9 °C (109,2 °F).
65
TriTempTM Non-contact thermometer F
Raisons pour lesquelles « Lo » apparaît Que faire
Cheveux ou transpiration sur le front Retirer les cheveux ou autre obstacle
avant de prendre la température
Courant d’air ou changements rapides de Veiller à ce qu’il n’y ait pas de soufe d’air
la température ambiante direct sur la zone d’utilisation.
Les prises de mesure sont trop Patienter 3 à 5 secondes entre les relevés
rapprochées de température.
Le thermomètre est trop loin du front La température doit être prise à une
distance de 3 à 5 cm (2 largeurs de doigt)
du front.
Mesure prise après application d’une La température ambiante doit être de 10 à
compresse froide, la prise de 40 °C
médicaments ou un bain.
Raisons pour lesquelles « HI » apparaît Que faire
Lorsque la température du corps est Veiller à ce qu’il n’y ait pas de source d’air
supérieure à 42,9 °C (109,2 °F) chaud en utilisation. Consulter
immédiatement un médecin.
La température ambiante est supérieure Veiller à ce que la température de
à 40 °C (104 °F) fonctionnement soit comprise entre 10 °C
et 40 °C (50 °F et 104 °F).
Lorsque la température de surface est Température dépassant la plage de
supérieure à 60°C (140 °F) mesure de température de 0° C à 60 °C
(32 °F à 140 °F).

TRITEMP™Non-contact thermometer EN
14
15
XI. Adjustment of MODE
settings
The device has 4 MODE options as
follows:
1. Unit of temperature °C or °F
2. Audio enabled ON / OFF
3. READ Mode BODY / SURFACE TEMP
4. OFFSET > +3 to -3 °C / +5.4 to
-5.4°F.
• The device is supplied with factory
settings and the device screen will
display °C , Audio ON, BODY and
0.0 offset.
• Alteration of the factory settings
must only be performed by a
qualiedBiomedicaltechnician
which are aligned with the
requirements of the clinical team.
• To adjust any MODE settings press
and hold the POWER button until
you hear an audible bleep. (See
Figure 1. Button Functions, Pg 10).
Release POWER button and °C will
startashingonthescreen.Theuser
can the move through each MODE
option (from 1 to 4 as listed above)
by pressing the POWER button each
time.
SETTING THE UNIT TEMPERATURE
(°C OR °F)
• To change the unit of measurement
from °C to °F
o Press and hold the POWER button
until you hear an audible bleep.
o Release POWER button and °C will
startashingonthescreen.
o Press the READ button to change
to°F.The°Fwillstarttoashon
the display.
o Press the POWER button 4 times
to move through the MODE
options and switch off the device
• To change the unit of measurement
from °F to °C
o Press and hold the POWER button
until you hear an audible bleep.
o Release POWER button and °F will
startashingonthescreen.
o Press the recessed adjust button
with the tip of a paperclip to revert
back to °C.
o Press the POWER button 4 times
to move through the MODE
options and switch off the device.
The device will display °C when
turned ON.

TRITEMP™Non-contact thermometer
EN
16
17
SETTING THE AUDIO - (ON/OFF)
• To switch audio function off
o Press and hold the POWER button
until you hear an audible bleep
o Release POWER button and °C
willstartashingonthescreen
o Press the POWER again to move
through to the Audio mode
option. The screen display will
ashON.
o Press ADJUST button to revert
back to OFF
o Press the POWER button 3 times
to move through the MODE
options and switch off the device
• To switch Audio Function ON
o Press and hold the POWER button
until you hear an audible bleep
o Release POWER button and °C
willstartashingonthescreen
o Press the POWER again to move
through to the Audio mode
option. The screen display will
ashOFF
o Press the READ button to switch
audio ON
o Press the POWER button 3
times to move through the
MODE options and switch off the
device
SETTING THE READ MODE
• Body/ surface temp
o BODY mode is the default
setting and is used for the body
measurement of a patient and the
measurement range is 32°C to
42.9°C (89.6°F-109.2°F).
o SURFACE TEMP mode is used
to measure the temperature of an
object or liquid and should NOT
be used for patients. Surface
temperature measurements are
between 0°C to 60°C (32°F to
140°F).
• To move from BODY mode to
SURFACE mode
o Press and hold the POWER button
until you hear an audible bleep
o Release POWER button and °C
willstartashingonthescreen.
o Press the POWER button 2 more
times to move through to the
READ location mode option. The
screendisplaywillashBODY.
o Press the READ button to change
to SURFACE TEMP.
o Press the POWER button 2 times
to move through the MODE
options and switch off the device

TRITEMP™Non-contact thermometer EN
16
17
• To move from SURFACE mode to
BODY mode
o Press and hold the POWER button
until you hear an audible bleep
o Release POWER button and °C
willstartashingonthescreen
o Press the POWER button 2 more
times to move through to the
READ location mode option. The
screendisplaywillashSURFACE
TEMP.
o Press ADJUST button to revert
back to body.
o Press the POWER button 2 times
to move through the MODE
options and switch off the device.
SETTING THE OFFSET (-3 TO +3°)
o OFFSET default setting is 0.0. This
is sometimes used if a user wants
to compare with another device
e.g. mercury thermometer and
this enables them to use a known
offset value to give a comparable
reading. It is NOT recommended
for any other application.
o Press and hold the POWER button
until you hear an audible bleep
o Release POWER button and °C
willstartashingonthescreen.
o Press the POWER 3 more times
to move through to the OFFSET
mode option. The screen display
willash0.0.
o Press the READ button to increase
the OFFSET by 0.1°. Each press
of the READ button will increase
the OFFSET by increments of 0.1°.
The maximum OFFSET is +3°.
o To decrease the OFFSET press
ADJUST button to decrease by
0.1° increments. The minimum
OFFSET is -3°.
o Press the POWER button 1 time to
switch off the device.

TRITEMP™Non-contact thermometer
EN
18
19
XII. Review previous
measurements
The TRITEMP™ will retain
measurements of the last 32 readings.
• To access this information press the
POWER button and release.
• Insert the end of a paperclip into the
recessed ADJUST button and press
and release. The device will present
the last 32 readings taken by the
device. On each press the device will
present as follows:
o 01 Reading from last measurement
o 02 Reading from 1 measurement
before last.
o 03 Reading from 2 measurements
before last.
• On release the measurement will be
displayed in the selected units.
• To delete the Memory press the
ADJUST button and hold for 4 secs
and all readings will be deleted.
• Press the ADJUST button again to
conrmthatallhavebeencleared
and the Display will read CLR.
• The 2 x AAA batteries provided
with the device will enable 20,000
measurements.
Battery icon
• When the LCD screen displays the
battery icon , the batteries need
to be replaced.
• Remove the battery cover from the
rear of the TRITEMP™ device.
• Insert the 2 x AAA batteries into the
device as shown in diagram below.
Check the orientation of the
batteries using the guide on the
interior of the device. (See Figure 3.
Inserting the batteries, Pg 11).
• Incorrect placement of the batteries
could compromise the device and
affect the warranty of the device.
When the batteries are inserted put
the battery door back on the device
and click into place.
XIII. Change the
batteries
TriTemp™ Non-contact thermometer
16
XII. Review previous
measurements
The TriTemp™ will retain measurements
of the last 32 readings.
• To access this information press the
POWER button and release.
• Insert the end of a paperclip into the
recessed ADJUST button and press
and release. The device will present
the last 32 readings taken by the
device. On each press the device will
present as follows:
o 01 Reading from last
measurement
o 02 Reading from 1 measurement
before last.
o 03 Reading from 2
measurements before last.
• On release the measurement will be
displayed in the selected units.
• To delete the Memory press the
ADJUST button and hold for 4 secs
and all readings will be deleted.
• Press the ADJUST button again to
conrm that all have been cleared
and the Display will read CLR.
XIII Change the batteries
• The 2 x AAA batteries provided with
the device will enable 20,000
measurements.
Battery icon
• When the LCD screen displays the
battery icon , the batteries need
to be replaced.
• Remove the battery cover from the
rear of the TriTemp™ device.
• Insert the 2 x AAA batteries into the
device as shown in diagram below.
Check the orientation of the
batteries using the guide on the
interior of the device. (See Figure 3.
Inserting the batteries, Pg 11)
• Incorrect placement of the batteries
could compromise the device and
affect the warranty of the device.
When the batteries are inserted put
the battery door back on the device
and click into place.
ENG
+
Final TriTemp IFU Manual V3 - 0817 ENG-D.qxp_Layout 1 12/09/2017 12:24 Page 18
V. Informations générales sur le thermomètre
TriTemp™ est un thermomètre
professionnel permettant de mesurer la
température corporelle sans contact et sans
aucun consommable, fabriqué en Europe.
Quels sont les avantages du thermomètre
infrarouge ?
1. Il est facile à utiliser et rapide, ce qui
permet de gagner du temps et
d’effectuer davantage de mesures.
2. Il permet de mesurer la température
sans toucher le patient, pour éviter au
maximum les infections.
3. Il est possible de mesurer la
température du patient lorsque
celui-ci est endormi, et minimise la gêne
occasionnée.
4. Appareil à faible consommation
d’énergie : arrêt automatique après 30
secondes, court délai de lecture (1
seconde), durée de vie des piles
étendue.
À noter lors de l’utilisation d’un
thermomètre infrarouge :
1. Le front doit être visible pour le capteur
optique du thermomètre infrarouge.
Tout obstacle, tels que les cheveux, la
sueur, la poussière, etc., aura une
incidence sur la mesure.
2. La sonde doit être protégée de la
poussière, des liquides et autres
particules.
3. Le thermomètre doit être orienté tout
droit, et sans l’incliner, vers le front.
Comment fonctionne-t-il ?
Chaque objet émet de l’énergie sous
forme de rayonnement, et l’intensité de
cette énergie varie en fonction de sa
température. Ce rayonnement ne se trouve
pas dans la plage de longueurs d’onde
visibles, il n’est donc pas perceptible à l’œil
nu. Cette zone se trouve dans la partie
rouge du spectre visible, d’où l’utilisation
du terme infra-rouge.
Le thermomètre comprend une lentille
focalisant l’énergie infrarouge sur un
détecteur qui convertit l’énergie en un
signal électrique. Ce signal peut alors être
afché en unités de température, après
avoir pris en compte les variations de la
température ambiante. Ainsi, l’appareil
peut mesurer la température à distance,
sans contact avec l’objet dont on souhaite
prendre la température. Pour la prise de
température frontale, l’appareil mesure la
chaleur générée par le ux artériel, une
bonne indication de la température du
corps.
57
TriTempTM Non-contact thermometer F

TRITEMP™Non-contact thermometer EN
18
19
XIII. Change the
batteries
XIV. Troubleshooting and
Error messages
• Please refer to this guide to help
resolve any problems using the
device. If the problem persists
please contact your supplier or
TriMedika customer service.
• The device has Error messages that
will be displayed on the Display as
follows:
Lo appears on the screen when the
BODY temperature measured is under
the measuring range or <32°C (89.6°F)
HI appears on the screen when the
BODY temperature measured is above
the measuring range or >42.9°C
(109.2°F)
Reasons for Lo message Action
Hair or perspiration on forehead Remove hair or any other obstruction
prior to taking a temperature
Air draft or rapid change in
ambient temperature
Ensurethereisnodirectairowinthe
area of use.
Readings are too close together Ensure there is 3-5 seconds between
temperature readings.
Thermometer is held too far away
from the forehead
Temperature must be taken 3-5cm
(2ngerwidths)fromforehead.
Measurement taken after cold
compress, taking medicine or bathing.
Ensure environment temperature is
between 10-40°C
Reasons for HI message Action
When body temperature is above
42.9°C (109.2°F)
Make sure there is no source of hot air
in area of use. Seek immediate medical
attention.
Ambient temperature is above
40°C (104°F)
Ensure the operating temperature
is between 10°C to 40°C (50°F to104°F).
When surface temperature is
above 60°C (140°F)
Temperature reading exceeds
measurement range of 0°C to 60°C
(32°F to 140°F).

TRITEMP™Non-contact thermometer
EN
20
21
XV. Guidelines
• TRITEMP™ complies with EU
Directive 93/42/EC concerning
medical products.
• TRITEMP™ is traceable to ASTM
E 1965-98 and European
standard EN60601-1-2 and is
subject to precautions with regard to
electromagnetic compatibility.
The sensor is the most fragile part
of the device and great care should
be taken when cleaning the device.
Use only the cleaning agents
recommended in this manual.
• To clean the sensor use a cotton
bud moistened with isopropyl or
ethyl alcohol and gently wipe the
lens of the device using a side to
side motion. Avoid touching the lens
except when cleaning is required.
• The device exterior can be cleaned
by wiping gently with a cloth
moistened in a mild soapy detergent.
• Ensure liquid does not enter the
device and NEVER submerge in
water or liquid.
• Do not use water to clean the lens.
Ensure the device is completely dry
before use.
The device is factory calibrated at
the time of manufacture and if used
according to the instructions in this
manual should not require periodic
adjustment.
TriMedika recommends an annual
calibration check or when the accuracy
of the measurement is in question.
The thermometer should be disposed
of in accordance with the EC Directive
– WEEE (Waste Electrical and Electronic
Equipment).
XVI. Cleaning the
thermometer
XVII. Calibration check of
the thermometer
XVIII. Disposal of the
thermometer
This manual suits for next models
1
Table of contents
