TRINITY Pro 72" 12-DRAWER STAINLESS STEEL ROLLING... User manual
OWNER’S MANUAL
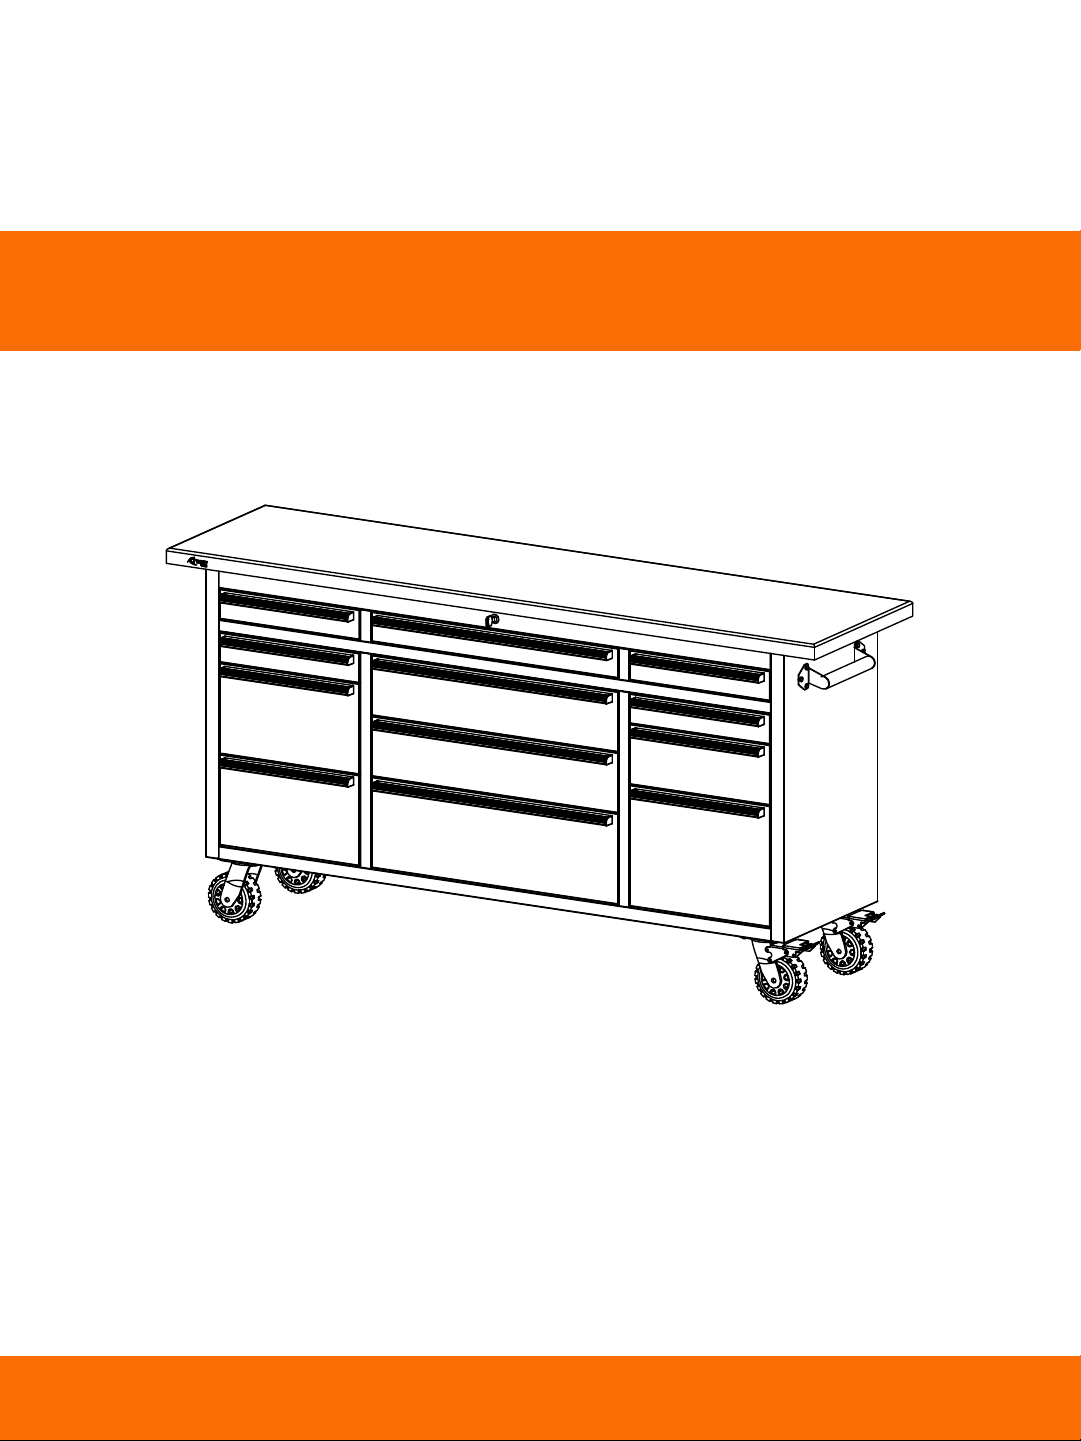
72”12-DRAWER STAINLESS STEEL ROLLING
WORKBENCH

A
SIDE HANDLE (2)
BC
CASTER BOLT (16)
M10
D
LINER (12)
EGH
HANDLE BOLT (12)
M6 LOCKING
CASTER (2)
F
NON-LOCKING
CASTER (2) KEY (2)
WORKBENCH (1)
PARTS LIST
If you are missing any parts, need assistance with assembly or have questions, please contact Customer
Service. Parts can also be requested online
You will need 10mm wrench (for handles) and 14mm wrench (for casters) for assembly. Not included.
1
Your 72in 12-Drawer Stainless Steel Rolling Workbench should include the following parts. Please
inspect box contents to ensure you have received all components.
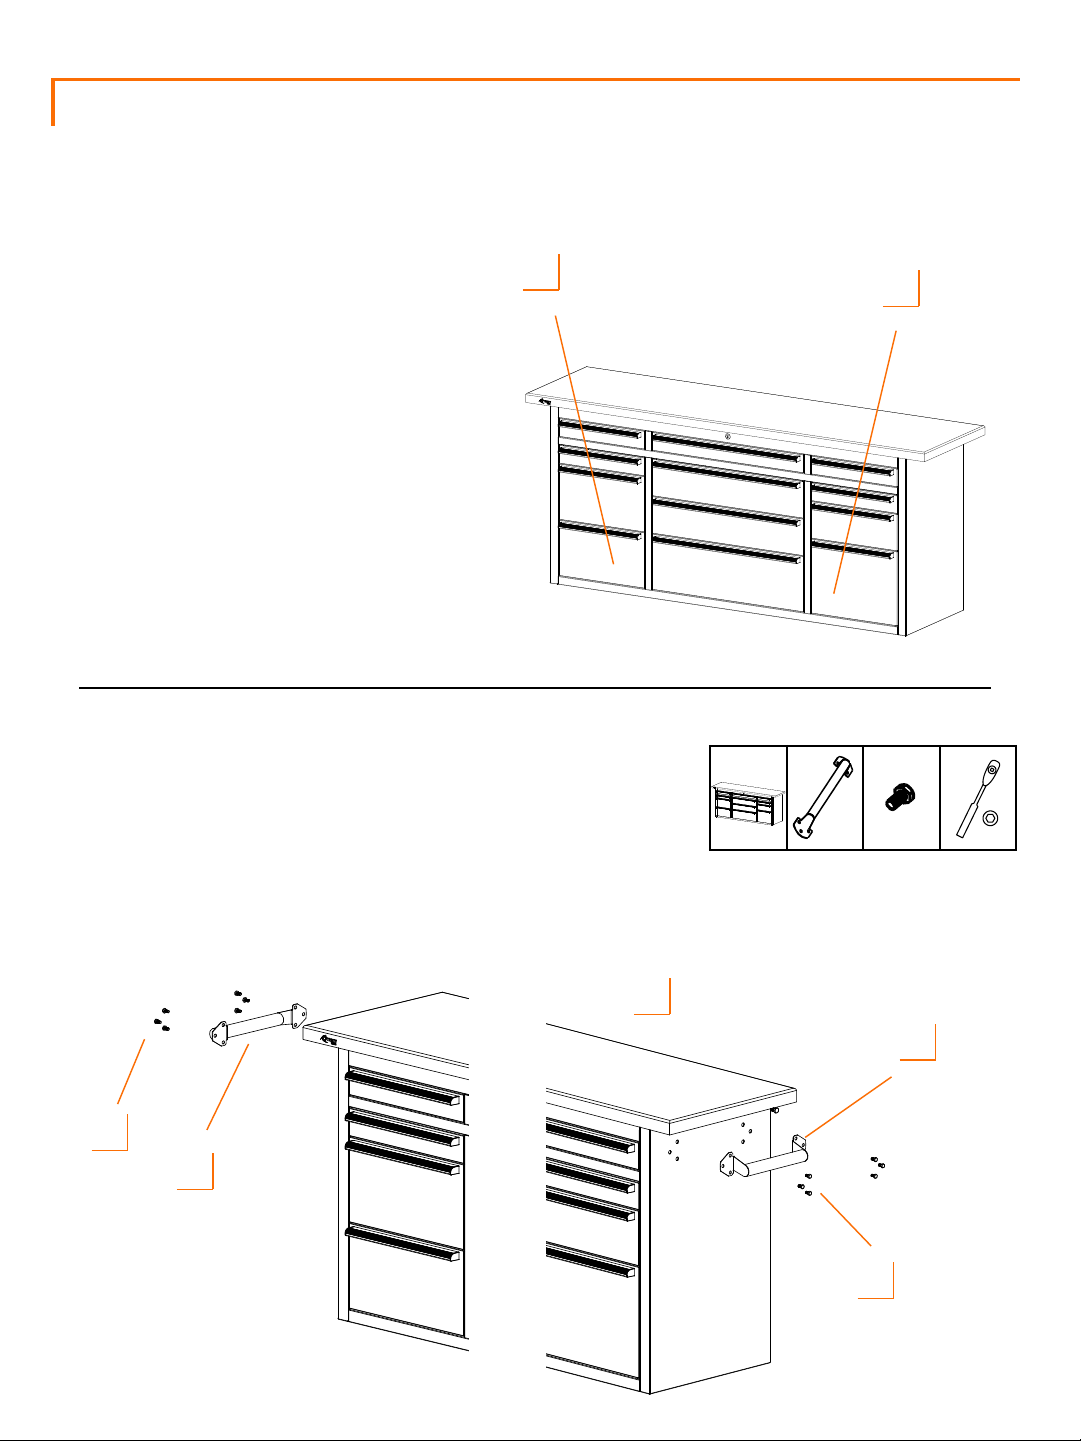
ASSEMBLY INSTRUCTIONS
Position SIDE HANDLE (B) over pre-installed nuts on side of
WORKBENCH (A). Insert HANDLE BOLTS (C) through holes on
SIDE HANDLE (B). Use a 10mm socket wrench to fully tighten
HANDLE BOLTS (C) to WORKBENCH (A).
Repeat above steps to install remaining SIDE HANDLE (B).
AB
C
STEP 1
STEP 2
10mmA (1) B (2) C (12)
Location of parts:
1) KEYS (H) are in a plastic bag taped on top of
the CASTERS (D/E/F) box in BOTTOM LEFT
Drawer.
2) LINERS (G) / SIDE HANDLES (B) and HANDLE
BOLTS (C) are all in BOTTOM RIGHT Drawer.
12
B
C
2

ASSEMBLY INSTRUCTIONS
STEP 3
D (2) E (2) F (16)
Lay WORKBENCH (A) on its backside. Lift
workbench by side handles. Do NOT lift
workbench by the wood top. Two people are
needed. Do NOT attempt this alone.
Position LOCKING CASTERS (D) on side of
WORKBENCH (A) of your choice and align holes to
pre-installed nuts on underside of WORKBENCH
(A). Use a 14mm socket wrench to fully tighten
CASTER BOLT (F) to WORKBENCH (A).
Repeat above steps to install NON-LOCKING
CASTERS (E).
Notes:
* Make sure to install both LOCKING CASTERS (D)
on same side of workbench.
** For ease of use, place LOCKING CASTERS (D) on
side you will regularly push or pull.
*** If you plan to push the workbench against a
wall, place LOCKING CASTERS (D) on front long
side for ease of access.
14mm
A
Place LINERS (G) in each drawer.
DO NOT place liner in TOP LEFT or TOP RIGHT
drawer which already has a wood work surface
installed inside.
STEP 4
ED
F
G (12)
G
3

USAGE INSTRUCTIONS
DRAWER REMOVAL
DRAWER REPLACEMENT
Pull drawer out so that it is almost fully extended. On RIGHT-hand side, push black release lever DOWN.
On LEFT-hand side, pull black release lever UP. While holding levers as instructed, pull drawer forward
until released from the slides attached to workbench (“Workbench Slides”).
Note: The slides attached to drawer (“Drawer Slides”) are an integral part of drawer and must be
removed along with drawer itself.
To replace drawer, pull slides out completely. Insert brackets on each side of Drawer Slides into the
corresponding slots on Workbench Slides, making sure they are properly positioned. Once brackets are
inserted into slots, completely close drawer to set all slides in their proper positions.
4
2
5
12
17
19
15
9
20
16
22
NOTE: Replacement keys may be ordered using the code shown on the face of the lock.
8
5
13
14
3
6
1
7
10
11
21
4
18
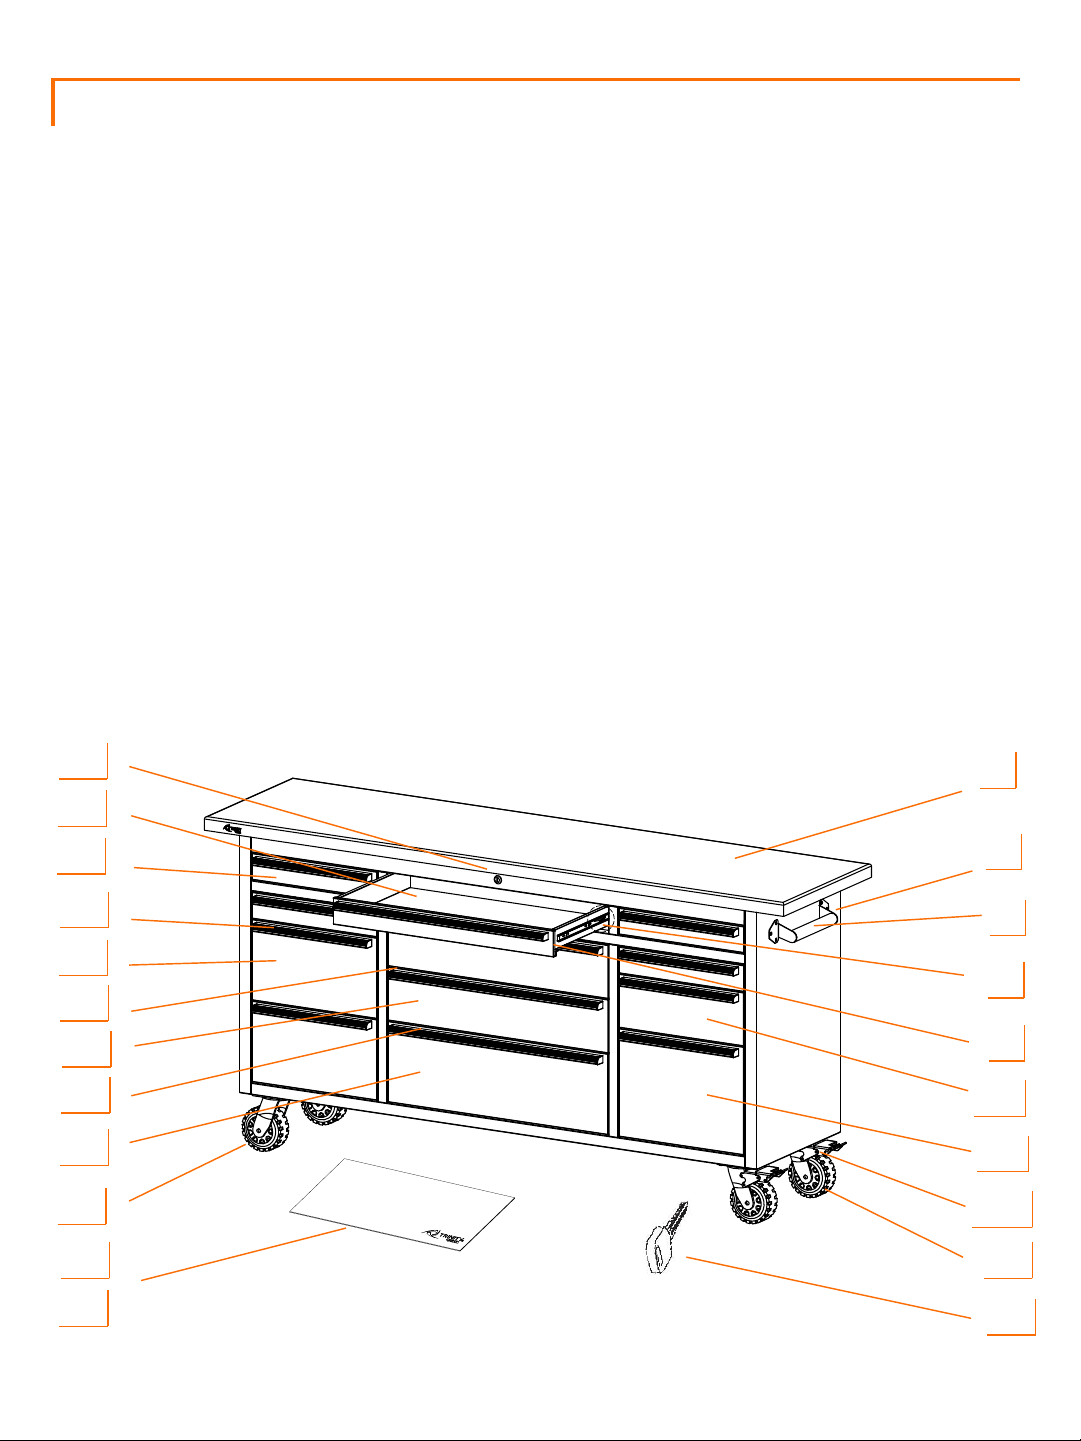
SERVICE PARTS LIST
Customer Service provides the following replacement parts:
Description Description
1) Wood Top 12) 27” Drawer Liner
2) Handle Bolt 13) Non-locking Caster
3) Side Handle 14) 27” Large Drawer
4) Slide (workbench side) 15) 27” Drawer Handle
5) Slide (drawer side) 16) 27” Medium Drawer
6) 15”1st Medium Drawer 17) End cap
7) 15” Large Drawer 18) 15” 2nd Medium Drawer
8) Caster Bolt 19)15” Drawer Handle
9) Locking Caster 20)15” Small Drawer
10) Key 21) 27” Small Drawer
11) 15” Drawer Liner 22) Lock

WARNINGS
1. Read and understand all instructions. Failure to follow all instructions may result in injury
and/or damage.
2. The warnings, cautions, and instructions discussed in this manual cannot cover all
possible conditions or situations that may occur. The user must always be aware of their
environment and ensure that they use the product in a safe and responsible manner.
3. Do NOT modify the product in any way. Unauthorized modification may impair the
function and/or safety of the product, and may affect the life of the product.
4. Check for damaged parts. Before using this product, carefully check that all parts are in
good condition, and that the product will operate properly and perform its intended
function. Check for damaged parts and any other conditions that may affect the operation
of this product. Replace damaged or worn parts, and never use this product with a
damaged part.
5. Do NOT overload the product.
6. Lock the casters when leaving workbench in stationary position.
7. Lock the drawers before moving the workbench.
8. Do NOT open more than one drawer at a time. Tipping can occur.
9. Do NOT step or lean on open drawers. Tipping can occur.
10. Do NOT lift workbench by wood top. Wood top may separate causing injury.
11. Do NOT let children play near workbench.
12. Load the workbench starting with the bottom drawers to prevent workbench from
tipping.
13. Make sure all drawers are closed tightly before locking or unlocking.
Weight capacity per drawer w/ 1 pair of slides 100 lb
Weight capacity per drawer w/ 2 pairs of slides 200 lb
Total weight capacity of workbench 2200 lb
6

CARE AND MAINTENANCE
•Avoid harsh, abrasive cleaners, and other corrosive chemicals.
•Do not use scouring pad for cleaning.
•Keep dry and avoid damp environments.
•Use a quality stainless steel cleaner and follow instructions that come with the cleaner.
Wipe ALONG the grain (NOT against).
•Wood top can be cleaned with damp cloth and wiped dry immediately with dry cloth. If
needed, solvent-based wood furniture cleaner can be used.
•Clean up any spills immediately to prevent stains from forming on the wood top.
7

First Name: Last Name:
Address:
City: State: Zip Code:
Email Address: Phone:
Location of Purchase:
Please rate the importance of each feature (1=least important; 10=most important)
Quality Price Size/Capacity Appearance Other
How did you hear about our product?
Magazine Ad Catalog Salesperson Word of Mouth
Internet Store Display Other
Marital Status: Single Married
Household Income: Below $50,000 $50,000-$150,000 $150,000+
Education: High School College Graduate School
Primary Residence: Own Rent
Comments/Suggestions:
PRODUCT REGISTRATION
Product Model #: Purchase Date: / /
8
Thank you for purchasing a 72in 12-Drawer Stainless Steel Rolling Workbench. In order to register your
product and receive streamlined customer service, please fill out the following Product Registration
Form and (1) fax the form (2) complete the Product Registration Form online or (3) scan and email the
form . Include a copy of your original receipt with your submission.

1 YEAR LIMITED WARRANTY
LIMITATION OF REMEDIES AND LIABILITY
Some states do not allow the exclusion or limitation of incidental, consequential, special, or punitive
damages, so the above limitation or exclusion may not apply to you. The above warranty gives you specific
legal rights, and you may have other rights which vary from state to state.
This warranty excludes normal wear and tear of the Product and its parts or components, and damage arising
from any of the following: negligent use or misuse of the Product, use contrary to this User’s Manual, or
alteration by any one other than us. The warranty period of 1 year shall not be extended or renewed by the
repair or replacement of, or compensation for, the Product. Any warranty implied by applicable law is limited
in duration to one year from the date of purchase and is subject to the same conditions and limitations as is
provided for our express warranty.
Except as set forth herein, and to the extent of applicable there are no warranties on this Product either
express or implied, and we disclaim all warranties including, but not limited to, any implied warranties of
merchantability, infringement or fitness for a particular purpose. No warranty or guarantee given by any
person, firm, or corporation with respect to this product shall be binding on us.
If your Product is defective or otherwise requires service or parts, please call Customer Service toll-free,
between 5:00 a.m. and 5:00 p.m. Please tell us which model you purchased, the date of the purchase, and
the problem with your Product. A copy of your original purchase receipt must accompany your service
request.
We (and its employees, officers, members, managers, affiliates an assigns) shall not be liable for any
incidental, consequential, special, indirect, remote, special or punitive damages for breach of any warranty,
express or implied, including, but not limited to, lost profits, lost savings, loss of anticipated benefits and
attorneys’ fees, which arise out of the purchase, use or inability to use the Product, whether arising out of
contract, negligence, strict tort, product liability, or any other legal theory on which a claim is based. As
noted above, to the extent damages are allowed by our express warranty or by applicable law, those
damages may not exceed the purchase price paid for the Product. Without limiting the foregoing Purchaser
assumes all risk and liability for loss, damage or injury to Purchaser and Purchaser’s property and to others
and their property arising out of the use, misuse, or inability to use this Product. This limited warranty shall
not extend to anyone other than the original purchaser of this product, is nontransferable and states your
exclusive remedy.
10
72” 12-Drawer Stainless Steel Rolling Workbench
We warrant to the original consumer purchaser (“Purchaser”) of the 72in 12-Drawer Stainless Steel Rolling
Workbench (“Product”) that each Product shall be free from defects in workmanship and materials for a
period of 1 year from the date of original purchase. Our obligation under this warranty shall be limited to
repair or replacement of, or adequate compensation for the Product which shall not be greater than the
amount of the purchase price of the Product, at the option of us, during the warranty period. All replaced
parts and Products become the property of us and must be returned to us.

Please feel free to contact us. There are no questions too small, or
any problems too big. We’re committed to providing our customers
with the highest level of service.
CONTACT US
QUESTIONS? NEED PARTS?
WE ARE HERE TO HELP!
Table of contents
Other TRINITY Pro Tools Storage manuals


Popular Tools Storage manuals by other brands

Kendall Howard
Kendall Howard ESDW-6030-1000 owner's manual

Seville Classics
Seville Classics UltraHD 20108 Assembly instructions

Husky
Husky H52CH6TR9 Use and care guide

Harbor Freight Tools
Harbor Freight Tools 99681 Assembly instructions

WFI
WFI W 600 Mounting instructions

STEELTEC
STEELTEC XWS078 instruction manual


