manuals.online logo
Brands
  1. Home
  2. •
  3. Brands
  4. •
  5. Arbor Technology
  6. •
  7. Tools Storage
  8. •
  9. Arbor Technology 01945 410950 User manual

Arbor Technology 01945 410950 User manual

Phone number: 01945 410950
support@arborgardensolutions.co.uk
http://www.arborgardensolutions.co.uk
Trading address: Unit 11, Cattle Dyke, Wisbech, England, PE1 34NR
Opifex Craftsman/Jewellers Workbench
Before you commence the assembly process, we recommend that you read these instructions
thoroughly beforehand to familiarise yourself with the assembly process and to also check that you
have the correct components. If for any reason you need assistance, you can find our contact details
on the top of page of these instructions.
We highly recommend that any assembly is carried out on a flat, level surface if possible and that you
use another person to assist you if necessary for your convenience all guide holes are pre-drilled.
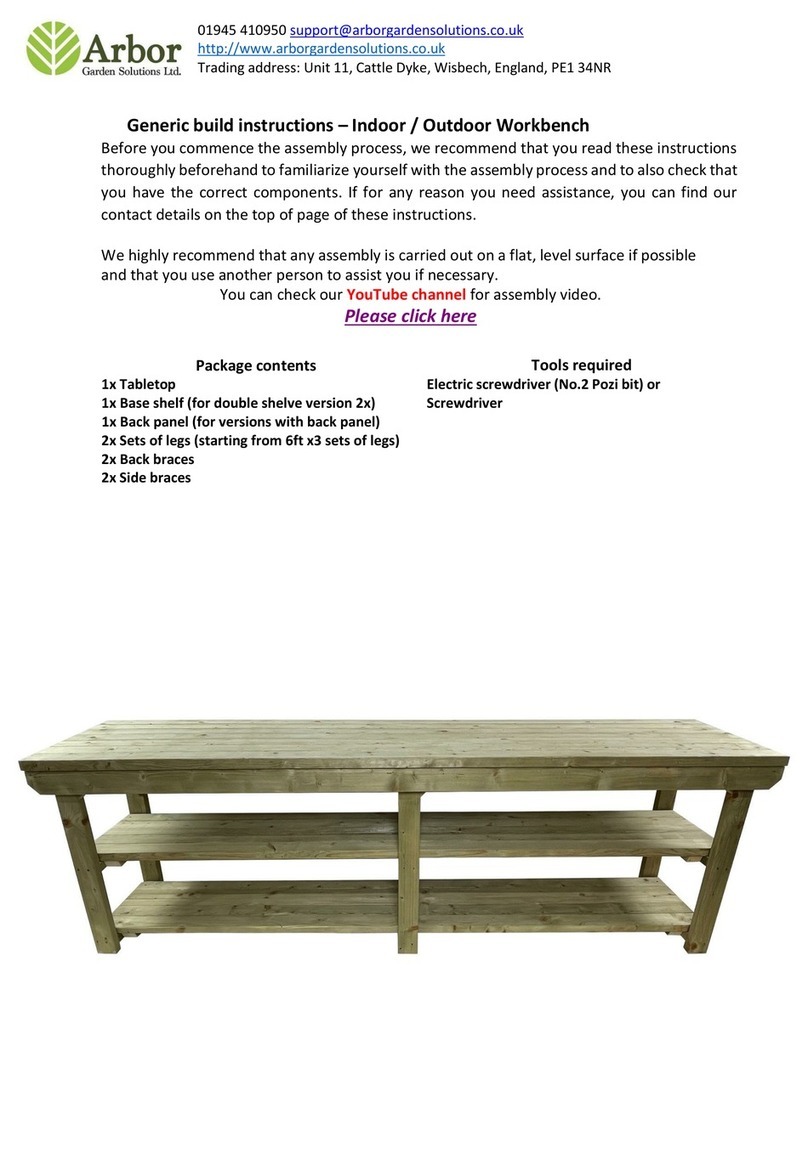
Package contents Tools required
1x Tabletop Spanner or battery-operated drill
2x Legs
1x Bench Peg and hand supports.
1x Bundle with fixings and necessary panels
Bundle with drawers
1x Bundle of Tool holder panels (If bought one)
Phone number: 01945 410950
support@arborgardensolutions.co.uk
http://www.arborgardensolutions.co.uk
Trading address: Unit 11, Cattle Dyke, Wisbech, England, PE1 34NR
Step 1
Step 2
Step 3
Step 4
Ensure that you have all the correct parts as listed on
the front page of these instructions, including any
fixings.
Take two of the provided panels and attach them just
as shown in the picture. Ensure them via provided pilot
holes using confirmat screws.
Now take 2x of the side panels and place just as shown in
the picture that the rails would match each other. Ensure
it with the confirmat screws.
After ensuring the side panels, attach one of the support
panels just as shown in the picture and secure it with the
provided confirmat screws.
Phone number: 01945 410950
support@arborgardensolutions.co.uk
http://www.arborgardensolutions.co.uk
Trading address: Unit 11, Cattle Dyke, Wisbech, England, PE1 34NR
Step 5
Step 6
Step 7
Step 8
Take another provided support panel and place it just as
shown in the picture, securing it with the confirmat
screws.
Repeat step 5 to secure the support panel, which is
shown in the picture.
Place the routed plank in the position shown in the
picture and ensure it with the confirmat screws.
Now rotate the workbench as shown in the picture with
side panels looking up and prepare your workbench legs
to be attached.
Phone number: 01945 410950
support@arborgardensolutions.co.uk
http://www.arborgardensolutions.co.uk
Trading address: Unit 11, Cattle Dyke, Wisbech, England, PE1 34NR
Step 9
Step 10
Step 11
Step 12
Before fixing the legs, please make sure that you are
fixing workbench legs in the correct places please see
numbers on the legs and match it with the numbers on
the panels. After sorting the legs out, secure them with
the confirmat screws, as shown in the picture.
After securing the parts in previous steps, please place
the backboard on the back of the workbench and knock
up all the provided nails. Now flip the workbench on its
legs and prepare to place the workbench top.
Phone number: 01945 410950
support@arborgardensolutions.co.uk
http://www.arborgardensolutions.co.uk
Trading address: Unit 11, Cattle Dyke, Wisbech, England, PE1 34NR
Step 13
Step 14
Step 15
Step 15.1
Underneath the workbench, you will find 3x holes which
need to be secured with the provided screws.
At this point, your workbench should look like this. Please
continue to further steps to finish assembling the
drawers.
Take two of the provided drawer panels and place them
in the same position.
Attach the drawers back panel that the cut out for the
board would be facing the same direction. And now
secure it with the confirmat screws.
Phone number: 01945 410950
support@arborgardensolutions.co.uk
http://www.arborgardensolutions.co.uk
Trading address: Unit 11, Cattle Dyke, Wisbech, England, PE1 34NR
Phone number: 01945 410950
support@arborgardensolutions.co.uk
http://www.arborgardensolutions.co.uk
Trading address: Unit 11, Cattle Dyke, Wisbech, England, PE1 34NR
Step 15.2
Step 15.3
Step 16
Step 17
Now place the drawers front panel and secure it with the
cam locks from each side. Repeat steps 15 to 15.3 to
finish assembling the drawers.
Slide the drawers baseboard as shown in the picture.
After assembling all the drawers, safely place them into
the workbench.
Don’t forget to slide in the hand supports and the
wooden pegboard to the provided holes. If you have a
tool holder shelf, please continue to step 18.
Phone number: 01945 410950
support@arborgardensolutions.co.uk
http://www.arborgardensolutions.co.uk
Trading address: Unit 11, Cattle Dyke, Wisbech, England, PE1 34NR
Step 18
Step 19
Assemble tool holder panel parts just as shown in the
picture and secure it with the confirmat screws.
Attach the holder on the side of the workbench as shown
in the picture and adjust it to your required height. After
finding the best place for your tool holder, secure it with
the provided screws.
Phone number: 01945 410950
support@arborgardensolutions.co.uk
http://www.arborgardensolutions.co.uk
Trading address: Unit 11, Cattle Dyke, Wisbech, England, PE1 34NR
Your Opifex Craftsman/Jewellers Workbench is now
completed!
We hope that you found your product quick and easy to assemble but if not and you require further assistance or
have any questions you can contact us via details above.
Also, you can check our YouTube channel for assemble videos, click on the link below:
https://www.youtube.com/watch?v=ACKMN7Th27c
Or
Type in YouTube search box Arbor Garden Solutions.
Attach the shelf on the side of the workbench as shown in
the picture and adjust it to your required height. After
finding the best place for your shelf secure it with the
provided screws.

Other Arbor Technology Tools Storage manuals

Arbor Technology Acorn Manual

Arbor Technology

Arbor Technology Acorn Manual

Arbor Technology Nanofex Craftsman/Jewellers Workbench User manual

Arbor Technology

Arbor Technology Nanofex Craftsman/Jewellers Workbench User manual

Arbor Technology TREATED-3FT-WBP-WW-DS Manual

Arbor Technology

Arbor Technology TREATED-3FT-WBP-WW-DS Manual

Arbor Technology Artifex Craftsman/Jewellers Workbench User manual

Arbor Technology

Arbor Technology Artifex Craftsman/Jewellers Workbench User manual
Arbor Technology Hollies Manual

Arbor Technology

Arbor Technology Hollies Manual

Popular Tools Storage manuals by other brands

Festool UCR 1000 Assembly instruction

Festool

Festool UCR 1000 Assembly instruction

Grizzly G8586 instructions

Grizzly

Grizzly G8586 instructions

kupper 70330 Series Assembly instruction

kupper

kupper 70330 Series Assembly instruction

Craftsman 120.29684 User instructions

Craftsman

Craftsman 120.29684 User instructions

TOOLCRAFT WSW-307 operating instructions

TOOLCRAFT

TOOLCRAFT WSW-307 operating instructions

Suncast BMCCPD7204 quick start guide

Suncast

Suncast BMCCPD7204 quick start guide

Grizzly Oak Workbench T10157 instructions

Grizzly

Grizzly Oak Workbench T10157 instructions

Milwaukee PACKOUT 48-22-8488 manual

Milwaukee

Milwaukee PACKOUT 48-22-8488 manual

GARANT Workbench assembies user manual

GARANT

GARANT Workbench assembies user manual

Ranger design S2-WA48-0 installation guide

Ranger design

Ranger design S2-WA48-0 installation guide

Black & Decker BEZ100 manual

Black & Decker

Black & Decker BEZ100 manual

Sealey AP28102BR instructions

Sealey

Sealey AP28102BR instructions

U-Line H-6450 manual

U-Line

U-Line H-6450 manual

Draper 53120 instructions

Draper

Draper 53120 instructions

Sealey AP5520SS instruction manual

Sealey

Sealey AP5520SS instruction manual

Safco 5024 operating instructions

Safco

Safco 5024 operating instructions

Husky H40CH4TR6 Use and care guide

Husky

Husky H40CH4TR6 Use and care guide

Tool Shed TSTH08 Operator's manual

Tool Shed

Tool Shed TSTH08 Operator's manual

manuals.online logo
manuals.online logoBrands
  • About & Mission
  • Contact us
  • Privacy Policy
  • Terms and Conditions

Copyright 2025 Manuals.Online. All Rights Reserved.