Trinnov Audio D-Mon Series User manual


D-Mon Series
User Guide
Version: V4.2
Edition: 28/09/2018
Copyright © 2017 by Trinnov Audio
All rights reserved. No part of this publication may be reproduced, distributed, or transmitted in any form or by any means,
including photocopying, recording, or other electronic or mechanical methods, without the prior written permission of the
publisher, except in the case of brief quotations embodied in critical reviews and certain other noncommercial uses permitted by
copyright law. For permission requests, write to the publisher, addressed “Attention: Permissions Coordinator,” at the address
below :
Trinnov Audio
5 rue Edmond Michelet,
93360 Neuilly Plaisance
France
To obtain the latest documentation and software downloads, please visit www.trinnov.com


Table of Contents
D-Mon Series User Guide 5/95
TABLE OF CONTENTS
1WELCOME ............................................................................................................................ 7
1.1 ABOUT THIS MANUAL.....................................................................................................................................7
1.2 SOFTWARE UPDATES .....................................................................................................................................7
1.3 USER REGISTRATION ......................................................................................................................................7
2IMPORTANT SAFETY INSTRUCTIONS.................................................................................... 8
3INTRODUCING THE D-MON SERIES....................................................................................... 9
3.1 OVERVIEW .....................................................................................................................................................9
3.2 COMPARISON OF MODELS ............................................................................................................................10
3.3 SYSTEM COMPONENTS ................................................................................................................................11
3.4 METHODS OF CONTROL ................................................................................................................................11
4THE D-MON PROCESSOR.................................................................................................... 13
4.1 FRONT PANEL .............................................................................................................................................13
4.2 REAR PANEL................................................................................................................................................14
5QUICK START ..................................................................................................................... 15
5.1 POWERING ON /BOOTING UP.......................................................................................................................15
5.2 OPENING THE GUI .......................................................................................................................................16
5.3 RESIZING THE GUI .......................................................................................................................................17
5.4 PAGES &NAVIGATION ..................................................................................................................................18
5.5 CONVENTIONS .............................................................................................................................................18
5.6 RECALLING A PRESET ...................................................................................................................................19
5.7 DAY-TO-DAY OPERATION ............................................................................................................................20
5.8 MODIFYING THE CONFIGURATION ..................................................................................................................22
5.9 EDITING THE SESSION SETTINGS ...................................................................................................................24
5.10 SAVING A SNAPSHOT ...................................................................................................................................26
5.11 NEXT STEPS................................................................................................................................................26
6INSTALLATION & SETUP..................................................................................................... 27
6.1 WHAT’S IN THE BOX ? ..................................................................................................................................28
6.2 STARTING UP THE D-MON PROCESSOR.........................................................................................................29
6.3 STUDIO INTEGRATION &WIRING....................................................................................................................31
6.4 CONFIGURING THE SYSTEM ..........................................................................................................................34
7THE D-MON CONTROL PANEL (GUI).................................................................................... 48
7.1 THE CONTROLLER PAGE...........................................................................................................................48
7.2 SESSION ROUTING..................................................................................................................................56
7.3 MONITORING MIXER...............................................................................................................................62
7.4 SESSION SETTINGS ................................................................................................................................64
7.5 STUDIO SETUP ........................................................................................................................................67
7.6 CONFIGURATION PRESETS ....................................................................................................................82

Table of Contents
6/95 D-Mon Series User Guide
8EXTERNAL CONTROL.......................................................................................................... 87
8.1 AVID EUCON...............................................................................................................................................87
8.2 AVID ICON SERIES.......................................................................................................................................88
9APPENDICES ...................................................................................................................... 92
9.1 WIRING DIAGRAMS ......................................................................................................................................92
9.2 MIDI IMPLEMENTATION ...............................................................................................................................93
9.3 TECHNICAL DATA.........................................................................................................................................94

1WELCOME
Welcome to the D-Mon series from Trinnov Audio.
1.1 ABOUT THIS MANUAL
This document describes how to install, setup and operate the D-Mon|4, D-Mon|6, D-Mon|8and D-Mon|12. We recommend that
you read this manual carefully before installing or operating a D-Mon Series system. The specification is valid for Version 4.2.x.
Note that most of the examples in this document show a D-Mon|12. The operation and setup of other models are identical, but
some functionality such as the number of Optimizer®channels will vary. These differences are noted in the relevant topics.
For a short introduction, we recommend reading Chapter 5: Quick Start.
Also, look out for the following text boxes which indicate:
Notes - points of clarification.
Tips - useful tips and short cuts.
ATTENTION!
Alert you when an action should always be observed.
1.2 SOFTWARE UPDATES
Trinnov Audio employ an ongoing development programme and offer software updates for all D-Mon series products. Releases
may be downloaded from the website after registration (see below).
The following utility software applications are available after registration:
•D-Mon App – this is a separate application which must be installed if you wish to remotely control the system from an Avid
EUCON control surface. See Chapter 8: External Control for details. App is only available on Mac computers.
1.3 USER REGISTRATION
For access to regular product updates and downloads, please register at register.trinnov.com
2IMPORTANT SAFETY INSTRUCTIONS
ATTENTION!
To ensure optimal performance, please pay attention to the instructions in this Quick Start Guide:
•Read these instructions.
•Keep these instructions.
•Follow all instructions.
•Install the apparatus on a solid, flat, level surface that is dry, well ventilated and out of direct sunlight. Be sure that all
four feet are supported.
•Do not use this apparatus near water.
•Clean only with a dry cloth. Do not use liquid solvent-based cleaners.
•Protect the detachable power chord from being walked on or pinched particularly at plugs, convenience receptacles,
and the point where they exit from the apparatus. If the ac cord becomes damaged, do not use it. Immediately replace
it with a new one of the same or better rating.
•Unplug this apparatus during lightning storms or when unused for long periods of time.
•Do not open the equipment case or remove any of the cover panels. There are no us
er serviceable parts in this
equipment. Refer all servicing to qualified service personnel.
•To prevent fire or shock hazard, do not allow liquids to spill or objects to fall into any openings of the product.
•Use only attachments/accessories specifies by the manufacturer.
•This unit is supplied with two 3-pin grounded AC plugs. Always insert the AC plug into a grounded outlet. Do not
remove the ground pin or disable the ground for any purpose. The main AC must be protected by a 20 Ampere circuit
breaker.
•Do not defeat the safety purpose of the polarized or grounding-type plug. A polarized plug has two blades with one
wider that the other. A grounding-type plug has two blades and a third grounding prong. The wide blade or the third
prong is provided
for your safety. If the provided plug does not fit into your outlet, consult an electrician for
replacement of the obsolete outlet.
•Before connecting the equipment, check that the main power supply voltage rating corresponds to
the local main
power supply. The rating of the main power supply voltage is printed on the equipment.
•If replacement of the ac line fuse and any internal fuse becomes necessary, replace only with same value and type of
fuse (110V: T1A Schurter FST 5x20; 220V: T800mA Schurter FST 5x20). Never bypass the fuse.
•It is imperative that these apparatus be operated in a well-ventilated
environment and the immediate external
temperature be maintained as specified. Do not expose this apparatus to humidity, steam, smoke or excessive
dampness or dust. Maximum permissible operating conditions: 0°C to 40°C, 20-
65% relative humidity. External
cooling fans may be required in some cases.
•Do not stack any equipment directly above or below this apparatus as to protect it from overheating, as well as the
continued functionality of any equipment near and around it.
•To completely disconnect the apparatus from the AC, completely remove the power cable from the main outlet.
•Refer all servicing to qualified service personnel. Servicing is required when the apparatus has been damaged in any
way, such as when the power-supply cord or plug-in damaged, liquid has been spilled, or object has fallen into the
apparatus or the apparatus has been exposed to rain or moisture, does not operate normally or has been dropped.
•Do not expose this apparatus to dripping or splashing and ensure that no objects filled with liquids, such as vases, are
placed on the apparatus.
•The main plug of the power-supply cord shall remain readily operable.
TO COMPLETELY DISCONNECT THIS APPARATUS FROM THE AC MAINS, DISCONNECT THE POWER SUPPLY CORD
PLUG FROM THE AC RECEPTACLE.
THIS SYMBOL IS INTENDED TO ALERT THE USER TO THE PRESENCE OF UNINSULATED "DANGEROUS
VOLTAGE" WITHIN THE PRODUCT'S ENCLOSURE THAT MAY BE OF SUFFICIENT MAGNITUDE TO
CONSTITUTE A RISK OF ELECTRIC SHOCK.
THE 220/110V SELECTION IS NOT AUTOMATIC.
It can only be made by an authorized person. Check with your reseller for further information.

3INTRODUCING THE D-MON SERIES
This chapter introduces the D-Mon Series.
3.1 OVERVIEW
The D-Mon Series provides comprehensive monitoring solutions for professional recording, mixing and/or mastering studios.
The different processor models are designed to meet varying needs ranging from simple stereo loudspeaker setups to more
demanding surround sound installations. In each case, the processor provides three main functions: an advanced monitoring
controller, loudspeakers to room tuner (Optimizer®) and optional loudness metering (Smart-Meter®).
Operations can be controlled via the D-Mon Control Panel (a web-based GUI, Graphic User Interface), or from a remote device (via
Avid Eucon or Icon protocols, or General Purpose MIDI).
D-Mon Processor D-Mon Control Panel GUI (common to all models)
Advanced Monitoring Control
•Monitoring: source & speaker set selection, volume, mute, dim, talkback, listen-back, headphone and outputs control.
•Routing Matrix: any physical input or mix bus can be assigned to any physical output.
•Internal Mixer: physical inputs can be mixed to mono/stereo mix buses and routed anywhere.
•Studio Presets & Session Snapshots:customize the processor for your installation, and store and recall different monitoring
arrangements and DAW (Digital Audio Workstation) session setups.
Loudspeakers to Room Tuning (Optimizer®)
The Optimizer®provides digital acoustic correction. The algorithms are included with every processor; the number of Optimizer
channels varies across the product range: D-Mon|4offers four channels; D-Mon|6offers six channels; and so on.
•Each Optimizer®channel can be re-assigned via presets to support multiple speaker sets.
•Multiple “sweet spot” presets can be saved for the same room – e.g. mixing seat, producer desk, musicians couch, etc.
•Advanced parameters meet the needs of different sound engineers - target curve, frequency, time & level alignment, etc.
•Other functions include down-mixing, graphic EQs, DRC emulation (Dynamic Range Compression), etc.
Optional Loudness Metering (Smart-Meter®)
The optional Smart-Meter®offers one of the most advanced Loudness Metering systems. It complies with EBU-R128 norms and
other international standards, and is timecode-aware meaning that updates can follow every tweak made to a mix. Advanced
session management tools allow loudness data to be attached to program files across both playout and server networks, or
printed ahead of playout to ensure producers are fully informed of compatibility rules.
3.2 COMPARISON OF MODELS
The D-Mon model describes the number of available Optimizer®channels. Also, there are variations in the amount of I/O, and the
internal summing and routing capabilities. The differences are summarized in the table below. Note that each model has been
designed with the following applications in mind:
D-Mon|4: for studios (recording, mixing, mastering) where two stereo speaker sets would be the Main and Alternate selections.
D-Mon|6: for post-production studios where one surround (5.1) speaker set is mostly in use. Additional stereo setups or any
arrangement of six speakers can be easily stored and recalled.
D-Mon|8: for studios producing 7.1 programs or working simultaneously with one 5.1 and one stereo speaker set.
D-Mon|12: for 3D mixing rooms producing programs in 7.4.1 formats such as Dolby Atmos, Auro-3D and DTS-X.
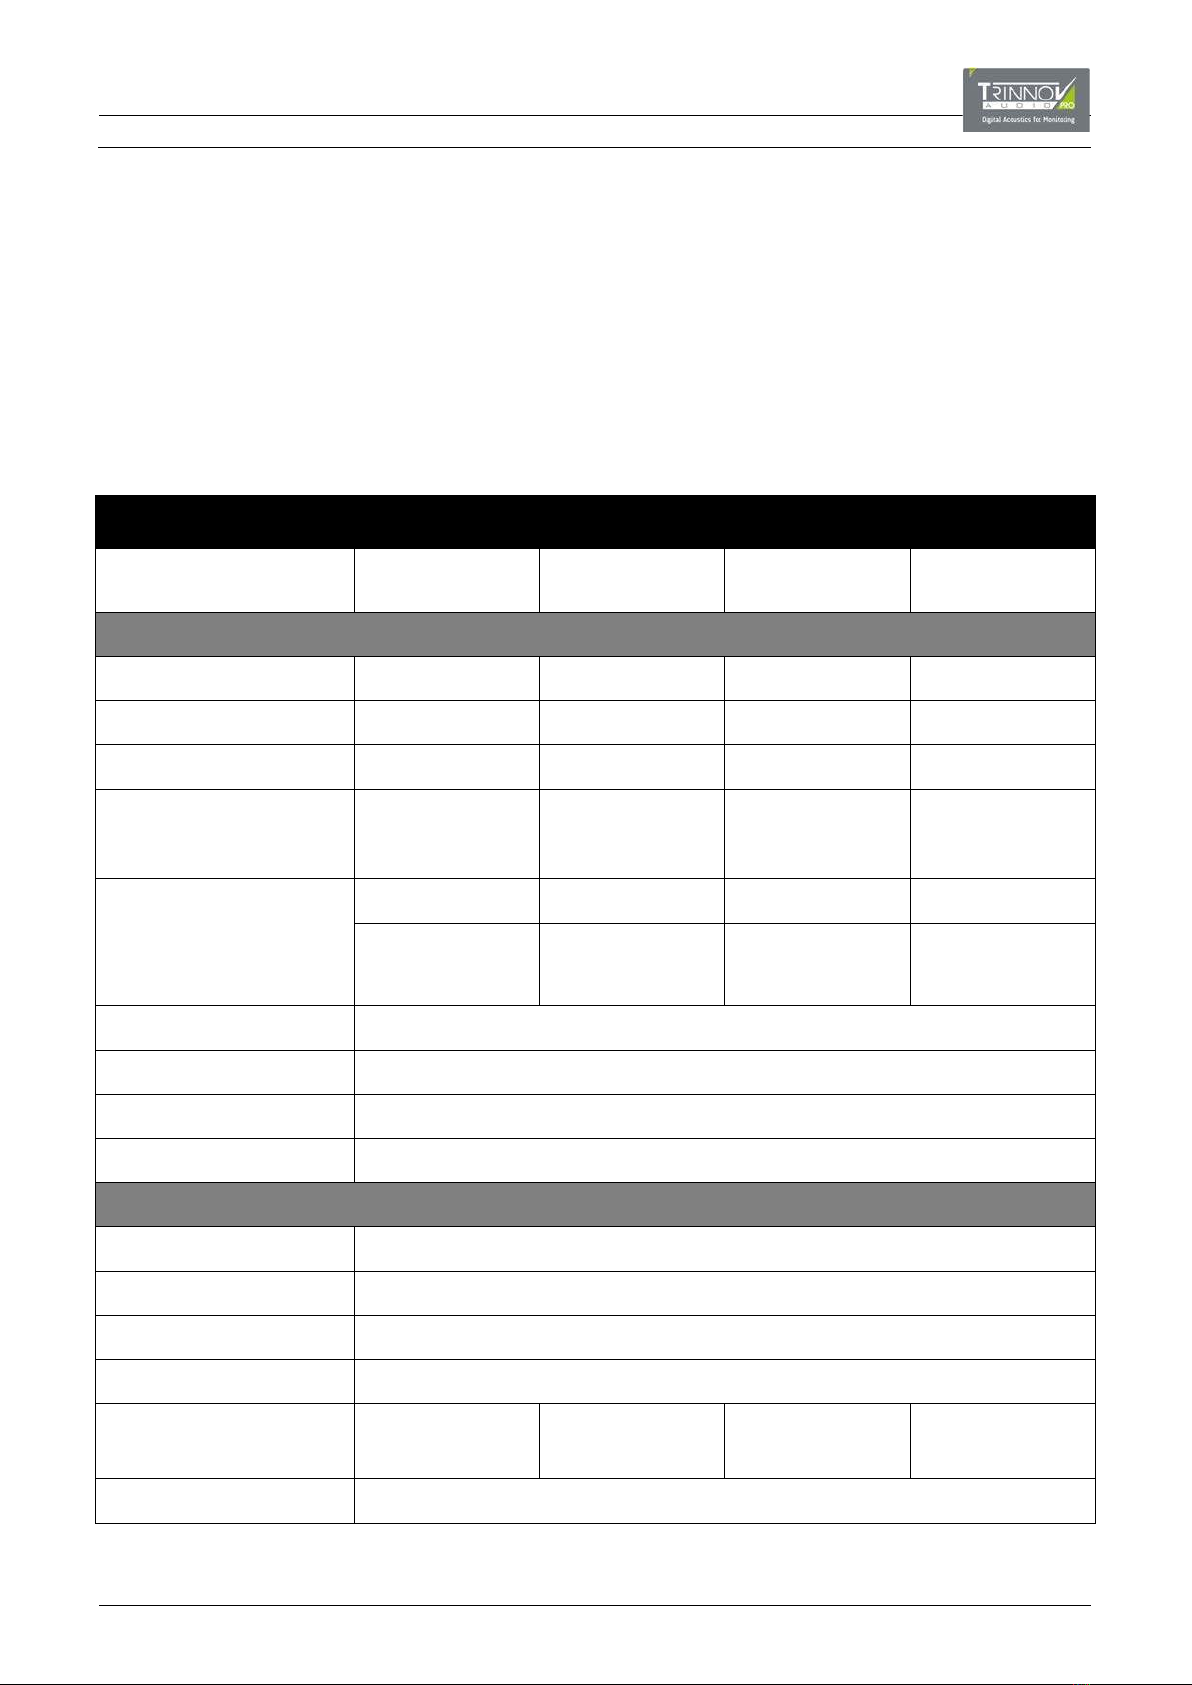
Product Comparison D-MON|4 D-MON|6 D-MON|8 D-MON|12
DESIGNED FOR Stereo Mixing or
Mastering Studios
5.1 Rooms for
Post-Production
7.1 / Surround Sound
Mixing Suites
3D Mixing Rooms
(7.4.1)
CONNECTIVITY
DIGITAL IN (SUBD-25) 8 (4x AES3) 8 (4x AES3) 16 (2×4 AES3) 16 (2×4 AES3)
DIGITAL OUT (SUBD-25) 8 (4x AES3) 8 (4x AES3) 16 (2×4 AES3) 16 (2×4 AES3)
ANALOG IN (SUBD-25) 4 Line Level 8 Line Level 8 Line Level 8 Line Level
ANALOG OUT (SubD-25)*
*8 first channels are mirrored on direct
XLR)
12 Line Level 12 Line Level 16 Line Level 16 Line Level
OPTIMIZER®
(DIGITAL ACOUSTIC TUNING)
4 Channels 6 Channels 8 Channels 12 Channels
e.g. 2 x stereo pairs
or LCR+Lfe
e.g. 5.1 speaker set
or 3 x stereo pairs
or LCRS+1xSt
e.g. 5.1 + 1 stereo pair
or 7.1 system
or LCRS+2xSt
e.g.
7.4.1
or 2 x 5.1 systems
ASSIGNABLE INTERCOM 2 x Talkback + 2 x Listen-back lines. Fully assignable with 2 x 48V-power analog inputs on MPIO.
WORD CLOCK BNC Input & Output
CONTROL PROTOCOLS Eucon (Avid MC5, S6). Icon D-Command & D-Control (X-Mon 15p cable). MIDI GPIO.
GPIOS Fully assignable 2 in / 1 out (footswitch, remote commands).
REMOTE & LOCAL PARAMETERS (Specifications may vary with some controllers)
LEVELS Level / Mute / Dim / Dim Level
SOURCE SELECTION Fully Configurable
MONITOR SELECTION Uses programmable presets & profiles. (Limited by what’s physically available.)
ROUTING MATRIX Any physical input, mix bus or Optimizer®output to any physical output.
SUMMING MATRIX
(stereo buses) 10 busses 14 busses 16 busses 16 busses
OPTIMIZER SETTINGS Full control over Ethernet and/or from the Processor itself. (VGA/HDMI screen & USB mouse/keyboard.)
3.3 SYSTEM COMPONENTS
To configure and operate the system, you will need three hardware components:
•D-Mon Processor (always supplied): handles all audio processing, routing, mixing and I/O.
•Trinnov 3D-Microphone (optional): required during setup to perform the speaker/room calibration.
•Controlling Device (not supplied): this can be a networked device with a web browser interface or a physical controller.
D-Mon Processor
3D-Microphone (optional)
3.4 METHODS OF CONTROL
The D-Mon processor can be remotely controlled using a web-based GUI or an external controller.
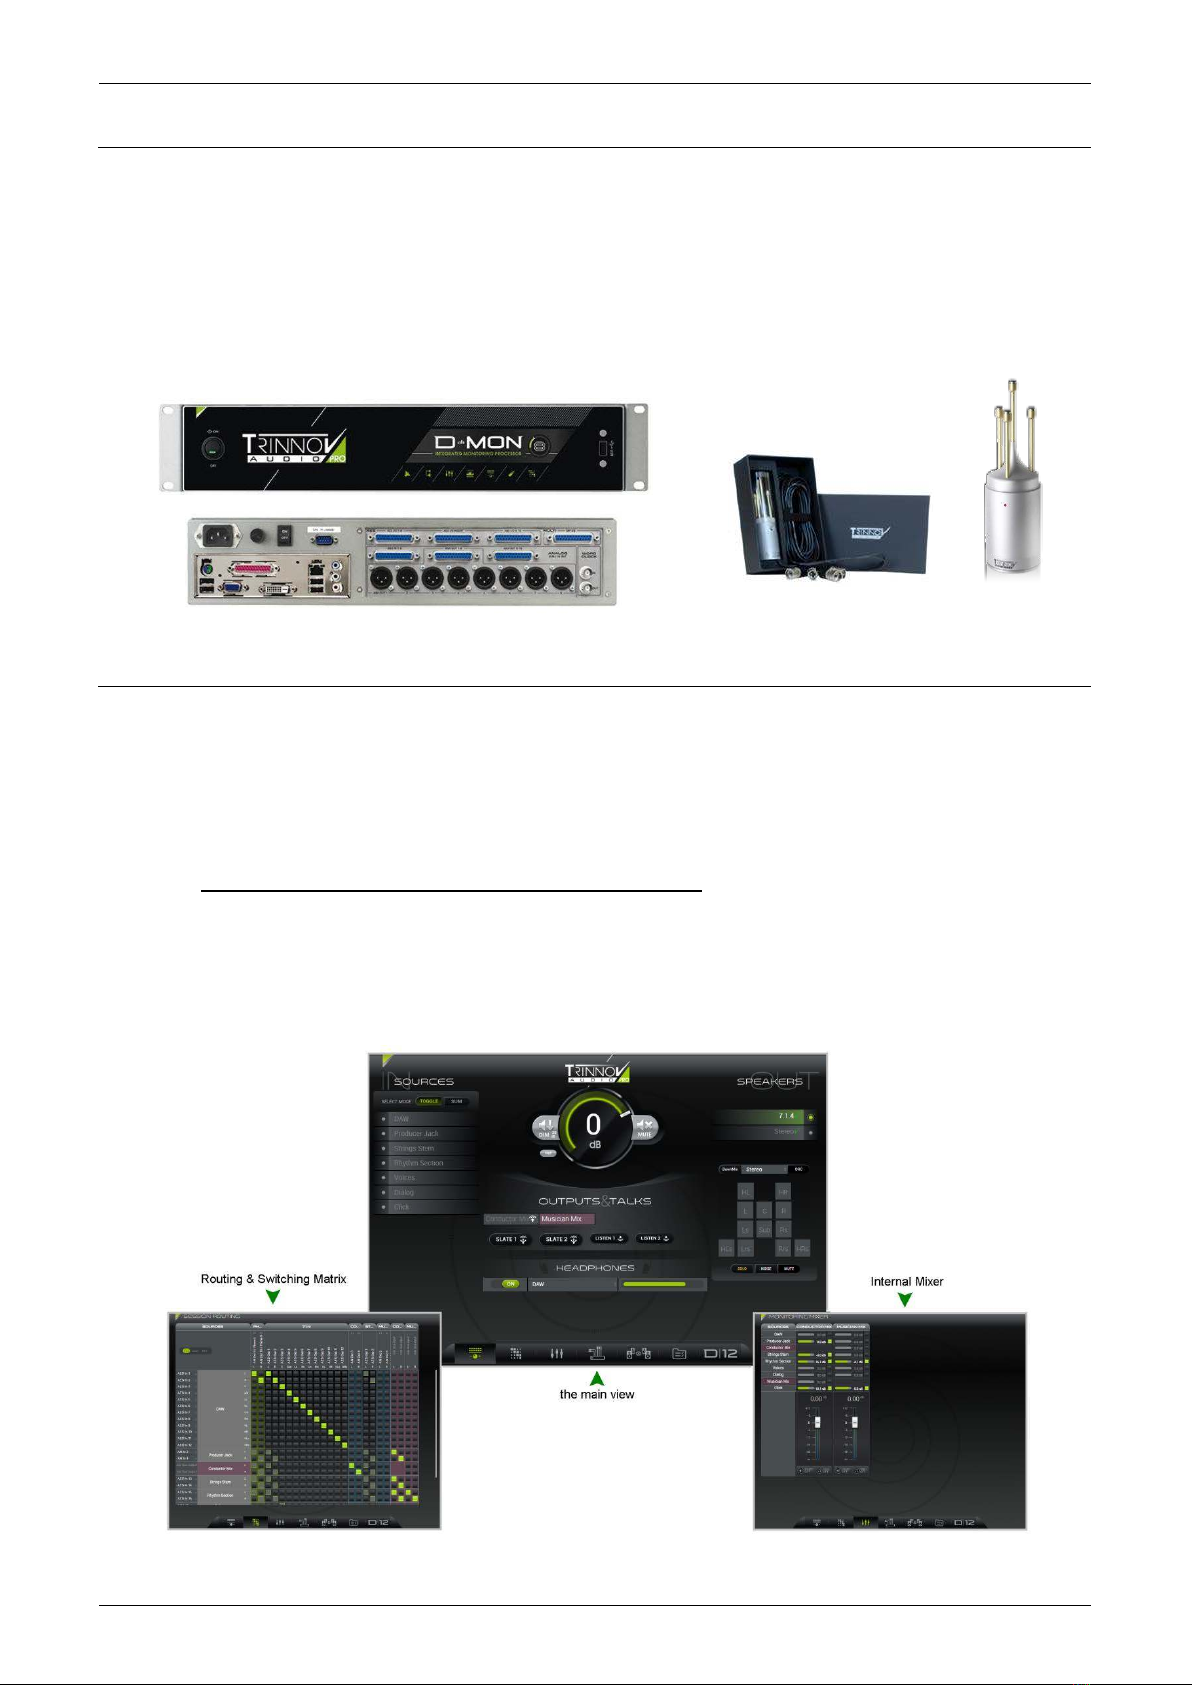
3.4.1 THE D-MON CONTROL PANEL (GUI)
The D-Mon Control Panel is the main Graphical User Interface (GUI) for the system. Each D-Mon processor includes a dedicated
web server and, therefore, the GUI can be accessed from a networked device with a web browser interface such as a desktop
computer, laptop, smart phone, tablet, etc. The GUI appears as soon as you open a valid browser connection to the processor; no
additional software is required. Multiple connections are supported; the last user’s changes always take affect and synchronise
with other open connections. A range of pages provide fast access to everyday tasks as well as setup functions:
3.4.2 EXTERNAL CONTROLLERS
The D-Mon processor can also be remotely controlled. The level of integration depends on the protocol used. The options are:
Protocol or Hardware Connection Method Level of Integration
Avid EUCON IP/Ethernet (requires the D-Mon App) Specific Functions + GPIOs
Avid ICON “ICON” MPIO Specific Functions + GPIOs
Generic MIDI “MIDI” MPIO GPIOs
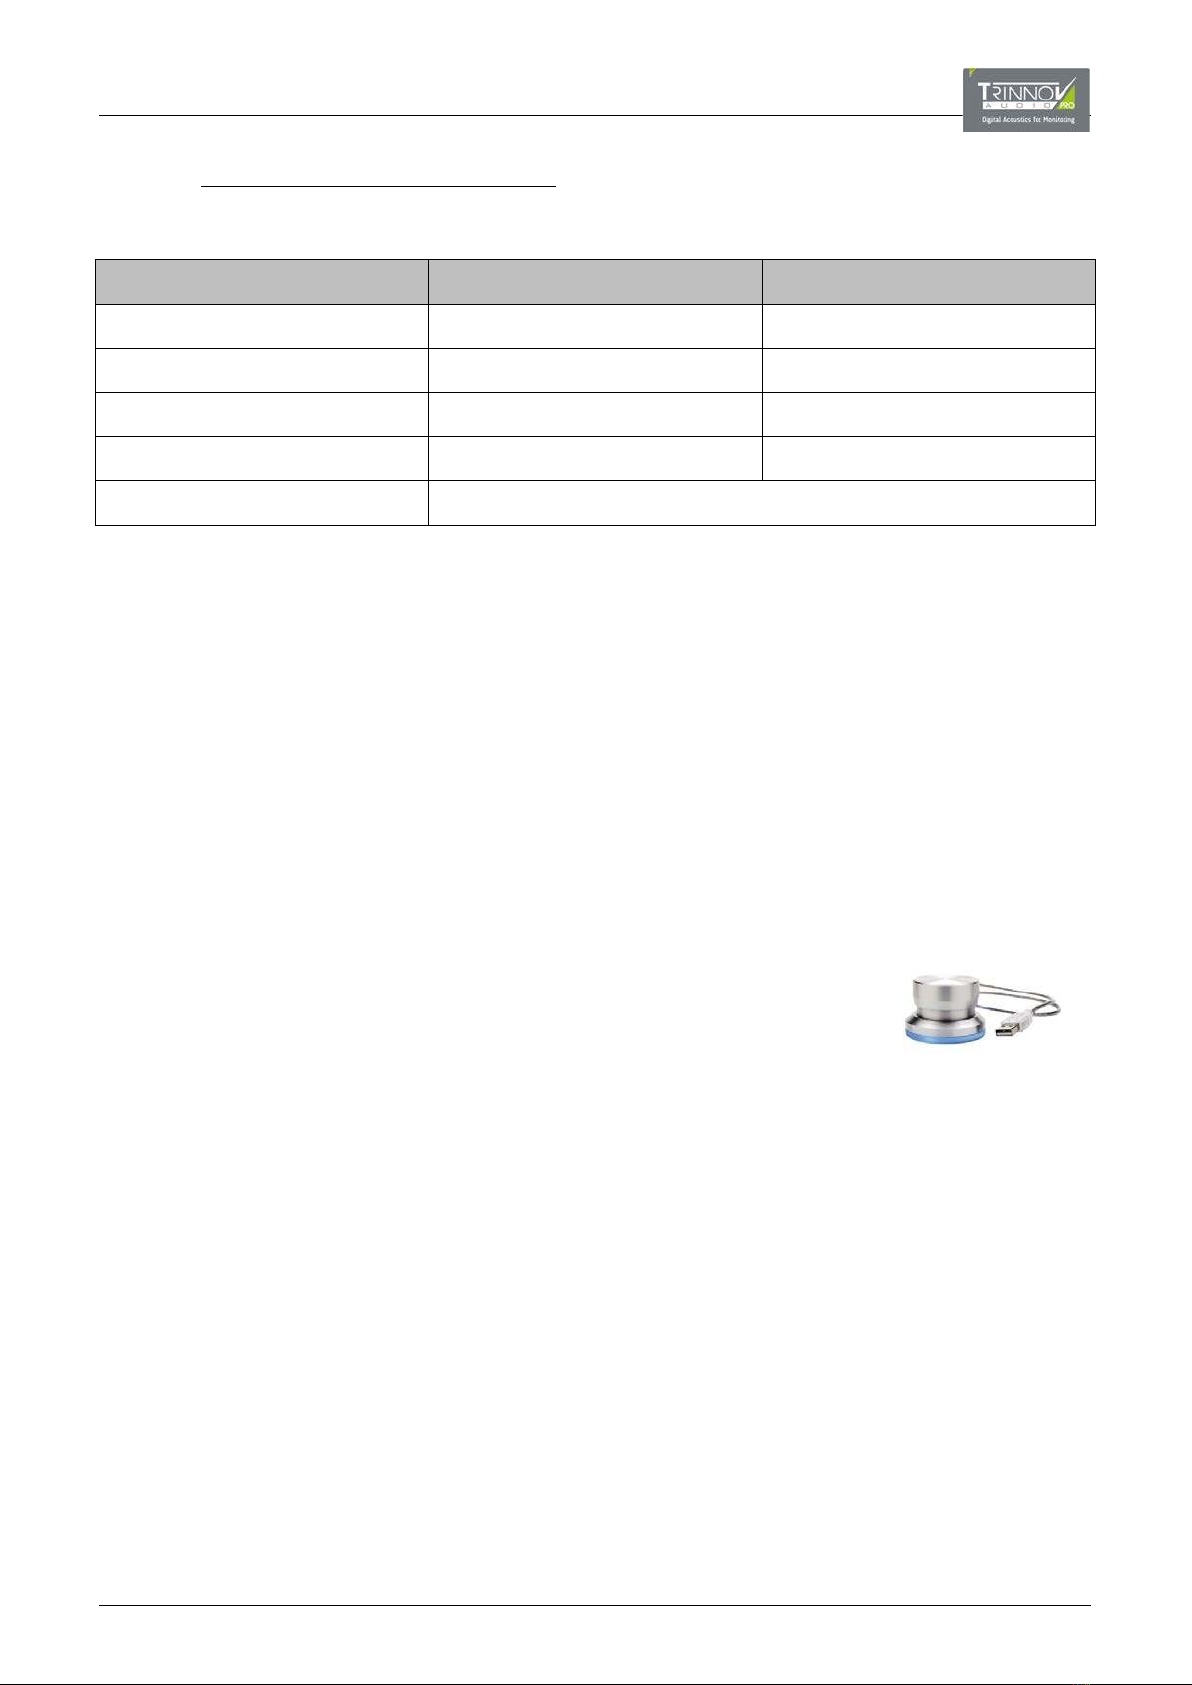
Griffin Volume Controller USB Speaker Volume + Mute (or Talkback)
Trinnov Protocols (proprietary) Dependent on the interface
Avid EUCON
To use a control surface based on Internet Protocol (IP) and/or Ethernet, like the Avid S6, then an additional software application
is required – the “DMon” App. The App must be installed on the DAW (Digital Audio Workstation) which is linked to the control
surface. It can be downloaded, for free, from the Trinnov website. The App detects which control surface(s) and D-Mon
processor(s) are available within the network; which versions of software are in use; and which protocols can be used. It also
includes a dedicated internet browser that automatically opens the D-Mon Control Panel.
Avid ICON Series / Generic MIDI Devices
Alternatively, an Avid ICON Series control surface such as the D-Command or D-Control, or any MIDI programmable device can
be connected via the MPIO (Multi-Purpose In/Out) connector. In this instance, no additional software is required. Two different
MPIO breakout cables are available:
•An "ICON" MPIO which has a DB15 ICON connector to connect to a D-Command/D-Control.
•A "MIDI" MPIO which is generic.
For more details, please see Chapter 8: External Control.
Griffin USB Volume Controller
This option provides physical control of speaker volume and mute (or talkback) functions. The
hardware must connect either directly to the USB port of the D-Mon processor (front or rear), or to
a DAW running the D-Mon App. Note that connection via the web GUI is not supported (the D-Mon
App is required). Multiple controllers can be installed – in this instance; all controllers will be
assigned the same functionality.
Trinnov Protocols
Other interfaces such as the Colin Broad TMC-1 support Trinnov proprietary protocols. For more details, please contact your local
Trinnov representative.
Functionality
The D-Mon Control Panel GUI assigns the processor’s available functions as follows:
•SESSION SETTINGS -> Remote Controllers – maps functions such as speaker sets, monitor sources and cues to Avid
EUCON or ICON control surfaces.
•STUDIO SETUP -> Remotes – maps Talkback, Mute, Dim and AES Insert switching to the GPIOs. Options for the Griffin USB
Volume Controller are also configured here.
4THE D-MON PROCESSOR
This chapter provides an overview of the D-Mon processor hardware.
For more details on installing the processor, or wiring to and from the unit, please see Chapter 6: Installation & Setup.
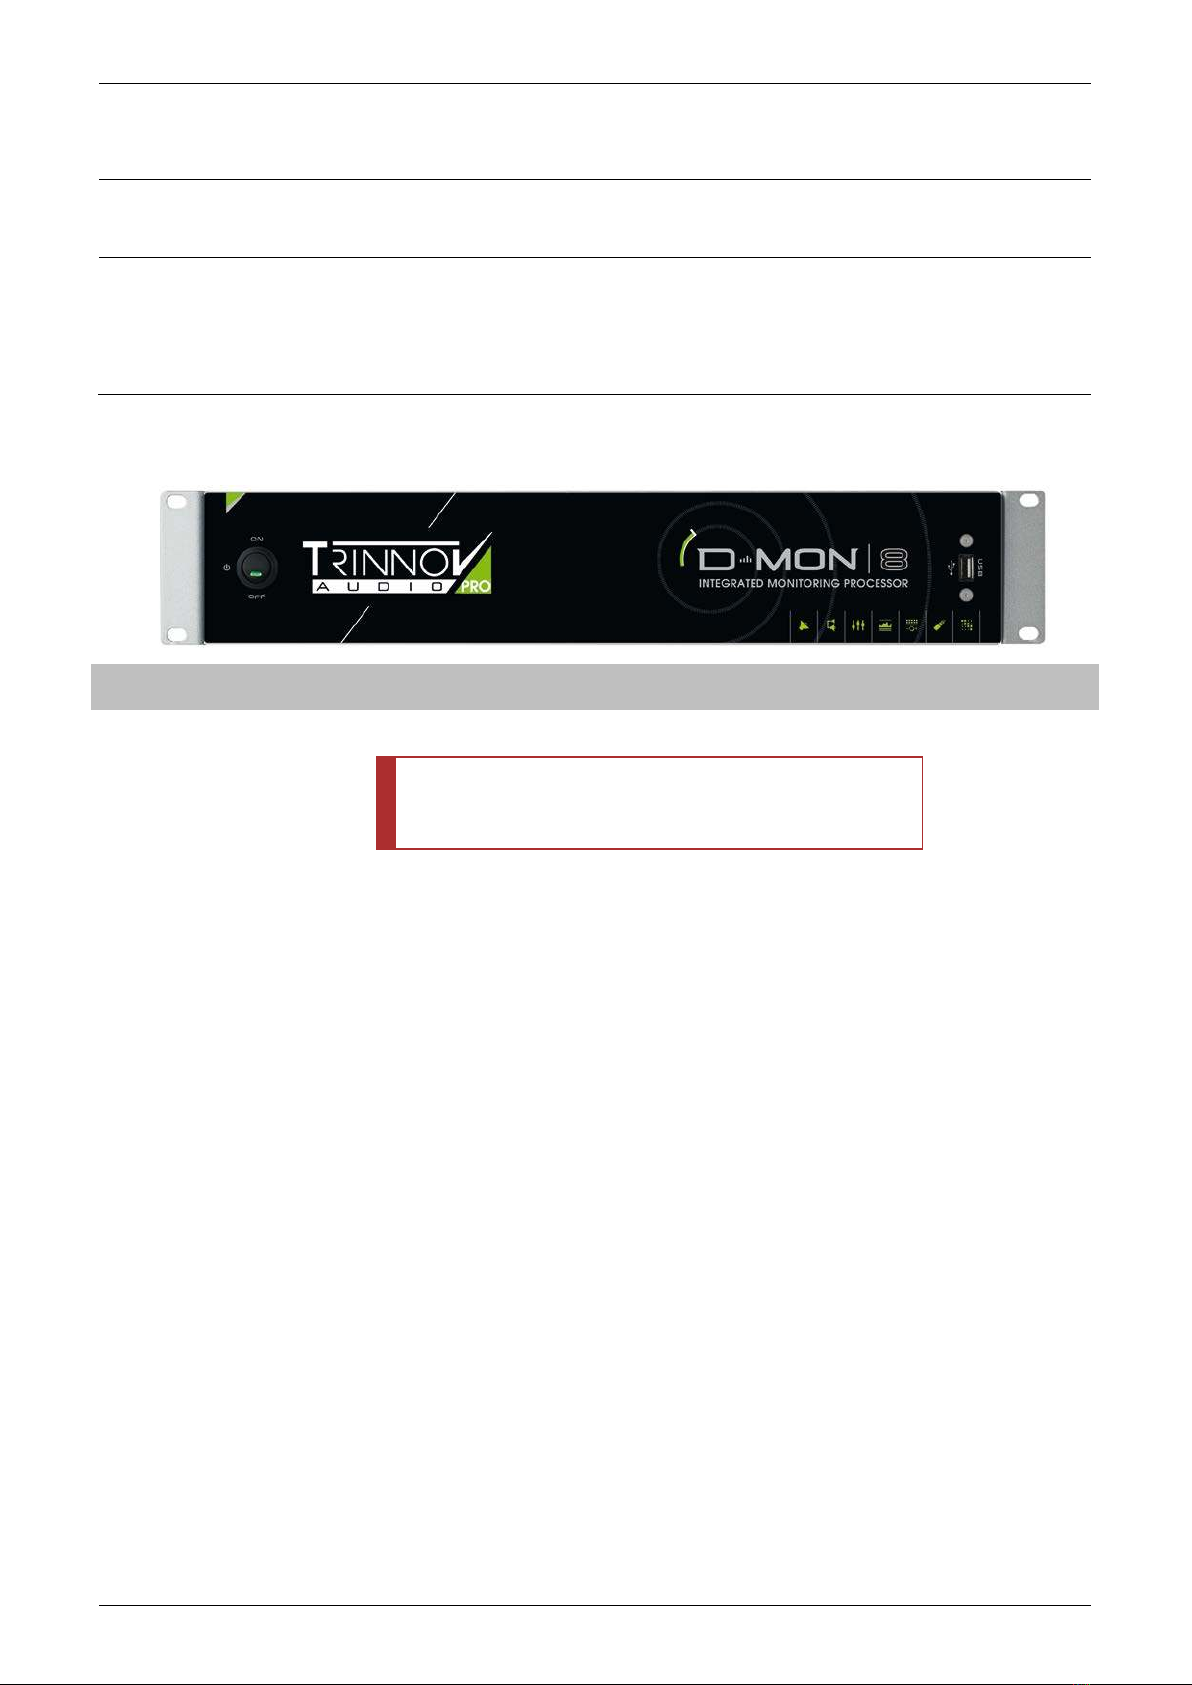
4.1 FRONT PANEL
Function D-Mon Model
#A ON/OFF switch Used to boot-up and shut down the CPU.
ATTENTION!
This switch should ALWAYS be used to shut down the processor
BEFORE using the rear panel ON/OFF switch to cut the power.
ALL
#B 1 x USB 2.0 port Used to attach a remote controller like a mouse or a volume knob, or for
inserting a USB key to save your preset and setup.
ALL
#C “D-Mon|8” label Indicates the D-Mon Series model number. ALL
A
B
C
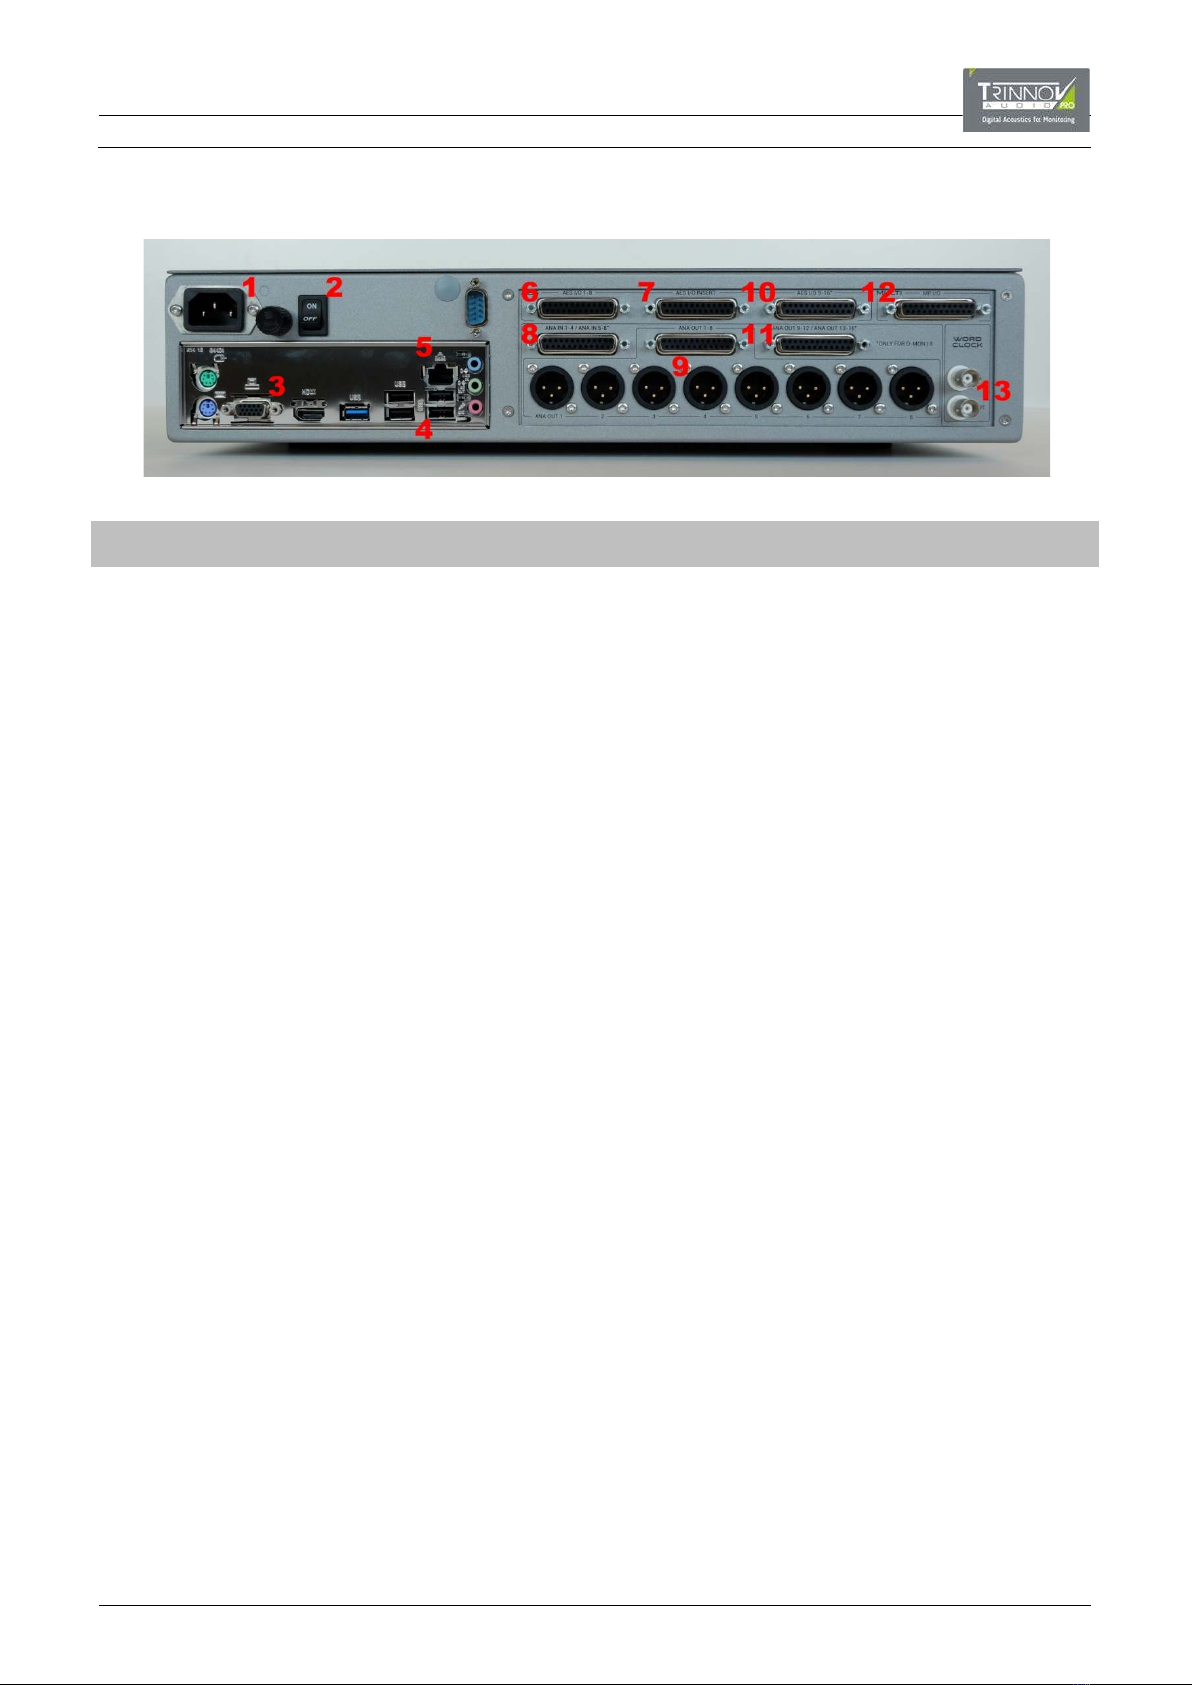
4.2 REAR PANEL
Function Connector D-Mon Model
#1 Power plug: 220/110V (specified on order) CEE Main ALL
#2 ON/OFF mains switch: applies power to the whole unit. n/a ALL
#3 VGA Output SubD 15p ALL
HDMI Output HDMI ALL
#4 Mouse, keyboard or memory-stick inputs 4 x USB 2.0 ALL
#5 Ethernet port (Cat5/6) RJ-45 ALL
#6 AES Inputs & Outputs 1-8 (4xAES3) SubD-25*ALL
#7 AES Insert 1-8 (4xAES3) SubD-25*ALL
#8 Analog Inputs 1-4 SubD-25*D-Mon|4
Analog Inputs 1-8 SubD-25*D-Mon|6, 8 & 12
#9 Analog Outputs 1-8 SubD-25*ALL
XLR-3
#10 AES Inputs & Outputs 9-16 (4xAES3) SubD-25*D-Mon|8 & 12
#11 Analog Outputs 9-12 SubD-25*D-Mon|4 & 6
Analog Outputs 9-16 SubD-25*D-Mon|8 & 12
#12 Multi-Purpose Inputs & Outputs SubD-25 ALL
#13 75Ω Wordclock input & output 2 x BNC ALL
*SubD-25 audio connectors are wired according to the TASCAM standard – see 9.1.1 Audio SubD-25 Connectors.
5QUICK START
This chapter provides a quick start to get you up and running as quickly as possible.
We will assume that the D-Mon processor is already installed and configured – i.e., all connections made; all speaker sets
defined and calibrated; the correct clock signal selected; etc. If not, please see Chapter 6: Installation & Setup.
Note that all the functions of the D-Mon Control Panel GUI are covered in more detail later in Chapter 7.
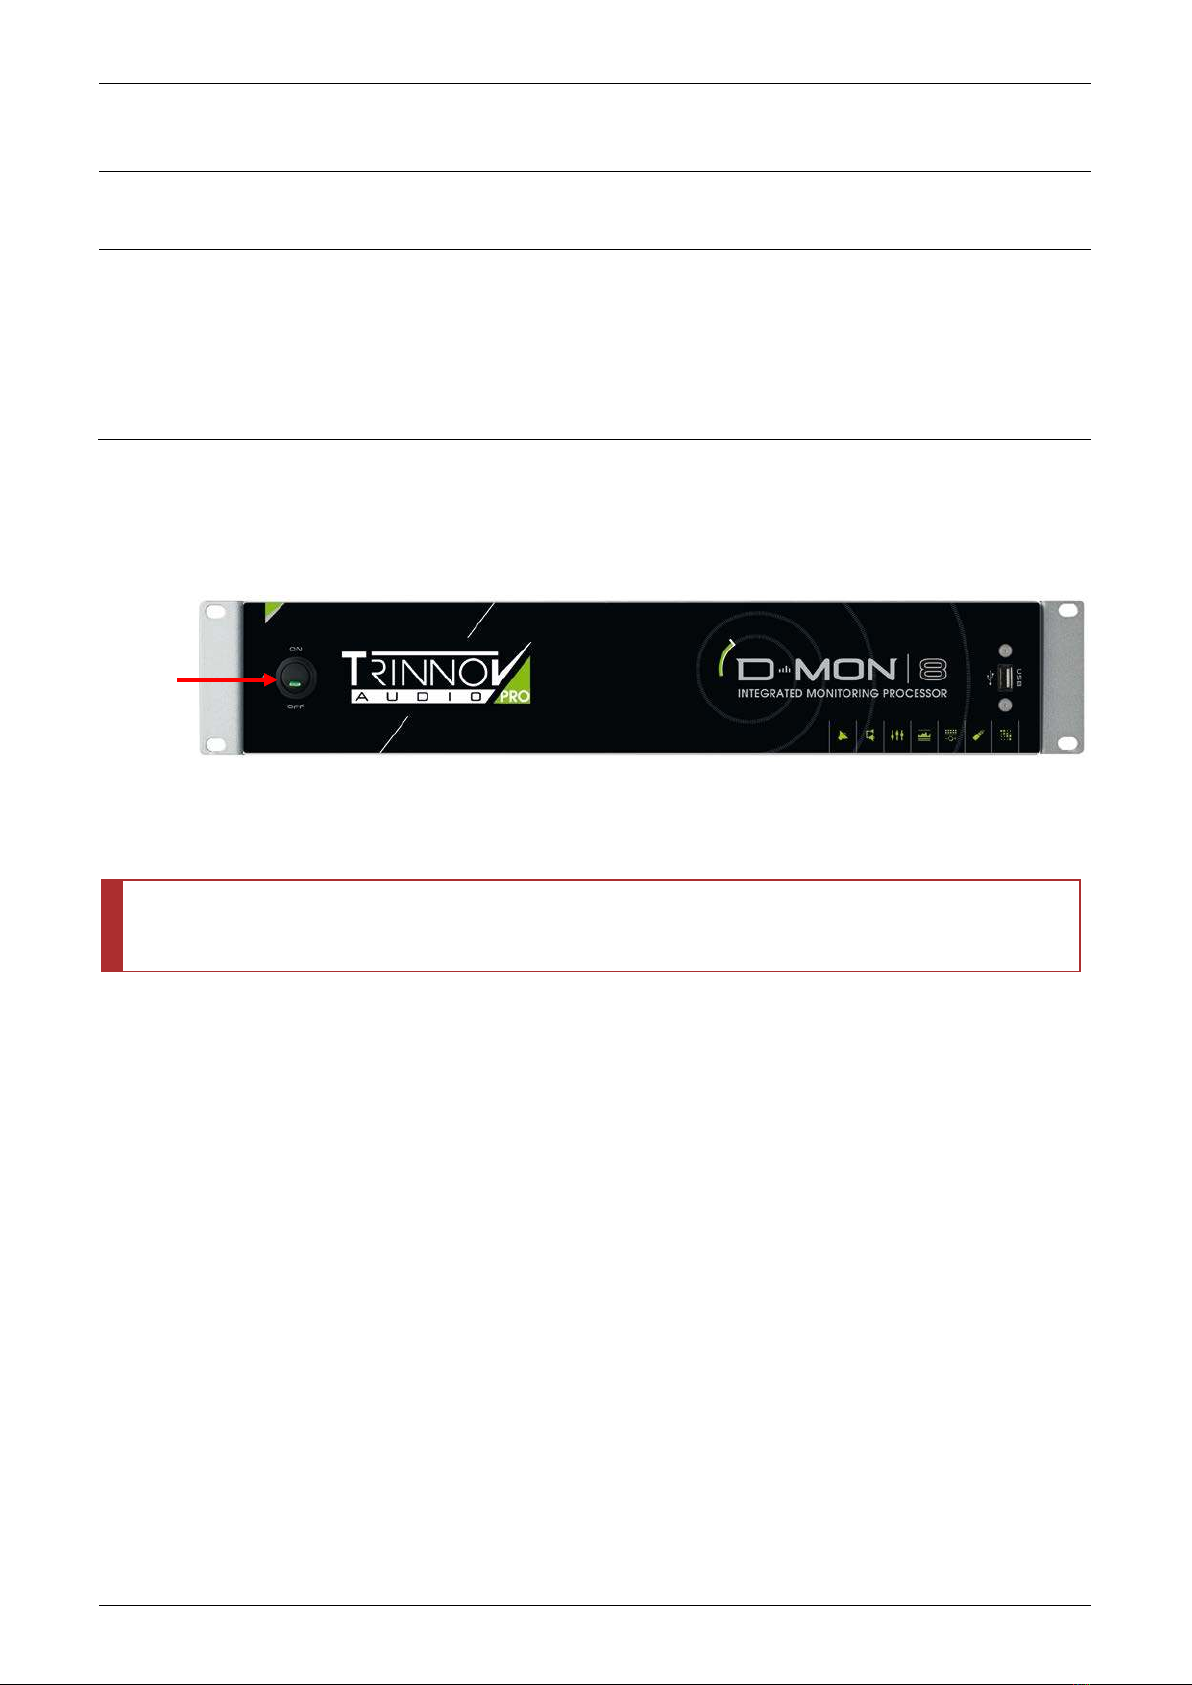
5.1 POWERING ON / BOOTING UP
Providing the processor has been fully installed and configured, it can be booted from the front panel.
Press the front panel ON/OFF button to switch ON the processor:
You will hear a click from the internal relay, and the ON button illuminates as shown above. The processor will take a few seconds
to boot, so please wait a little while before opening the GUI.
At the end of the boot-up procedure, the processor recalls a specific preset (see 7.6.5: Setting the Default Preset.) This should
reset the processor’s configuration so that it meets the needs of your studio.
ATTENTION!
To turn off the unit, ALWAYS use the front panel ON/OFF button to shut down the processor BEFORE
switching off the
mains power.
Turn ON here

5.2 OPENING THE GUI
The D-Mon Control Panel (DMCP) can be accessed by opening a browser connection to the D-Mon processor from a networked
device such as a desktop computer, laptop, smart phone or tablet.
System Requirements
•The device must be connected to the same IP network as used by the D-Mon processor.
•The device must support a suitable web browser: Chrome (recommended), Safari, Internet Explorer, Firefox, etc.
•The D-Mon processor’s network connection and IP settings must be properly configured (see 6.2.2: Setting up the CPU).
Opening the GUI
Start your browser software and type the IP address of the D-Mon processor into the search bar – for example:
The IP address of the D-Mon processor can be found in the “About” and “Setup -> Network” tabs of the
Optimizer &
Processor Control Panel (OPCP) during the setup of the processor. See 6.2.2: Setting up the CPU.
Press Enter – the GUI’s CONTROLLER page should appear:
Trouble-shooting
If the GUI does not appear, then check:
•Is the D-Mon processor booted? (the front panel ON button should be lit)
•Have you entered the correct IP address?
•Are both the D-Mon processor and your networked device connected to the same IP network? (You can check the network
settings of the D-Mon processor from the OPCP GUI using the “Setup -> Network” tab. See 6.2.2: Setting up the CPU.)
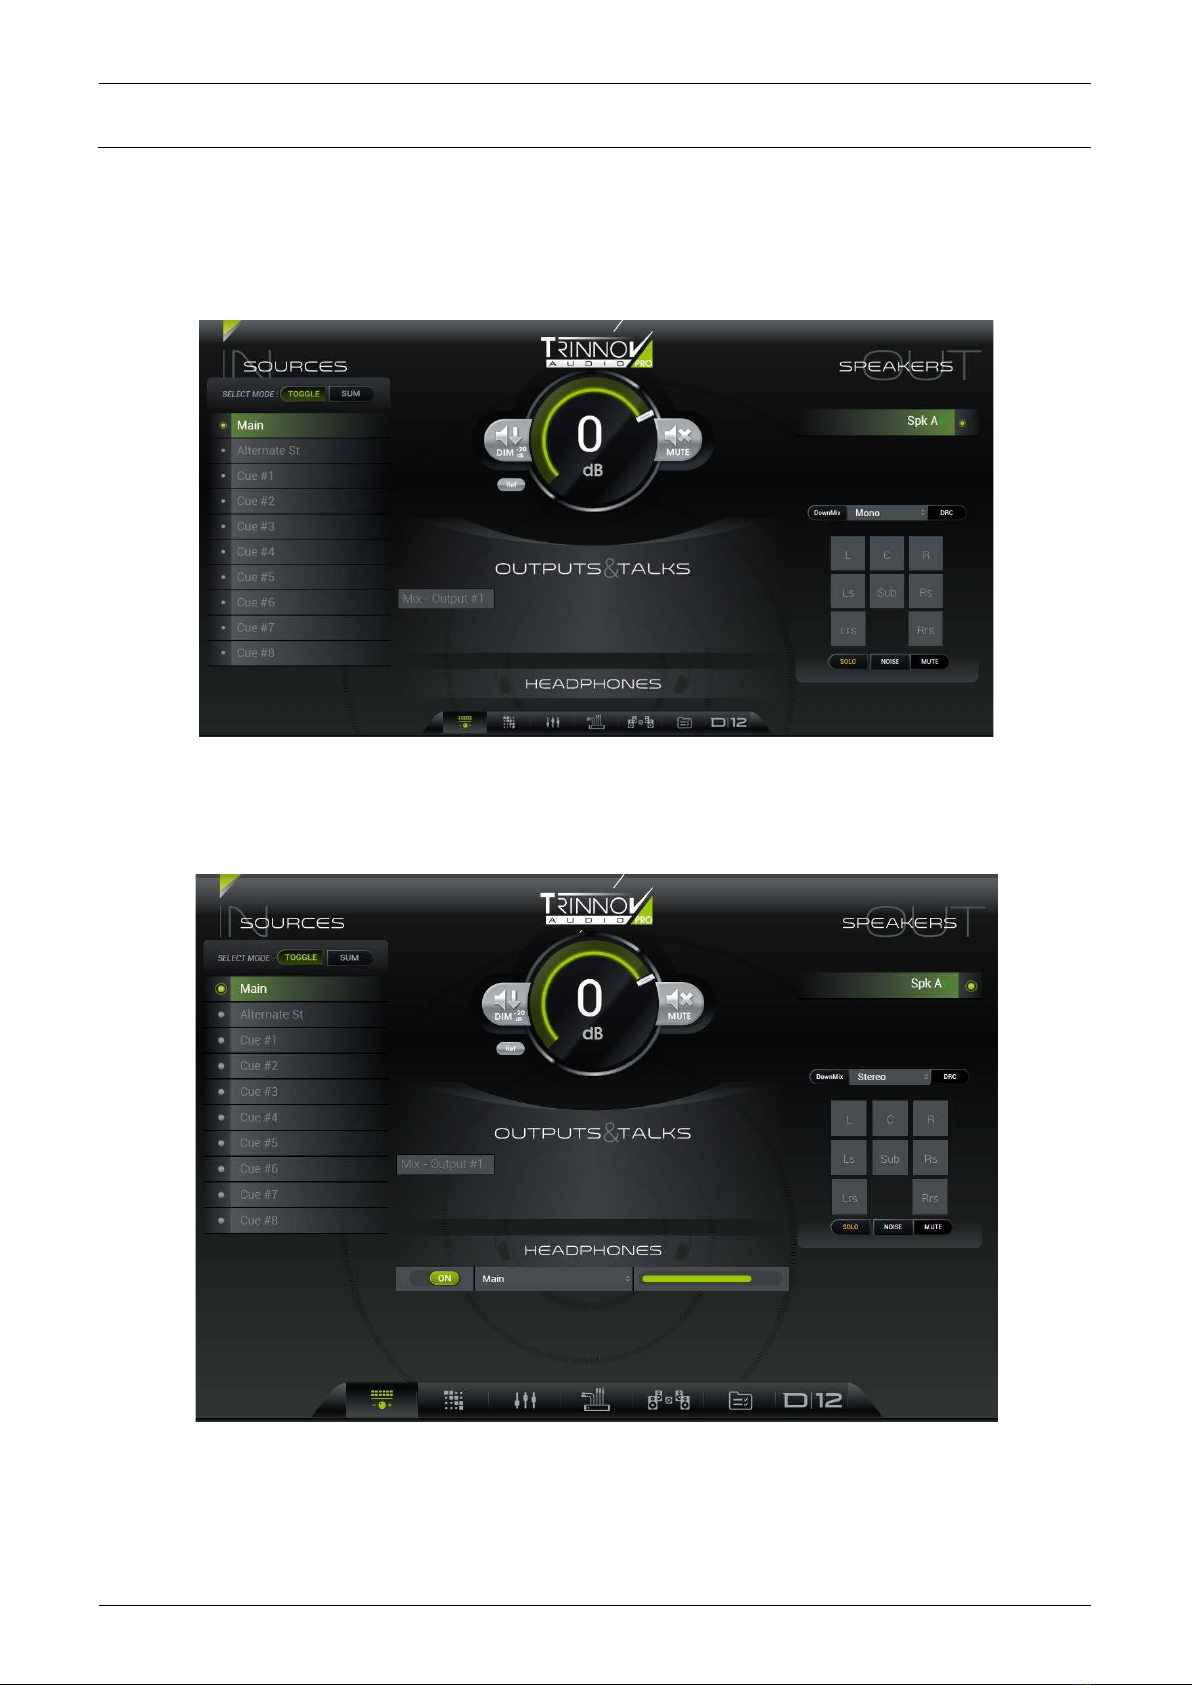
5.3 RESIZING THE GUI
Before using the GUI, please check the screen resolution. In our example below, some functions are “missing” from the bottom of
the CONTROLLER page as the GUI is being viewed on a 16:9 computer screen.
CONTROLLER Page (viewed at 16:9)
The GUI is optimized for 4:3. Therefore, please adjust your browser’s window size and screen resolution accordingly.
You should now be able to see all parameters clearly - in our example, the headphones ON/OFF button, source select and volume.
CONTROLLER Page (resized for 4:3)
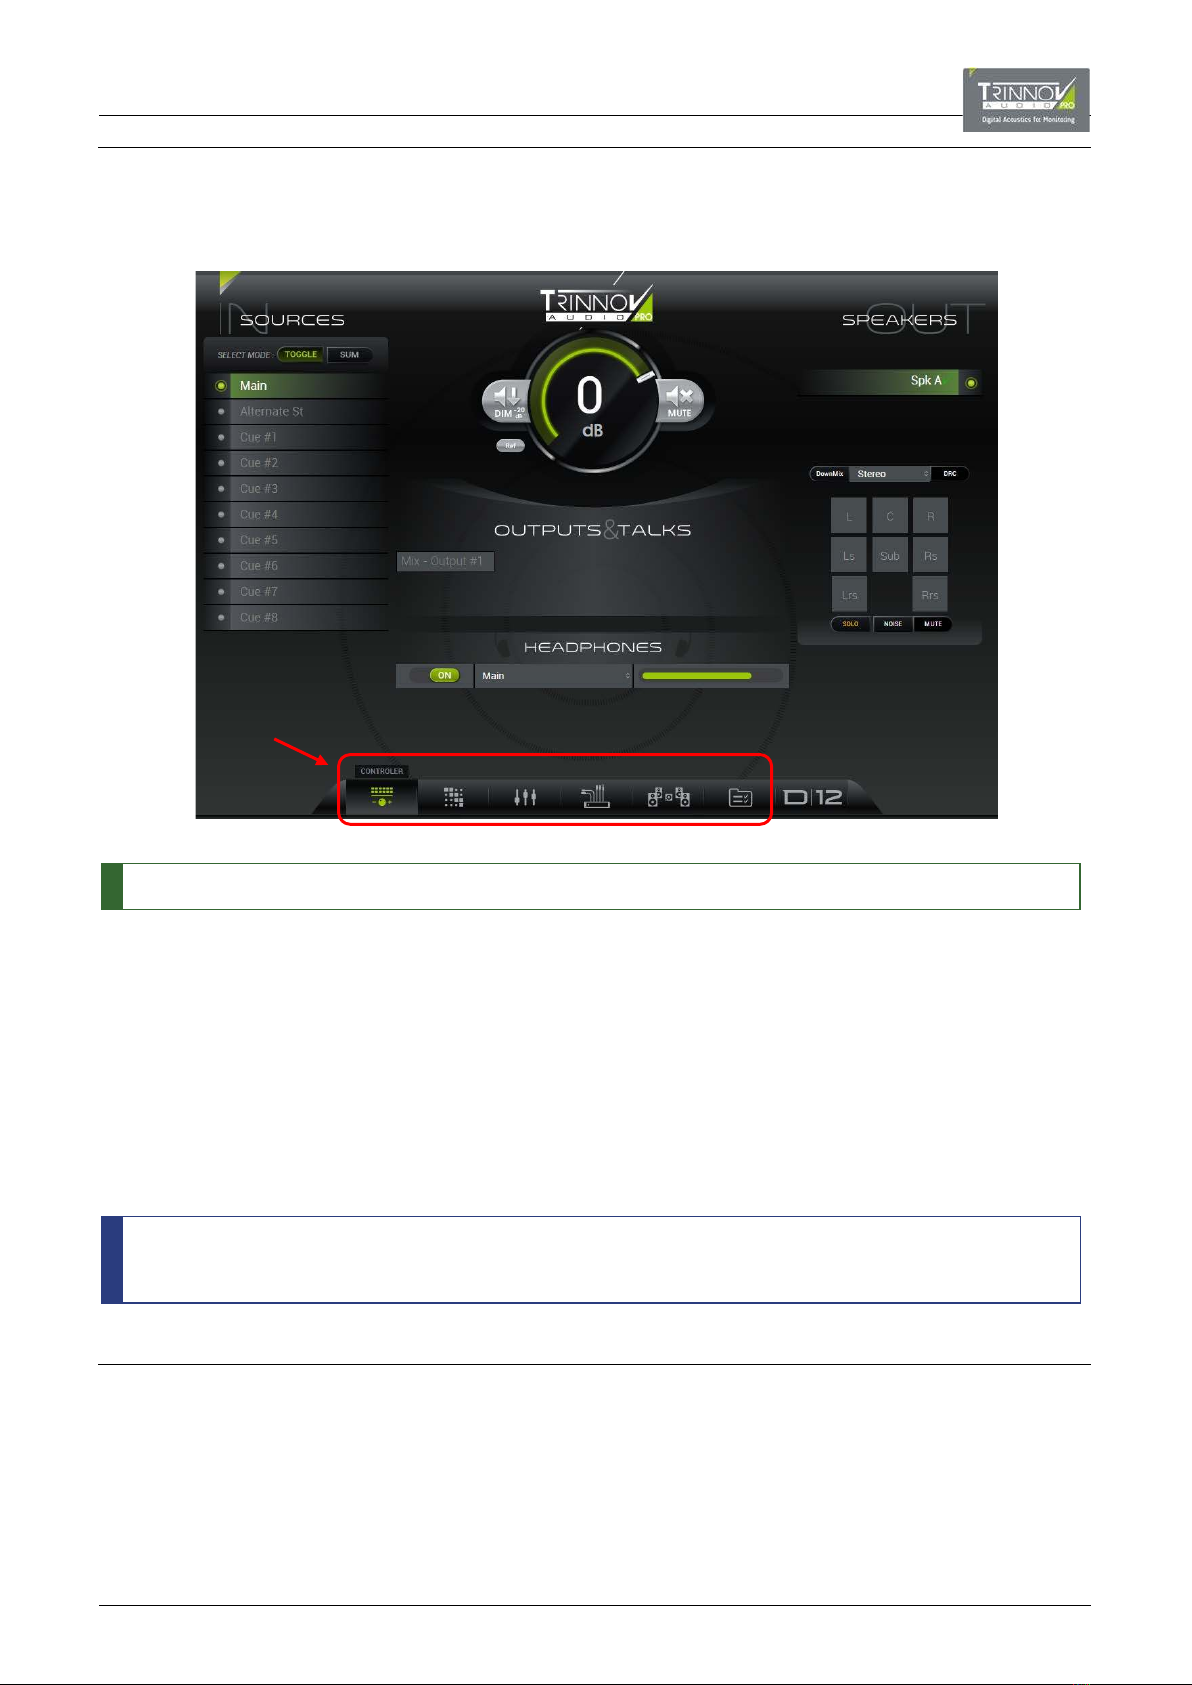
5.4 PAGES & NAVIGATION
The D-Mon Control Panel supports six pages – use the icons at the bottom of the GUI to change page:
If you hover the cursor over an icon, then the page name is displayed (e.g. CONTROLLER).
The six pages are:
•CONTROLLER – this is the main operational page (shown above). From here you can perform everyday tasks such as select
a monitor source; switch between speaker sets; talk to a destination, and adjust speaker and headphone volume.
•SESSION ROUTING – controls the routing matrix. Here you can see the results of any automated switching, and make
manual assignments for the session such as routing a mix bus to its output destination.
•MONITORING MIXER – controls the summing of the session’s sources onto mix buses.
•SESSION SETTINGS – defines parameters which apply to the session such as the sources, mix buses and outputs.
•STUDIO SETUP – defines parameters which apply to the studio such as the speaker sets, audio clock signal, etc.
•CONFIGURATION PRESETS – opens a pop-up menu where you can recall either a snapshot (to reset session parameters) or
a preset (to reset the complete unit). The MANAGE button opens a full-size page with further file management options.
The processor’s model number can also be selected – in our example, D12. This opens the Processor Control GUI in a new
browser window. It is used for setup functions such as the speaker/room calibration and is described later in this manual
(see 6.4.1: Working with the DMCP & OPCP).
5.5 CONVENTIONS
In general, a color (usually green) indicates when something is enabled. So, in our example above, the CONTROLLER page is
selected; the source named Main (on the left) is assigned to Spk A (on the right); the speaker listening level is open (indicated by
the central rotary slider); the HEADPHONES are turned ON and the headphone level is open (indicated by the horizontal slider).
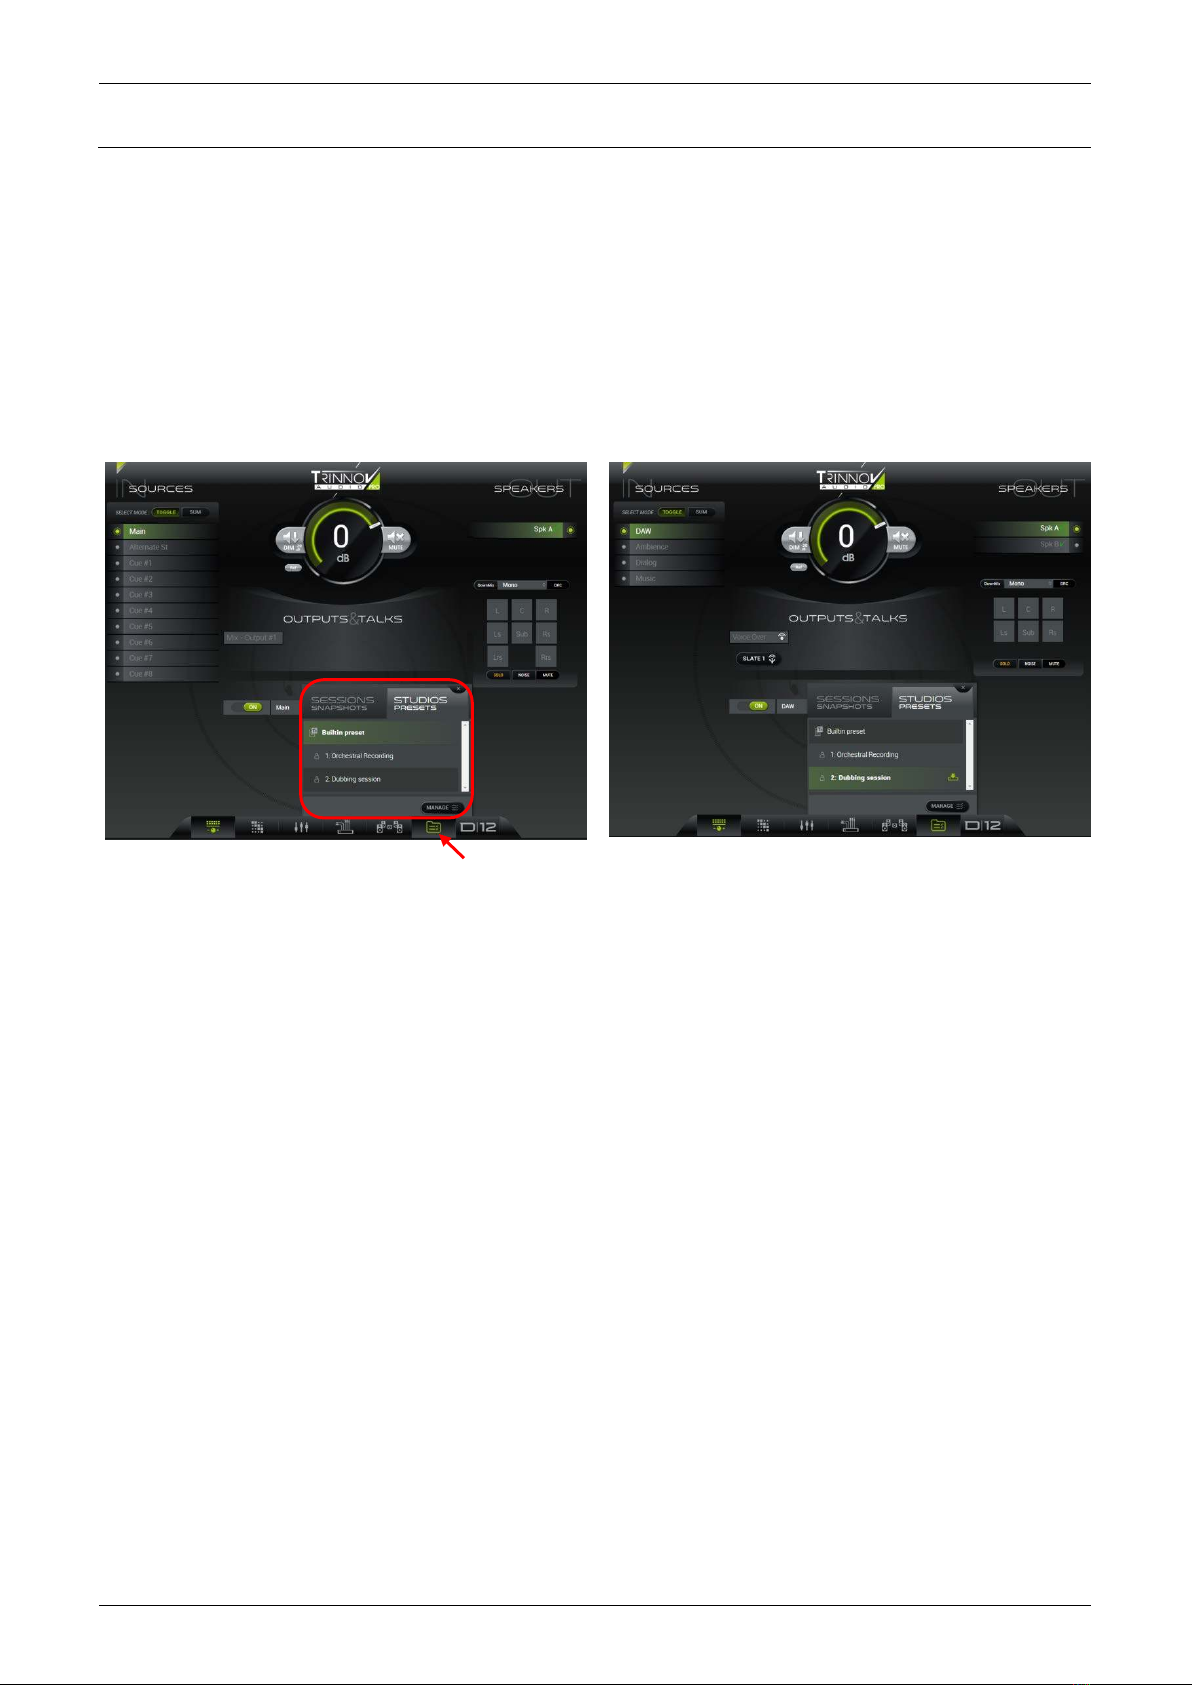
5.6 RECALLING A PRESET
At this stage, it is a good idea to recall a preset to be sure that the processor’s speaker sets, and other studio-related parameters,
are configured correctly. Presets will be described in more detail later. For now, use the following steps to reset your system:
Select CONFIGURATION PRESETS from the page icons at the bottom of the GUI – a pop-up menu appears.
Check that the STUDIOS PRESETS tab is selected and scroll up/down to view the available presets.
Click on a preset name to load its settings: e.g. Dubbing session.
It will take a second or two to load the new configuration; the preset highlights in green once the recall is complete.
CONFIGURATION PRESETS -> STUDIO PRESETS
Preset Recall Complete
Click on the X(at the top right of the menu) to close the CONFIGURATION PRESETS pop-up.
For more details on snapshots and presets, please see 7.6: CONFIGURATION PRESETS.
Click here to open pop-up menu
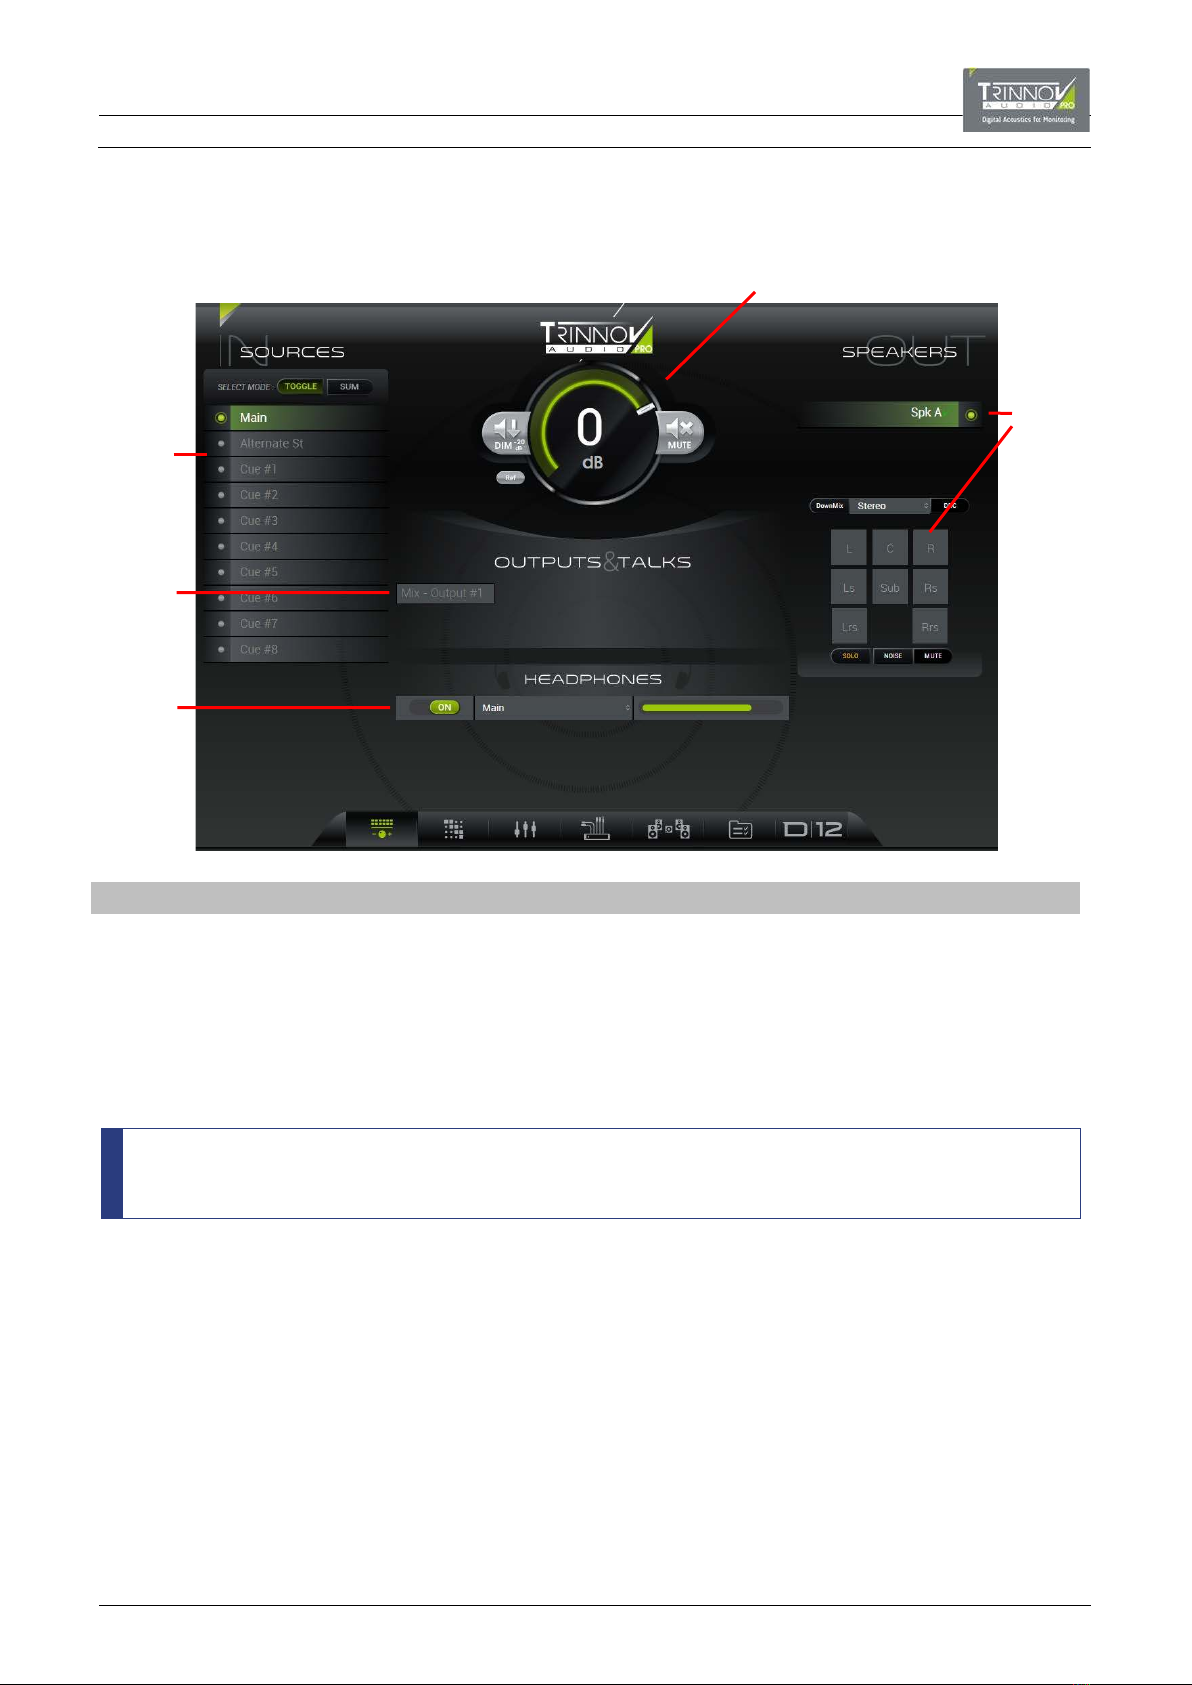
5.7 DAY-TO-DAY OPERATION
Once your processor is configured, all everyday tasks can be operated from the CONTROLLER page:
Area Primary Function
#1
SOURCES Click to monitor an incoming source (e.g. Main) on the selected speaker set (#3).
#2
Speaker Level Click and drag to adjust the speaker level.
#3
SPEAKERS Click to select a speaker set (e.g. Spk A) – the individual speaker buttons update accordingly.
#4
OUTPUTS & TALKS Click to monitor a mix or output on the selected speaker set. You can also talk to a mix bus if
talkback is configured.
#5 HEADPHONES Click to enable the headphone output (ON/OFF), select a source (e.g. Main) and adjust the level.
The contents of the SOURCES (#1), SPEAKERS (#3) and OUTPUTS & TALKS (#4) areas will vary depending on the
configuration and D-Mon processor model.
The screenshot above is taken from a D-Mon12 processor after recalling the Built-in preset.
2
1
5
4
3
This manual suits for next models
4
Table of contents
Other Trinnov Audio Recording Equipment manuals


Popular Recording Equipment manuals by other brands


Harman
Harman Lexicon MX400 user guide

Enforcement Technology Group
Enforcement Technology Group 60113 operating manual

Telos Alliance
Telos Alliance SDI AoIP Node Quick start installation guide

NewTek
NewTek TriCaster 40 quick start guide

NZXT
NZXT SIGNAL 4K30 manual

Behringer
Behringer Minicom COM800 user manual