manuals.online logo
Brands
  1. Home
  2. •
  3. Brands
  4. •
  5. Tripp Lite
  6. •
  7. UPS
  8. •
  9. Tripp Lite Smart Series Guide

Tripp Lite Smart Series Guide

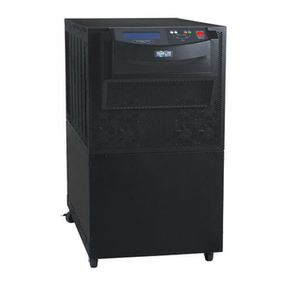
Thank you for purchasing the Tripp Lite SmartPro
Medical Grade SMART SERIES Tower UPS.
We hope this product exceeds your expectations of
performance in its intended application.
Throughout the life span of this UPS, there are
some maintenance practices that need to occur in
order to ensure continued operation of the unit.
The primary component that requires attention is
the internal battery of the UPS system.
In spite of good maintenance practices and favorable
operating conditions, the capacity of batteries does
deplete over time which reduces the back up or run
time a UPS can deliver to user applications.
Some environmental factors that influence loss of
battery capacity are:
•Humidity
•Temperature
•Depth of discharge
•Frequency of recharge
Replacing the batteries may be required if the UPS has been stored for
an extended period of time without a recharge, a loss of AC power
occurred allowing the batteries to completely discharge, or if a problem
has occurred whereby the batteries cannot sustain an adequate voltage.
For planning purposes, expect most batteries in Tripp Lite UPS products
to have a lifespan of 3-5 years. However, for applications that require
constant discharging and charging of the internal batteries on a daily
basis, the lifespan expectation diminishes at a much higher rate.
Because battery cells have only a finite number of discharge and
recharge cycles, the internal batteries may require replacement within a
2 year period if not earlier. This issue is also magnified by deep
discharges, or complete battery drains, allowing the UPS to completely
power off due to lack of DC voltage.
Providing the UPS with a fresh set of batteries maintains the
effectiveness and reliability of the unit and restores the UPS capacity to
its factory fresh state.
The SMART SERIES comes equipped with a user accessible
battery replacement door, which enables qualified
personnel to replace the UPS’ batteries without the need to
take the unit out of service. This prevents extended
downtimes for an application.
The batteries in the SMART SERIES are hot-swappable,
which allows for the replacement to occur while the
equipment attached to the unit continues to operate.
However, for added safety to the load, consider
performing battery replacement during off or non-peak
hours of your application with the attached load shut
down, and the UPS completely powered off.
The following steps are crucial to proper
battery replacement.
Please adhere to these instructions in order to
prevent personal injury and damage to the
UPS.
Facing the rear of the
UPS, locate the two
screws that hold the
battery door in place.
Using a Phillips head
screw driver, remove
the two screws. Once
the last screw is
removed, remove the
battery door from the
UPS.
Locate the tab made of
black tape that allows the
battery cartridge to be
pulled away from the unit
(indicated by the yellow
arrow).
Firmly grasp the tab and
pull the battery away from
the unit enough to expose
the black battery cable
taped to the battery itself
(indicated by the green
arrow).
Remove the tape
covering the black
battery cable connection
to the battery.
Using needle nose pliers,
pull the cable away from
the battery terminal in a
side to side motion until
the cable is
disconnected.
Using the tab that allows
the battery cartridge to be
removed from the UPS
(indicated by the yellow
arrow), begin to pull the
battery away from the unit.
As more of the battery is
exposed, place one hand
underneath the battery
cartridge (indicated by the
green arrow) to support it
as it is removed from the
unit.
Pull the battery out of the
unit until it is free from
the compartment and
place it directly behind
the UPS.
A red battery cable will
remain connected so be
sure not to pull the
battery too far so as not
to disconnect this cable.
Remove the tape
covering the battery
terminal connections to
expose all the battery
cable connectors.
Using needle nose pliers,
pull the red cable away
from the battery terminal
in a side to side motion
until the cable is
disconnected.
With the battery fully
disconnected from the UPS,
locate the 2 battery cables
connecting the three
batteries (indicated by
yellow arrows) together.
Using needle nose pliers,
pull the battery cables away
from the battery terminals
in a side to side motion
until the cables are
disconnected. Set them
aside for use with the
replacement battery cells.
Set the original batteries aside.
Line up the 3 new batteries
included with the RBC53 side by
side with the red positive battery
connector of each cell next to
the black negative battery
connector of the battery next to
it (indicated with yellow arrows).
(Note: RBC53 batteries are not
taped together as one cell. We
suggest using duct tape to
connect the cells together, which
allows for easier cable
connection and installation into
the UPS battery compartment.)
Using the short black
battery cables removed
from the original batteries,
reconnect the 3 cells
together connecting the red
positive terminal of one cell
to the negative black
terminal of the next cell.
Repeat this process to
connect the third cell.
Be aware that a spark or arc
can appear when the
connections are made.
Place the new set of
batteries directly
behind the battery
compartment of the
UPS with the exposed
red battery terminal
closest to the unit.
Using needle nose pliers,
take the red cable from
the UPS system and
connect it to the red
positive battery terminal
using a side to side
motion until the cable is
connected.
Be aware that a spark or
arc can appear when the
connection is made.
Lift the battery cartridge and
begin to ease the cells into the
battery compartment.
Be careful not to pinch the red
battery cable at the rear or top
of the compartment.
Also be sure that the loose black
negative battery cable from the
UPS is held above the cells so as
to allow connection after the
batteries are inserted (indicated
by yellow arrow).
Leave the black negative battery
terminal not connected to a
cable exposed (indicated by
green arrow).
Using needle nose pliers,
take the black cable from
the UPS system and
connect it to the black
negative battery terminal
using a side to side
motion until the cable is
connected.
Be aware that a spark or
arc can appear when the
connection is made.
Once the black cable
from the UPS is
connected to the black
negative battery terminal,
push the battery
cartridge into the
compartment.
Align the battery door
with the mounting holes
of the housing for the
UPS system. Install the
screws used to secure
the door in place.

Other Tripp Lite UPS manuals

Tripp Lite OMNIVSINT1000 User manual

Tripp Lite

Tripp Lite OMNIVSINT1000 User manual

Tripp Lite SmartPro UPS System SMART550USB User manual

Tripp Lite

Tripp Lite SmartPro UPS System SMART550USB User manual

Tripp Lite AVR750U User manual

Tripp Lite

Tripp Lite AVR750U User manual

Tripp Lite InternetX550AVR User manual

Tripp Lite

Tripp Lite InternetX550AVR User manual

Tripp Lite SmartOnline SU3000XLNAFTA User manual

Tripp Lite

Tripp Lite SmartOnline SU3000XLNAFTA User manual

Tripp Lite SmartOnline SU10KRT3/1X User manual

Tripp Lite

Tripp Lite SmartOnline SU10KRT3/1X User manual

Tripp Lite BCINTERNET500 User manual

Tripp Lite

Tripp Lite BCINTERNET500 User manual

Tripp Lite SmartOnline SU750XL User manual

Tripp Lite

Tripp Lite SmartOnline SU750XL User manual

Tripp Lite SmartPro UPS System SMART550USB User manual

Tripp Lite

Tripp Lite SmartPro UPS System SMART550USB User manual

Tripp Lite OmniSmart RMX 500 VA OM500RMX User manual

Tripp Lite

Tripp Lite OmniSmart RMX 500 VA OM500RMX User manual

Tripp Lite SMX1000LCD User manual

Tripp Lite

Tripp Lite SMX1000LCD User manual

Tripp Lite AG-04F5 Series User manual

Tripp Lite

Tripp Lite AG-04F5 Series User manual

Tripp Lite SmartOnline SU750RTXL2U User manual
Tripp Lite

Tripp Lite SmartOnline SU750RTXL2U User manual

Tripp Lite SmartOnline SU10KRT3U User manual

Tripp Lite

Tripp Lite SmartOnline SU10KRT3U User manual

Tripp Lite OMNIVS1500XLCD User manual

Tripp Lite

Tripp Lite OMNIVS1500XLCD User manual

Tripp Lite SmartOnline SU2200XLA User manual

Tripp Lite

Tripp Lite SmartOnline SU2200XLA User manual

Tripp Lite SmartOnline SU8000RT4U User manual

Tripp Lite

Tripp Lite SmartOnline SU8000RT4U User manual

Tripp Lite SmartPro Net User manual

Tripp Lite

Tripp Lite SmartPro Net User manual

Tripp Lite OMNISMART OMNIVS500 User manual

Tripp Lite

Tripp Lite OMNISMART OMNIVS500 User manual

Tripp Lite SmartPro AGSM152DRTi2U User manual

Tripp Lite

Tripp Lite SmartPro AGSM152DRTi2U User manual

Tripp Lite HT850UPS User manual

Tripp Lite

Tripp Lite HT850UPS User manual

Tripp Lite AGOM5515 User manual

Tripp Lite

Tripp Lite AGOM5515 User manual

Tripp Lite SmartOnline SU3000XL User manual

Tripp Lite

Tripp Lite SmartOnline SU3000XL User manual

Tripp Lite SmartOnline User manual

Tripp Lite

Tripp Lite SmartOnline User manual

Popular UPS manuals by other brands

PCM TC Series Installation, operation and maintenance manual

PCM

PCM TC Series Installation, operation and maintenance manual

Emerson SolaHD SDU AC B-Series user manual

Emerson

Emerson SolaHD SDU AC B-Series user manual

Bicker UPSI-1208DPx user manual

Bicker

Bicker UPSI-1208DPx user manual

Powerware 9170+ user guide

Powerware

Powerware 9170+ user guide

GE Power Supply user manual

GE

GE Power Supply user manual

Greenware Defendo 600 user guide

Greenware

Greenware Defendo 600 user guide

Dynex TE685AVR user manual

Dynex

Dynex TE685AVR user manual

Eaton 9125 Two-in-One UPS 2500 user guide

Eaton

Eaton 9125 Two-in-One UPS 2500 user guide

Easystat EA906S user manual

Easystat

Easystat EA906S user manual

GE 8 Series operating manual

GE

GE 8 Series operating manual

PowerWalker VFI 1000R LCD manual

PowerWalker

PowerWalker VFI 1000R LCD manual

Monster Power HTUPS500 owner's manual

Monster Power

Monster Power HTUPS500 owner's manual

Belkin OmniGuard F6C110-RKM-2U user manual

Belkin

Belkin OmniGuard F6C110-RKM-2U user manual

Emerson Liebert PSA quick start guide

Emerson

Emerson Liebert PSA quick start guide

Lowell power UPS6-350LI User & installation manual

Lowell power

Lowell power UPS6-350LI User & installation manual

CyberPower 649532815197 Specification sheet

CyberPower

CyberPower 649532815197 Specification sheet

Keatec Energy RTM Series user guide

Keatec Energy

Keatec Energy RTM Series user guide

Gamatronic Power+ user guide

Gamatronic

Gamatronic Power+ user guide

manuals.online logo
manuals.online logoBrands
  • About & Mission
  • Contact us
  • Privacy Policy
  • Terms and Conditions

Copyright 2025 Manuals.Online. All Rights Reserved.