5
f
e
fe
G2
IV
G1
g
h
IV
Qo
p
bc
c
abdy
I
III
II EN
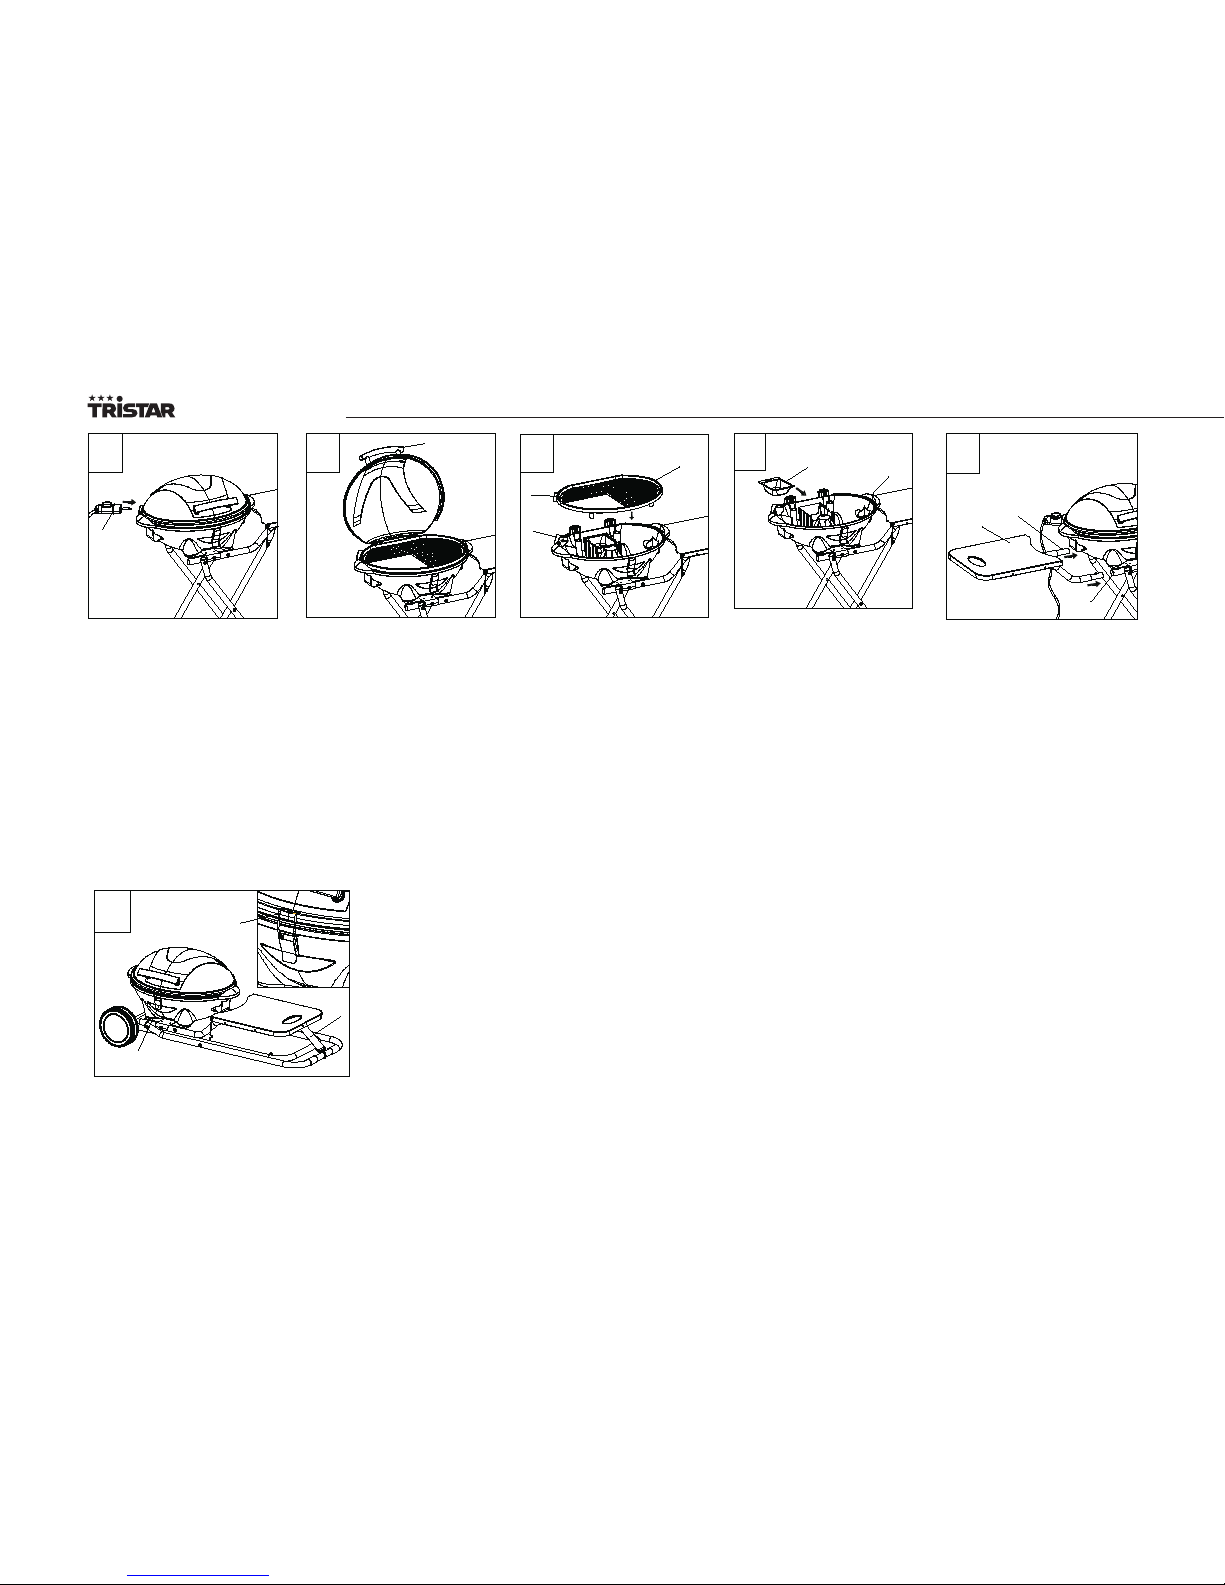
Barbecue-grill
Take the trolley frame and
accessoires out of the box. Please
make sure that the trolley frame
is placed on a dry, at and stable
surface. Let the wheel axle (a) pass
through two holes which are at
the end side of the tube.
After standing up the trolley frame,
you MUST set the safety locking unit
(f) immediately. This safety locking
unit is with self-locking feature. Press
the spring (e) and hook the bent
hook(f) on the extension part (e).
Then stop pressing the spring and
it will retract to lock the safety hook
unit automatically.
Attention: Make sure the safety
hook unit is LOCKED during
cooking or moving. DO NOT try to
turn or pull the safety hook while
using this appliance.
Attach the wheels (b) at
the two sides of the axle (a)
respectively.
Firstly, remove the screw from
the trolley tube. Then install the
stand tube (G1) onto the trolley
tube. and install the stand
tube (G2) onto the trolley tube.
There is a positioning hole (IV)
on the stand tube (G2), it will
attach G1 and G2 to each other
by screws. Tight the stand tube
(G1 and G2) and trolley with
screws and nuts.
There are two mounting holes
on each end side of the axis (a),
insert the “R” pin(c) through the
hole. This will lock the wheels.
Place the bowl-shaped base of
the appliance (h) into the stand
tube (g).
Fix the bottom of the base
into the positioning hole (IV).
When removing the base from
the stand tube (g), please step
slightly on the supporting tube,
hold the handles of the base
and take it o.
Press the wheel covers (d) to
the wheels (b) according to the
three location tips.
Install the hood. Hold the
hood handle (p) and insert the
clips(O) into the installation
holes (Q) of the base. When
removing the hood, please
open the hood and tilt to 45°
between hood and grill plate,
and detach the clips(o) from
installation holes (Q).
Put the trolley in the
upward position: First,
step on the middle of the
supporting tube (I) with your
right foot, lift up the side
table (II) with your right hand
while lifting the tube for the
wheel (III) upward with your
left hand. Then connect the
tube (III) with the tube which
is located under the side
table. The trolley frame is
standing up now.
Fold up the trolley: First,
step on the middle of
supporting tube (I) with your
right foot, hold up the side
table (II) with your right hand
whilst your left hand holds
the short edge of support
tube (III) and place it down
slowly.
Attention: when folding
up the trolley , Do not hold
the two sides of tube (III) to
avoid that your hand got
pinched.
1 2
6 7 8 9
3 4 5
a