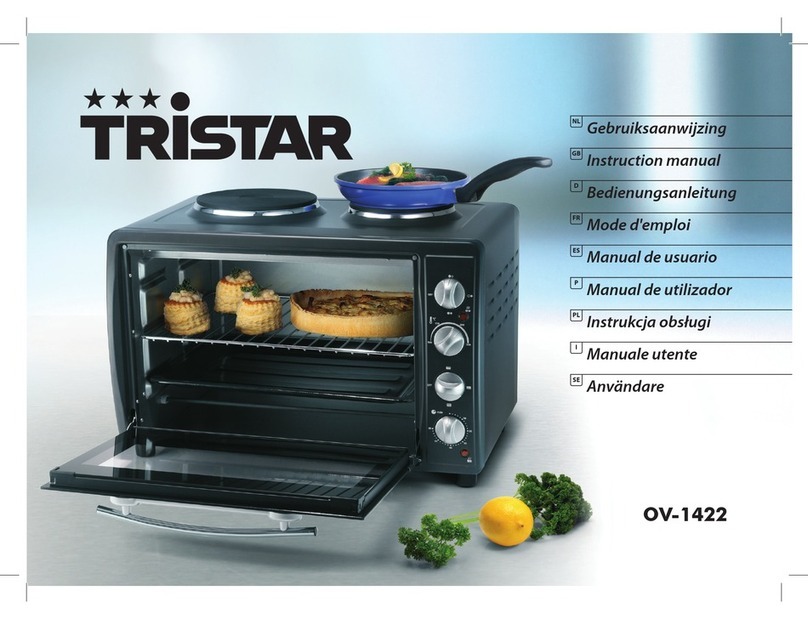
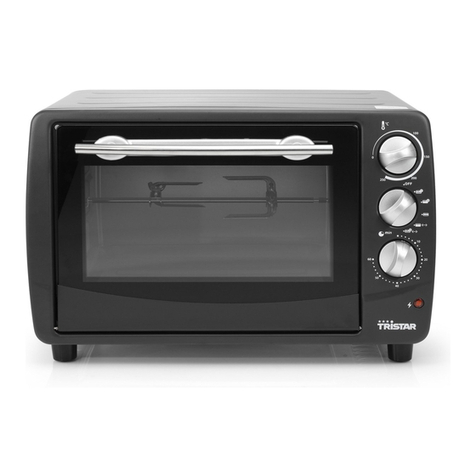
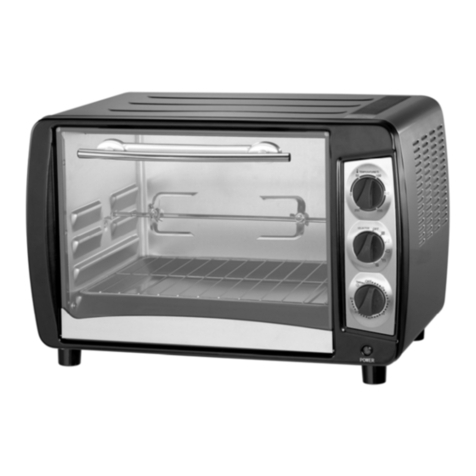
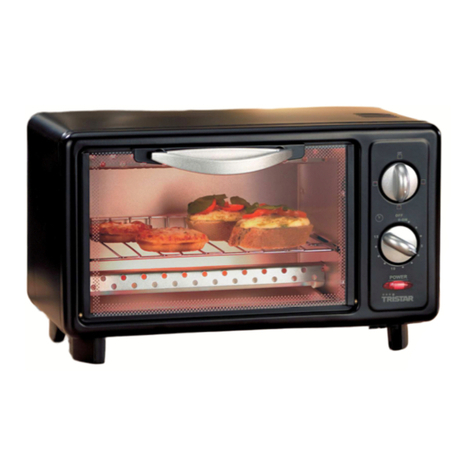
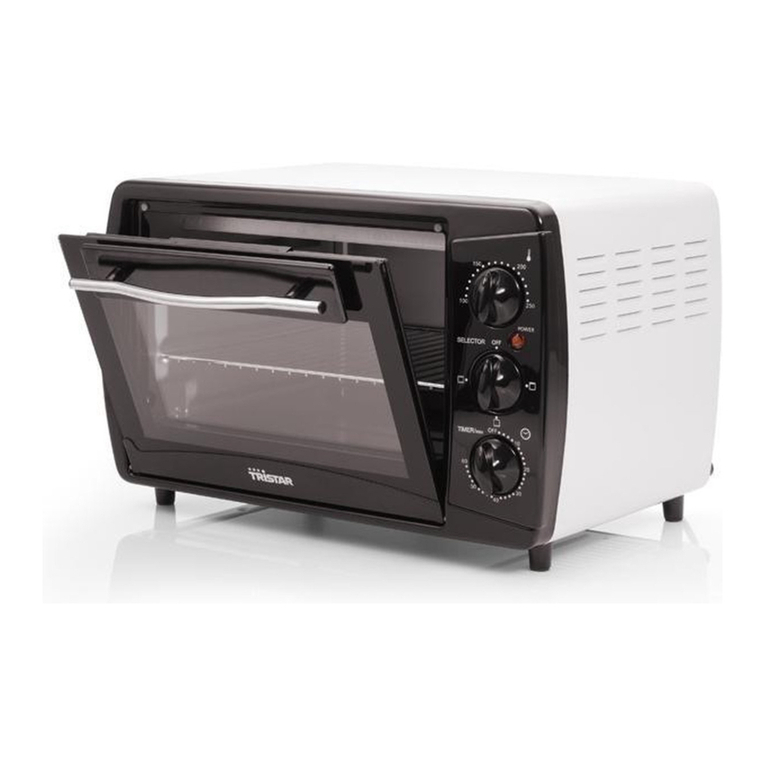
TriStar OV-1422 User manual

EN
NL
FR
DE
ES
PT
PL
IT
CS
SV
SK
Instruction manual
Gebruiksaanwijzing
Mode d'emploi
Bedienungsanleitung
Manual de usuario
Manual de utilizador
Instrukcja obsługi
Manuale utente
Návod na použití
Bruksanvisning
Návod na použitie
OV-1422

2

Oven
3
EN
GENERAL SAFETY INSTRUCTIONS
• This device meets the safety requirements. Please read the
instruction manual carefully before using the device. Please keep
these instructions, the guarantee certicate, the sales receipt and,
if possible, the carton with the inner packaging.
• Check if the voltage of the appliance corresponds to the main
voltage of your home. Rated voltage: 220-240V~ 50Hz. The socket
must be at least 16A or 10 A slow-protected.
• The appliance can be used by children aged from 8 years and
above and persons with reduced physical, sensory or mental
capabilities or lack of experience and knowledge if they have been
given supervision or instruction concerning use of the appliance in
a safe way and understand the hazards involved. Children shall not
play with the appliance. Cleaning and user maintenance shall not
be made by children unless they are older than 8 and supervised.
• Keep the appliance and its cord out of reach of children less than
8 years.
• By ignoring the safety instructions the manufacturer can not be
hold responsible for the damage
• To protect children against the dangers of an electrical appliances,
please make sure that you never leave the appliances unattended.
There for you have to select a storage place for the appliance
where children are not able to grab it. Make sure that the cable is
not hanging in a downward position.
• This appliance is only to be used for household purposes and only
for the purpose it is made for.
• The appliance must be placed on a stable, level surface.
• Do not touch hot surfaces. Use handles or knobs.
• Never use the device unsupervised.
• All repairs should be made by a competent qualied electrician(*).
• Make sure that the appliance is stored in a dry environment.
• It is absolutely necessary to keep this appliance clean at all times
because it comes into direct contact with food.
• This appliance complies with all standards regarding
electromagnetic elds (EMF). If handled properly and according
to the instructions in this user manual, the appliance is safe to use
based on scientic evidence available today.
• The use of accessory that are not recommended by the
manufacturer can cause injuries and will invalidate any warranty
that you may have.
• Never move the appliance by pulling the cord and make sure the
cord can not become entangled.
• Do not use this appliance outdoors.
• Allow the appliance to cool down before you clean or store it.
• To protect yourself against an electric shock, do not immerse the
cord, plug or appliance in the water or any other liquid.
• Unplug the appliance from the socket by changing the spare parts
or for maintenance.
• Do not use this appliance with a damaged cord or plug or when
the appliance has malfunctions, or has been damaged in any
manner. To avoid a hazard make sure that a damaged cord or plug
will be replaced by an authorized technician(*). Do not repair this
appliances by yourself.
• Do not use this appliance near direct heat sources.
• Unplug the appliance from the socket when you are not using it.
• Note: To avoid danger by accidental resetting the thermal
protection, this appliances may not be powered through an
external switching device, such as a timer, or connected to a circuit
that regularly will be switched on or o.

4
1
8
10
11
13
16
4
12
14
2
3
5 6
7
9
15
• Using an extension cord or something similar is not allowed.
• Allow the device to cool down before you are going to remove or
replace spare parts.
• Make sure that the cord is not hanging over the edge of the table
or counter, does not touch any hot surfaces or is coming directly
into contact with the hot parts of the appliances. Do not place the
appliance underneath or close to curtains, window coverings etc.
• Make sure the cord does not touch the hot parts of the appliance.
* Competent qualied electrician: after sales department of the producer
or importer or any person who is qualied, approved and competent to
perform this kind of repairs in order to avoid all danger. In any case you
should return the appliance to this electrician.
PARTS DISCRIPTION
1. Heating element
2. Glass door
3. Food tray support
4. Door handle
5. Large cook plate (800W)
6. Small cook plate (500W)
7. Controlknob cook plates
8. Warninglight cook plates
9. Controlknob temperature
10. Controlknob oven modes
11. Timer oven and cook plates
12. Warninglight oven
13. Stand
14. Wire rack
15. Handle
16. Baking tray
Instruction manual

Oven
5
EN
FIRST USE
• Take the appliance and accessories out the box. Remove the stickers,
protective foil or plastic from the device.
• Do not put any food or pans in the oven or on the cook plates
• Put the appliance in a safe spot, make sure there is 30 cm free air above
the oven, and 10 cm on the other sides.
• Set the control knob of the cook plates (10) in the lowest position.
• Set the control knob of the temperature (12) on 250 °C.
• Set the control knob of the oven modes in the lowest position.
• Set the control knob of the time (14) on 20 minutes.
During rst use there could be some smoke and a burning smell. This
happens because the appliance is new. It will disappear after a few minutes.
This does not mean there is a malfunction and it will not cause one.
USE
Control knob of the cook plates (7)
• Position upwards: large cook plate.
• Position to the right: small cook plate.
• Position downwards: both cook plates.
• With this knob you select which cook plate you want to use.
• Set the timer o the cook plates and the oven on the desired time.
• If you only want to use the cook plates you can keep control knob for
the oven modes in the o position.
Control knob temperature (9)
• Select clockwise the temperature u want to use for prepare your dish.
• You can choose from 100 °C till a temperature of 250 °C.
Control knob oven modes (10)
• Position upwards: upper element.
• Position to the right: bottom element.
• Position downwards: upper and bottom element.
• Select the desired heating element, which depends on the dish you are
preparing.
• See the baking tips further in the manual for the correct settings in
terms of preparation time, temperature and oven settings.
Timer oven en cook plates (11)
• The time controller can be used in combination whit the cook plates
and the oven function.
• Select the desired cooking time, the cooking time is depending on the
dish you want to prepare.
• Select the time by turning the timer clockwise.
• The device will automatically turn o at the end of the selected time,
there will ring a bell.
• If you want to select a time of less than 5 minutes, then turn the knob
to over the 6 minutes and turn it back to the desired time.
• You can manually turn o the device during use, by turn the timer
knob to the o position.
Oven function an cook plates together
• Select with control knob for the cook plates (7) if you want to use one
or two cook plates.
• Select with the control knob for the oven function (10) the desired mode.
• Select with the control knob for the temperature (9) the desired
temperature.
• Select with the timer knob (11) the desired time, you will see that the
lights No. 8 and No. 12 will light on. You can now start cooking on the
cook plates and put your dish in the oven.
Accessories
• The backing tray can be used for preparing chicken, hamburgers,
gratin, cakes and many other oven dishes.
• The grid can be used for various dry dishes such as (French) bread.

6
• For dishes that release a lot of grease, we recommend to use the grill
together with the backing tray.
Caution: when removing the grill or the backing tray, these can be very
hot! Always use the supplied handle.
BAKING TIPS
Your oven is very well suited to prepare the most fantastic dishes. In the
table below you will nd some tips about preparation time, temperature
and the oven settings for a diversity of dishes. The temperatures and
times mentioned below are only an indication. Baking results may vary
depending on the recipes, the dishes used and the ingredients.
Mode 1. Mode 2. Mode 3.
Recipe Quantity Temp. Cooking time Mode
Fresh pizza 400 g 200 °C 25 min. 3
Salted pie 600 g 200 °C 35 min. 3
Frozen pizza 450 g 220 °C 15 min. 3
Lasagna 1500 g 200 °C 40 min. 3
Whole chicken 1500 g 220 °C 90 min. 3
Meatballs 1000 g 200 °C 60 min. 3
Eggplant with cheese 1700 g 200 °C 30 min. 1
Grill meat 1000 g 220 °C 20 min 1
Breaded potatoes 1500 g 200 °C 40 min. 1
Apple-pie 1000 g 190 °C 90 min. 3
Wrapped trout 800 g 190 °C 40 min. 2
Add about 5 minutes to the preparation time for preheating the oven.
CLEANING AND MAINTENANCE
• Unplug the appliance if you want to clean it, do not start cleaning the
appliance before it is cooled down completely.
• Do not use a hard brush or other abrasive materials to clean the inside
or the outside of the appliance, to prevent scratching the surface and
the inside of the appliance.
• Do not use any toxic or abrasive cleaning supplies like petrol,
scrubbing powder or solvent. Regular kitchen cleaner or dishwashing
liquid with water is enough.
Cleaning the cook plates
• After boiling over remove the remains immediately. Caution: This parts
can be hot.
• Clean the cook plates with dishwashing liquid and some water.
• After cleaning heat up the cook plates for a short time, otherwise they
could rust.
Cleaning the oven
• Fruit juice leaking down the baking tray will make stains that cannot be
removed, even with oven cleaner. Do not overll the baking tin when
baking moist fruitcake.
• A slightly dirty oven can be cleaned with just some dishwashing liquid,
warm water and a splash of vinegar.
• The baking and cooking process can take longer when the oven is dirty
inside.
Caution: always let the oven and cook plates cool down well before
cleaning them.
Instruction manual

Oven
7
EN
GUARANTEE
• This appliances is covered with a 12 months guarantee starting on the
date of purchase (receipt).
• Damage caused by not following the instruction manual, will lead to
a void of warranty, if this results in consequential damages Tristar will
not be liable .
• Tristar will not be liable for material damage or personal injury caused
by improper use or if the safety instruction are not properly executed.
• Other then cleaning, as mentioned in this manual, is the only
maintenance that is necessary for this appliances.
• When the application should be repaired, make sure that this will be
preformed by an authorized company.
• This appliance is for household use only.
• This appliance may not be amended or changed
• If problems arise during the 12 months from the date of purchase,
which are covered by the factory warranty, you can go back to the
point of purchase to replace it for a new one.
• Only material or manufacturing defects are included in this warranty
• Tristar is not liable for damages occurred through:
1. In case the appliance has fallen.
2. In case the appliance has been technically changed by the owner or
another third party.
3. In case of improper use of the appliance.
4. In case of normal wear of the appliance.
• By executing repairs the original warranty period of 12 months will not
be extended, nor the right to a complied new warranty. This warranty
is only legal on European soil. This warranty does not overrule the
European directive 1944/44CE.
• For questions or compliances please contact your retailer“point of purchase”.
• Always keep your receipt, without this receipt you cannot claim any
form of warranty what so ever.
• If you wish to make a claim please return the entire machine with the receipt.
• Damage to accessories does not mean automatic free replacement of
the whole appliances. In such cases please contact our hotline. Broken
glass or breakage of plastic parts are always subject to a charge.
• Defects to consumables or parts subject to wearing, as well as cleaning,
maintenance or the replacement of said parts are not covered by the
guarantee and hence are to be paid!
• The guarantee lapses in case of unauthorized tampering.
• After the expiry of the guarantee repairs can be carried by the competent
dealer or repair service against the payment of the ensuing costs.
TECHNICAL SPECIFICATIONS
Model no.: OV-1422
Power supply: 220-240V~ 50 Hz
Power consumption: 3100 W
Dimensions : 615 x 435 x 450 mm
Weight: 13,5 kg

8
ENVIRONMENT
Directions to protect the environment
This appliance should not be put into the domestic garbage
at the end of its durability, but must be oered at a central
point for the recycling of electric and electronic domestic appliances. This
symbol on the appliance, instruction manual and packaging puts your
attention to this important issue. The materials used in this appliance
can be recycled. By recycling used domestic appliances you contribute
an important push to the protection of our environment. Ask your local
authorities for information regarding the point of recollection.
Packaging
The packaging is 100% recyclable, return the packaging separated.
Product
This device is equipped with a mark according to the European Directive
2002/96/EC on Waste Electrical and Electronic Equipment (WEEE). By
ensuring that this product will be correctly processed into waste,
it will help prevent possible negative consequences for the environment
and human health.
EC Declaration of conformity
This device is designed, manufactured and marketed in accordance
with the safety objectives of the Low Voltage Directive "No 2006/95/
EC,the protection requirements of the EMC Directive 2004/108/EC
"Electromagnetic Compatibility" and the requirement of Directive 93/68/
EEC.
Tips for saving energy
• Only use pans with a diameter equal to the diameter of the cook plates.
• Only use pots and pans with a at bottom.
• Keep during cooking the lid on the pan if possible.
• Cook vegetables, potatoes, etc. with little water, in order to keep the
preparation time a short as possible.
• Use proper temperatures for the dierent dishes you are preparing.
Instruction manual

Oven
9
EN
ALGEMENE VEILIGHEIDSAANWIJZINGEN.
• Dit apparaat voldoet aan de veiligheidsvoorschriften. Lees de
gebruiksaanwijzing aandachtig door voordat u het apparaat
voor het eerst gebruikt. Bewaar de gebruiksaanwijzing, het
garantiecerticaat, de verkoopbon en indien mogelijk de
kartonnen doos met de binnenste verpakking om deze indien
nodig later te kunnen raadplegen.
• Controleer of het voltage dat wordt aangegeven op het apparaat,
overeenkomt met de plaatselijke netspanning voordat u het
apparaat aansluit. Voltage: 220V-240V~ 50Hz. De contactdoos
moet met ten minste 16 A of 10 A traag beveiligd zijn.
• Dit apparaat kan worden gebruikt door kinderen van 8 jaar en
ouder en personen met beperkte fysieke, zintuigelijke of mentale
vermogens, of gebrek aan ervaring en kennis, als ze onder toezicht
staan, of instructies hebben ontvangen over het op een veilige
wijze gebruiken van het apparaat, en op de hoogte zijn van de
mogelijke gevaren. Kinderen mogen niet met het apparaat spelen.
Reiniging en onderhoud dienen niet te worden uitgevoerd door
kinderen, tenzij zij ouder dan 8 zijn, en onder toezicht staan.
• Houd het apparaat en het snoer buiten bereik van kinderen jonger
dan 8 jaar.
• Als de veiligheidsinstructies niet worden opgevolgd, kan de
fabrikant niet verantwoordelijk worden gesteld voor schade die
daar eventueel het gevolg van is.
• Om kinderen te beschermen tegen de gevaren van elektrische
apparatuur mag u ze nooit zonder toezicht bij het apparaat laten.
Selecteer daarom een plek voor uw apparaat op dusdanige wijze
dat kinderen er niet bij kunnen. Zorg er voor dat het snoer niet
naar beneden hangt.
• Dit apparaat is alleen voor huishoudelijk gebruik en voor het doel
waar het voor bestemd is.
• Het apparaat moet worden geplaatst op een stabiele, vlakke
ondergrond.
• Raak hete oppervlakken niet aan. Gebruik hendels of draaiknoppen.
• Laat het apparaat nooit onbeheerd achter wanneer het in werking is.
• Reparaties dienen te geschieden door een bekwame
gekwaliceerde dienst(*).
• Zorg dat het apparaat opgeborgen wordt op een droge plaats.
• Het is noodzakelijk om dit toestel zuiver te houden aangezien het
in direct contact komt met eetwaren.
• Dit apparaat voldoet aan alle richtlijnen met betrekking tot
elektromagnetische velden (EMV). Mits het apparaat op de juiste
wijze en volgens de instructies in deze gebruiksaanwijzing wordt
gebruikt, is het veilig te gebruiken volgens het nu beschikbare
wetenschappelijke bewijs.
• Gebruik nooit accessoires die niet aanbevolen worden door de
fabrikant. Deze kunnen gevaar opleveren voor de gebruiker en
schade toebrengen aan het apparaat.
• Verplaats het apparaat nooit door aan het snoer te trekken en zorg
er voor dat het snoer nergens in verstrikt kan raken.
• Gebruik het apparaat nooit buitenshuis.
• Zorg ervoor dat het apparaat afgekoeld is voordat u het
schoonmaakt en opbergt.
• Dompel het snoer, de stekker en/of het apparaat nooit in het
water of een andere vloeistof, dit om u te beschermen tegen een
elektrische schok.
• Haal de stekker uit het stopcontact als u toebehoren wisselt en
voor onderhoudswerkzaamheden.
• Gebruik het apparaat niet indien de stekker, het netsnoer of het
apparaat zelf beschadigd is. Indien het netsnoer beschadigd
is, moet u het laten vervangen door een geautoriseerd
servicecentrum(*) om gevaar te voorkomen.
10
Gebruiksaanwijzing
• Gebruik het apparaat nooit in de buurt van directe hitte bronnen.
• Haal het stekker uit het stopcontact wanneer het apparaat niet
gebruikt wordt.
• Let op: om gevaar te voorkomen door het onbedoeld terugstellen
van de thermische beveiliging mag dit apparaat niet gevoed
worden via een extern schakelapparaat, zoals een timer, of
aangesloten zijn op een circuit dat regelmatig uit en aangezet
wordt door het voorwerp.
• Het gebruik van een verlengsnoer of iets dergelijks is niet toegestaan
• Laat het apparaat afkoelen alvorens onderdelen te verwijderen of
te monteren.
• Laat geen snoer over de rand van de tafel hangen, tegen hete
oppervlakken of in contact komen met het apparaat. Plaats het
product niet onder of dicht bij de gordijnen, raambekleding enz.
• Zorg dat het snoer niet in aanraking komt met de warme
onderdelen van het toestel.
* Bekwame gekwaliceerde dienst: after-sales-dienst van de fabrikant of de
invoerder, die erkend en bevoegd is om dergelijke herstellingen te doen
zodat elk gevaar vermeden wordt. Gelieve het toestel bij problemen naar
deze dienst terug te brengen.
ONDERDELEN BESCHRIJVING
1. Verwarmingselement
2. Glasdeur
3. Bakplaat geleider
4. Handvat deur
5. Grote verwarmingsplaat (800W)
6. Kleine verwarmingsplaat (500W)
7. Regelknop kookplaten
8. Powerindicatielampje
9. Thermostaat
10. Ovenstand regelknop
11. Tijdschakelaar
12. Waarschuwingslampje oven
13. Voetsteun
14. Rooster
15. Handgreep
16. Bakplaat
1
8
10
11
13
16
4
12
14
2
3
5 6
7
9
15

Oven
11
NL
VOOR HET EERSTE GEBRUIK
• Haal het apparaat en accessoires uit de doos. Verwijder eventuele
stickers, beschermfolie of plastic van het apparaat.
• Plaats nog geen etenswaren in de oven en geen pannen op de kookplaten.
• Plaats het apparaat op een veilige plek, zorg ervoor dat de oven aan de
bovenkant 30 cm vrij is en aan de overige zijden minimaal 10 cm vrij is.
• Schakel de regelknop voor de kookplaten (10) in op de onderste stand.
• Schakel de regelknop voor de temperatuur (12) op 250°C in.
• Schakel de regelknop voor de ovenstanden (13) in op de onderste stand.
• Schakel de regelknop voor de tijd (14) op 20 minuten in.
Let op: Tijdens deze ingebruikname kan wat rook en brandlucht vrijkomen.
Dit wordt veroorzaakt doordat het apparaat nieuw is. Na enkele minuten is dit
verdwenen. Dit duidt niet op een defect en kan geen defecten veroorzaken.
GEBRUIK
Regelknop kookplaten (7)
• Met deze knop selecteert u welke kookplaat u wenst te gebruiken.
• Stand naar boven: grote kookplaat.
• Stand naar rechts: kleine kookplaat.
• Stand naar beneden: beide kookplaten.
• Stel met de tijdschakelaar de gewenste tijd voor het gebruik van de
kookplaat in.
• Indien u alleen de kookplaten wenst te gebruiken laat u de ovenstand
knop op o staan.
Thermostaat (9)
• Selecteer met de klok mee welke temperatuur u wilt selecteren om uw
gerecht te bereiden.
• U kunt een keuze maken van 100°C tot 250°C.
Ovenstand regelknop (10)
• Stand naar boven: boven verwarming.
• Stand naar rechts: onderverwarming.
• Stand naar onder: Boven en onder verwarming.
• De juiste verwarmingsstand is volledig afhankelijk van het gerecht dat
u wilt bereiden.
• Zie de baktips verder op in de handleiding voor de juiste instellingen
wat betreft bereidingstijd, temperatuur en oven instellingen.
Tijdschakelaar (11)
• De tijdregelaar is te gebruiken in combinatie met zowel de kookplaten
als de oven functie.
• Selecteer de gewenste kooktijd in minuten met de tijdregelaar
afhankelijk van het gerecht dat u wilt bereiden.
• Selecteer de tijd door de tijdknop met de klok mee te draaien.
• Het apparaat zal automatisch uitschakelen aan het eind van de door u
geselecteerde tijd, er zal dan een belletje rinkelen.
• Indien u een tijd wilt selecteren van minder dan 5 min., draai de
knop dan tot meer dan 6 min. en draai deze dan terug naar de door u
gewenste tijd.
• U kunt het apparaat handmatig uitschakelen tijdens het gebruik, door
de timerknop tegen de knop in te draaien naar o.
Oven functie en kookplaat tegelijkertijd
• Selecteer met de regelknop voor de kookplaat (7) of u één of twee
kookplaten wenst te gebruiken.
• Selecteer met de regelknop voor de ovenfunctie (10) de gewenste stand.
• Selecteer met de regelknop voor de temperatuur (9) de gewenste
temperatuur in.
• Selecteer met de regelknop voor de tijd (11) de gewenste tijd, u zult
zien dat de controle lampjes nr. 11 en nr. 15 beide oplichten. U kunt nu
beginnen met koken en uw gerecht in de oven plaatsen.

12
Gebruiksaanwijzing
Toebehoren
• De dichte bakplaat is te gebruiken voor bijvoorbeeld het bereiden van
kip, hamburger, gratin, cake en vele andere ovengerechten.
• Het rooster is te gebruiken voor het bereiden van verschillende droge
gerechten zoals bijvoorbeeld (stok)brood.
• Voor gerechten waar veel vet bij vrijkomt raden wij u aan het rooster in
combinatie met de dichte bakplaat te gebruiken.
Let op: wees voorzichtig met het eruit halen van het rooster of de bakplaat,
deze kunnen zeer heet zijn! Gebruik altijd de bijgeleverde handgreep.
BAKTIPS
Uw oven is uitzonderlijk geschikt om de meest fantastische gerechten mee te
bereiden. In het onderstaande schema treft u enkele tips over de bereidingstijd,
temperatuur en de oveninstelling voor verschillende gerechten. De aangegeven
temperaturen en tijden zijn slechts een indicatie. De bakresultaten variëren
afhankelijk van de recepten, de gebruikte schalen en de ingrediënten.
Stand 1. Stand 2. Stand 3.
Recept Hoeveelheid Temp. Bereidingstijd Stand
Verse pizza 400 g 200 °C 25 min. 3
Gezouten taart 600 g 200 °C 35 min. 3
Diepgevroren pizza 450 g 220 °C 15 min. 3
Lasagne 1500 g 200 °C 40 min. 3
Hele kip 1500 g 220 °C 90 min. 3
Gehaktballen 1000 g 200 °C 60 min. 3
Aubergines met kaas 1700 g 200 °C 30 min. 1
Grillen vlees 1000 g 220 °C 20 min 1
Gegratineerde
aardappelen
1500 g 200 °C 40 min. 1
Appeltaart 1000 g 190 °C 90 min. 3
Forel in een pakketje 800 g 190 °C 40 min. 2
Voeg aan de bereidingstijd circa 5 minuten toe voor de voorverwarming
van de oven.
SCHOONMAAK EN ONDERHOUD
• Haal voor het schoonmaken de stekker uit het stopcontact en laat het
apparaat volledig afkoelen.
• Gebruik bij het schoonmaken van de binnen en de buiten zijde van het
apparaat geen harde borstel of andere schurende middelen, dit om te
voorkomen dat er krassen op het oppervlak en in het apparaat kunnen
ontstaan.
• Gebruik geen toxische en schurende schoonmaakmiddelen zoals
benzine, schuurpoeder of oplosmiddel. Een normale keukenreiniger of
sopje volstaat.
Kookplaten schoonmaken
• Verwijder onmiddellijk de kookresten bij overkoken, let er wel op dat
de kookplaten heet kunnen zijn.
• Maak de kookplaten met een sopje schoon.
• Verwarm hierna de kookplaten een korte tijd, hiermee voorkomt u dat
de kookplaten gaan roesten.
Oven schoonmaken
• Vruchtensap dat van het bakblik afdruipt veroorzaakt vlekken die ook
met een ovenreiniger niet te verwijderen zijn. Zorg er dus voor dat het
bakblik niet te vol zit tijdens het bakken van vochtig vruchtengebak.

Oven
13
NL
• Een licht vervuilde oven hoeft u alleen maar met een warm sopje of
met warm water met een scheutje azijn af te nemen.
• Indien de binnenkant van de oven vervuild is, kan het bak en
kookproces langer duren dan normaal.
Let op: laat de oven en de kookplaten altijd eerst goed afkoelen voordat u
deze gaat schoonmaken.
GARANTIEVOORWAARDEN
• Dit apparaat is alleen bedoeld voor huishoudelijk gebruik en niet voor
commercieel of industrieel gebruik.
• Tristar is niet verantwoordelijk voor schade:
1. Ten gevolge van een val of ongeluk.
2. Indien het apparaat technisch is gewijzigd door gebruiker of derden.
3. Door oneigenlijk gebruik van het apparaat.
4. Door normale gebruiksslijtage.
• Door eventuele reparatie wordt de oorspronkelijke garantieperiode
van 2 jaar niet verlengd. Deze garantie is slechts geldig op Europees
grondgebied. Deze garantie heft de gebruikersrechten volgens
Europese richtlijn 1944/44CE niet op.
• Bewaar altijd uw aankoopbewijs, zonder dit aankoopbewijs kunt u
geen aanspraak maken op enige vorm van garantie.
• Bij schade veroorzaakt door het niet opvolgen van de
gebruiksaanwijzing, vervalt het recht op garantie! Voor vervolgschade
die hieruit ontstaat zijn wij niet aansprakelijk.
• Voor materiële schade of persoonlijk letsel veroorzaakt
door ondeskundig gebruik of het niet opvolgen van de
veiligheidsvoorschriften zijn wij niet aansprakelijk. In dergelijke
gevallen vervalt elke aanspraak op garantie.
• Anders dan het schoonmaken, zoals genoemd in deze handleiding, is
aan dit apparaat geen ander onderhoud noodzakelijk.
• Indien er reparaties moeten worden uitgevoerd, mag dit uitsluitend
door een geautoriseerd bedrijf gebeuren.
• Het product mag niet worden gewijzigd of veranderd.
• Indien zich problemen zouden voordoen gedurende 2 jaar na
aankoopdatum, welke gedekt zijn door de fabrieksgarantie, kunt u het
apparaat ter vervanging aanbieden bij uw aankooppunt.
• Voor vragen of klachten kunt zich melden bij uw verkooppunt.
• Dit apparaat heeft 24 maanden garantie vanaf de datum van aankoop
(kassabon).
• Uitsluitend materiaal- en/of fabricagefouten zijn inbegrepen in deze
garantie.
• Als u gebruik wilt maken van uw garantieaanspraak , zorgt u er
dan voor dat u het volledige apparaat in zijn originele doos en
aankoopbewijs inlevert bij uw aankooppunt.
• Schade aan accessoires of onderdelen betekend niet automatisch dat
het gehele apparaat zal worden vervangen. In dit soort gevallen moet
u contact opnemen met onze serviceafdeling. Afgebroken glazen/
plastic onderdelen of accessoires vallen niet onder de garantie en
zullen dus altijd tegen een vergoeding kunnen worden vervangen.
• Defecten aan hulpstukken of aan de slijtende onderdelen, alsmede
reiniging, onderhoud of de vervanging van slijtende delen vallen niet
onder de garantie en zullen dus in rekening worden gebracht!
• De garantie vervalt in geval van ongeoorloofde manipulatie.
• Na het verstrijken van de garantie reparaties kunnen worden
uitgevoerd door de bevoegde dealer of reparatie service tegen de
betaling van de daaruit voortvloeiende kosten.

14
Gebruiksaanwijzing
TECHNISCHE SPECIFICATIES
Model nr.: OV-1422
Voeding: 220-240V~ 50 Hz
Stroom verbruik: 3100 W
Afmetingen: 615 x 435 x 450 mm
Gewicht: 13,50 kg
MILIEU
Aanwijzingen ter bescherming van het milieu
Dit product mag aan het einde van zijn levensduur niet bij het
normale huisafval worden gedeponeerd, maar dient
bij een speciaal inzamelpunt voor het hergebruik van elektrische en
elektronische apparaten te worden aangeboden. Het symbool op artikel,
gebruiksaanwijzing en verpakking attendeert u hierop. De gebruikte
grondstoen zijn geschikt voor hergebruik. Met het hergebruik van
gebruikte apparaten of grondstoen levert u een belangrijke bijdrage
voor de bescherming van ons milieu. Informeer bij uw lokale overheid
naar het bedoelde inzamelpunt.
Verpakking
Het verpakkingsmateriaal is 100% recyclebaar, lever het
verpakkingsmateriaal gescheiden in.
Product
Dit apparaat is voorzien van het merkteken volgens de Europese richtlijn
2002/96/EG Inzake Afgedankte elektrische en elektronische apparaten
(AEEA). Door ervoor te zorgen dat dit product op de juiste manier als afval
wordt verwerkt, helpt u mogelijk negatieve consequenties voor het milieu
en de menselijke gezondheid te voorkomen.
EG-conformiteitsverklaring
Dit apparaat is ontworpen om in contact te komen met levensmiddelen
en is ontworpen in overeenstemming met de EG-richtlijn 89/109/
EEC. Dit apparaat is ontworpen, vervaardigd en in de handel
gebracht in overeenstemming met: de veiligheidsdoeleinden van de
“laagspanningsrichtlijn”nr. 2006/95/EC, de beschermingsvoorschriften
van de EMC-richtlijn 2004/108/EC“Elektromagnetische compatibiliteit” en
de vereiste van richtlijn 93/68/EG.
Tips voor energiebesparing
• Gebruik alleen pannen met een doorsnede die gelijk is aan die van de
kookplaten.
• Gebruik alleen potten en pannen met een platte bodem.
• Houd zo mogelijk het deksel op de pan tijdens het koken.
• Kook groenten, aardappelen enz. met weinig water om de
bereidingstijd zo kort mogelijk te houden.
• Gebruik de juiste temperaturen voor de diverse te bereiden maaltijden.

15
FR
Four
INSTRUCTIONS GENERALES DE SECURITE
• Cet appareil respecte les exigences de sécurité. Veuillez lire
attentivement les instructions de ce manuel avant d'utiliser
l’appareil. Veuillez conserver ces instructions, le bon de garanti, la
facture et, si possible, le carton et les emballages du produit.
• Vériez si la tension de l'appareil correspond à la tension du
secteur de votre domicile. Tension nominale : 220 à 240 V~ 50 Hz.
La che doit être protégée à au moins 16 ou 10 A.
• L’appareil peut être utilisé par des enfants âgés de 8 ans et plus
et par les personnes ayant des capacités physiques, sensorielles
ou mentales réduites ou qui manquent d’expérience ou de
connaissances si elles sont supervisées ou instruites pour
l’utilisation de l’appareil en toute sécurité et si elles comprennent
les dangers en rapport. Les enfants ne doivent pas jouer avec
l’appareil. Le nettoyage et l’entretien utilisateur ne doivent pas être
accomplis par des enfants à moins qu’ils aient plus de 8 ans et ne
soient supervisés.
• Conservez l'appareil et son cordon hors de porte des enfants de
moins de 8 ans.
• Si vous ignorez ces instructions de sécurité, le fabricant récuse
toute responsabilité pour les dommages.
• An de protéger les enfants des dangers liés aux appareils
électriques, ne les laissez jamais sans surveillance. Rangez
l'appareil dans un endroit où les enfants ne peuvent pas accéder.
Vériez que le câble ne pend pas.
• Cet appareil est réservé à une utilisation familiale et seulement
pour son utilisation prévue.
• L’appareil doit être posé sur une surface stable et nivelée.
• Ne touchez pas les surfaces brûlantes. Utilisez les poignées ou les
boutons.
• Ne laissez jamais cet appareil sans surveillance.
• Toutes les réparations doivent être eectuées par un électricien
qualié (*).
• Rangez l’appareil dans un endroit sec.
• Il est primordial de garder cet appareil propre car il entre
directement en contact avec des aliments.
• Cet appareil respecte toutes les normes relatives aux champs
magnétiques. Si vous manipulez correctement cet appareil en
suivant les instructions de ce manuel, son utilisation sera sûre
d’après les connaissances scientiques actuelles.
• L’utilisation d’accessoires non recommandés par le fabricant de
l’appareil peut entraîner des dommages corporels et rendre la
garantie caduque.
• Le cordon d'alimentation ne constitue pas une poignée de
transport, veillez à ce qu’il ne s’emmêle pas.
• N'utilisez pas cet appareil à l'extérieur.
• Laissez l’appareil refroidir avant de le nettoyer ou de le ranger.
• Pour éviter un choc électrique, n’immergez pas le cordon, la che
ou l’appareil dans l’eau ou dans un autre liquide.
• Débranchez la prise de l’appareil avant de changer des pièces ou
d’eectuer un entretien.
• N'utilisez pas l'appareil si son cordon et sa prise sont endommagés
ou s'il présente des dysfonctionnements, ou s’il est endommagé
de quelque manière que ce soit. Pour des raisons de sécurité, si
le cordon ou la che sont endommagés, veillez à ce qu’ils soient
remplacés par un technicien agréé (*). Ne réparez pas cet appareil
vous-même.
• N’utilisez pas cet appareil à proximité d’une source de chaleur.
• Débranchez la prise d’alimentation de l’appareil après utilisation.
• Remarque : Pour éviter de réenclencher par accident la protection

16
thermique, l’appareil ne doit pas être alimenté par un dispositif
de connexion externe comme un minuteur et il ne doit pas être
connecté sur un circuit ; il faut allumer et éteindre l’appareil
manuellement.
• L’utilisation d’une rallonge ou d’un dispositif similaire n’est pas permise.
• Laissez l’appareil refroidir avant de retirer ou de remplacer des
pièces.
• Vériez que le cordon ne pend pas de la table, qu’il ne touche pas
de surface chaude ou entre directement en contact avec les pièces
chaudes de l’appareil. Ne posez pas l’appareil sous ou à proximité
de rideaux ni de décors de fenêtre.
• Vériez que le cordon ne touche pas les pièces chaudes de
l’appareil.
* Électricien qualié agréé : Le service après-vente du fournisseur ou de
l’importateur ou toute personne qualiée, agréée et compétente pour
eectuer ce genre de réparations pour des raisons de sécurité. Dans tous les
cas, vous devrez apporter l'appareil à cet électricien.
DESCRIPTION DES PIECES
1. Résistance en serpentin
2. Porte vitrée
3. Support de la plaque alimentaire
4. Poignée de la porte
5. Grande plaque de cuisson (800W)
6. Petite plaque de cuisson (500W)
7. Bouton de contrôle des plaques
8. Témoin des plaques
9. Bouton de température
10. Contrôle des modes de four
11. Minuteur et plaques de cuisson
12. Témoin de fonctionnement
13. Pied
14. Grille de cuisson
15. Poignée
16. Plaque de cuisson
1
8
10
11
13
16
4
12
14
2
3
5 6
7
9
15
Mode d’emploi

17
FR
Four
PREMIERE UTILISATION
• Sortez l'appareil et les accessoires de la boîte. Enlevez les autocollants
et le lm de protection de l’appareil.
• Ne mettez aucun aliment ni casserole dans le four ni sur les plaques de
cuisson.
• Mettez l’appareil dans un endroit sûr, en laissant un espace de 30 cm
au-dessus du four, et 10 cm autour du four.
• Mettez le bouton de contrôle des plaques (10) en position la plus
basse.
• Réglez le contrôle de température (12) sur 250 °C.
• Mettez le bouton de contrôle des modes de four (10) en position la
plus basse.
• Réglez le bouton de durée (14) sur 20 minutes.
Lors de la première utilisation, il peut y avoir de la fumée et une odeur de brûlé.
Cela se produit car l’appareil est neuf. Cela disparaîtra au bout de quelques
minutes. Il ne s’agit pas d’un dysfonctionnement et cela n’en causera pas.
UTILISATION
Bouton de contrôle des plaques (7)
• Position vers le haut : grande plaque de cuisson.
• Position vers la droite : petite plaque de cuisson.
• Position vers le bas : les deux plaques de cuisson.
• Ce bouton sert à sélectionner la plaque à utiliser.
• Désactivez le minuteur des plaques et réglez la durée du four.
• Si vous souhaitez utiliser les plaques de cuisson, vous pouvez laisser le
bouton des modes de four en position désactivée.
Bouton de contrôle de la température (9)
• Sélectionnez la température de cuisson voulue dans le sens des
aiguilles d’une montre.
• Vous pouvez choisir une température comprise entre 100 et 250 °C.
Bouton de contrôle des modes de four (10)
• Position vers le haut : élément chauant supérieur.
• Position vers la droite : élément chauant inférieur.
• Position vers le bas : élément chauant supérieur et inférieur.
• Sélectionnez un élément chauant en fonction du plat que vous
préparez.
• Réglez également le four en suivant les instructions du manuel pour les
réglages de durée de préparation et la température de cuisson, et pour
les réglages du four.
Minuteur et plaques de cuisson (11)
• Le réglage du minuteur peut être utilisé avec les fonctions des plaques
et du four.
• Sélectionnez la durée de cuisson voulue, elle dépend du plat que vous
préparez.
• Réglez la durée en tournant le bouton du minuteur dans le sens des
aiguilles d’une montre.
• L’appareil s’éteindra et sonnera automatiquement au bout de la durée
sélectionnée.
• Si vous voulez sélectionner une durée inférieure à 5 minutes, alors
mettez le bouton sur 6 minutes puis ramenez-le sur la durée souhaitée.
• Vous pouvez éteindre manuellement l’appareil pendant l’utilisation en
mettant le bouton du minuteur en position arrêt.
Fonction four et plaques ensemble
• Sélectionnez la ou les plaques à utiliser (7) grâce au bouton de
contrôle.
• Sélectionnez la fonction du four (10) grâce au bouton de contrôle.
• Sélectionnez la température (9) grâce au bouton de contrôle.
• Sélectionnez la durée voulue grâce au minuteur (11), les témoins n°
8 et n° 12 s’allumeront. Vous pourrez commencer à cuisiner sur les
plaques et mettre vos plats dans le four.

18
Accessoires
• La plaque de cuisson peut servir à cuire du poulet, des hamburgers, du
gratin, des gâteaux et bien d’autres plats.
• La grille sert à divers plats secs comme le pain.
• Pour les plats qui perdent beaucoup de graisse, nous recommandons
d’utiliser la grille avec la plaque.
Attention : en sortant la grille ou la plaque de cuisson, ils peuvent être
brûlants ! Utilisez toujours la poignée fournie.
CONSEILS DE CUISINE
Votre four convient parfaitement pour préparer les plats les plus fabuleux.
Dans le tableau ci-dessous, vous trouverez des conseils sur la durée et la
température de cuisson, ainsi que sur les réglages du four pour plusieurs plats.
Les températures et les durées ci-dessous sont données à titre indicatif. Les
bons réglages du four varient entre les recettes, les plats et les ingrédients.
Mode 1. Mode 2. Mode 3.
Recette Quantité Temp. Durée de cuisson Mode
Pizza fraîche 400 g 200 °C 25 min. 3
Cake salé 600 g 200 °C 35 min. 3
Pizza congelée 450 g 220 °C 15 min. 3
Lasagnes 1500 g 200 °C 40 min. 3
Poulet entier 1500 g 220 °C 90 min. 3
Boules de viande 1000 g 200 °C 60 min. 3
Aubergine et fromage 1700 g 200 °C 30 min. 1
Viande grillée 1000 g 220 °C 20 min 1
Pommes de terre panées 1500 g 200 °C 40 min. 1
Tarte aux pommes 1000 g 190 °C 90 min. 3
Papillote de truite 800 g 190 °C 40 min. 2
Ajoutez environ 5 minutes à la durée de cuisson pour préchauer le four.
NETTOYAGE ET ENTRETIEN
• Avant de nettoyer l’appareil, débranchez-le et attendez qu'il ait
complètement refroidi.
• N’utilisez pas une brosse dure ni de matériel abrasif pour nettoyer
l’intérieur ou l’extérieur de l’appareil, an d’éviter de rayer la surface et
l’intérieur de l’appareil.
• N’utilisez pas de produit toxique ou abrasif tels que l’essence, de la
poudre à récurer ou du solvant. Un nettoyant pour cuisine classique ou
un liquide vaisselle avec de l'eau sura.
Nettoyage des plaques de cuisson
• Après cuisson, retirez les restes rapidement. Attention : ces pièces
peuvent être brûlantes.
• Nettoyez les plaques de cuisson avec du liquide vaisselle et un peu d’eau.
• Après nettoyage, chauez les plaques de cuisson pendant une courte
durée, sinon elles vont rouiller.
Nettoyage du four
• Si du jus de fruit coule sur la plaque de cuisson, ces tâches ne partiront
pas, même avec un nettoyant pour four. Ne remplissez pas le plat de
cuisson en cuisant un gâteau aux fruits moelleux.
• Si le four est légèrement sale, vous pouvez le nettoyer avec un peu de
liquide vaisselle, de l’eau chaude et quelques gouttes de vinaigre.
Mode d’emploi

19
FR
Four
• Le processus de cuisson peut prendre plus de temps si le four est sale
à l’intérieur.
Attention : laissez toujours le four et les plaques de cuisson refroidir
complètement avant de les nettoyer.
GARANTIE
• Cet appareil est couvert par une garantie de 12 mois à partir de la date
d’achat (réception).
• Les dommages causés par le non respect des instructions de ce manuel
rendront la garantie caduque, Tristar décline toute responsabilité en
cas de dommages indirects.
• Tristar décline toute responsabilité en cas de dégâts matériels ou de
dommages corporels causés par une utilisation inappropriée ou si les
instructions de sécurité n’ont pas été convenablement observées.
• Seuls le nettoyage et l’entretien mentionnés dans ce manuel sont
nécessaires à cet appareil.
• Conez toute réparation à un centre technique agréé.
• Cet appareil est réservé à un usage familial.
• Il est interdit de modier cet appareil.
• Si des problèmes surviennent pendant la période de 12 mois suivant
la date d’achat, qui est couverte par la garantie d’usine, vous pouvez
ramener l’appareil au point d’achat pour en demander un nouveau.
• Cette garantie ne couvre que les défauts matériels et les vices de
fabrication.
• Tristar décline toute responsabilité pour les dommages entraînés par
les cas suivants :
1. En cas de chute de l’appareil.
2. Si l’utilisateur ou un tiers a eectué des modications techniques sur
l’appareil.
3. En cas d’utilisation inappropriée de l’appareil.
4. En cas usure normale de l’appareil.
• Si l’appareil subi des réparations, la garantie initiale de 12 mois ne sera
pas prolongée, cela n’entraîne pas de droit à une nouvelle garantie.
Cette garantie n’est valable que sur le sol européen. Cette garantie
n’annule pas la directive européenne 1944/44CE.
• Adressez vos questions sur la conformité au « point d’achat » de votre
détaillant.
• Conservez toujours votre reçu, car sans celui-ci vous ne pourrez
réclamer aucune sorte de garantie.
• Si vous souhaitez faire une réclamation, veuillez retourner toute la
machine avec la facture.
• Si les accessoires sont endommagés, cela ne signie pas que toute
la machine sera remplacée gratuitement. Dans de tels cas, veuillez
contacter notre assistance téléphonique. Des pièces brisées en verre ou
en plastique sont toujours sujettes à des frais.
• Les défauts des consommables ou des pièces susceptibles de s’user,
ainsi que le nettoyage, l’entretien ou la réparation desdites pièces ne
sont pas couverts par la garantie et doivent donc être payés.
• La garantie est caduque en cas de modication non autorisée.
• Après l’expiration de la garantie, les réparations peuvent être
eectuées par un distributeur compétent ou par un réparateur contre
un paiement pour les frais occasionnés.
CARACTERISTIQUES TECHNIQUES
Modèle n° : OV-1422
Alimentation : 220-240V~ 50 Hz
Puissance consommée : 3100 W
Dimensions : 615 x 435 x 450 mm
Poids : 13,5 kg

20
ENVIRONNEMENT
Directives pour la protection de l’environnement
Cet appareil ne doit pas être jeté avec les déchets ménagers
à la n de sa durée de vie, il doit être remis à un centre de
recyclage pour les appareils électriques et électroniques. Ce symbole
sur l’appareil, le manuel d’utilisation et l’emballage attire votre attention
sur un point important. Les matériaux utilisés dans cet appareil sont
recyclables. En recyclant vos appareils, vous contribuez de manière
signicative à la protection de notre environnement. Renseignez-vous
auprès des autorités locales pour connaître les centres de collecte des
déchets.
Emballage
L’emballage est 100% recyclable, retournez-le séparément.
Produit
Cet appareil comprend un marquage selon la directive européenne
2002/96/EC relative aux Déchets d’Équipements Électriques et
Électroniques (DEEE). En assurant le bon traitement de vos déchets, vous
contribuerez à protéger l'environnement et la santé.
Déclaration de conformité CE
Cet appareil est conçu, fabriqué et commercialisé conformément aux objectifs
de sécurité de la Directive 2006/95/EC sur les appareils basse tension, aux
exigences de sécurité de la Directive 2004/108/EC relative à la compatibilité
électromagnétique et aux exigences de la Directive 93/68/EEC.
Conseils pour économiser de l’énergie
• N’utilisez que des casseroles ayant un diamètre égal à celui des plaques
de cuisson.
• N’utilisez que des casseroles et des poêles à fond plat.
• Prolongez la cuisson avec le couvercle sur la casserole si possible.
• Cuisinez les légumes, les pommes de terre, etc. avec un peu d’eau pour
que la cuisson soit aussi courte que possible.
• Cuisez vos plats à la bonne température.
Mode d’emploi
Other manuals for OV-1422
1
Table of contents
Languages:
Other TriStar Oven manuals

TriStar
TriStar OV-3615 User manual

TriStar
TriStar OV-1416 User manual

TriStar
TriStar OV-1422 User manual

TriStar
TriStar OV-1417 User manual

TriStar
TriStar OV-3630 User manual

TriStar
TriStar PD-8897 User manual

TriStar
TriStar OV-1412 User manual

TriStar
TriStar OV-2927 User manual

TriStar
TriStar OV-1418 User manual

TriStar
TriStar OV-1434 User manual