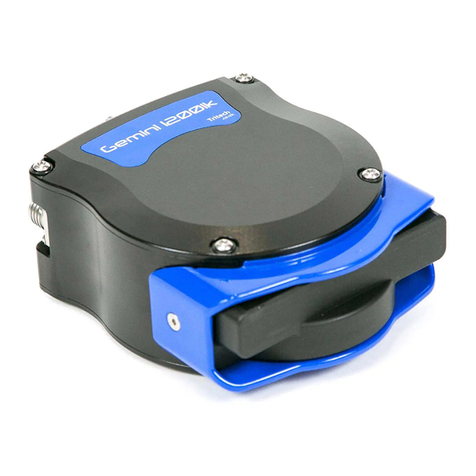
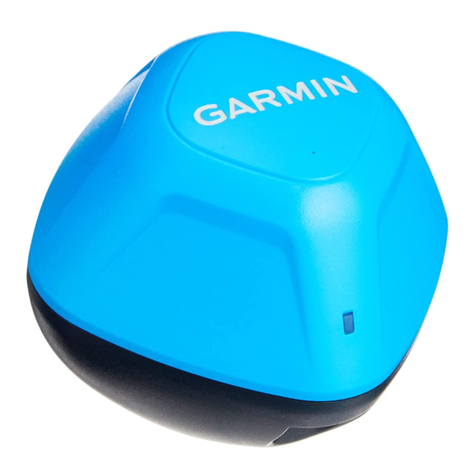
Tritech Gemini Profiler User manual

Gemini Profiler with Survey Software
0695-SOM-00009, Issue: 01 1© Tritech International Ltd.
Gemini Profiler with Survey Software
EIVA NaviScan
0695-SOM-00009, Issue: 01

Gemini Profiler with Survey Software
0695-SOM-00009, Issue: 01 2© Tritech International Ltd.
© Tritech International Ltd
The copyright in this document is the property of Tritech International Ltd. The document is supplied by Tritech International Ltd on the
understanding that it may not be copied, used, or disclosed to others except as authorised in writing by Tritech International Ltd.
Tritech International Ltd reserves the right to change, modify and update designs and specifications as part of their ongoing product development
programme.
All product names are trademarks of their respective companies.

Gemini Profiler with Survey Software
0695-SOM-00009, Issue: 01 3© Tritech International Ltd.
Table of Contents
Help & Support ........................................................................................................ 4
Warning Symbols ..................................................................................................... 5
1. Introduction .......................................................................................................... 6
2. Hardware Setup for EIVA NaviScan .................................................................. 7
3. Configure the Gemini Software .......................................................................... 8
4. Configure EIVA NaviScan .................................................................................. 9
4.1. The Gemini Profiler ................................................................................. 9
4.2. 3rd Party Sensors .................................................................................... 12
Glossary .................................................................................................................. 17

Gemini Profiler with Survey Software
0695-SOM-00009, Issue: 01 4© Tritech International Ltd.
Help & Support
First please read this manual thoroughly (particularly the Troubleshooting section,
if present). If a warranty is applicable, further details can be found in a Warranty
Statement at the end of the manual.
Tritech International Ltd can be contacted as follows:
Mail Tritech International Ltd
Peregrine Road
Westhill Business Park
Westhill, Aberdeenshire
AB32 6JL, UK
Telephone ++44(0)1224 744 111
Fax ++44(0)1224 741 771
Email [email protected]
Website www.tritech.co.uk
Prior to contacting Tritech International Ltd please ensure that the following is
available:
1. The Serial Numbers of the product and any Tritech International Ltd equipment
connected directly or indirectly to it.
2. Software or firmware revision numbers.
3. A clear fault description.
4. Details of any remedial action implemented.
Contamination
If the product has been used in a contaminated or hazardous environment
you must de-contaminate the product and report any hazards prior to
returning the unit for repair. Under no circumstances should a product be
returned that is contaminated with radioactive material.
The name of the organisation which purchased the system is held on record at
Tritech International Ltd and details of new software or hardware packages will be
announced at regular intervals. This manual may not detail every aspect of operation
and for the latest revision of the manual please refer to www.tritech.co.uk
Tritech International Ltd can only undertake to provide software support of systems
loaded with the software in accordance with the instructions given in this manual. It
is the customer's responsibility to ensure the compatibility of any other package they
choose to use.

Gemini Profiler with Survey Software
0695-SOM-00009, Issue: 01 5© Tritech International Ltd.
Warning Symbols
Throughout this manual the following symbols may be used where applicable to
denote any particular hazards or areas which should be given special attention:
Note
This symbol highlights anything which would be of particular interest to
the reader or provides extra information outside of the current topic.
Important
When this is shown there is potential to cause harm to the device
due to static discharge. The components should not be handled without
appropriate protection to prevent such a discharge occurring.
Caution
This highlights areas where extra care is needed to ensure that certain
delicate components are not damaged.
Warning
DANGER OF INJURY TO SELF OR OTHERS
Where this symbol is present there is a serious risk of injury or loss of life.
Care should be taken to follow the instructions correctly and also conduct
a separate Risk Assessment prior to commencing work.

Gemini Profiler with Survey Software
0695-SOM-00009, Issue: 01 6© Tritech International Ltd.
1. Introduction
In order to be used as a bathymetric survey system the Gemini Profiler will be used
in conjunction with additional software. Details are presented here for the EIVA
NaviScan software package.
The basic principle of operation is that the Gemini Software communicates with the
sonar head and then sends out data in a compatible format to the survey software.
Usually the survey software is installed on a separate computer and they are connected
via a network link.
Note
For more details of the software and after sales support for NaviScan
please contact your sales representative or visit the EIVA website at
www.eiva.com.

Gemini Profiler with Survey Software
0695-SOM-00009, Issue: 01 7© Tritech International Ltd.
2. Hardware Setup for EIVA NaviScan
It will be necessary to run the Gemini Profiler off one computer and the EIVA
NaviScan software on another computer. The two computers will be connected
through an Ethernet LAN.
The survey system should be connected as follows:
Figure 2.1. EIVA NaviScan Hardware Configuration

Gemini Profiler with Survey Software
0695-SOM-00009, Issue: 01 8© Tritech International Ltd.
3. Configure the Gemini Software
To set the Gemini software for use with a survey computer running EIVA NaviScan
it will be necessary to configure the data output over an Ethernet port. The computer
running the Gemini software will essentially be connected to two LANs, one for the
Gemini Profiler head(s) and the other for the connection to the survey software.
Note
The computer running the Gemini software and the computer running
the NaviScan software should be assigned IP addresses within the same
subnetwork.
The network settings for the connection to NaviScan are located in the section titled
Set up network data output in the Digitisation section of the
Advanced tab (as shown in Figure 3.1, “Gemini Software Digitisation Settings”).
The Format should be set to Tritech and the Hostname set to the IP address of
the computer which is running NaviScan.
Figure 3.1. Gemini Software Digitisation Settings
Once the network has been properly set it will be necessary to configure the Hub
Setup so that the data from auxiliary sensors is passed through correctly.
In the Hub Setup tab ensure that the time synchronisation is set to GPS and the
network data output is Framed.
Figure 3.2. Gemini Software Hub Setup

Gemini Profiler with Survey Software
0695-SOM-00009, Issue: 01 9© Tritech International Ltd.
4. Configure EIVA NaviScan
In order to set up the Gemini Profiler it will be necessary to launch the NaviScan
Config dialog. Each of the steps outlined below are performed with this dialog as
a starting point.
4.1. The Gemini Profiler
From NaviScan Config click on Equipment→Add sensor.
Figure 4.1. NaviScan Config
Next, select the Echosounder option.

Configure EIVA NaviScan Gemini Profiler with Survey Software
0695-SOM-00009, Issue: 01 10 © Tritech International Ltd.
Figure 4.2. Select Echosounder
Choose TritechMbe for a single head system or TritechMbeDual for a dual
head system and then click OK to proceed.
Figure 4.3. Choose Single or Dual Head

Configure EIVA NaviScan Gemini Profiler with Survey Software
0695-SOM-00009, Issue: 01 11 © Tritech International Ltd.
The Port settings window will now appear. Set the Port type to UDP/IP
Port and enter the IP Address and IP Port number of the Gemini computer that will be
used for the connection (as configured in Chapter 3, Configure the Gemini Software).
Note
The example in Figure 4.4, “Echosounder Port Settings” shows a
computer running the Gemini software that is configured to use an IP
address of 192.168.2.100 on Port 52905 (the default communication port).
Figure 4.4. Echosounder Port Settings
Click on Connect and the new sensor will be added into the NaviScan Sensor listing

Configure EIVA NaviScan Gemini Profiler with Survey Software
0695-SOM-00009, Issue: 01 12 © Tritech International Ltd.
Figure 4.5. NaviScan Sensor Listing
4.2. 3rd Party Sensors
To add in any 3rd party sensors to be used with the system such as GPS Position,
Motion Sensor or Gyro Compass launch the NaviScan Config dialog and select
Equipment→Add sensor.
Position Sensor over UDP
To add in a sensor that is connected via the UDP interface first select
Equipment→Add sensor:
Figure 4.6. Choose Position Sensor

Configure EIVA NaviScan Gemini Profiler with Survey Software
0695-SOM-00009, Issue: 01 13 © Tritech International Ltd.
In the Port settings dialog that is present select the UDP/IP Port option and
make sure the IP Address and Port match the computer running the Gemini Software
(in the example shown, the Gemini computer is on IP 192.168.2.50 using Port 52905).
Figure 4.7. Select and Configure UDP Settings
Note
For UDP connections, make sure the Network data output is set
to Framed in the Gemini Software as shown in Figure 3.2, “Gemini
Software Hub Setup”.
Other Sensors
Repeat the steps outlined for the Position Sensor over UDP to connect
all the other sensors required for the system (e.g., GPS, Motion Sensor
and Gyro).
GPS Time Over Serial Connection
If desired, it is possible to connect serial sensors directly to the computer running
NaviScan. An example is shown here using GPS Time data, but the steps can be
followed for any relevant serial device.
Select Equipment→Add sensor:

Configure EIVA NaviScan Gemini Profiler with Survey Software
0695-SOM-00009, Issue: 01 14 © Tritech International Ltd.
Figure 4.8. Choose GPS Time
Choose the GPS device that matches the equipment being used, e.g.,
Figure 4.9. Choose GPS Device Type
Then in the Port settings page configure the COM port connection for the
incoming GPS data strings and click OK when finished.

Configure EIVA NaviScan Gemini Profiler with Survey Software
0695-SOM-00009, Issue: 01 15 © Tritech International Ltd.
Figure 4.10. Select and Configure COM Port
The GPS Time sensor will now be included in the NaviScan Config sensor listing
as shown in Figure 4.11, “Naviscan Sensor Listing (showing GPS Time)”. Make sure
that PPS usage is set to CTS.
Figure 4.11. Naviscan Sensor Listing (showing GPS Time)

Gemini Profiler with Survey Software
0695-SOM-00009, Issue: 01 17 © Tritech International Ltd.
Glossary
Ethernet A family of computer networking technologies for local area
networks (LANs).
Gemini Unless specified this can refer to any of the multibeam sonars
in the Gemini range by Tritech International Ltd such as the
Gemini Imager (720id), Narrow Beam Imager or Gemini Profiler
(620pd).
Gemini Hub A rack mountable device capable of driving 2 Gemini sonars and
multiple serial sensors and outputting the data to a PC network.
GPS Global Positioning System.
LAN Local Area Network
PPS Pulse Per Second
RS232 Traditional name for a series of standards for serial binary data
control signals.
This manual suits for next models
1
Table of contents
Other Tritech Sonar manuals
Popular Sonar manuals by other brands
Kongsberg
Kongsberg Simrad SU90 Series manual
Lowrance
Lowrance ActiveTarget installation manual

Lowrance
Lowrance X-28 Installation and operation instructions

Klein
Klein 5000 SERIES Operation and maintenance manual

Interphase
Interphase PC/180 troubleshooting guide

Eagle
Eagle FishMark 500C Installation and operation instructions

