6
Trulife Pressurecare products are designed to assist with
the distribution of pressure across a larger surface area
and assist with supporting patient positioning. A Patient’s
predisposition to developing a pressure injury is based on
many factors including intrinsic factors such as general
health, age, weight and pre-existing medical conditions.
The risk of patients acquiring pressure related injuries
can be minimized by properly using the Trulife range of
products, along with good clinical practices. Appropriate
care and attention will ensure the long life and durability
of your Trulife Pressurecare products.
General use of your Trulife Pressurecare
products.
• In line with good clinical practice, assess the patient’s
condition and areas of potential risk prior to deciding
which pads and positioners to use.
• Please ensure the patient is correctly positioned in a
safe and secure manner at all times and ensure that no
excess pressure is applied to any one area. Pay particu-
lar attention to areas of high risk.
• A sheet may be placed over the product; however, this
will reduce its shear relieving properties. If a sheet is
used, it should fit loosely over the products and be un-
starched and free of wrinkles or folds.
• Products should be handled with care. Avoid placing
sharp instruments on the products as they will punc-
ture the film.
• Pads may be heated to body temperature in an oven,
pre-heated to 40ºC, or on a heated mattress.
Please follow instructions of the oven or mattress man-
ufacturer as appropriate. (Please refer to good clinical
practices)
• The products can be cooled to -12ºC without any ad-
verse effects.
• Avoid pulling table pads while patients are lying on
them, as excessive force will adversely affect them.
• Avoid pulling products along rough or sharp surfaces.
• Products should be checked for wear and tear. If dam-
age occurs (e.g. cut, crack or tear) the product should
be discarded.
• Products should be clean and dry before use.
• The Oasis + discs aid slip reduction, however they
should be used in conjunction with other anti-slip
measures. (Please refer to good clinical practices)
• The Oasis + range is 100% silicone. It is ‘oily to touch’
as the silicone releases oil, this is hypo-allergenic and
gives extra grip.
• Do not expose the product to a naked flame.
• Use correct lifting techniques when lifting heavy prod-
ucts.
• Please store all products flat.
• Fold large table pads in sections of approximately 35cm
when storing.
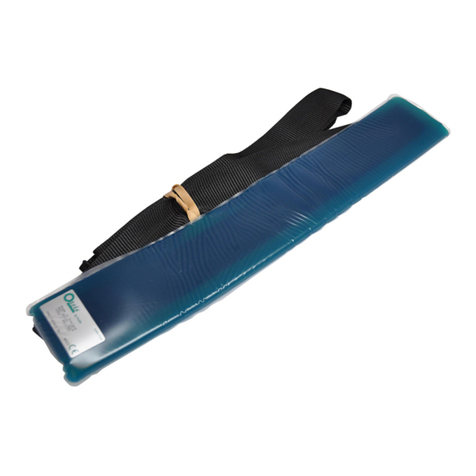
Oasis Extremity Belt (OA113) and Oasis Positioning
Belt (OA110)
This product is designed to assist in stabilizing the pa-
tient when positioned on the operating table, and is not
designed to support weight of the patient.
Prone Positioners EL903 and EL904/ELP914
• For Maximum protection, this product should be used
in conjunction with the prone headrest (EL141), and a
low chest roll or universal Positioner to elevate the feet
– See image 1
• Ensure the patient is positioned safely and securely.
• Please ensure straps are securely wrapped around the
side rails of the table (EL903)
ELTS40 Elite Trendelenburg System Set Up
1. To begin place the Anti-Slip Mat at the base of the table.
2. The Positioner should then be aligned on top of the
Anti-Slip Mat.
3. Fasten straps to the rail.
4. Place the headrest as close to the Positioner as possi-
ble; noting the directional arrows.
5. When transferring the patient, make sure the shoul-
ders are aligned with the indicators on the main body of
the Positioner. (Refer to image 2&3, page 4).
6. Place patients head onto headrest. Once the patient
is correctly positioned, please place the patient’s legs
into the leg stirrups.
7. Once the patient is correctly positioned, Shoulder Sup-
ports can be added. To attach Shoulder Supports, fit
the L-Bracket provided by sliding the L-Bracket into
the receiver, located at the front of the support.
8. The L-Bracket should then be placed into the Clamp.
9. Gently slide the Shoulder Supports forward underneath
the patient.
10. If there is not a continuous rail, or if fixing prevents
the attachment, move the system back to a position
that best accommodates the Shoulder Supports and
Clamps.
11. Manoeuvre the pockets over the Shoulder Supports.
12. Secure the system by tightening the Clamps on the
surgical rail. Arm retainers can be added by pushing
the flat side of the board under the mattress
13. Before surgery a tilt test should be performed, to
ensure the patient is secure. Please note our system
also works in lateral tilt.
For further information and images please refer to the
ELTS40 set-up guide included with your products or view
the set up video here https://vimeo.com/180749129
EL913: Oasis Elite Lateral Park Bench Positioner
Ensure the gel side is facing up. Place the product with
the longer side under the patient’s body, ensuring the
shorter side is draped over the side of the OR table as
per image 4.
Please ensure straps are securely wrapped around the
side rails of the table
This product should be used in conjunction with the Op-
erating Room Tables Positioning-specific accessories.
Please consult your table manufacturer for more infor-
mation.
The EL800: Oasis Elite Lateral Leg Positioner is also
suitable for this position. Ensure the patient is positioned
safely and securely.
Oasis Elite Table Pads (EL030 and EL031)
For best results store product with Gel side facing out-
wards.
Cleaning of your Trulife Pressurecare products.
• Products should be disinfected before and after use.
• Oasis, Oasis Elite, Azure and Oasis + products can be
easily cleaned using standard operating room cleaning
agents. Avoid soaking products in cleaning fluid.
Advice to ensure long life and best Service from your Trulife
Pressurecare products.


