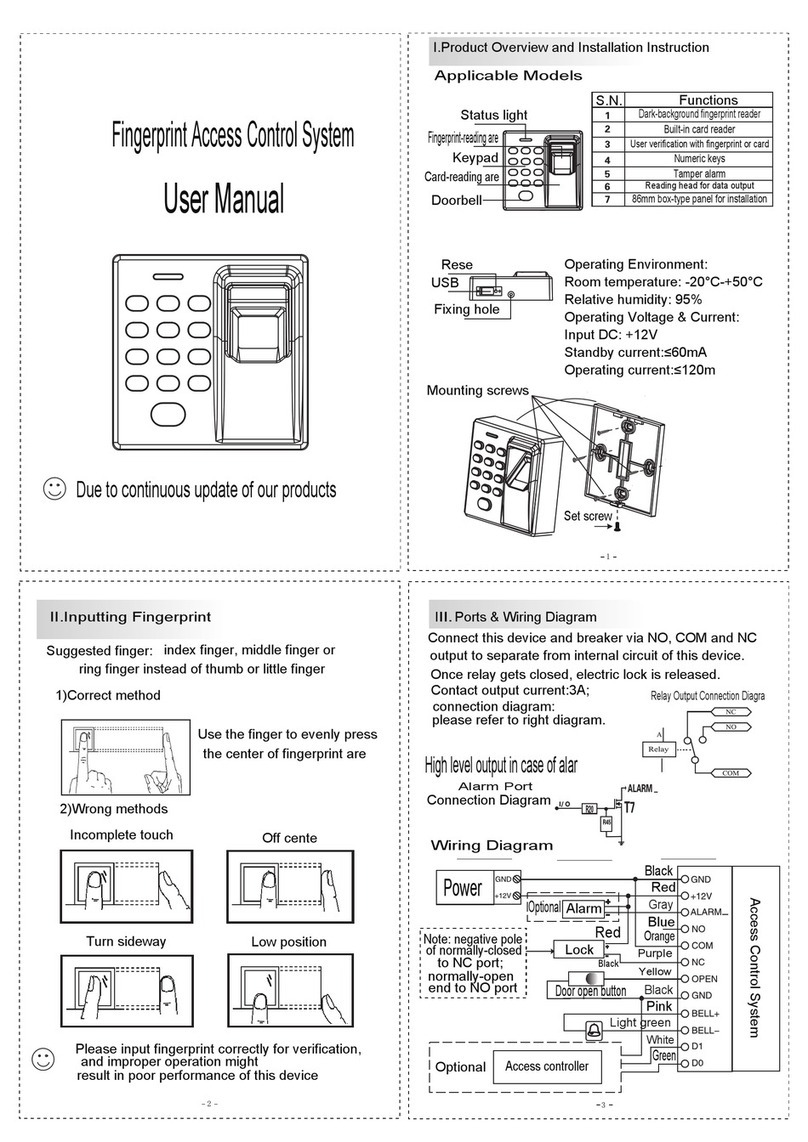
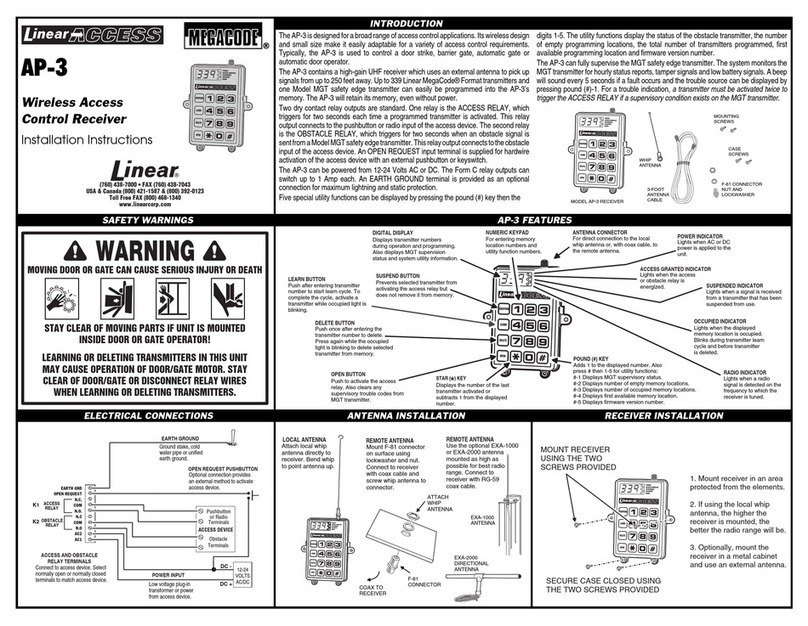
Trusted Systems UserGuard Manual

UserGuard Installation & Operating Instructions
Trusted Systems, Inc.
(410) 756-3300
(800) 414-4203
www.trustedsys.com
1
2
3
4
Forinstallation,pleaserefertocablingdiagramonpage2.
1. Feedoutputcabling(8,10and11)inthroughthecableentryportallocatedonthebackoftheIPSContainerand
connecttoUserGuardControlGateway(1).
2. Connect14ftCat6Ethernetcable(14)tobackofDesktopModule“KillBox”(2),feedintoIPSContainerthroughthe
cableentryportalandconnecttoUserGuardControlGateway(1).
3. Feed2x15ftUSBextensioncables(12)alreadyconnectedtobackofDesktopModule(2)intoIPSContainerthrough
thecableentryportalandconnecttoUSBPowerModule(4).
4. Connect1.5ftUSBcontrolcable(13)betweenUSBPowerModule(4)andIntelligentGateway(1).
5. Connectinputcables(5,6and7)betweensecurePC/switchandIntelligentGateway(1).
Note:DoNOTconnecttoPOEdevice.ThiswillpermanentlydamagetheUserGuardIntelligentGateway.
6. SecureUserGuardRackMountKitintoIPSContainerrackatdesiredlocation.
7. CarefullyconnectthemicroUSBcablefromUSBPowerModule(4)toTabletPC(3).SecuremicroUSBcableto
tabletusingprovidedstrainreliefclampandcabletieasshownincablingdiagramonpage2.
8. Plug5vpoweradaptersfromUSBPowerModule(4)into115Vpowersource.
9. PoweronSIPRPC/LaptopandUserGuardTabletPC(3).TheRed“OFF”buttonlocatedonfrontofUserGuardControl
Gateway(1)willlightup.
10. ManuallytestUserGuardbypressingBlue“ON”buttonlocatedonfrontofUserGuardControlGateway(1).Ensure
thatvideo,USBandEthernetconnectionsareactiveandvideooutputsettingsarecorrect.(Note:Laptopdisplay&
powersettingsmayneedtobeadjustedsoexternalmonitorremainsactivewhenlaptopisclosed.)
11. Oncedesktopcorrectlydisplaysandconnectionsareverified,press“KillButton”locatedonfrontofDesktop
Module(2).
12. NowactivatetheUserGuardsystemwithprovidedCACcardbyfollowingthe“OperatingInstructions”onpage3.
Oncesystemoperationhasbeenverified,removeCACtodeactivatethesystem.
13. Connect9vpoweradapterformotionsensortobackofDesktopModule(2)andpluginto115Vpowersource.
Switchto“ON”positionandverifymotionsensoroperation.
14. SecureallcablestowhitecabletiemountlocatedontheRackMountKit(4)usingsuppliedcableties.
YourUserGuards
y
stemis nowfull
y
o
p
erational.
ENCLOSEDITEMS:INSTALLATIONINSTRUCTIONS
IntelligentGateway
DesktopAccessControlModule
TabletPC(withstrainreliefclamp)
RackMountKit(withUSBPowerModule)
InputCables:
6ftUSBcableM‐M
6ftHDMIcableM‐M
7ftCat6Ethernetcable
OutputCables:
15ftUSBextensioncableM‐F
4‐portUSBHub(withpoweradapter)
15ftHDMIcableM‐M
14ftCat6Ethernetcable
ControlCables:
2x15ftUSBextensioncablesM‐F
1.5ftUSBcableM‐M
14ftCat6Ethernetcable
UserGuardCACCards(5total)
CableTies(10total)
1
2
3
4
5
6
7
8
9
10
11
12
13
14

USERGUARDINSTALLATION&OPERATINGINSTRUCTIONS
Trusted Systems, Inc.
(410) 756-3300
(800) 414-4203
www.trustedsys.com
Page|2
TabletStrainReliefClamp
PIN
PAD
TrustedSystems
IPSContainer
SIPR
PC/Laptop
USBINETHINHDMI
IN
HDMI
OUT
ETHOUTUSB
OUT
KILLBOXCNTRL
SIPRswitch
VOSIP
SECURE
VTC
1
2
3
4
5
6
7
8
9
10 11
12
13
14
8
10
11
12
14
SIPR
token
NoPOE
AUX
CNTRL
CAC
READER
5v 5v
9v
ETHERNET
toLaptop
Crypto
ETHERNETto
VOSIP/VTC

USERGUARDINSTALLATION&OPERATINGINSTRUCTIONS
Trusted Systems, Inc.
(410) 756-3300
(800) 414-4203
www.trustedsys.com
Page|3
1. PlaceUserGuardcardontoKillBox/AuthenticationUnitCACreader.
2. Usingthenumberpad,enterPINandpress“ENTER”.(DefaultPINis7747)
3. Waitapprox.5‐10secondsforsystemtoactivate.BlueLED“KillButton”locatedonfrontofKillBoxwilllightup
whenactive.
4. Whenfinishedwithsecuresession,removecardfromKillBox/AuthenticationUnitreaderandsystemwill
disconnect.BlueLED“KillButton”lightwillturnoffwhendisconnected.
5. Ifsystemautomaticallytimesoutduetolackofmotionorismanuallydisconnectedusingthe“KillButton”,user
mustremovecardandwaitapprox.10secondsforsystemtoresetbeforeattemptingtoreactivatethesystemusing
steps1to3above.
NOTE:ONCE3WRONGPINATTEMPTSHAVEBEENMADE,THESYSTEMWILLDISENROLLTHECARD.YOUR
ADMINISTRATORMUSTRE‐ENROLLTHECARDBYFOLLOWINGINSTRUCTIONSONPAGE4.
OPERATINGINSTRUCTIONS
1. IfwrongPINisenteredorsystemdoesnotactivate,removeCACcardfromreaderandwaitapprox.10seconds
beforetryingagain.Thiswillallowthesystemtoreset.
2. Themotionsensorautotimeoutfactorydefaultissetto30seconds.Ifsystemtimesoutintermittentlywhileuseris
present,increasethetimersettingusingthesmalladjustmentdiallocatedontherearoftheKillBox.
3. Ifsystemactivatesbutvideodoesnotdisplay,checkthatmonitorhasnotenteredpowersavemode.Many
DVI/HDMImonitorsenterpowersavemodewhennotactive.
TROUBLESHOOTING
Controller 0
1
PWR9V
MotionSensor
TimerSetting
MotionSensor
On/OffControl
(0=OFF,1=ON)
MotionSensor
MOTIONSENSOR:
TheMotionsensorhasarangeofapproximately6‐10ftwitha60degreearc.Donotplaceanythingbetweenthe
motionsensoranduser.Ifnotrequired,themotionsensorcanbedeactivatedbyplacingtheON/OFFswitchinthe
down(0)positionand/orunpluggingthe9Vpoweradapter.
KillButton
Trustedsys.com
800‐414‐4203
PINPad
12
12 CACReader

USERGUARDINSTALLATION&OPERATINGINSTRUCTIONS
Trusted Systems, Inc.
(410) 756-3300
(800) 414-4203
www.trustedsys.com
Page|4
Note:aUSBmousecanbepluggedinto
the“AUX”portlocatedonUSBPower
Module(4)toaidwithCAC&PIN
management.
Note:aUSBmousecanbepluggedinto
the“AUX”portlocatedonUSBPower
Module(4)toaidwithCAC&PIN
managementontheUserGuardTabletPC.
Upto5separateCAC/PINuserscanbe
enrolledonthesystemwithonecardfor
eachWindowsclientaccount.Toentera
newCAC&PINcredentialusetheTablet
touchscreentoselectaWindowsclient
(“Trusted1”through“Trusted5”)and
logonusingadministratorWindows
password(defaultpassword7777).Besure
theCACisnotonthereaderatthistime.
Onceyouareloggedonwithyourwindows
password,followtheinstructionsshownin
thefollowingscreenshots.
