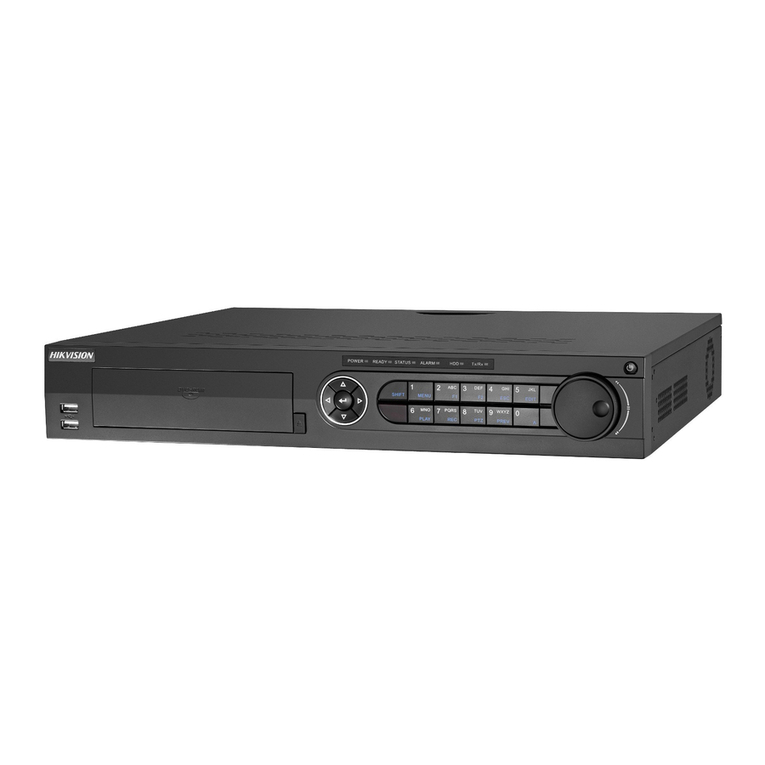
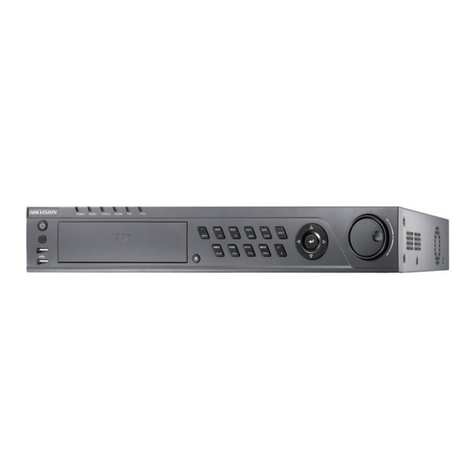
TruVision DVR 16 User manual

TruVision DVR 16 Quick Start
Guide
EN
TruVision DVR 16 Quick Start Guide
DE
TruVision DVR 16 Schnellstartanleitung
ES
Guía de inicio rápido de TruVision DVR 16
FI
TVR 16:n pikaopas
FR
Guide de démarrage rapide du TruVision DVR 16
IT
Guida di avvio rapido di TruVision DVR 16
NL
TruVision DVR 16 Snel aan de slag-gids
PL
Instrukcja szybkiego uruchamiania rejestratora TruVision
DVR 16
PT
Guia Rápido do TruVision DVR 16
RU
Краткое руководство по началу работы с TruVision DVR 16
TR
TruVision DVR 16 Hızlı Başlangıç Kılavuzu
P/N
1034-ALL •REV A • ISS 12NOV20

Copyright
©
2020 Carrier. All rights reserved. Specifications subject to change without
prior notice
.
This document may not be copied in whole o
r in part or otherwise reproduced
without prior
written consent from Carrier, except where specifically permitted
under US and international copyright law.
Trademarks and patents
The
TruVision name and logo are trademarks of Carrier
Other trade names used in this document m
ay be trademarks or registered
trademarks of the manufacturers or vendors of the respective products.
Certification
Product warnings and
disclaimers
THESE PRODUCTS ARE
INTENDED FOR SALE TO AND INSTALLATION BY
QUALIFIED PROFESSIONALS. CARRIE
R FIRE & SECURITY CANNOT
PROVIDE ANY ASSURANCE THAT ANY PERSON OR ENTITY BUYING ITS
PRODUCTS, INCLUDING ANY “AUTHORIZED DEALER” OR “AUTHORIZED
RESELLER”, IS PROPERLY TRAINED OR EXPERIE
NCED TO CORRECTLY
INSTALL FIRE AND SECURITY RELATED PRODUCTS.
For more i
nformation on warranty disclaimers and product safety information,
please check https://firesecurityproducts.com/policy/product
-warning/ or scan
the following code:

TruVision DVR 16 Quick Start Guide 1 EN
EN
TruVision DVR 16 Quick Start
Guide
Figure
1: Back panel connections
1. Connect up to 16 analog cameras to BNC-type
connectors (depends on the recorder model).
2. Connect one CCTV monitor (BNC-type
connector).
3. Connect to an optional USB device such as a
mouse, CD/DVD burner or HDD.
4. Connect to a HDTV. The HDMI connection
supports both digital audio and video.
5. Connect to a VGA monitor.
6. Connect four audio inputs to RCA connectors.
7. Connect to speakers for audio output.
8. Connect to a network.
9. Connect to a RS-485 device such as a PTZ
camera or a keypad.
10. Connect to the 12 VDC PSU (included).
11. Power switch (on/off).
12. Connect up to 16 alarm inputs.
13. Connect up to four alarm outputs.
14. Connect to a RS-232 device.
15. Connect to ground.
Default IP address: 192.168.1.82

EN 2 TruVision DVR 16 Quick Start Guide
Figure
2: Front panel controls (8-channel model shown)
For detailed information on all the button functions, please refer to the user manual.
Name Description
1
.Channel buttons Switch between different cameras in live, PTZ control or playback modes.
2
.Display buttons
Display: In multiview mode, toggle through the various multiviews (full, quad,
1+5, 1+7, 9 and 16).
In HDD information mode and user management mode delete a se
lected item. In
PTZ mode, delete a selected key point. In Log Search mode, display the details
of a log file in Log Search result.
Seq: In Live View mode, start/stop sequencing cameras on the current monitor.
3
.Menu and
Search buttons
Menu: Enter/exit the main menu.
Search: In live view, enter the advanced search menu.
4
.Status LEDs
Power: A steady green light indicates the recorder is working correctly. Red
indicates a fault.
Event Alarm: A flashing red light indicates that there is a sensor Alarm In or
another alarm such as motion or tampering. No light indicates that there is no
alarm.
HDD: HDD indicator blinks red when data is being read from or written to the
HDD. A steady red light indicates an HDD exception or error.
Tx/Rx: Steady green indicates a normal network connection. No light indicates
that it is not connected to a network.
Technical Alarm: A steady red light indicates that there is a technical alarm from
the recorder. No light indicates that there is no alarm.
5
.IR receiver Not used.
6
.Playback
buttons
Reverse: In live view mode, use to play back the earliest video. In playback mode,
playback a camera in the reverse direction.
Pause: In live view, freeze the last image of the live display for all active cameras
displayed. In playback mode, stop playback.
Play: In live view mode, play all day playback of the current camera (upper-left
video tile if in multiview mode). In playback mode, play back a camera in the
forward direction. In search mode, play back a selected video or view a
snapshot. In PTZ mode, do an auto tour.
Live: Switch to live view mode.
Replay: In playback mode, start playing the current file. Starts at the beginning of
the file.

TruVision DVR 16 Quick Start Guide 3 EN
Name Description
7
.PTZ buttons
Zoom +/-: In live view mode, playback mode, and PTZ control mode use this
button to zoom in and out. Also use them to navigate within menus.
Preset: In PTZ Control mode, press Preset and a numeric button to call the
specified preset.
Also use to edit holiday mode, video search mode, HDD selection mode, user
management mode, bookmark management, and bookmark search.
Tour: In PTZ Control mode, press Tour and a numeric button to call the specified
shadow tour.
Also use to scroll between calendar months and to navigate in a text field.
8
.Direction The DIRECTION buttons are used to navigate between different fields and items
in menus.
Enter button
The ENTER button is used to confirm selection in any of the menu modes.
9
.Archive button
Press once to enter quick archive mode. Press twice to start archiving. Indicator
blinks green when data is being written to backup device.
10
.USB Interface Universal Serial Bus (USB) port for additional devices such as a USB mouse,
CD/DVD burner, or USB Hard Disk Drive (HDD).
Figure
3: Live view toolbar
1. Pause: Freeze live image of the selected
camera.
2. Start Manual recording: Start/stop manual
recording.
3. Instant Playback: Play back the recorded
video from the last five minutes.
4. Audio On: Enable/disable audio output.
5. Snapshot: Capture a snapshot of a video
image.
6. PTZ Control: Enter PTZ control mode.
7. Digital Zoom: Enter digital zoom mode.
8. Image Settings: Modify the image lighting levels.
9. Auxiliary Focus: Automatically focus the
camera lens
10. Lens Initialization:Initialize the lens of a
camera with a motorized lens
11.Close: Close the toolbar.

EN 4 TruVision DVR 16 Quick Start Guide
Package contents
The TruVision DVR 16 (model TVR 16) is
shipped with the following items:
•AC power cords
•12 VDC PSU
•USB mouse
•DVR
•TruVision DVR 16 Quick Start Guide
You can download the software and the
following manuals from our web site:
•TruVision DVR 16 User Manual
•TruVision Recorder Operator Guide
Installation environment
Refer to the user manual for detailed
information, but observe these important
requirements:
•Place the unit in a secure location.
•Ensure that the unit is in a well-ventilated
area.
•Do not expose the unit to rain or moisture.
Quick install
Recommended steps for setting up the
recorder:
1. Connect all the devices required to the
back panel of the recorder. See Figure 1
on page 7.
Basic connections:
Connect the cameras to the BNC camera
inputs and monitor A to the BNC, VGA or
HDMI output. Connect the mouse to the
USB port in the front panel.
Optional connections:
All the other connections shown are
optional and depend upon installation
requirements.
2. Connect the power supply to the unit and
turn on the power.
3. Set up the unit with the required settings
using the setup Wizard.
First-time use
The recorder has an express installation
wizard that lets you easily configure basic
recorder settings when first used. It configures
all cameras simultaneously. The configuration
can then be customized as required.
By default, the setup wizard will start once the
recorder has loaded. The wizard walks you
through some of the more important settings
of your recorder. Select the preferred
language for the system and then enter the
administrator password. There is no default
password provided.
The wizard will then guide you through the
menus to set the time and date, network
configuration, HDD management, and
recording configuration.
When all the required changes have been
entered, click Finish to exit the wizard. The
recorder is now ready to use. Recording starts
automatically.
Operating the recorder
There are several ways to control the unit:
•Front panel control
•Mouse control
•Web browser control
•TVK-600 keypad
•TVK-800 keypad
•Software (TruVision Navigator,
TVRMobile)
Front panel
The buttons on the front panel control fewer
functions than using a mouse. See Figure 2
on page 2 for the locations of the controls.
USB mouse
The USB mouse provided with the recorder
operates all the functions of the recorder,
unlike the front panel, which has limited
functionality. The mouse lets you navigate and
make changes to settings in the user
interface. Use a USB 2.0 mouse in the front
panel.
Connect the mouse to the recorder by
plugging the mouse USB connector into the
USB port on the back or front panel. The

TruVision DVR 16 Quick Start Guide 5 EN
mouse operates immediately, and the pointer
should appear.
Web browser control
The recorder’s Web browser lets you view,
record, and play back videos as well as
manage all aspects of the recorder from any
PC with Internet access. The browser’s easy-
to-use controls give you quick access to all
recorder functions.
To access the unit, open a web browser and
enter the IP address assigned to the recorder
as a web address. In the logon screen, enter
the user ID and password.
The default values for recorder network
settings are:
• DHCP: Disabled by default.
• IP address - 192.168.1.82
• Subnet mask - 255.255.255.0
• Gateway address - 192.168.1.1
• Server Port: 8000
• HTTP Port: 80
• RTSP port: 554
Note: The following ports need to be
forwarded in the router in order to connect
properly: Server port and RTSP port.
Figure 4: Web browser interface
Live view mode
Live mode is the normal operating mode of the
unit where you watch live pictures from the
cameras.
Regularly used functions in live view can be
quickly accessed by clicking the left-button of
the mouse when its cursor is on the camera
image. The live view toolbar appears. See
Figure 3 on page 3for a description of the
functions available.
Configuring the recorder
The recorder has an icon-driven menu
structure that allows you to configure the unit’s
parameters. Each command icon displays a
screen that lets you edit a group of settings.
Most menus are available only to system
administrators.
Refer to the recorder user manual for detailed
information on configuring the unit.
To access the main menu from live view:
• Press the Menu button on the front
panel.
- Or -
• Right-click the mouse and select Menu
from the pop-up menu.
The main menu screen appears. Move the
mouse over a command icon in the menu
toolbar and click to select it.
Description of the command icons in the
menu toolbar:
Configures display settings.
Configures analog and IP camera
settings.
Configures standard network
settings.
Configures recording settings.
Configures alarm and event settings.

EN 6 TruVision DVR 16 Quick Start Guide
Configures system settings.
Configures storage management.
Configures user settings.
View system information.
Provides reference information to the
various toolbars and menus within
the interface.
Provides access to logout, reboot
and shutdown options.
Specifications
Power supply
: 12 VDC
Power consumption (without HDD):
TVR 1604c
TVR 1608
TVR 1616
≤ 10 W
≤ 20 W
≤ 25 W
Operating temperature:
-10 to +55 ºC
Relative humidity:
10 to 90%
Dimensions (W x H x D):
TVR 1604c 315 × 235 × 45 mm
TVR 1608
TVR 1616
380 × 311 × 48 mm
Weight
(without HDD):
TVR 1604c ≤1.26 kg
TVR 1608 ≤1.88 kg
TVR 1616 ≤2.1 kg
Contact information
EMEA: https://firesecurityproducts.com
Australian/New Zealand:
https://firesecurityproducts.com.au/
Product documentation
Please consult the following web link to
retrieve the electronic version of the product
documentation. The manuals are available in
several languages.

TruVision DVR 16 Schnellstartanleitung 7 DE
DE
TruVision DVR 16
Schnellstartanleitung
Abbildung
1: Anschlüsse an der Rückseite
1. Anschluss von bis zu 16 analogen Kameras
an BNC-Anschlüsse (abhängig vom
Rekorder-Modell).
2. Anschluss eines CCTV-
Videoüberwachungsmonitors (BNC-
Anschluss).
3. Anschluss an ein optionales USB-Gerät, z. B.
Maus, CD/DVD-Brenner oder Festplatte.
4. Anschluss an einen HDTV. Die HDMI-
Verbindung unterstützt digitales Audio und
Video.
5. Anschluss an einen VGA-Monitor.
6. Anschluss von bis zu vier Audioeingängen
über Cinchstecker.
7. Anschluss von bis zu vier Alarmausgängen.
8. Anschluss an ein Netzwerk.
9. Anschluss an ein RS-485-Gerät, wie z. B eine
PTZ-Kamera oder -Bedienpult.
10. Anschluss an ein Netzteil mit 12 V Gleichstrom
(enthalten).
11. Netzschalter (Ein/Aus).
12. Anschluss für bis zu 16 Alarmeingänge.
13. Lautsprecheranschluss für Audioausgang.
14. Anschluss an ein RS-232-Gerät.
15 Anschluss an die Erdung
Standard-IP-Adresse: 192.168.1.82

DE 8 TruVision DVR 16 Schnellstartanleitung
Abbildung
2: Frontbedienelemente (Abbildung für 8-kanaliges Gerät)
Detaillierte Informationen zu den
Tastenkombinationen finden Sie im Benutzerhandbuch.
Name Beschreibung
1
.Kanaltasten Schaltet in den Live-, PTZ-Steuerungs- und Wiedergabe-Modi zwischen
verschiedenen Kameras um.
2
.Anzeigetasten
Anzeige: Schaltet im Mehrfachbildmodus zwischen den verschiedenen
Mehrfachanzeigen um: Voll, Quad, 1+5, 1+7, 9 und 16.
Löscht im Modus "HDD Information" (Festplatteninfo) und im
Benutzerverwaltungsmodus ein ausgewähltes Element. Löscht im PTZ-Modus
einen ausgewählten Keypoint. Zeigt im Protokollsuchmodus die Details einer
Protokolldatei als Protokollsuchergebnis an.
Seq: Startet/stoppt im Liveanzeigemodus die Sequenzierung von Kameras auf
dem aktuellen Bildschirm.
3
.Tasten Menü
und Suchen
Menü: Das Hauptmenü aufrufen/beenden.
Suche: Geben Sie in der Livebildanzeige das erweiterte Suchmenü ein.
4
.Status-LEDs
Netz: Eine konstant leuchtende grüne LED zeigt an, dass der Rekorder
ordnungsgemäß funktioniert. Rot weist auf einen Fehler hin.
Ereignis-Alarm: Eine blinkende rote LED zeigt an, dass ein Sensor-
Alarmeingang oder ein anderer Alarm, z. B. ein Bewegungs- oder
Sabotagealarm vorliegt. Leuchtet keine LED, gibt es keinen Alarm.
Festplatte: Wenn der HDD-Anzeiger rot blinkt, werden auf der HDD Daten
gelesen oder geschrieben. Ein durchgehend rotes Licht zeigt eine Ausnahme
oder einen Fehler auf der Festplatte an.
Tx/Rx: Ein durchgehend grünes Licht zeigt eine normale Netzwerkverbindung
an. Leuchtet keine LED, ist das Gerät mit keinem Netzwerk verbunden.
Technischer Alarm: Ein dauerhaft rot leuchtendes Licht zeigt einen technischen
Alarm vom Rekorder an. Leuchtet keine LED, gibt es keinen Alarm.
5
.IR-Empfänger Nicht benutzt.
6
.Wiedergabe-
tasten
Rücklauf: Dient im Livebildanzeige-Modus zum Wiedergeben des ältesten
Videos. Im Wiedergabemodus wird eine Kamera damit rückwärts
wiedergegeben.
Pause: In der Livebildanzeige kann damit das letzte Bild der Liveanzeige bei
allen angezeigten, aktiven Kameras eingefroren werden. Im Wiedergabemodus
wird die Wiedergabe gestoppt.

TruVision DVR 16 Schnellstartanleitung 9 DE
Name Beschreibung
Wiedergabe: Gibt im Liveanzeigemodus die ganztägigen Aufnahmen der
aktuellen Kamera (im Mehrfachbildmodus die obere linke Videokachel) wieder.
Im Wiedergabemodus wird eine Kamera damit vorwärts wiedergegeben. Im
Suchmodus wird ein ausgewähltes Video wiedergegeben oder ein
Schnappschuss angezeigt. Im PTZ-Modus wird eine automatische Tour
durchgeführt.
Live: Zum Livebildanzeigemodus wechseln.
Wiedergabe: Im Wiedergabemodus erfolgt die Wiedergabe der aktuellen Datei.
Startet am Anfang der Datei.
7
.PTZ-Tasten
Zoom +/-: Im Live-, Wiedergabe- und PTZ-Steuerungsmodus können Sie diese
Tasten zum Vergrößern und Verkleinern des Bildes verwenden. Sie dienen
auch zur Navigation innerhalb der Menüs.
Preset: Drücken Sie im PTZ-Steuerungsmodus auf Preset und eine
Zahlentaste,
um das angegebene Preset aufzurufen.
Die Taste dient auch zur Bearbeitung des Feiertagsmodus, Videosuchmodus,
HDD-Auswahlmodus, Benutzerverwaltungsmodus, Markerverwaltung und
Markersuche.
Tour: Drücken Sie im PTZ-Steuerungsmodus auf Tour und eine Zahlentaste,
um die angegebene Tour aufzurufen.
Die Taste dient auch zum Scrollen zwischen den Kalendermonaten und zur
Navigation in einem Textfeld.
8
.Richtung Mit den Richtungstasten können Sie durch die verschiedenen Felder und
Elemente der Menüs navigieren.
ENTER-Taste
Mit der ENTER-Taste wird in jedem Menümodus eine Auswahl bestätigt.
9
.Taste
Archivieren
Einmal drücken, um den Schnellarchivierungsmodus aufzurufen. Zweimal
drücken, um die Archivierung zu starten. Die Anzeige blinkt grün, wenn Daten
auf ein Sicherungsgerät geschrieben werden.
10
.USB-Anschluss USB (Universal Serial Bus)-Anschluss für zusätzliche Geräte wie USB-Maus,
CD-/DVD-Brenner oder USB-Festplatte (HDD).
Abbildung
3: Liveanzeige-Symbolleiste
1. Pause: Livebild der ausgewählten Kamera
fixieren.
2. Manuelle Aufnahme starten: Manuelle
Aufnahme starten/beenden.
3. Sofortige Wiedergabe: Wiedergabe der
letzten fünf Minuten des aufgenommenen
Videos.
4. Audio ein: Aktivieren/Deaktivieren des
Audioausgangs.
5. Schnappschuss: Erstellt einen
Schnappschuss des Videobilds.
6. PTZ-Steuerung: Aufrufen des PTZ-
Steuerungsmodus.
7. Digitalzoom: Zugriff auf den Digitalzoom-Modus.
8. Bildeinstellungen: Bildhelligkeitsstufen ändern.
9. Fokusassistent: Stellt das Kameraobjektiv
automatisch scharf.
10. Objektivinitialisierung:Initialisiert das Objektiv
von Kameras mit motorbetriebenem Objektiv.
11. Schließen: Symbolleiste schließen.

DE 10 TruVision DVR 16 Schnellstartanleitung
Lieferumfang
Im Lieferumfang des TruVision DVR 16
(Modell TVR 16) sind folgende Teile enthalten:
•Netzkabel (Wechselspannung)
•Netzteil 12 V Gleichstrom
•USB-Maus
•DVR
•TruVision DVR 16-Schnellstartanleitung
Sie können die Software und die folgenden
Handbücher von unserer Website
herunterladen:
•TruVision DVR 16-Benutzerhandbuch
•TruVision-Rekorder – Bedieneranleitung
Installationsumgebung
Einzelheiten hierzu finden Sie im
Benutzerhandbuch. Beachten Sie jedoch
Folgendes:
•Stellen Sie das Gerät an einem
geschützten Ort auf.
•Stellen Sie sicher, dass das Gerät in einer
gut belüfteten Umgebung installiert wird.
•Achten Sie darauf, dass das Gerät vor
Regen oder Feuchtigkeit geschützt ist.
Schnellinstallation
Empfohlene Schritte für das Setup des
Rekorders:
1. Schließen Sie alle erforderlichen Geräte
an der Rückseite des Rekorders an. Siehe
Abb. 1 auf Seite 7.
Grundlegende Anschlüsse:
Schließen Sie die Kameras an die BNC-
Kameraeingänge und den Monitor A an
den BNC-, VGA- oder HDMI-Ausgang an.
Schließen Sie die Maus an den USB-Port
des Frontbedienelements an.
Optionale Anschlüsse:
Alle sonstigen dargestellten Verbindungen
sind optional und hängen von den
jeweiligen Installationsanforderungen ab.
2. Schließen Sie das Netzkabel an und
schalten Sie das Gerät ein.
3. Nehmen Sie die erforderlichen
Geräteeinstellungen mithilfe des Setup-
Assistenten vor.
Erstmalige Verwendung
Der Rekorder verfügt über einen Express-
Installationsassistenten, der bei der
erstmaligen Verwendung die Konfiguration
grundlegender Rekorder-Einstellungen
erleichtert. Er konfiguriert alle Kameras
simultan. Anschließend kann die Konfiguration
nach Bedarf angepasst werden.
Der Setup-Assistent wird standardmäßig
gestartet, sobald der Rekorder bereit ist. Der
Assistent führt Sie durch die wichtigsten
Einstellungen Ihres Rekorders. Wählen Sie
die gewünschte Sprache für das System aus
und geben Sie anschließend das
Administratorpasswort ein. Ein
Standardpasswort ist nicht festgelegt.
Der Assistent führt Sie anschließend durch die
Menüs, um Uhrzeit und Datum, Netzwerk-
konfiguration, Festplattenverwaltung sowie
Aufnahmekonfiguration festzulegen.
Wenn Sie alle erforderlichen Änderungen
vorgenommen haben, klicken Sie auf Fertig
stellen, um den Setup-Assistenten zu
beenden. Der Rekorder ist nun einsatzbereit.
Die Aufnahme wird automatisch gestartet.
Bedienung des Rekorders
Es bestehen verschiedene Möglichkeiten, das
Gerät zu steuern:
•Steuerung über das Frontbedienelement
•Steuerung über die Maus
•Steuerung über den Webbrowser
•TVK 600-Bedienpult
•TVK 800-Bedienpult
•Software (TruVision Navigator,
TVRMobile).
Frontbedienelement
Mit den Tasten des Frontbedienelements
können weniger Funktionen gesteuert werden
als mit der Maus. Die Position der

TruVision DVR 16 Schnellstartanleitung 11 DE
Steuerungen finden Sie in Abbildung 2 auf
Seite 8.
USB-Maus
Die mit dem Rekorder mitgelieferte USB-Maus
steuert alle Funktionen des Rekorders (im
Gegensatz zum Frontbedienelement, dessen
Funktionalität eingeschränkt ist). Verwenden
Sie die Maus zum Navigieren und nehmen Sie
in der Bedieneroberfläche so Änderungen an
den Einstellungen vor. Verwenden Sie für das
Frontbedienelement eine USB 2.0-Maus.
Schließen Sie die Maus an den Rekorder an,
indem Sie den Maus-USB-Anschluss in den
USB-Anschluss am Frontbedienelement
einstecken. Die Maus ist sofort betriebsbereit
und der Mauszeiger sollte angezeigt werden.
Steuerung über den Webbrowser
Mit dem Rekorder-Webbrowser können Sie
Videos anzeigen, aufzeichnen und
wiedergeben sowie alle Aspekte des
Rekorders von jedem PC mit Internetzugriff
verwalten. Die benutzerfreundlichen
Steuerelemente des Browsers ermöglichen
einen schnellen Zugriff auf alle
Rekorderfunktionen.
Um auf das Gerät zuzugreifen, öffnen Sie
einen Webbrowser und geben Sie die IP-
Adresse ein, die dem Rekorder als
Webadresse zugewiesen ist. Geben Sie im
Anmeldebildschirm die Benutzer-ID und das
Passwort ein.
Die Standardwerte für die
Netzwerkeinstellungen des Rekorders sind:
• DHCP: Standardmäßig deaktiviert.
• IP-Adresse – 192.168.1.82
• Subnetzmaske – 255.255.255.0
• Gateway-Adresse – 192.168.1.1
• Server-Port: 8000
• HTTP-Port: 80
• RTSP-Port: 554
Hinweis: Für die folgenden Ports muss eine
Weiterleitung im Router eingerichtet werden,
um eine ordnungsgemäße Verbindung zu
gewährleisten: Server-Port und RTSP-Port.
Abbildung 4: Webbrowser-Oberfläche
Livebildanzeige-Modus
Der Livemodus ist der normale Betriebsmodus
des Geräts, in dem Sie die
Liveschnappschüsse der Kameras sehen.
Regelmäßig verwendete Funktionen in der
Livebildanzeige können durch Klicken mit der
linken Maustaste schnell aufgerufen werden,
wenn sich der Cursor auf dem Kamerabild
befindet. Die Symbolleiste für die
Livebildanzeige wird angezeigt. Eine
Beschreibung der verfügbaren Funktionen
finden Sie in Abbildung 3 auf Seite 9.
Konfigurieren des Rekorders
Der Rekorder hat eine symbolgesteuerte
Menüstruktur, die Ihnen die Konfiguration der
Geräteparameter erlaubt. Jeder Befehl zeigt
einen Bildschirm an, in dem Sie eine Gruppe
von Einstellungen bearbeiten können. Die
meisten Menüs sind nur für
Systemadministratoren zugänglich.
Einzelheiten zur Konfiguration des Gerätes
finden Sie im Benutzerhandbuch des
Rekorders.
So greifen Sie in der Liveanzeige auf das
Hauptmenü zu:
• Drücken Sie die Taste Menü auf der
dem Frontbedien-element.
- Oder -
• Klicken Sie mit der rechten Maustaste und
wählen Sie Menü aus dem Popup-Menü.
Der Hauptmenü-Bildschirm wird angezeigt.
Bewegen Sie die Maus über ein
Befehlssymbol in der Menüsymbolleiste und
klicken Sie darauf, um es auszuwählen.

DE 12 TruVision DVR 16 Schnellstartanleitung
Beschreibung der Befehlssymbole in der
Menüsymbolleiste:
Konfiguriert Anzeige-einstellungen.
Konfiguriert die analogen und IP-
Kameraeinstellungen.
Konfiguriert Standard-
Netzwerkeinstellungen.
Konfiguriert Aufnahme-einstellungen.
Konfiguriert die Alarm- und
Ereigniseinstellungen.
Konfiguriert System-einstellungen.
Konfiguriert die Speicher-verwaltung.
Konfiguriert Benutzer-einstellungen.
Zeigt Systeminformationen an.
Enthält Informationen zu den
verschiedenen Symbolleisten und
Menüs der Benutzer-oberfläche.
Enthält Informationen zu Optionen für
Abmeldung, Neustart und
Herunterfahren.
Spezifikationen
Stromversorgung:
12 V Gleichstrom
Energieverbra
uch (ohne HDD):
TVR 1604c
TVR 1608
TVR 1616
≤ 10 W
≤ 20 W
≤ 25 W
Betriebstemperatur:
-10 bis +55 ºC
Relative
Luftfeuchtigkeit:
10 bis 90 %
Abmessungen (B × H × T):
TVR 1604c 315 × 235 × 45 mm
TVR 1608
TVR 1616
380 × 311 × 48 mm
Gewicht (ohne
HDD):
TVR 1604c ≤1,26 kg
TVR 1608 ≤1,88 kg
TVR 1616 ≤2,1 kg
Kontaktinformationen
EMEA: https://firesecurityproducts.com
Australian/New Zealand:
https://firesecurityproducts.com.au/
Produktdokumentation
Über den folgenden Weblink können Sie die
elektronische Version der
Produktdokumentation abrufen. Die
Handbücher sind in mehreren Sprachen
verfügbar.

TruVision DVR 16 Schnellstartanleitung 13 ES
ES
Guía de inicio rápido de TruVision
DVR 16
Figura
1: Conexiones del panel posterior
1. Conexión de hasta 16 cámaras analógicas a
conectores de tipo BCN (dependiendo del
modelo del grabador).
2. Conexión de un monitor CCTV (conector tipo
BNC).
3. Conexión a un dispositivo USB opcional como,
por ejemplo, un ratón, un grabador de
CD/DVD o una unidad de HDD.
4. Conexión a un dispositivo HDTV. La conexión
HDMI admite tanto audio como vídeo digital.
5. Conexión a un monitor VGA.
6. Conexión de cuatro entradas de audio a
conectores RCA.
7. Conexión de hasta cuatro salidas de alarma.8.
Conexión a una red.
9. Conexión a un dispositivo RS-485 como, por
ejemplo, una cámara PTZ o un teclado.
10. Conexión a FA de 12 V CC (incluido).
11. Interruptor de alimentación (encender/apagar).
12. Conexión de hasta 16 entradas de alarma.
13. Conexión a FA de 12 V CC (incluido).
14. Conexión a un dispositivo RS-232.
15. Conexión a tierra.
Dirección IP predeterminada: 192.168.1.82

ES 14 Guía de inicio rápido de TruVision DVR 16
Figura
2: Controles del panel frontal (imagen del modelo de 8 canales)
Para obtener información completa sobre todas las funciones d
e los botones, consulte el manual del usuario.
Nombre Descripción
1
.Botones de canal Permiten cambiar entre las diferentes cámaras en los modos de visualización en
directo, control PTZ o reproducción.
2
.Botones de
visualización
Visualización: en el modo de vista múltiple, permite cambiar entre las diversas
vistas múltiples (completa, cuádruple, 1+5, 1+7, 9 y 16).
En el modo de información de unidad de disco duro y el modo de administración
de usuarios, permite eliminar un elemento seleccionado. En el modo PTZ,
elimina un punto clave seleccionado. En el modo de búsqueda de registros,
muestra los detalles de un archivo de registro encontrado en los resultados de la
búsqueda de registros.
Secuencia: en el modo de visualización en directo, inicia/detiene la secuencia
de cámaras que se visualizan en el monitor actual.
3
.Botones Menú
y Búsqueda
Menú: accede/sale del menú principal.
Búsqueda: en el modo de visualización en directo, entra en el menú de
búsqueda avanzada.
4
.LED de estado
Alimentación: una luz verde fija indica que el grabador está funcionando
correctamente. Si se ilumina en rojo, indica la presencia de un fallo.
Alarma de evento: una luz roja parpadeante indica que se ha activado un sensor
de entrada de alarma u otra alarma como de movimiento o de tamper. Si no hay
luz, indica que no hay ninguna alarma.
HDD: el indicador de unidad de disco duro parpadea en rojo cuando se están
leyendo o escribiendo datos en la unidad de disco duro. La luz roja fija indica
que hay una excepción o un error en la unidad de disco duro.
Tx/Rx: cuando permanece fijo en verde indica una conexión de red normal. Si no
hay luz, indica que no hay conexión a ninguna red.
Alarma técnica: una luz roja fija indica que hay una alarma técnica proveniente
del grabador. Si no hay luz, indica que no hay ninguna alarma.
5
.Receptor de
infrarrojos
No utilizado.
6
.Botones de
reproducción
Atrás:
en el modo de visualización en directo, utilice este botón para reproducir el
vídeo anterior. En el modo de reproducción, reproduce una cámara en el sentido
contrario de reproducción.
Pausa: en la visualización en directo, congela la última imagen de la
reproducción en directo de todas las cámaras activas que se están visualizando.
En el modo de reproducción, detiene la reproducción.

Guía de inicio rápido de TruVision DVR 16 15 ES
Nombre Descripción
Reproducir: en la visualización en directo, reproduce la reproducción de todo el
día de la cámara actual (mosaico de vídeo superior izquierdo cuando se está en
el modo de vista múltiple). En el modo de reproducción, reproduce una cámara
en el sentido de la reproducción. En el modo de búsqueda, reproduce un vídeo
seleccionado o visualiza una fotografía. En el modo PTZ, realiza un tour
automático.
En directo: cambia al modo de visualización en directo.
Repetición: en el modo de reproducción, se inicia la reproducción del archivo
actual. Comienza al principio del archivo.
7
.Botones PTZ
Zoom +/-: en los modos de visualización en directo, reproducción y control PTZ,
utilice este botón para acercar y alejar el zoom. Úselos también para navegar
dentro de los menús.
Posición preestablecida: en el modo de control PTZ, pulse Posición
preestablecida y un botón numérico para solicitar una posición preestablecida
específica.
Úselo también para modificar el modo de vacaciones, el modo de búsqueda de
vídeo, el modo de selección de la unidad de disco duro, el modo de
administración de usuarios, la administración de marcadores y la búsqueda de
marcadores.
Tour: en el modo de control PTZ, pulse Tour y un botón numérico para solicitar
un tour de sombra específico.
Úselo también para desplazarse entre los meses del calendario y para navegar
en un campo de texto.
8
.Dirección Los botones de DIRECCIÓN se utilizan para desplazarse entre diferentes
campos y elementos en los menús.
Botón Intro
El botón INTRO se utiliza para confirmar la selección en cualquiera de los
modos de menú.
9
.Botón Archivo
Púlselo una vez para entrar en el modo de archivado rápido. Púlselo dos veces
para iniciar el archivado. El indicador parpadeará en verde cuando se esté
escribiendo o se estén realizando copias de seguridad de datos en el
dispositivo.
10
.Interfaz USB Puerto bus universal en serie (USB) para dispositivos adicionales como, por
ejemplo, un ratón USB, un grabador de CD/DVD o una unidad de disco duro
USB.

ES 16 Guía de inicio rápido de TruVision DVR 16
Figura 3: Barra de herramientas de visualización en directo
1. Pausa: permite congelar la imagen de la
cámara seleccionada.
2. Iniciar grabación manual: permite
iniciar/detener la grabación manual.
3. Reproducción instantánea: permite
reproducir los últimos cinco minutos del vídeo
grabado.
4. Audio activado: activa y desactiva la salida
de audio.
5. Fotografía: permite capturar una fotografía
del vídeo.
6. Control PTZ: accede al modo de control PTZ.
7. Zoom digital: permite acceder al zoom digital.
8. Configuración de imagen: permite modificar el
nivel de iluminación de la imagen.
9. Enfoque auxiliar: enfoca automáticamente la
óptica de la cámara.
10. Inicialización de lentes:inicializa la óptica de
una cámara con óptica motorizada.
11. Cerrar: permite cerrar la barra de herramientas.
Contenido del paquete
El grabador TruVision DVR 16 (modelo
TVR 16) se suministra con los siguientes
elementos:
•Cables de alimentación de CA
•FA de 12 VCC
•Ratón USB
•DVR
•Guía de inicio rápido de TruVision DVR 16
Puede descargar el software y los siguientes
manuales de nuestro sitio web:
•Manual del usuario del grabador TruVision
DVR 16
•Guía del operador del grabador TruVision
Entorno de instalación
Consulte el manual del usuario para obtener
información detallada; tenga en cuenta
además estos requisitos importantes:
•Coloque la unidad en un lugar seguro.
•Asegúrese de que la unidad esté en una
zona bien ventilada.
•No exponga la unidad a la lluvia ni a la
humedad.
Instalación rápida
Pasos recomendados para configurar el
grabador:
1. Conecte todos los dispositivos necesarios
al panel posterior del grabador. Consulte
la figura 1 en la página 13.
Conexiones básicas:
Conecte las cámaras a las entradas de
cámara BNC y el monitor A a la salida
BNC, VGA o HDMI. Conecte el ratón al
puerto USB del panel frontal.
Conexiones opcionales:
El resto de conexiones mostradas son
opcionales, y su uso depende de los
requisitos de instalación.
2. Conecte la fuente de alimentación a la
unidad y encienda la unidad.
3. Configure la unidad con los parámetros
necesarios, usando el asistente de
configuración.

Guía de inicio rápido de TruVision DVR 16 17 ES
Primer uso
El grabador cuenta con un asistente de
instalación rápida que le permite establecer
con facilidad la configuración básica de este
cuando se utiliza por primera vez. Configura
todas las cámaras de forma simultánea. A
continuación, la configuración se puede
personalizar según corresponda.
El asistente de configuración se iniciará de
forma predeterminada una vez que se haya
cargado el grabador. Le guiará por algunos
de los parámetros de configuración más
importantes de su grabador. Seleccione el
idioma que prefiera para el sistema, e
introduzca la contraseña de administrador. No
se proporciona una contraseña
predeterminada.
Después, el asistente le guiará por los menús
para establecer la hora y fecha, la
configuración de red, la administración de
HDD y la configuración de grabación.
Una vez introducidos todos los cambios
necesarios, haga clic en Finalizar para salir
del asistente de configuración. El grabador ya
puede utilizarse. La grabación se iniciará de
manera automática.
Funcionamiento del grabador
Existen varias formas de controlar la unidad:
•Panel de control frontal
•Control mediante ratón
•Control mediante explorador web
•Teclado TVK-600
•Teclado TVK-800
•Software (TruVision Navigator,
TVRMobile).
Panel frontal
Los botones del panel frontal controlan menos
funciones que si utilizara un ratón. Para
conocer la localización de los controles,
consulte la figura 2 en la página 14.
Ratón USB
El ratón USB que se suministra con el
grabador controla todas las funciones del
grabador, a diferencia del panel frontal, que
cuenta con una funcionalidad limitada. El
ratón USB le permite navegar y hacer
cambios en las opciones de la interfaz de
usuario. Utilice un ratón USB 2.0 en el panel
frontal.
Conecte el ratón al grabador insertando el
conector USB del ratón en el puerto USB
situado en el panel frontal o trasero. El ratón
se puede utilizar de forma inmediata y el
puntero debe aparecer en pantalla.
Control mediante explorador web
El explorador web del grabador le permite ver,
grabar y reproducir vídeos, así como
administrar todos los aspectos del grabador
desde cualquier PC con acceso a Internet.
Los sencillos controles del explorador le
ofrecen un rápido acceso a todas las
funciones del grabador.
Para acceder a la unidad, abra el explorador
web e introduzca la dirección IP asignada el
grabador, como si fuese una dirección web.
En la pantalla de registro, introduzca el ID de
usuario y la contraseña.
Los valores predeterminados de la
configuración de red del grabador son los
siguientes:
• DHCP: Los siguientes parámetros están
desactivados por defecto:
• Dirección IP: 192.168.1.82
• Máscara de subred: 255.255.255.0
• Dirección de puerta de enlace:
192.168.1.1
• Puerto del servidor: 8000
• Puerto HTTP: 80
• Puerto RTSP: 554
Nota: es necesario direccionar los siguientes
puertos en el router para una conexión
correcta: Puerto del servidor y puerto RTSP.
Figura 4: Interfaz del navegador web

ES 18 Guía de inicio rápido de TruVision DVR 16
Modo de visualización en directo
El modo de visualización en directo es el
modo de funcionamiento normal de la unidad,
mediante el que se visualizan imágenes en
vivo de las cámaras.
Puede acceder de manera rápida a todas
funciones que se usan regularmente en el
modo de visualización en directo colocando el
cursor sobre la imagen de cámara y pulsando
el botón izquierdo del ratón. Aparecerá la
barra de herramientas de visualización en
directo. Para obtener una descripción del
teclado, consulte la figura 3 en la página 16.
Configuración del grabador
El grabador tiene una estructura de menús
organizada por iconos que le permite
configurar sus parámetros. Cada icono de
comando muestra una pantalla que le permite
editar un grupo de valores. La mayoría de los
menús solo están disponibles para los
administradores del sistema.
Para obtener información detallada sobre
la configuración del grabador, consulte el
Manual del usuario.
Para acceder al menú principal del modo
de visualización en directo:
• Pulse Menú en el panel frontal.
O bien
• Haga clic con el botón derecho del ratón
y seleccione la opción Menú del menú
emergente.
Aparecerá la pantalla del menú principal.
Sitúe el ratón sobre uno de los iconos de
comando de la barra de herramientas del
menú y haga clic para seleccionarlo.
Descripción de los iconos de comando de
la barra de herramientas del menú:
Permite configurar los parámetros de
la pantalla.
Permite configurar los parámetros de
la cámara analógica o IP.
Permite configurar paráme
tros de red
estándar.
Permite configurar los parámetros de
grabación.
Permite configurar las alarmas
y eventos.
Permite configurar los parámetros del
sistema.
Permite configurar la administración
del almacenamiento.
Permite configurar los p
arámetros de
usuario.
Permite ver la información
del sistema.
Proporciona información de
referencia sobre las diversas barras
de herramientas y menús de la
interfaz.
Proporciona acceso a las opciones
de cierre de sesión, reinicio y
apagado.
Especificaciones
Fuente de
alimentación:
12 V CC
Consumo de
energía (sin HDD):
TVR 1604c
TVR 1608
TVR 1616
≤ 10 W
≤ 20 W
≤ 25 W
Temperatura de
funcionamiento:
De -10 a +55 ºC
Table of contents
Languages:
Other TruVision DVR manuals
