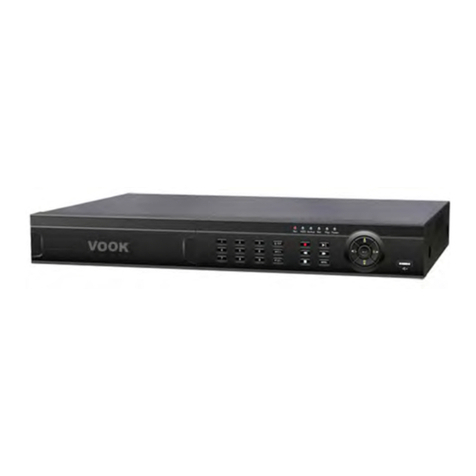
TruVision TVN 12 User manual

TVN 12 User Manual
P/N 1065-EN • REV A • ISS 17MAY22

Copyright
© 2022 Carrier. All rights reserved. Specifications subject to change
without prior notice.
This document may not be copied in whole or in part or otherwise
reproduced without prior written consent from Carrier, except where
specifically permitted under US and international copyright law.
Trademarks and
patents
TruVision and associated names and logos are a product brand of
Aritech, a part of Carrier.
Other trade names used in this document may be trademarks or
registered trademarks of the manufacturers or vendors of the
respective products.
Manufacturer
PLACED ON THE MARKET BY:
Carrier Fire & Security Americas Corporation, Inc.
13995 Pasteur Blvd, Palm Beach Gardens, FL 33418, USA
Authorized EU manufacturing representative:
Carrier Fire & Security B.V.,
Kelvinstraat 7, 6003 DH Weert, Netherlands.
Product warnings and
disclaimers
THESE PRODUCTS ARE INTENDED FOR SALE TO AND
INSTALLATION BY QUALIFIED PROFESSIONALS.
CARRIER FIRE & SECURITY B.V. CANNOT PROVIDE ANY
ASSURANCE THAT ANY PERSON OR ENTITY BUYING ITS
PRODUCTS, INCLUDING ANY “AUTHORIZED DEALER” OR
“AUTHORIZED RESELLER”, IS PROPERLY TRAINED OR
EXPERIENCED TO CORRECTLY INSTALL FIRE AND SECURITY
RELATED PRODUCTS.
For more information on warranty disclaimers and product safety
information, please check https://firesecurityproducts.com/policy/
product-warning/ or scan the QR code.
FCC conditions
This device complies with Part 15 of the FCC Rules. Operation is
subject to the following two conditions:
(1) This device may not cause harmful interference.
(2) This Device must accept any interference received, including
interference that may cause undesired operation.
FCC compliance
Class A: This equipment has been tested and found to comply with
the limits for a Class A digital device, pursuant to part 15 of the FCC
Rules. These limits are designed to provide reasonable protection
against harmful interference when the equipment is operated in a
commercial environment. This equipment generates, uses, and can
radiate radio frequency energy and, if not installed and used in
accordance with the instruction manual, may cause harmful
interference to radio communications. Operation of this equipment in
a residential area is likely to cause harmful interference in which
case the user will be required to correct the interference at his own
expense.
ACMA compliance
Notice! This is a Class A product. In a domestic environment this
product may cause radio interference in which case the user may be
required to take adequate measures.
Canada
This Class A digital apparatus complies with Canadian ICES-003.
Cet appareil numérique de la classe A est conforme à la norme
NMB-003 du Canada.

cUL
Safety Instructions:
Improper use or replacement of the battery may result in explosion
hazard. Replace with the same or equivalent type only. Dispose of
used batteries in conformance with the local codes.
Instructions de sécurité:
L’utilisation ou le remplacement inadéquats de la pile peuvent
entraîner un risque d’explosion. Remplacez-la par le même type ou
l’équivalent du même type seulement. Jetez les piles usagées
conformément aux directives fournies par le fabricant de la pile.
Compliance
European Union
directives
This product and - if applicable - the supplied accessories too are
marked with "CE" and comply therefore with the applicable
harmonized European standards listed under the EMC Directive
2014/30/EU, the RoHS Directive 2011/65/EU.
2012/19/EU (WEEE Directive): Products marked with this symbol
cannot be disposed of as unsorted municipal waste in the European
Union. For proper recycling, return this product to your local supplier
upon the purchase of equivalent new equipment, or dispose of it at
designated collection points. For more information see:
recyclethis.info.
2006/66/EC (Battery Directive): This product contains a battery that
cannot be disposed of as unsorted municipal waste in the European
Union. See the product documentation for specific battery
information. The battery is marked with this symbol, which may
include lettering to indicate cadmium (Cd), lead (Pb), or
mercury (Hg). For proper recycling, return the battery to your supplier
or to a designated collection point. For more information see:
recyclethis.info.
Contact information
EMEA: https://firesecurityproducts.com
Australian/New Zealand: https://firesecurityproducts.com.au/
Product
documentation
Please consult the following web link to retrieve the electronic
version of the product documentation. The manuals are available in
several languages.


TVN 12 User Manual 1
Content
Important information 4
Chapter 1 Physical installation 7
Installation environment 7
Unpacking the recorder and its accessories 7
Back panel 8
PoE ports 9
Monitor connections 10
Rack mounting 10
Front panel 10
Contact information and manuals/firmware 10
Chapter 2 Getting started 12
Powering up the recorder 13
Activate the admin password 13
Access via a web browser 14
Access via the OSD 15
Change the recorder’s language 18
Chapter 3 Browser configuration 19
Chapter 4 System management 22
System settings 22
Maintenance 29
Security 36
Chapter 5 Camera management 39
Manage IP cameras in web mode 40
Manage IP cameras in OSD mode 42
PoE settings 44
Manage camera passwords 45
Add an IP camera 47
Change camera settings 50
Restrict viewing cameras on a VGA/HDMI monitor 51
Chapter 6 User management 52
Manage users in web mode 52
Manage users in OSD mode 56
Chapter 7 Network settings 58
TCP/IP settings 58
DDNS settings 60
PPPoE settings 62
Email settings 62
HTTPS settings 64

2 TVN 12 User Manual
Network protocols and plug-in applications 66
Alarm host setup 66
Multicast IP address 67
Open the camera web page from within the recorder web page 67
Detect if a camera is already connected to another device 68
Connect the recorder to UltraSync 68
Add the recorder to TVRMobile 69
Chapter 8 Video and audio configuration 71
Audio 71
Dual VCA 71
V-stream encoding 72
Chapter 9 Image settings 73
Display settings 73
Camera OSD 74
Day/night switch 76
Privacy mask 76
Chapter 10 Event setup 78
Motion detection 78
Camera tamper 83
Video loss detection 86
Set up alarm inputs 87
Set up alarm outputs 89
Manually trigger an alarm output 91
Exception notification 91
Intrusion integration alarm reporting 93
Disable Actions 97
Smart event 100
Behavior analysis 102
Face capture 108
Chapter 11 Recording 111
Recording schedule 111
Camera encoding settings 115
Holiday recording schedules 117
Chapter 12 Storage management 119
Storage status information 119
Activate a new HDD 120
Initialize an HDD 120
Add a network storage system 120
S.M.A.R.T. settings 122
Bad sector detection 123
HDD sleep mode 124
Overwrite an HDD 125
Record file duration 125

TVN 12 User Manual 3
Storage mode 125
Group HDDs 126
Redundancy in group mode 127
Alarm and snapshot storage 127
Repair HDD database 128
Chapter 13 Live view in web mode 129
Description of live view 129
PTZ control 130
Preset and preset tours 131
Chapter 14 Live view in OSD mode 133
Live view control toolbar 134
Live view mouse menu 134
Live view general setup menu 135
Single and multiview display modes 136
Sequencing cameras 137
Digital zoom 137
PTZ control 138
Chapter 15 Playback in web mode 141
Play back recordings 143
Synchronous playback 144
Smart search 144
Create snapshots 145
Create video clips 145
Digital zoom in playback 146
Chapter 16 Playback in OSD mode 147
Playback modes 149
Smart search 150
Thumbnail images to preview a recording 152
Instant playback 152
Create bookmarks 152
Create video clips 153
Digital zoom in playback 153
Play back recordings with people and vehicles 153
Chapter 17 Search recordings 155
Search recordings in web mode 155
Search recordings in OSD mode 155
Appendix A Specifications 159
Appendix B Port forwarding info 162
Seeking further assistance 162
Appendix C Overview of OSD and web functions 164

4 TVN 12 User Manual
Important information
Limitation of liability
To the maximum extent permitted by applicable law, in no event will Carrier be liable for
any lost profits or business opportunities, loss of use, business interruption, loss of
data, or any other indirect, special, incidental, or consequential damages under any
theory of liability, whether based in contract, tort, negligence, product liability, or
otherwise. Because some jurisdictions do not allow the exclusion or limitation of liability
for consequential or incidental damages the preceding limitation may not apply to you.
In any event the total liability of Carrier shall not exceed the purchase price of the
product. The foregoing limitation will apply to the maximum extent permitted by
applicable law, regardless of whether Carrier has been advised of the possibility of
such damages and regardless of whether any remedy fails of its essential purpose.
Installation in accordance with this manual, applicable codes, and the instructions of the
authority having jurisdiction is mandatory.
While every precaution has been taken during the preparation of this manual to ensure
the accuracy of its contents, Carrier assumes no responsibility for errors or omissions.
Product warnings
YOU UNDERSTAND THAT A PROPERLY INSTALLED AND MAINTAINED
ALARM/SECURITY SYSTEM MAY ONLY REDUCE THE RISK OF EVENTS SUCH AS
BURGLARY, ROBBERY, FIRE, OR SIMILAR EVENTS WITHOUT WARNING, BUT IT
IS NOT INSURANCE OR A GUARANTEE THAT SUCH EVENTS WILL NOT OCCUR
OR THAT THERE WILL BE NO DEATH, PERSONAL INJURY, AND/OR PROPERTY
DAMAGE AS A RESULT.
THE ABILITY OF CARRIER PRODUCTS, SOFTWARE OR SERVICES TO WORK
PROPERLY DEPENDS ON A NUMBER OF PRODUCTS AND SERVICES MADE
AVAILABLE BY THIRD PARTIES OVER WHICH CARRIER HAS NO CONTROL AND
FOR WHICH CARRIER SHALL NOT BE RESPONSIBLE INCLUDING, BUT NOT
LIMITED TO, INTERNET, CELLULAR AND LANDLINE CONNECTIVITY; MOBILE
DEVICE AND OPERATING SYSTEM COMPATIBILITY; MONITORING SERVICES;
ELECTROMAGNETIC OR OTHER INTERFERENCE, AND PROPER INSTALLATION
AND MAINTENANCE OF AUTHORIZED PRODUCTS (INCLUDING ALARM OR
OTHER CONTROL PANEL AND SENSORS).
ANY PRODUCT, SOFTWARE, SERVICE OR OTHER OFFERING MANUFACTURED,
SOLD OR LICENSED BY CARRIER, MAY BE HACKED, COMPROMISED AND/OR
CIRCUMVENTED AND CARRIER MAKES NO REPRESENTATION, WARRANTY,
COVENANT OR PROMISE THAT ITS PRODUCTS (INCLUDING SECURITY
PRODUCTS), SOFTWARE, SERVICES OR OTHER OFFERINGS WILL NOT BE
HACKED, COMPROMISED AND/OR CIRCUMVENTED.
CARRIER DOES NOT ENCRYPT COMMUNICATIONS BETWEEN ITS ALARM OR
OTHER CONTROL PANELS AND THEIR WIRELESS OUTPUTS/INPUTS INCLUDING

TVN 12 User Manual 5
BUT NOT LIMITED TO, SENSORS OR DETECTORS UNLESS REQUIRED BY
APPLICABLE LAW. AS A RESULT THESE COMMUNICATIONS MAY BE
INTERCEPTED AND COULD BE USED TO CIRCUMVENT YOUR ALARM/SECURITY
SYSTEM.
THE EQUIPMENT SHOULD ONLY BE OPERATED WITH AN APPROVED POWER
ADAPTER WITH INSULATED LIVE PINS.
DO NOT CONNECT TO A RECEPTACLE CONTROLLED BY A SWITCH.
THIS UNIT INCLUDES AN ALARM VERIFICATION FEATURE THAT WILL RESULT
IN A DELAY OF THE SYSTEM ALARM SIGNAL FROM THE INDICATED CIRCUITS.
THE TOTAL DELAY (CONTROL UNIT PLUS SMOKE DETECTORS) SHALL NOT
EXCEED 60 SECONDS. NO OTHER SMOKE DETECTOR SHALL BE CONNECTED
TO THESE CIRCUITS UNLESS APPROVED BY THE LOCAL AUTHORITY HAVING
JURISDICTION.
WARNING! The equipment should only be operated with an approved power adapter
with insulated live pins.
Caution: Risk of explosion if battery is replaced by an incorrect type. Dispose of
batteries according to the instructions. Contact your supplier for replacement batteries.
Warranty disclaimers
CARRIER HEREBY DISCLAIMS ALL WARRANTIES AND REPRESENTATIONS,
WHETHER EXPRESS, IMPLIED, STATUTORY OR OTHERWISE, INCLUDING ANY
IMPLIED WARRANTIES, THE WARRANTIES OF MERCHANTABILITY OR FITNESS
FOR A PARTICULAR PURPOSE.
(USA only) SOME STATES DO NOT ALLOW THE EXCLUSION OF IMPLIED
WARRANTIES, SO THE ABOVE EXCLUSION MAY NOT APPLY TO YOU. YOU MAY
ALSO HAVE OTHER LEGAL RIGHTS THAT VARY FROM STATE TO STATE.
CARRIER DOES NOT MAKE ANY CLAIMS OR WARRANTIES TO YOU OF ANY
KIND REGARDING ANY PRODUCT, SOFTWARE OR SERVICE’S POTENTIAL,
ABILITY, OR EFFECTIVENESS TO DETECT, MINIMIZE, OR IN ANYWAY PREVENT
DEATH, PERSONAL INJURY, PROPERTY DAMAGE, OR LOSS OF ANY KIND
WHATSOEVER.
CARRIER DOES NOT REPRESENT TO YOU THAT ANY PRODUCT (INCLUDING
SECURITY PRODUCTS), SOFTWARE, SERVICE OR OTHER OFFERING MAY NOT
BE HACKED, COMPROMISED AND/OR CIRCUMVENTED.
CARRIER DOES NOT WARRANT THAT ANY PRODUCT (INCLUDING SECURITY
PRODUCTS), SOFTWARE OR SERVICE MANUFACTURED, SOLD OR LICENSED
BY CARRIER WILL PREVENT, OR IN ALL CASES PROVIDE ADEQUATE WARNING
OF OR PROTECTION FROM, BREAK-INS, BURGLARY, ROBBERY, FIRE, OR
OTHERWISE.

6 TVN 12 User Manual
CARRIER DOES NOT WARRANT TO YOU THAT ITS SOFTWARE OR PRODUCTS
WILL WORK PROPERLY IN ALL ENVIRONMENTS AND APPLICATIONS AND DOES
NOT WARRANT ANY PRODUCTS AGAINST HARMFUL ELECTROMAGNETIC
INTERFERENCE INDUCTION OR RADIATION (EMI, RFI, ETC.) EMITTED FROM
EXTERNAL SOURCES
CARRIER DOES NOT PROVIDE MONITORING SERVICES FOR YOUR
ALARM/SECURITY SYSTEM (“MONITORING SERVICES”). IF YOU ELECT TO HAVE
MONITORING SERVICES YOU MUST OBTAIN SUCH SERVICE FROM A THIRD
PARTY AND CARRIER MAKES NO REPRESENTATION OR WARRANTY WITH
RESPECT TO SUCH SERVICES INCLUDING WHETHER OR NOT THEY WILL BE
COMPATIBLE WITH THE PRODUCTS, SOFTWARE OR SERVICES
MANUFACTURED, SOLD OR LICENSED BY CARRIER.
Intended use
Use this product only for the purpose it was designed for; refer to the data sheet and
user documentation. For the latest product information, contact your local supplier or
visit us online at firesecurityproducts.com.
The system should be checked by a qualified technician at least every 3 years and the
backup battery replaced as required.
Advisory messages
Advisory messages alert you to conditions or practices that can cause unwanted
results. The advisory messages used in this document are shown and described below.
WARNING: Warning messages advise you of hazards that could result in injury or loss
of life. They tell you which actions to take or to avoid in order to prevent the injury or
loss of life.
Caution: Caution messages advise you of possible equipment damage. They tell you
which actions to take or to avoid in order to prevent the damage.
Note: Note messages advise you of the possible loss of time or effort. They describe
how to avoid the loss. Notes are also used to point out important information that you
should read.

TVN 12 User Manual 7
Chapter 1
Physical installation
Installation environment
When installing your product, consider these factors:
•Ventilation
•Temperature
•Moisture
•Chassis load
Ventilation: Do not block any ventilation openings. Install in accordance with the
manufacturer’s instructions. Ensure that the location planned for the installation of the
unit is well ventilated.
Temperature: Consider the unit’s operating temperature (-10 to +55 ºC, 14 to 131 °F)
and noncondensing humidity specifications (10 to 90%) before choosing an installation
location. Extremes of heat or cold beyond the specified operating temperature limits
may reduce the life expectancy of the recorder. Do not install the unit on top of other
hot equipment. Leave 44 mm (1.75 in.) of space between rack-mounted DVR units.
Moisture: Do not use the unit near water. Moisture can damage the internal
components. To reduce the risk of fire or electric shock, do not expose this unit to rain
or moisture.
Chassis: Equipment weighing less than 15.9 kg (35 lb.) may be placed on top of the
unit.
Unpacking the recorder and its accessories
When you receive the product, check the package and contents for damage, and verify
that all items are included. There is an item list included in the package. If any of the
items are damaged or missing, please contact your local supplier.
Items shipped with the product include:
•AC power cord or external power supply (depending on the model)
•Recorder including HDDs

Chapter 1: Physical installation
8 TVN 12 User Manual
•USB mouse
•Rack mounts (8 and 16-channel models only)
•TruVision NVR 12 Quick Start Guide
You can download the software and the following manuals from our web site:
•TruVision NVR 12 Quick Start Guide
•TruVision NVR 12 User Manual
•TruVision NVR 12 Operator Guide
Back panel
The figures below show the back panel connections and describe each connector on a
typical TVN 12 digital video recorder. Details may vary for specific models.
Before powering up the recorder, insert the hard drives and connect a main monitor for
basic operation.
Note: For every hardwired alarm input, connect one wire to the input connection with
the alarm number label and one wire to a ground connection (labeled G).

Chapter 1: Physical installation
TVN 12 User Manual 9
Figure 1: TVN 1216S back panel connections
Figure 2: TVN 1204c back panel connections
1. Connect a microphone for bi-directional audio
(not recorded).
2. Connect up to four alarm inputs
3. Connect one alarm relay output.
4. Connect to power.
5. Embedded PoE ports to connect IP cameras
(depending on model).
6. Connect to a network.
7. Connect to speakers for audio output.
8. Connect to an HDTV. The HDMI connection
supports both digital audio and video.
9. Connect to a VGA monitor.
10. Connect to an optional USB 2.0 device such
as a mouse or HDD.
11. Connect to ground.
12. Power switch (on/off).
13. Connect to the 12 VDC PSU (included).
Default IP address - 192.168.1.82
Download the latest recorder firmware and
TruVision Navigator software from
www.firesecurityproducts.com
PoE ports
The S models of the recorder have PoE ports for camera connections. Connect up to 8
or 16 IP cameras to the embedded PoE ports on the TVN 12S recorder.

Chapter 1: Physical installation
10 TVN 12 User Manual
Monitor connections
The recorder supports up to 1920 × 1080 / 30 Hz resolution in VGA and 4K resolution
in HDMI. The monitor resolution should be at least 1280 × 720. Adjust your monitor
accordingly to this resolution.
The VGA or HDMI monitor can be used as the main monitor of the recorder. Both
produce the same content.
Rack mounting
The four-channel version of the recorder is a desk-top model, so it is not shipped with
rack ears. The TVN 1208(S) and TVN 1216(S) recorders are shipped with rack ears.
Front panel
There are no buttons on the front panel to control recorder functions. There are status
LEDs showing power, HDD data upload/download, and the network connection.
Figure 3: Front panel
Name
Description
1.
Power
A steady green light indicates the recorder is working correctly. Red indicates a
fault.
2.
HDD
Light blinks red when data is being read from or written to the HDD. A steady red
light indicates an HDD exception or error.
3.
Tx/Rx
Steady green indicates a normal network connection. No light indicates that it is
not connected to a network.
4.
USB interface
Universal Serial Bus (USB) port for additional devices such as a USB mouse or
USB Hard Disk Drive (HDD).
Contact information and manuals/firmware
For contact information and to download the latest manuals, tools, and firmware, go to
the web site of your region:

12 TVN 12 User Manual
Chapter 2
Getting started
The recorder can be configured through the OSD (On Screen Display) shown on a
monitor connected to the recorder, web browser, TruVision Navigator, and the SDK.
You can access the recorder through the OSD and web interfaces. They let you view,
record, and play back videos as well as manage many aspects of the recorder from any
PC with internet access. See Figure 4.
Figure 4: Web browser interface (live view with menu options shown)
The recorder can fully integrate with the license-free TruVision Navigator software,
which is ideal for most commercial applications. TVN 12’s easy and intuitive-to-use web
browser interface enables remote configuration and secure viewing, searching, and
playing back of video from computers connected via the Internet.

Chapter 2: Getting started
TVN 12 User Manual 13
Powering up the recorder
Before starting the recorder, connect at least one monitor (VGA or HDMI). Otherwise,
you will not be able to see the user interface and operate the device.
It comes equipped with a universal power supply that will auto-sense 110/240 V,
60/50 Hz. Models are shipped with the power cords for their region.
Note: It is recommended to use an uninterruptible power supply (UPS) in conjunction
with the device.
To turn on/off the recorder:
Turn on or off the recorder using the power switch on the back panel. Once it is
powered up, the status LEDs on the front panel will light up.
Activate the admin password
When you first start up the unit, the Activation window appears. You must define a high-
security admin password before you can access the unit. There is no default password
provided.
A message will appear on-screen when the unit has been activated.
Tips on creating a strong password:
A valid password range must be between 8 and 16 characters. You must use at
least one character from each of the following items: numbers, lower-case letters,
upper-case letters, and special characters : _ - , .* & @ / $ ? Space. The maximum
number of allowed attempts to enter a password is 3. Lockout is 30 minutes when in
web mode and 10 minutes when in OSD mode.
The password is case-sensitive.
Do not use personal information or common words as “password”.
The password cannot contain the username.
We recommend that you do not use a space at the start or end of a password, and
that you reset your password regularly. For high security systems, it is particularly
recommended to reset the password monthly or weekly for better protection.
Note: If you should forget your admin password, please contact our Technical Support
to reactivate the unit with a new password.
Go to Chapter 6 “User management” on page 52 for further information on creating
user passwords.
You can also set up the camera password when starting up the recorder.
Default network settings:
The network settings are:
• IP address - 192.168.1.82

Chapter 2: Getting started
14 TVN 12 User Manual
• Subnet mask - 255.255.255.0
• Gateway address - 192.168.1.1
• Ports:
When using a browser:
RTSP port: 554
HTTP port: 80
When using Google Chrome, Apple Safari,
Opera, or Mozilla Firefox, port in HTTP mode:
port 7681
When using TruNav:
RTSP port: 554
Server/Client software port: 8000
Access via a web browser
To access the unit via the browser, open a web browser and enter the IP address
assigned to the recorder as a web address. In the logon screen, enter the user ID and
password.
You can also access the recorder interface using its OSD display. However, the OSD
does not have all the same functions as the browser. The user manual explains how to
use the recorder via the browser and OSD modes.
The recorder can automatically detect which browser you are using.
Microsoft Internet Explorer plug-in
When using Microsoft Internet Explorer, install the recorder web plug-in to see live
camera images. You are requested to install this plug-in the first time you use the
recorder via Internet Explorer.
Google Chrome, Apple Safari, and Mozilla Firefox plug-in
There is another plug-in tool available for use with Google Chrome, Apple Safari, and
Mozilla Firefox, which can be downloaded via the webpage of the recorder. Click
“Download plug-in” on top right of the recorder window when using one of these
browsers. This plug-in solves the limitations of the plugin-free solution.
The recorder must be connected to the internet to download the plug-in.
Plug-in free browser access
You can use the recorder without a plug-in for the browsers Google Chrome, Apple
Safari, and Mozilla Firefox. However, there are limitations to the functions that can be
accessed. See Table 1 on page 15.

Chapter 2: Getting started
TVN 12 User Manual 15
Table 1: Browser plugin-free limitations
Mode
Function
Result
Remark
Live
Live view
Possible for resolution
<= 1080p; bit rate<=
2048kbps
For viewing higher
resolution/quality
cameras, use the
substream.
Audio
Supported
Capture a snapshot
Supported
Digital zoom
Supported
Window division
Supported
Full screen view
Supported
Local record
Only supported for
Google Chrome
Playback
Playback
1 channel @ 1080P
(max.)
Fast forward
Not supported
Single frame
Not supported
Reverse playback
Not supported
Download a video clip
Not supported
Configuration
Export device
parameters
Import device
parameters
Firmware upgrade
Draw area
(Motion/VCA)
Export log
Local configuration
File path setting
Access via the OSD
When you log in to the recorder, you see the OSD interface showing live view of one or
more cameras. Many features of live view can be quickly accessed by placing the
cursor on a live image and clicking the right-button of the mouse. The mouse menu
appears. For more information, see Chapter 14 “Live view in OSD mode” on page 133.

Chapter 2: Getting started
16 TVN 12 User Manual
Startup wizard in OSD mode
The recorder has an express installation wizard when using OSD mode that lets you
easily configure basic recorder settings when first used. The configuration of each
camera and recorder can be customized as required.
By default, in OSD mode the startup wizard will start once the recorder has loaded. It
will walk you through some of the more important settings of your recorder.
Note: If you want to set up the recorder with default settings only, click Next in each
screen until the end.
There is no startup wizard when using web mode. Once you log on to the recorder, you
are immediately in live mode and must set up the recorder from the Configuration
menu.
To use the Startup wizard in OSD mode:
1. Log on to the recorder. If it is the first time using the device, the installation wizard
automatically appears. By default, once set up the wizard no longer appears when
logging on to the recorder.
Note: To always launch the startup wizard when rebooting, enable Wizard in the
Configuration > System > General > Basic Settings menu.
2. Select the preferred language for the system and resolution from the drop-down list
and then click Apply.
3. In each setup configuration page, enter the desired information and then click Next
to move to the next page. The setup configuration pages are:
Wizard setup pages
Description
Time and date configuration
Select the desired time zone, date format, system time, and
system date.
If Daylight saving time (DST) is required, check Enable DST and
enter the desired summer and winter months.
Network time protocol (NTP) is a networking protocol for time
synchronization. The device can connect to NTP (network time
protocol) server to sync time. NTP time synchronization is
disabled by default.
The interval time is the synchronization time in minutes with the
NTP server.
NTP server IP address and port are displayed.
Note: Recordings use the camera time and date.
Network configuration
Configure your network settings such as the IP address, subnet
mask, and default gateway. Enter the preferred DNS server
address as well as the alternate one to use.
HDD management
The hard drives are initialized at the factory. However, if you
wish to clear all data, select the HDD, and click Init (Initialize) to
initialize the HDD. You can also add and delete hard drives.
Other manuals for TVN 12
1
Table of contents
Other TruVision DVR manuals


