Truvox Multiwash MW 340 User manual

2
Contents Page
1.Product information............................................................................................3
1.1.Importantsafetyinstructions.................................................................3
1.2.Guidelinesfortheoperator...................................................................3
1.3.Electricalconnection.............................................................................3
2.Knowingyourmachine...................................................................................4
3.WorkingPrinciple.........................................................................................5
4.Preparing foruse...........................................................................................5
5.Assembly........................................................................................................5
6.Brushselectionguide.....................................................................................6
7.Brushidentification.........................................................................................6
8.Controls.........................................................................................................6
9.Operatingthemachine...................................................................................7
10.Careof themachine.......................................................................................7
11.Maintenance...................................................................................................8
12.Accessories....................................................................................................8
13.Aftersalesservice..........................................................................................9
14.Guarantee....................................................................................................9
15.Electricaldiagram.........................................................................................10
16.Technicalspecification.................................................................................11
17.ECdeclarationof conformity.......................................................................12

3

4
IMPORTANT
READ THESE INSTRUCTIONSCAREFULLYAND RETAINFOR FUTUREREFERENCE
1.ProductInformation
Pleasepassallsafetyinstructionsontoother
personsoperatingthismachine.
The floorcleaningmachinesaredesigned foruseon
smooth, evenfloorsinindoorareas. Theycanbe
used onmostfloorsurfacesincluding shortpile
carpet, wood,PVC,rubberand stone. Theyshould
benot usedonroughunevensurfaces.
Weareconfidentthemachineswillgiveyearsof
troublefreeservice, coupledwitheaseof useand
minimummaintenance.
Equipmentmust beoperated, servicedand
maintained inaccordancewiththe manufacturer's
instructions.Ifin doubtcontactthesupplierofyour
machine.
The followinginstructionscontain important
informationabout themachine's andsafetyadvicefor
theoperator.
1.1Importantsafetyinstructions
The machinemustbeunpackedandassembledin
accordancewiththeseinstructionsbeforeconnecting
tothe electricalsupply.
Thismachineshould always beconnectedtoafully
earthedpowersupplyof therightvoltage and
frequency.
Keepthepowersupplycordawayfrommovingparts.
During operation, hazardmayoccurwhenrunning
machineoverthe supplycord.
The machinemustbedisconnectedfromthe mains
supply(bypullingtheplugout)beforechangingthe
brushes,cleaningthemachineandformaintenance.
Warning! Onlyusethebrushes/ accessoriesasper
theinstructionmanual.Usageofanyother
brushes/accessoriescancausesafetyproblems.
Periodicallyinspectthecordforpossibledamage. A
damaged cordmust bereplacedwiththe specialcord
available fromthemanufactureroranauthorised
serviceagents.
DONOT leavethemachineconnectedtothepower
supplywhennot inuse;always removetheplugfrom
themainssocket.
DONOT usewherehazardousdustispresent.
DONOT usemachinenearflammableliquids.
DONOT usein anexplosiveatmosphere.
DONOT useonagradient orslopes.
1.2Guidelines fortheoperator
•Operatorsmust befullytrainedinaccordance
withtheseinstructions, abletoperformroutine
upkeepofthemachineandcorrect selectionof
brushes.
•Operatorsshould be physicallycapableto
manoeuvre, transportand operatethemachine.
•DONOT runthemachinedry, asthiscould
damagethefloorsurfaceorthemachineitself.
•Takeadequatecaretohold the machinefirmly
whileinstallingandremovingthebrush.
•Neveruseexcessivefoamingorhighlycorrosive
cleaningsolutions.
•While operatingonafloodedfloor,always ensure
that thewaterlevel doesnot exceed1/4" or
6mm.
•DONOT operatethismachine onroughuneven
surfacese.g.industrialconcretefloors.
•DONOT cleanthe machineusingwatersprays
orjets.
•Ensureallpartsarefittedproperlybefore
operation.
1.3Electricalconnection
Beforeconnectingthemachinetothepowersupply,
checkthatyoursupplyvoltagecorrespondswiththat
markedonthe rating labelonthebodyofthe
machine.
Pleasereadthefoll
owinginstructions
completely
beforeoperatingthe machine.Anyviolationofthe
samewill notonlyinvalidatethewarranty,but may
alsoresult inasafetyhazard.
UK only
Thesupplycordisfittedwithanon-rewireable
plugcontaininga13ampfuse.Shouldthefuse
requirereplacementit mustonlybe replacedbya
13ampfuseconformingtoBS1362, andthefuse
covermustberefitted.If the fusecoverislost the
plugmust notbeuseduntilthe correct
replacement coverisfitted.

2.Knowingyourmachine
NOTE:
MWXXXrefersStandardmodel&MWXXX/PUMPrefersPumpmodel
XXXreferstomachine width240/ 340/ 440 mm
IfyouhavepurchasedPumpmodel pleasereferFig.b, Fig.c,Fig.e&Fig. g(forFig.gseepage6)
IfyouhavepurchasedStandardmodelpleasereferFig. a,Fig.d, Fig.e&Fig. f (forfig.f seepage6)

6
3.WorkingPrinciple
1.Cleaningliquidin the solutiontankisappliedto
thefloorbyeithergravity(Standard)orSpray
(Pump).
2.The counterrotatingbrushesscrubthefloorand
alsothrowthedirtywaterontheConveyordrum.
The front brushdoesmostofthe scrubbingand
drying.Therearbrushcompletesthescrubbing
and collectstheremaining wateroff thefloor.
3.Abladefittedtothedirtywatertankwipesthe
drumandcollectsthedirtywater.
4.Preparing foruse
Unpack
1. Tosavepackingspaceandtoensurethesafety
of themachineduringtransportation, the
machinecomestoyouwithitshandle dismantled.
Ensurethatthelistedpartsarepresent asshown
andidentifythemin ordertounderstandthe
assemblyinstructions.
2. Removethehookwhichholdsthebottomhandle
withthe machinebodywhile holdingthebottom
handle.
5.Assembly
1.Insert thetwotubularhandlesintothe bottom
handleand securethemusing
knob (2off)bytightening
lightly.Ensurethatthe
handlesareassembled
accordingtotheirmarked
positionandthecable holding
hooksarepointing towards
therear.
2.Slidetheelectriccable
retainerintothetopportionof
RH handle.
3.Fitthetop handleoverthe
tubularhandlesandsecure
themwithwasherand screw
(2sets).Ensurethat thelabel
onthetop handleisfacing the
front of themachine.Now
tightenfirmlyboththeknobs
and screwsalternately. Insert
thedummycapsprovidedto
coverthe screws(2off)inthe
tophandle.
4.Passthefreeendofthepull
cable throughthe plastic
guideinRHHandle. Press
andtwist clockwisetofirmly
securethe cable endtothefreshwatertank
(Standard).
5.Fixtheauxiliarytankfirmlyintothebottom
handle byholding thetophandle.
6.Rotatethe knob toholdtheauxiliarytank.
7.Thebrushesareonlylooselypacked in the
machinefortransit, thereforethebrushshafts
must befittedbeforeoperatingthemachine.
Pushtheshaftsthroughthe brushesfromthe
side of the machine.Toremovebrushes, push
thebrushshaft outfromthe sideofthemachine
usingthefingersandwithdrawtheshaft.
Normallythestandardbrushwill besupplied
withthe machine. Brushesshould beselected
accordingtothetypeoffloorsurfacetobe
cleaned, andthedegreeofdirt toberemoved,
pleasereferBrushSelectionGuide.
8.Themachineisnowreadyforuse.
1. Bottomhandle9.Cableretainer
2. Machinebody10.Powercord
3. PumpHousing(Pump)/11.Dirtywatertank
Freshwatertank(Standard)12.Hook
4. AuxillaryTank(Pump)13.Knob
5. Tophandle &pullcable
6. Handle LH&RH
7. Brushshafts(2)
8. Screws&washers
Warning!Thismachineis
heavy.Donotattempt
tolift themachinewithout assistance.
Incorrectlifting techniquesmayresult inpersonal
injury.
Warning!
Sincethebottomhandleisspring
loaded,caremust betaken whenremovingthe
hooktoavoid suddenspringingbackleading to
possible injurytopersonnel.
LEFT
BOTTOM
REAR
RIGHT
BOTTOM
REAR

7
6.BrushSelectionGuide
TypeoffloorFirsttime
cleaning Maintenance
Cleaning
Allnaturalstone
floors,Ceramic,
Mosaic,Wood,
Profiledrubber,
Vinyl,PVC
StandardSoft
Shortpile carpetSoftSoft
Marble GraniteSoftSoft
SmoothconcreteHardStandard
EscalatorEscalatorEscalator
OthersTosuitindividual floorconditions
7.Brushidentification
Thisisapplicable whenthecustomerhasmorethan
oneset ofbrushesofsametype.
Distinctcolourcodingmakeit easy toseparatetools
intotheircorrectareasofuse. Washroomtoolsare
keptinthe restroom;kitchentoolsarekeptinthe
kitchen-reducing bacteria cross-contamination
betweenhighand low-risk areas.RED, BLUE,
WHITEandYELLOWbrushbuttonsarepackedwith
themachine.Simplyplugthebuttonsintotheholein
thebrushasshown.
Clearidentification, bycolourcoding,helpsto
prevent crosscontamination.
8.Controls
On/Off Control Bypressingthepedal lightly
withyourfoot (1),pullbackthe
handle (2)alittle tostart the
motor.Thebrushesandthe
drumstartsrotating. Pullingthe
handle furtherwithoutpressing
thepedal, lowersthemachine
andengagestherotating
brushesontothe floor.Tostopworking,takethe
handle tothe verticalposition.
Transport/Working ModeControl
SlidethisknobtoTOPposition
(Working Mode)tooperatethe
machine.Slidethisknob to
BOTTOMposition tomovethe
machineandparkthe machine.
Warning! Keepingtheknob in
thetopposition (working mode)
and movingthe machinewill damage thebrushes.
BrushContactControl
Brushcontactwiththeflooris
adjustablein 4steps,contactis
MINIMUMwhenthe knob is
fullydownandMAXIMUMwhen
it isfullyraised.Thishelpsyou
tocompensateforthe wearof
brushesandalsotocontrolthe
scrubbingeffect.Ifthe machinedoesnotmove
whenthe handleislowered,slidethe
transport/working mode knob uponestep
CleaningLiquid DischargeControl
Bypulling, theliquid discharge
control handleup,thecleaning
solutionisdispensed onthe
floor.Thesolutionstopsonce
theliquiddischargecontrol
handleisreleased
Pull cableconnect/ disconnectcontrol
Insert thefreeendof pullcable
intothevalvebodyfittedin the
freshwatertank.
Press and twistclockwiseto
securethe cable end.Similarly,
press andtwistanti-clockwiseto
disconnectthecableend
MotorOverloadProtector
Intheeventofmotorgetting
overloadeddue toimproper
powersupplyorunexpected
obstructiontothe brush/drum
rotation, theoverload protector
tripsandprotectsthemotor
fromdamage. If thishappens,
identifythe cause,correctitand, resettheprotector
buttonafterminimumof30secondsfromtrippingby
pressingtheoverloadprotectormanuallyand
continueworking.
Important
-Shouldthemachinefail tooperate,
contactthe supplierfromwhomyoupurchased
themachine.
(a)Holeprovidedforpluggingbutton.
(b)Brushwithbuttonplugged.

8
9.Operating themachine
Beforethewashing operationstarts
1.Ensurethat the
brushesarefitted
properly.
2.Fillfreshwatertank
withcleaningsolution.
3.Insertthepluginto
mains3-pinsocket.
Recommendedwashing sequence
1.Start themachinebypressing the pedaland
pulling thehandleback(Fig-ii).
2.Moveforward,while sparinglypullingthe liquid
dischargecontrolhandle(Fig-iii).Thishandle
shouldnotbekeptpulledall the time.The
duration andfrequency of pullingand releasing
hastobe adjustedtomatchwiththe typeof
floor,extentofdirt. etc.Fortiled orstonefloors,
applyverylittlewater. Thespraypatternofthe
machinecan beadjustedbytheuser.Adjustthe
spraytoprevent solution being dispensed onto
areasthatalreadyhavebeencleaned.
The spraypatternisadjusted byusing the
serrationsin thespraynozzleandholder. Each
serrationallowsa4degreechange(Fig-iv).
3.Stop theliquid dischargeapproximately30 cm
beforethe end offorwardmotion,continueto
moveforwarduptothewall withoutpulling the
pull handle.
4.Pull themachinebackwardsinthesametrack,
but without discharging anyliquid.Whenyou
reachthestarting point, changethetrack and
repeat steps2through4.Whenyou are
changingthetrackallowsomeoverlap withthe
cleaned area. IncaseoflargehallstakeaU-turn
andmoveforward.Ifquickdryingisrequired,
moveonthe sametrack,withoutdischargingthe
liquid(Fig-v)
5.Cleanthe bladesand pushthetankintoits
place.
10.Careofthemachine
1.Movethe Transport
/Workingmodecontrolknob
toBOTTOM(Transport)
position(Fig-viii).
2.Disconnectthepower
supplybyunpluggingthe
electricalplug and windthe
cable overcable holdersin
thehandle.
3.Pullout thedirtywatertank
and washitcompletely.
4.Toprevent possible
cloggingoffilter,drain
cleaningliquid andkeepthe
freshwatertankclean.
5.Removethebrushesby
pushingthebrushshaft out
(Fig-ix).
6.Washthebrusheseitherby
dippingin abucket/sinkorin
running water(Fig-x).
7.Turnthe machinesideways and wipecleanthe
conveyorandmachinebodywithadampcloth
(Fig-xi).
8.Re-installthebrushesafterwashing.Itiseasierto
pushthebrushshaft fromtheright hand side
(identifiedbythe electricalcable).
9.Storethe machine in adryindoorareaonly.
Warning!
Pre-sweepthefloortoremovedebris
beforeusing themachine
Warning
!
Avoidtouchingthesharpedge ofdirty
watertank, itmaycauseinjurytohands.
Warning!Beforecleaningthe machine, switchoff
themachineandunplugfromtheelectricalsupply.

9
11.Maintenance
Toget themaximumlifeof the machineensurethe
following.
Supplycord
Regularlyinspect sheath, plugandcordanchorage
fordamage orlooseconnection.
Brushes
Formaximumlife, washthe brushesregularly.
EnsuremachineisinTransportmodewhennotin
use.Storeadditionalbrushesinavertical positionto
avoidbendingof bristles.Check forpermanent
bendingofbristlesinaparticulardirection.Thismay
occurif themachineisoperatedforseveraldays
without removingthebrushes, whichisnot
recommended.Ifthisoccurs, reversethebrushso
that thebentbristlesareautomaticallystraightened.
WiperBlade
Afteryearsofusethe wiperblademaywear.Ifthis
occursthewatercollection performancewill
decrease.It shouldbe replacedbyan authorised
serviceagent.
Solutiontankfilter(Standard)
Thefilterpreventscloggingofthedripholesin the
tank. Periodicallyclean thefiltertoensureuniform
dischargeofliquid.Incaseof nonuniformdischarge
fromthedripholes, back flushthe tankin running
water.Cleanthedripholesusingwireorabluntpin.
Solutionfeedfilter(Pump)
Thefilterpreventscloggingofthespraynozzle and
should beperiodicallycleaned. Usepressurised
air/waterforcleaning.
Nozzlemaintenance(Pump)
Ifthe sprayofthe nozzle becomeblocked,slide the
nozzle coveroffandremovenozzle washin clean
waterandclean usingapin andrefit.
12.Accessories
TransportTrolley
Thesimplyfitted trolleyprovidesforeaseof
movement whentransportingthemachine.
Using thetrolley
1.Withthe machinehandlein the upright position
placethe trolleycentrallyalongsidethemachine.
2.Byholdingthemachinefirmly,strapthevelcro
withthemachinetofix
thetransporter.
3.Ensurethat the velcro
strapissecurely
wrappedaround the
bottomhandle.
4.Nowthe trolleyisready
touse. Themachine
can thenbe
manoeuvred easily
whilstholding thetop
handle.
SideBrush
Tocleanup towalls, theside brushcanbeused.
Switchoff andunplugthemachinebeforefittingthe
sidebrush.
Fitting thesidebrush 1.Removethefrontbrush
andbrushshaft.
2.Fixtheshield assembly
onthesideplate.
3.Insert theside brush
throughthe shieldand
main brush.
Using thesidebrush
1.Tilt the machine at ananglemoveforward. This
way, thedirtywaterthrownbytheside brushwill
be collectedbytherearbrush.
2.Useside brushonlyforwashingthe edges.
Warning! Emptyall liquidfromthemachinebefore
usingthe transporter.
Warning!Beforeundertaking anymaintenance
operationsoradjustmentsswitchoff themachine
andunplugfromtheelectricalsupply.
Warning!
Donot usesidebrushinaroomwithno
wallskirting,otherwise,thewall maygetdirty.

10
13. Aftersalesservice
Shouldyourequireaftersalesserviceplease
contact thesupplierfromwhomyoupurchasedthe
machine,whowillarrangeservice. Repairsand
servicingshouldonlybe performedbytrainedstaff.
Improperrepairscancauseconsiderable dangerto
theuser.
14.Guarantee
Yourproductisguaranteed for one yearfromthe
dateoforiginal purchase,orhirepurchase,against
defectsinmaterialsorworkmanship during
manufacture.Withintheguaranteeperiodwe
undertakeatourdiscretion,torepairorreplacefree
ofchargetothepurchaser,anypartfoundtobe
defective,subjecttothefollowing conditions.
CONDITIONS
1.Claimsmadeunderthetermsof theguarantee
mustbesupportedbythe originalinvoice/billof
saleissuedatthetimeof sale.
2.Forclaims underthisguarantee contact the
supplierfromwhomyoupurchasedthe product
whowillarrange the appropriateaction.Donot
initiallyreturnthe product asthiscouldresult in
transit damage.
3.Neitherthe manufacturernoritsdistributorshall
beliableforanyincidentalorconsequentialloss.
4.Thisguaranteeiscoveredbythe lawsof
England.
5.Thisguaranteedoesnot coveranyofthe
following:-
•Periodicmaintenance, andrepairor
replacement of partsduetonormalwearand
tear.
•Damagecaused byaccident,misuseorneglect,
orthefitting ofotherthanthemanufacturer's
genuineparts.
•Defectsin otherthan themanufacturer'sgenuine
parts,orrepairs,modificationsoradjustments
performedbyotherthanan authorisedservice
engineerorserviceagent.
•Costsandrisksoftransportrelatingdirectlyor
indirectlytotheguaranteeof thisproduct.
•Consumable itemssuchasbrushes,drivebelts
and filters.
•Thisguaranteedoesnot affectyourstatutory
rights, noryourrightsagainstthesupplierarising
fromtheirsalesorpurchasecontract.
•Ourpolicyisoneofcontinualproduct
developmentand wereservethe righttoalter
•Specificationswithout priornotice.

11
14. ElectricalDiagram

12
15. Technical Specifications
Model
ProductCodeMW240MW340(withtank&
spray)
MW340/ PUMP
(with tank&
spray)
MW440/PUMP
VoltageV/Hz230~/50230~/50230~/50230~/50
Motorpowerw400600600+ 261000
Solutiontank
capacity l1.21.744
Brushwidthcm 24343444
Brushspeedrpm650650650650
Soundpressure
level (see note1) dB
(A) 68696971
Handlevibration
(seenote2) m/s²<2.5<2.5<2.5<2.5
Cable lengthm12121212
Size(l Íw Íh(with
handle) cm 37.8 Í34 Í
111.8 37.8Í44
Í111.8 37.8 Í44 Í
111.8 37.8 Í54 Í
111.8
Weightemptykg19232529.5
Warranty1year1year1year1year
Othervoltagesavailable
ModelMain supplyPower(W)Brushspeed
(rpm)
MW340/Pump220VAC+ 6%, 60Hz,
SinglePhase 1050 780
MW340/Pump110VAC+ 6%, 50Hz,
SinglePhase 750+ 26 650
MW340/Pump110VAC+ 6%, 60Hz,
SinglePhase 750+ 26 780
MW440/Pump220VAC+ 6%, 60Hz,
SinglePhase 1200 780
MW440/Pump110VAC+ 6%, 50Hz,
SinglePhase 850650
MW440/Pump110VAC+ 6%, 60Hz,
SinglePhase 850780
Note:
1.Noiselevelsmeasuredatadistanceof1meterfrommachineand 1.6metresabovefloor,when washinga
hardfloor.Measurementsrecordedusingahandheld meter.
2.Handle vibrationdoesnot exceed2.5m/s², whenoperatingon asmoothhardsurface.
3.Abovedimensionsareapprox.Sincethe companiespolicyistocontinuouslyimprovetheproduct,therecould
be changeswithout priornotice.
16ECDeclarationofConformity

13
WeTruvoxInternational Ltd.
OfThirdAvenue
Millbrook
Southampton
SO15 0LE
England
declarethatthemachinery
MakeMW
TypeFloorcleaningmachine
ModelMW240,MW340, MW340/PUMPand MW440/PUMP
SerialNumber:
YearofConstruction:2006
hasbeenmanufacturedusingthefollowing transposedharmonizedEuropeanStandardsand technical
specifications.
BSEN60335-1ANDBSEN60335-2-67,EMC: EN55014-1, EN61000-3-2, EN61000-3-3, EMF: EN50366,and
isin conformitywithECdirectives2006/95/EC,89/336/EEC,RoHSdirective2002/95/ECandWEEEdirective
2002/96/EC,Noisedirective86/594/EECandall amendments:
Signedin:SOUTHAMPTON,England
on the1st dayofNovember2008
Signature
NameM.R.Eneas
PositionNewProductDevelopmentManager
TruvoxInternational Limited
ThirdAvenue,Millbrook,Southampton, HampshireSO150LE,England
Tel: +44(0)238070 2200Fax: +44(0)23 80705001
e-mail: truvox@truvox.com Web: www.truvox.com
Other manuals for Multiwash MW 340
1
This manual suits for next models
3
Table of contents
Other Truvox Floor Machine manuals

Truvox
Truvox Orbis OB431500 User manual

Truvox
Truvox Orbis ECO 200 User manual

Truvox
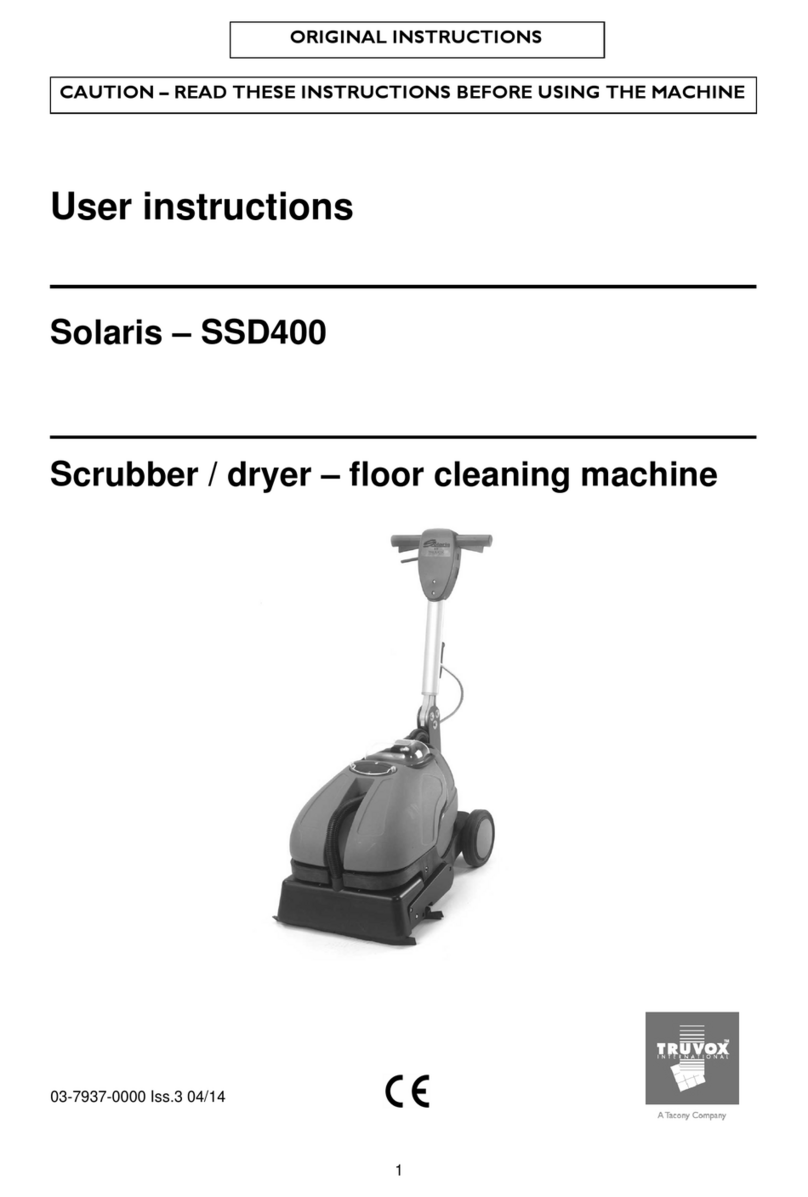
Truvox Solaris - SSD400 User manual

Truvox
Truvox HYDROMIST 13 User manual

Truvox
Truvox Hydromist 35 User manual

Truvox
Truvox Hydromist Lite User manual

Truvox
Truvox HM 10 User manual

Truvox
Truvox Orbis OB431500 User manual

Truvox
Truvox Orbis Compact OB28240 User manual