Truweld TWP-1 User manual

OPERATION MANUAL
TWE Pin Welder
Model TWP-1
TRU‐WELDEQUIPMENTCOMPANY
6400N.HONEYTOWNROAD
SMITHVILLE,OHIO44677
(330)669‐2773

CONTENTS
SectionDescriptionPages
1ProductFeatures3
3ExternalFeatures5‐6
4Safety7‐9
5SetupandWelding10‐14
6TestingWeldSettings15
7InspectingTheWeld16
8TWP‐1Views17
2Specifications4

Model:TWP‐1
TheTWP‐1incorporatesthelatestsolidstatetechnologyintoacompact
andrugged,portableCDPinWelder.Thissystemhasthecapacitytoweld
pins(includingcuppedheadpins)upto10‐gaugeandCDStudsupto#10.
FEATURES
• DigitalDCvoltagereadout(allowsformoreaccurateandrepeatable
weldsettings).
• Coolingfanforincreasedefficiency.
• Dial‐downDCvoltagesetting(noneedtoturnofftheunitwhenreset‐
tingtoalowervoltage).
• Only15ampcircuitrequirement(unitfused@15amps).
• poweroutput@lowerDCvoltagerequirements.
• Terminalconnectionsonthecapacitorareover5/8”indiameterfora
goodseatoftheterminalbussbarstoincreasereliability.
• Theterminalconnectionsonthecapacitorhave1/4‐28socketsetscrews
insertedintoeachone.Thesocketsetscrewisusedtomaketheconnec‐
tiontothebussbar.Thiseliminatesdamagingthethreadsinthealumi‐
numconnectorsofthecapacitor,ensuringasolidconnection.
• Rigidinternalconstructionconnectingtheentireinternalunittothe
frontandrearpanelsminimizestheopportunityofthecomponents
cominglooseduringhandlingoroperations.
• TheTWE‐PinWelderismountedinaruggedoutercaseforgreaterdura‐
bility,texture,andappearance.
• TheTWE‐PinWelderweighsinatabout11poundsforeaseofcarrying.
PRODUCT FEATURES

PRODUCT SPECS
SPECSTWE‐PINWELDER
SIZE105/8”x911/16”x67/8”
270mmx246mmx174mm
WEIGHT10.6lbs.
WELDRANGE
WeldPins‐Upto10gauge
CDStuds‐Upto#10
DUTYCYCLE16‐20pinsperminute
PRIMARYPOWER110VAC@50/60Hz15Ampcircuitor220
VAC@50/60Hz7.5Ampcircuit
CHARGEVOLTAGE35‐110VDC
OperationalandSafetyFeatures
• LEDVoltageMeter
• SafetyShutdown
• CoolingFan
• Front‐PanelInformationalLED’s
• Dial‐Downweldvoltagecontrol

FRONTPANEL
TOPOPENVIEW
EXTERNAL FEATURES
LEDDisplay
VoltageSelector
Weld‐ReadyIndicator
Capacitor

SIDEVIEWS
EXTERNAL FEATURES
StudGunControlCableCon‐
nection
StudGunWeldCableCon‐
nection
GroundCableConnection
ON/OFFSwitch
CoolingFan
15ampCircuitBreaker

PROTECTYOURSELFANDOTHERS!
Readthesafetynoticesbeforeusingwelder.
ELECTRICAL
Noportionoftheoutercoveroftheweldingcontrollershouldberemovedbyany‐
oneotherthanqualifiedpersonnel.Alwaysdisconnecttheunitfromthemainpower
priortoremovingcover.
• Thisequipmentcontainsatransformerpowersupplysystem,whichisenergized
byACcurrentandtransformstheACtoDCcurrent.Duetopotentialdangerous
electricalinputandoutputtheequipmentmustbedisconnectedfromallincom‐
ingpowerwhenservicing.
• Capacitorsstoreelectricalenergy.Checkforresidualchargebeforeperforming
anymaintenance.
• Donotusefluidstocleanelectricalcomponentsasthesemaypenetratetheelec‐
tricalsystemandcauseshorts.
Connectionoftheunitintoservicemustbeinaccordancewiththesetupprocedures
asdetailedinthismanual.Operationofthisequipmentmustbeinaccordancewith
alllocal,regional,andnationalsafetycodes.
SAFETY

FIRE
Duringwelding,smallparticlesofhotmetalcanbeexpelled.Ensurethatnocombus‐
tiblematerialsareneartheweldingarea.
PERSONALSAFETY
Arcrayscanburnyoureyesandskin.Wearprotectiveclothingandeyeprotection
whenwelding.
Loudnoisesfromweldingcandamagehearing.Wearearplugsorotherprotective
gear,ifapplicable.
Fumesandgasesexpelledduringweldingcanbehazardoustoyourhealth.Make
sureweldingisdoneinawell‐ventilatedarea.
Hotmetalsplattercancausefiresandburns.Wearprotectiveclothing,freeofcom‐
bustiblematerials.Haveafireextinguishernearbyandknowhowtouseit.
MAINTENANCE
Allcablesmustbeinspectedregularlytoensurethatnodangerexistsfromwornor
damagedinsulationorunsafeelectricalconnections.Takespecialnotetothecables
nearthestudgun‐thisiswheremaximumwearoccurs.
Worncablesnotonlyproduceinconsistentwelds,butcanoverheatorspark.
SAFETY
FIRE HAZARD
FROM SPARKS

TRAINING
Useofthisequipmentmustbelimitedtoauthorizedpersonnelonly.Theymustbe
adequatelytrained,andhavereadandunderstoodeverythinginthismanual.The
manualmustbeavailabletooperatorsatalltimes.
INSTALLATION
Selectasitefortheequipmentwhichiscapableofsupportingtheweightofthe
equipment,whichisclearfromtrafficrouteswherepeoplemaytripovercables,or
theymaybedamagedbyotherequipmentorvehicles.
Donothangconnectingcablesoversharpedgesorhavenearheatsources.
DISPOSAL
Theequipment,initsentiretyorascomponents/partsmaybedisposedofasgeneral
industrialwasteorscrap.Noneofthecomponentsusedinthemanufacturingofthe
CDWeldersaretoxic,carcinogenic,orotherwiseharmfultoyourhealth.
SAFETY
AUTHORIZED
PERSONNEL ONLY

CONNECTINGTHEWELDINGLEADS
Connectthestudgunweldcableintothegunterminalsocketonthesideofthe
weldingunit.
***NOTE‐thecableendplughasaflatwhichalignswithadotonthepanelmount
socket.Securetheconnectorintothepanelmountsocket,andthenturnitclockwise
untilitlocksintoproperposition.Failuretodosocouldresultindamagetothecon‐
nector.
Connecttheweldguncontrolcableintothecenterpanel2‐pinsocket.
***NOTE‐theplughasalargepinandasmallpinthatmatchthesocketontheunit.
Thisistopreventincorrectconnections.Pushtheplugfirmlyintothesocketand
twistclockwisetosecuretheplugintothecorrectposition.
ConnecttheGroundCableintothegroundterminalsocketonthesideoftheunit.
SET-UP AND WELDING
StudGunWeldCableConnection
GroundCableConnection
StudGunControlCableConnection

CONNECTINGTHEGROUNDCLAMP
Attachtheclampoftheweldinggroundleadtotheworkpiece.Priortosecuringthe
clamp,makecertainthatthecontactareaisfreeofrust,paint,grease,oranyother
impuritiestoensureagoodgroundconnection.
SET-UP AND WELDING

SELECTINGTHEPROPERSTUDCOLLET(STUDHOLDER)
Thecolletisselectedtotheproperdiameterthatyouarewelding.
Therearethreestylesofcollets;
• The“B”colletwhichisatwo‐pieceassembly(colletandinsert).Theinsertdeter‐
mineshowmuchofthestudisengagedinthecollet.
• TheCI(ColletInsert)whichisasinglepartandtheamountofthestudthatisen‐
gagedispredetermined.
• StandardAdjustableChuckshaveanadjustableinternalscrewtomanuallyadjust
fortheengagementofthestud.
Thechoicebetweenthesesystemsisusuallyamatterofpersonalpreference.
Insertingtheselectedcolletintothestudgunisasimpletask.Placethecolletinto
thefrontholderofthestudgunandsetthelockingscrewstoholditinplace.
Afterinsertingthecollet,mountthetwolegsandfootpieceontothestudgun.The
colletshouldbecenteredthroughtheopeningofthefootpiece.
Whenthelegsandfootpieceareinplace,insertthestudtobeweldedintothecol‐
let.Adjustthelegandfootpiecebyslidingitintopositionuntilapproximately1/8”
ofthestudprotrudesfrombeyondthefootpiece.Locklegsinplacewiththeset
screws.
SET-UP AND WELDING
FootPiece
Collet
LegPiece

SELECTINGTHESPRINGLOAD
Theproperspringpre‐loadsettingonthestudgunwillvarydependingonthese‐
lectedapplication.Generalsrulesofapplicationwouldbe;mildsteelorstainless
steelusuallyinthe1to2range,dependingonthestuddiameterandthethicknessof
thebasematerial.Aluminumandothernonferrousmetalswouldrequiresettings
from3to5dependingonthediameterofthestudandbasematerialthickness.
Thisspringpre‐loadadjustmentismadebyturningthescrewinsertinthebackofthe
studgunwithascrewdriver.Onthebottomofthebackcapofthestudgunisthe
indicatornumbered1thru5,whichwillshowyouthetensionsettingduringthead‐
justment.
SET-UP AND WELDING
AdjustmentScrew
TensionIndicator

READYFORWELDING
Whenyouhavecompletedallofthepreviousstepstoprepareforwelding,including
connectingthestudgunandgroundcablestotheunit,attachingthegroundcable(s)
totheworkarea,settingupandadjustingthestudgunfortheselectedstuddiame‐
terandmaterial,youcannowpoweronthewelder.
ThecontrollerON/OFFswitchislocatedontherearoftheunitintheupperright
handcorner.Belowthisswitchisthe15ampcircuitbreakerforthesystem.
VOLTAGESELECTION
• Selectingtherequiredweldvoltageisachievedbyturningtheselectorknob.The
voltagerangeisfrom35VDCto130VDC.
• Thevoltageisdeterminedbythediameterofthestudandthebasematerial.The
unitislabeledwithrecommendedvoltagesettingsforvariousapplications.
• Finetuningthevoltagetomeetyourrequirementforyourspecificapplicationis
recommended.
SET-UP AND WELDING
ON/OFFSWITCH
15ampCircuitBreaker
VoltageSelectorLEDDisplay

TESTINGYOURSETTINGS
Whenyouhaveperformedallofthepresetsasdiscussedinthismanual,itisrecom‐
mendedthatyouperformseveraltestweldswiththesamediameterstudandbase
materialthatyouwillbeusing.Thiswillverifythatallofthesettingsarecorrectto
theresultsyoudesire.Weldingisdonebyplacingthestudintothecollet,andpress‐
ingthestudguntotheworkpiece,compressingthespring.Thisiswhythestudmust
protrudebeyondthefootpieceatleast1/8”.
Holdingthegunperpendiculartotheworkpiece,andaligningthestudtothedesired
positionontheworkpiece,pressdownsothatthefootpieceisflushwiththework
piece(springcompressed),anddepressthetrigger.
Whenremovingthestudgunfromtheweldedstud,alwaysliftthestudgunvertically
fromtheweldedstudinordertomaintainthepropertensionofthecollet.Spreading
thecolletwhenliftingthestudgunfromtheweldedstudwillshortenthelifeofthe
colletandwilleventuallycreateanundesirableweld.
TESTING WELD SETTINGS

INSPECTINGTHEWELD
Visuallyinspecttheweld.Agoodweldwillresultinanall‐aroundweld,withasmall
visibleamountofweldsurroundingtheflangeofthestud.Toomuchsplatterandthe
weldistoohot,lowerthevoltage.Nosplatterandtheweldistoocold,increasethe
voltage.
Ifyougetweldflashtoonesideofthestudasopposedtoanevenamountaround
thebaseoftheflange,thisiscalled“arcblow”,andcanbesolvedbyrepositioning
thegroundclamporusingadualgroundclamp.
Properweldedstudscanbetestedbyeithertorquingorbendingthestud.The
weldedflangeofthestudshouldstayinplaceusingeithermethod,eventhoughthe
threadedportionofthestudbreaks.Ifthebasematerialisverythin,thenafullslug,
thediameteroftheflangewillpullfromthebasemetalforaproperlyweldedstud.
SET-UP AND WELDING

TWP-1 VIEWS
Table of contents
Other Truweld Welding System manuals

Truweld
Truweld TWE-SC900 User manual

Truweld
Truweld TWE-SC1950 User manual
Truweld
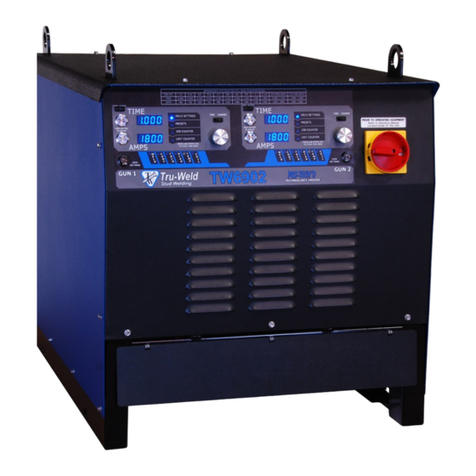
Truweld TW6802 User manual
Truweld
Truweld TWP-2 User manual

Truweld
Truweld TW-i Series User manual
Truweld
Truweld TW6900 User manual

Truweld
Truweld TWE - 19000 User manual
Truweld
Truweld TW55000 User manual
Truweld
Truweld TW4400 User manual

Truweld
Truweld TWE - SC1900 User manual
