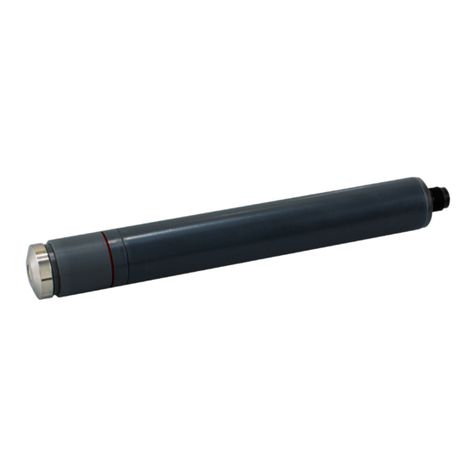
TRYTECK TT01 User manual

User Manual
Voice Recording Pen

How to user guide.
User's manual
Model: TT01
Dear customer,
Thank you for choosing to buy from us!
Please read the following manual carefully before use.
If you have any problems or questions about the
products, please do not hesitate to let us know, our
after-sales service team will help solve your issue
within 24 hours.
PS: The fastest and most direct way is to contact us
through Amazon
Included in box
•X1 Pen Recorder Device
•X4 Ink Refillable Cartridges
•X1 Micro to USB cord
•X1 Micro to Earphone Jack
•X1 Micro to Headphones

Operations of Us
01. Start a Recording/Save a Recording
Start a recording: without connecting the headset, press the pen button
(i.e. the power button) once to turn the device on, the red light will stay on
for about 10 seconds and then turn blue and flash, indicating that recording
has started.
Note - wait for the device to start up after turning it on, i.e. about 10
seconds.
Save the recording: To save the recording, switch off the device while
recording by pressing the power button once.
Note. (Do not connect the device to the computer during recording;
otherwise, the current recording will be lost)
02. Record playback / Music file playback
Playing back recorded audio files: first, connect the headphones and then
turn on the device to automatically enter recording playback mode.
Playing music files: in recorded audio file playback mode (refer above),
press the Play/Pause button on the headphones 2 times quickly to switch
between recording playback mode and music file playback mode (music
only). In this way, the device can be used to listen to music, just like a real
MP3 player.
03. Play/Pause
Play/Pause: In playback mode, press and hold the Play/Pause button to
pause, the red and blue lights will flash to indicate playback is paused, then
press Play again to play.
04. Adjusting volume/File Playback
Adjusting the volume; during playback mode, long-press the [+]/[-] buttons
on the headphones to adjust the volume.
Next/previous track: During playback mode, press the [+]/[-] keys once to
switch to the next or previous track.
05. Fast Forward / Rewind
Fast forward and rewind mode: turn on the device with the headphones
connected and immediately press and hold the + button until playback

starts, which activates fast forward and rewind mode. At this point, press
and hold the "+" button to fast-forward, and the "-" button to reverse.
Note - (in this mode, you cannot adjust the volume).
06. Connecting to a computer
After connecting this recording device to the USB interface of your
computer, you can move, copy, delete, playback the files contained in the
recorder directly from your computer.
Set the date and time: connect the pen to the computer using the USB
cable, open the removable disk drive assigned to the recorder, open the
folder named "SetTime", then start the file named "SetTime" to
synchronize the device with the time and date on the computer, click "OK"
after doing so.
07. Voice activation
Activate the voice activation function. Connect the headset to the device
and then turn it on, press and hold the Play/Pause button for 3 seconds
until the red and blue lights come on, then release the button. Once this is
done, press and hold the Play/Pause button again for 3 seconds, the blue
light will start flashing a couple of times, indicating that the voice activation
function has been activated. From the next recording onwards, the device
will record in voice activation mode, recording only when it detects a
sound.
Deactivate the voice activation function: If you want to deactivate the
activation mode, repeat the steps taken to activate the function, but this
time the red light will flash and not the blue light, indicating that the
function has been deactivated. From the next recording onwards, the
device will normally record continuously without voice activation.

FAQ
Q1: The recorder can no longer record, how do I fix it?
A1: Make a backup of the file you do not want to lose and format your
computer device. If you can use it normally after formatting, please clean
your computer in time. This means that your computer's virus has infected
the pen, making it unusable for recording. It may damage the pen and
make it non-repairable.
Q2: The indicator light behaves abnormally or remains lit all the time.
A2: Back up the files, you do not want to lose and format the device from
your computer. To format the device you need to connect it to your
computer via USB cable, click on "My Computer", right-click on the
removable disk drive assigned to the recorder and click on Format, then
click on Quick Format.
Q3: The computer does not reveal the recorder
A3: Make sure the USB cable and USB ports from your computer are
working properly. Perform a virus scan of your computer and then try
again. If it does not resolve, contact our after-sales support team.
When charging or connecting to the
computer, press first the "off" button;
when disconnecting, wait until the
light is off before using it.
After recording, regardless of whether
the recorder is powered on or off, you
must first press the "off" button to
save the recording file.
Please charge with provided charging
cable to avoid damaging the unit.
Warranty
We provide a Two-year warranty,
ensuring that all of our products
meet the stated performance
specifications under normal use
and proper care.
Battery
Built-in lithium
battery
Charging time
Approx. 1.5
hours (connect
the device to
the computer
to charge)
Playback format
MP3/WMA/WA
V playback
format
Recording
Quality 192
KBPS
Memory
Built-in 16GB
memory - up to
196 hours
playback time
USB
Interface USB
2.0
Package contents
1x Voice
recorder
Table of contents
Popular Accessories manuals by other brands
Simrad
Simrad PI BOTTOM CONTACT - QUICK REFERENCE GUIDE REV... Quick reference guide
ST
ST X-NUCLEO-53L3A2 Detailed Quick Start Guide

CAS
CAS CI-1500 user manual

American Standard
American Standard Rise and Shine Toilet Seat 5325.024 Specifications

Swisher
Swisher PowerBlade PBP-3640 Assembly instructions

Airspan
Airspan Air4Gp installation guide
