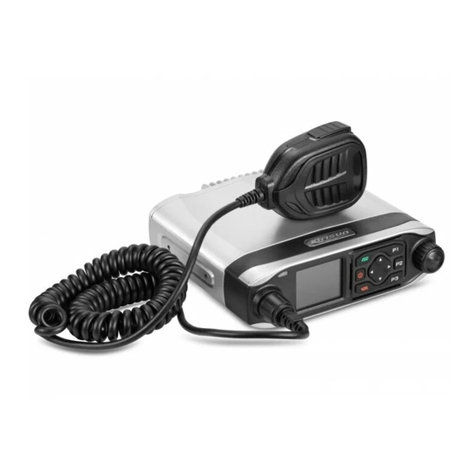
TTI PMR-1000TX User manual

Instruction Manual
Tech
Private Mobile Radio (PMR)446MHz
Model:PMR-1000TX

CAUTION
NEVER ATTEMPT TO CHARGE ALKALINE OR DRY CELL
BATTERIES. WHEN RECHARGING, USE ONLY THE RE-
CHARGEABLE BATTERIES SUPPLIED WITH YOUR TRANS-
CEIVER (OPTIONAL IN SOME CASES). USE OF OTHER
BATTERIES WILL CAUSE DAMAGE TO YOUR PMR-1000TX
TRANSCEIVER. OTHER TYPES OF BATTERIES MAY BURST
CAUSING PERSONAL INJURY.
AVOIDINSTALLINGTHEPMR-1000TX TRANSCEIVERINAN
AREA WHERE IT MAY BE SUBJECTED FOR PROLONGED
PERIODS OF TIME TO DIRECT SUNLIGHT OR TEMPERA-
TURES BELOW -4°F (-20°C) OR ABOVE 140°F (60°C).
KEEP THE ANTENNA AT LEAST 1 INCH (2.5 cm) AWAY
FROM YOUR HEAD AND BODY. DO NOT USE YOUR
PMR-1000TX RADIO TRANSCEIVER WITH A DAMAGED
ANTENNA.

Model PMR-1000TX
1. Battery CHARGE On/Off Switch
2. Liquid Crystal Display (LCD)
3. TX/RX LED
4. Antenna
5. Battery Door
6. Voice-Operated Transmission
(VOX) Button
7. Monitor Button
8. SCAN/Lock Button
9. Built-in Speaker
10. Built-in Microphone
11. CALL Button
12. DC12V Power Jack
13. Charging (CHG.) LED (Red)
14. Up/DownChannel/
VolumeButtons
15. Memory 1 Button
16. MODE Button
17. Memory 2 Button
18. Power On/Off Button
19. External Speaker(SPK)/
Microphone (MIC) Jacks
20. Push-To-Talk (PTT) Button
14
17
19
20
16
18
15
13
12
6
8
5
4
10
11
2
9
7
1
3
SPK MIC
DC12V CHARGE
OFF ON

Model PMR-1000TX DISPLAY
1. Beep On/Off Indicator: This icon appears when the beep key
tone is on, and disappears when tone is not in use.
2. Key Lock Indicator: Icon appears when keypad is locked. This
function disables keys such as MODE, Memory, SCAN and VOX.
3. Monitor Indicator: Icon appears when the Monitor (MON) button
is pressed and the channel monitor function is activated.
4. Signal Strength Indicator: Icon appears when a signal is being
received. The icon consists of five bars to indicate the received
signal level.
5. Continuous Tone Coded Squelch System (CTCSS) Indicator:
Icon appears when the CTCSS tone function is active.
6. Large Segment Display: Indicates the PMR-446 Radio channel
number in use.
7. Scan Indicator: This function allows the user to scan a channel
to search for a valid signal.
8. Battery Level Indicator: Icon indicates the battery charge level.
9. MEM1 / MEM2 Indicators: Appropriate icon appears when the
required memorized channel is selected.
11
10
12
13
7
8
6
4
5
3
2
1
9

Powering the transceiver:
The primary power source for Your PMR-1000TX base station is the
AC wall adaptor. The PMR-1000TX is also supplied with a battery
back-up, should you experience loss of household current.
The PMR-1000TX will automatically switch to battery back-up when AC
power is interrupted.
The rechargeable batteries are charged in the radio transceiver using
the AC power adaptor, which is also supplied with the unit.
Installing the Back-Up Batteries
(For some customers, batteries are optional.) :
The four AA batteries are installed in the compartment at the right
rear of the transceiver; the compartment is fitted with a removable
cover. Install the batteries as follows:
1. Press down with the thumb at the arrow, and slide the battery cover
off the side of the unit.
2. Insert the four AA rechargeable batteries provided. (Alternate
positive ends (+) as shown in battery compartment layout.) Replace
the cover.
10. Roger Beep Tone Indicator: Icon appears when the roger beep
tone is enabled, signifying transmission has been terminated.
Icon disappears when tone is disabled.
11. Small Segment Display: Displays the CTCSS tone option for a
given channel from (01-38).
12. Dual Watch Mode Indicator: Icon appears when dual watch
mode is active.
13. Voice Activated Transmission (VOX) Indicator: This
function allows hands-free conversation. The icon appears
when the VOX mode is activated.

The following guidelines will improve performance and provide
longer operating times for the PMR-1000TX:
BATTERY
INSTALLATION
POLARITY
BATTERY
COMPARTMENT
COVER
BATTERY
COMPARTMENT
COVER ARROW
1. Do not mix old and new batteries.
2. Do not mix alkaline, or rechargeable (Ni-MH) batteries.
3. If the unit is not to be used for an extended period of time,
remove the batteries. Old or leaking batteries can cause
damage to the unit and will void the warranty.
Charging The Rechargeable Batteries:
The rechargeable batteries, supplied with the unit, are
charged by connecting the AC Adaptor plug to the DC12V
jack on the top of the unit, and setting the CHARGE switch
to the ON position. Use only the AC Wall Adaptor that is
supplied with the base unit. The CHG. LED indicator below
the LCD display lights
red
during battery charge operation.

The battery charge indicator icon displays the battery charge level
when the AC adaptor is unplugged. When the AC adaptor is connected
and in use, the indicator icon will indicate a full charge as shown below.
Full Battery - three segments are illuminated.
Low Battery - one segment is illuminated.
Approximately 20–24 hours are required to fully charge the batteries.
The red LED charging indicator (12) will light whenever the batteries
are charging. A flashing red LED-charging indicator denotes batteries
are not installed. You must set the CHARGE switch to the OFF
position, when using any batteries other than the ones provided.
Failure to do this may cause damage to batteries resulting in personal
injury and/or damage to the unit.
Caution: The charging adaptor is intended for use with the supplied
rechargeable Ni-MH batteries. Do not attempt to recharge
any other type batteries.
CHARGE
ON/OFF
SWITCH ADAPTOR
PLUG
AC
ADAPTOR
DC12V
JACK BASE
UNIT
DC12V CHARGE
OFF ON

PMR-1000TX OPERATIONAL MODES
CHANNEL
SELECT
CALL
SELECT
MODE
CTCSS
SELECT
DUAL
WATCH
ROGER
BEEP
BEEP TONE
MEMORY1
SELECT
MEMORY2
SELECT

Controls:
Power On/Off (18) Button
Press and hold the power on/off button ( ) for at least 2 seconds.
You will hear a confirming melody to indicate the unit is on. To turn
the unit off, press and hold the button for at least 2 seconds.
Adjusting the Volume
With the unit powered on, press the Up Channel/Volume button
( ) to increase volume and the Down Channel/Volume button ( )
to decrease volume. The display will indicate the current volume level
by the small number adjacent to the icon ( )
This button is used to check activity on the current frequency before
transmitting. Check activity by pressing the Monitor (MON) button
longer than 2 seconds; the icon will appear on the display
and you will hear static if frequency is clear.
Donottransmitifyouhear conversation.
HolddowntheMONbuttonagain
longer than 2 seconds and the icon will disappear from the
display. The monitor function will temporarily bypass the squelch setting
and play all signals on a given channel. This feature is useful when
communicating with other parties at extreme range. By pressing the
monitor button momentarily, the LCD backlight is turned on; the LCD
backlight will turn off automatically in about 5 seconds, or when the
MON button is pressed momentarily once again.
Push To Talk (PTT) Button (20)
Pressing and holding this button will allow you to speak to any transceiver
that is set to the same channel and privacy code setting as yours.
Afteryou havefinishedspeaking,releasethePTTbuttontoallow reception
of incoming signals. It is not possible to transmit and receive at the
same time. The Transmit (TX) LED at the upper left side of the LCD
panel will light
red
while the PTT button is pressed. Releasing the button
allows the unit to revert to standby mode. When receiving an incoming
signal, the received signal strength indicator ( ) will display
the relative strength of the signal, and the receive (RX) LED at the
lower left side of the LCD will light green.
Monitor/(MON)Button(6)

CALLButton(11)
Pressing the button will call another party on the same channel.
The Transmit LED will light
red
for approximately 3 seconds and
then go out.
Up Channel/Volume Button (14)
In the standby mode, pressing this button ( ) will increment
the listening volume. When in function edit mode, this button will
be used to adjust the unit’s settings.
Down Channel/Volume Button (14)
In the standby mode, pressing this button ( ) will decrement the
listening volume. When in function edit mode, this button will be
used to adjust the unit’s settings.
Mode Button (16)
In the standby mode, pressing this button momentarily will enter
the function edit mode. Subsequent presses will cycle to each mode.
The MODE button is used to select various features for adjustment.
External Speaker (SPK)/Microphone (MIC) Jacks (19)
Thisset ofjacks acceptsan externalheadset/microphone connector.
Referto the Operational Modes.
Scan/Lock Mode Button (8)
Press this button momentarily to enable or disable the scan mode.
Press and hold button for more than 1 second to lock or unlock keypad
functions, except PTT, Call, Monitor (MON), Power on/off and Volume
up/down. When the keypad is locked, the ( ) icon will appear
in the upper left corner of the display.
Operational modes
Channel Selection
In order to communicate with other PMR-446 units, both transmitting
and receiving party must be on the same frequency. The PMR-1000TX
has 8 channels (frequencies 01-08) indicated by the large digits on
the LCD display panel. Communication with any compatible units
is possible on these 8 channels. Before transmitting on the selected

To change the PMR-1000TX channel,
- From the standby mode, press the MODE button (16) until
the channel number flashes.
- Press the Up button ( ) briefly to move to the next higher
main channel number.
- Press the Down button ( ) briefly to move to the next lower
main channel number.
Continuous Tone Coded Squelch System (CTCSS) Mode (Sub-
channel)Selection
The Coded Tone Controlled Squelch System (CTCSS) consists of 38
Sub-Frequencies. This feature allows you to utilize the coded squelch
tones (01-38) within each main channel (01-08). This enables you
to communicate with another party on the same main channel using
the same sub-code. The CTCSS filters out unwanted transmissions
without the same coded squelch tone.
To change the CTCSS Sub-channel,
channel, press the Monitor (MON) button (7) to check the activity
on that channel. If there is activity on the selected channel, change
to another channel that is clear.
- From the standby mode, press the MODE button twice; the
sub-channel number will flash as it is displayed. If oF is displayed,
press the Up or Down button to enable the CTCSS mode; the
flashing CTC icon will appear on the display with the flashing
sub-channel number.
- Then press the Up or Down button to select the desired sub-channel
for use.
- Press the PTT button momentarily to confirm selection.
The CTCSS mode can be turned off by selecting the oF icon
with the Up or Down button.
NOTE: To communicate with other PMR-446 units, they must be
switched to the same channel and CTCSS sub-code. To
communicate with other PMR-446 units that do not have
sub-codes, switch your unit to the same channel with the

sub-code set to oF. The CTCSS sub-codes do not prevent others from
hearing your transmission. This will only allow you to ignore all traffic
on a given channel not using the same sub-code.
Dual Watch Mode
This feature allows you to monitor two channels. While in dual watch
mode, the unit will continuously monitor both the primary and dual
watch channel. Received signals will be played for 5 seconds then the
other channel will be scanned. Pressing the PTT button during a
received transmission will set the unit to transmit on the same channel.
Pressing the PTT button when no signal is received will set the unit
to transmit on the primary channel.
To set the Dual Watch Mode:
- From the standby mode, press the MODE button 3 times;
the DW icon flashes on the display. If the dual watch mode is
off, the oF icon will also appear flashing.
- To enable the dual watch mode, press the Up or Down button;
the dual watch channel number will flash and start to increment
up or down as the Up or Down button is pressed.
-Press the PTT button to confirm selection of the dual watch
channel. The display will now alternate between the primary
channel and the dual watch channel just selected.
When enabled, the DW icon appears steady on the display. To exit
the dual watch mode, enter the dual watch mode again and set the
mode off (oF).
Roger Beep Tone
The Roger Beep is a tone, which is automatically transmitted whenever
the PTT button is released. This tone alerts the receiving party that
the transmission has been terminated intentionally.
To enable and disable the Roger Beep tone:
-From the standby mode, press the Mode button 4 times until rb
appears on the display with the flashing Roger Beep icon ( )
and On or oF.
-Press the Up or Down button to select the tone on or off as desired.
- Momentarily press the PTT button to confirm selection.
When enabled, the tone icon ( ) appears steady on the display.

Beep Tone
This feature allows the transceiver to sound a tone whenever the
following keys are pressed: Up/Down buttons, VOX button, MODE
button, SCAN button, Monitor (MON) button, Memory (MEM1/MEM2)
button, or Power button.
To turn the beep tones on or off:
-From the standby mode, press the MODE button 5 times until bp,
the Bell ( ) icon, and On or oF flash on the LCD display.
-Press the Up or Down button to toggle the key tone feature
On or Off.
- Momentarily press the PTT button to confirm your selection.
When enabled, the bell icon appears steady on the display.
Memory Selection
The Memory function allows you to store a channel so that you can use
the stored channel when needed by pressing the MEM1 or MEM2
button.
- From the standby mode, press the MODE button6 timesuntil MEM1
icon appears on the display with the flashing MEM1 icon.
- Press the Up or Down button to select a channel.
-Momentarily press the PTT button to confirm selection.
NOTE: To use the stored channel, press the "MEM1"button, then you
will be able to see the stored channel and MEM1 icon on the display.
* While the memorized channel is working, the SCAN and
MODE buttons are locked. To unlock the buttons, press the
MEM1 button one more time. The radio goes to the home
channel and the buttons are unlocked.
To select or exit MEM2, press the Mode button 7 times until MEM2
icon appears on the display, and repeat the same process as done
in MEM1.
Call Ringer Selection Mode
The transceiver provides 5 user-selectable call ringer melodies to alert
you to an incoming call.
To select your favorite call ringer melody:
-From the standby mode, press the MODE button 8 times; C will
appear on the display, together with a flashing number between

01 and 05, and an appropriate call ring.
-Press the Up or Down button to preview and hear the 5 available call
melodies.
- Momentarily press the PTT button to confirm your selection.
VOX Selection Mode
This option enables you to have hands-free conversation. Your
voice or other relatively loud noises are detected and the radio
transmits without the need to press the PTT button.
To set radio for VOX operation,
-From standby mode, press the VOX button; Vo appears steady and
VOX icon and sensitivity level (if VOX is enabled) flashes on the
display.
-Press the Up or Down button to select the desired VOX sensitivity
level (05 is the most sensitive, 01 is the least sensitive, oF represents off).
-Momentarily press the PTT button to confirm the VOX selection.
-The VOX icon will appear steady on the display whenever the
VOX feature is in use.
VOX can be turned off by selecting oF as the setting.
Scan Operation
This feature allows you to monitor all channels automatically for
valid signals. While scanning, you can transmit and receive. During
reception, the scan function is interrupted and will return to the scan
mode after 10 seconds. To enable the channel scan mode,
-Momentarily press the SCAN button; SCAN will appear on the
display.
-The radio will display each channel (01-08) in order as the scan
mode operates to find an active main channel.
When unit doesn’t find any signals and you want to transmit, press
the PTT switch to return to home channel operation. The transceiver
will automatically resume scanning approximately 15 seconds
after the transmission is completed.
-If there is no activity and you want to leave the scan mode, press
the SCAN button momentarily and the unit will return to normal
operation; SCAN icon will disappear from the display.
-
Call ring can be turned off buy selecting oF as the setting.
-

Auto Key Lock Selection Mode
This feature prevents accidental channel change. The Auto Key Lock
functiontemporarily disablestheVOX, SCANMODE,MEM1 andMEM2
buttons.
To access the Auto Key Lock selection menu:
-From the standby mode, press and hold the SCAN button for over
2 seconds to Lock the Auto Key function; the ( ) icon appears
on the display.
-To unlock the Auto Key function, press and hold the SCAN button
for at least 2 seconds; the ( ) icon disappears from the display.
Additional Functions
When one or more segments of the battery ( ) icon appear(s)
flashing on the LCD panel, recharge unit or install new approved
rechargeable batteries. If this icon continues to flash on the LCD,
please contact your authorized service center. Prior to contacting
your authorized service center, please check the following:
1. Check the operating procedures.
2. Verify correct battery installation.
3. Install new, charged Alkaline batteries and check functions.
4. Check that AC adaptor is plugged into a working AC power
outlet.
NOTES FOR GOOD COMMUNICATION
1.The PMR-1000TX channels are shared on a 'take turns' basis.
This means other groups may be talking on any of the channels.
A common code of
courtesy is to switch to another vacant channel
and not to attempt to talk over someone who is already using the
channel you first selected.
2.The PMR-1000TX has been designed to maximize performance
and improve transmission range in the field.To avoid interference,
it is recommended that you do not use the units closer than 5 feet
apart.
3.
To increase battery life, use the SCAN feature sparingly.
This feature
will reduce operating time considerably.

Remove the batteries from the transceiver if it is not expected to be
used for long periods.This will eliminate the possibility of chemicals
leaking from the batteries and corroding the transceiver.
Avoid exposing the transceiver to water or extremes of temperature.
Do not use this device in or near a mining facility, which uses remotely
triggered explosives or in areas labeled "Blasting Area".
Do not attempt to modify or in any way increase the output of this
transceiver. Its output is designed to meet the legal limits.
Do not use this device or charge its batteries in potentially explosive
atmospheres. Turn your transceiver off wherever posted notices
restrict the use of radios or cellular telephones.
Facilities such as hospitals may use equipment that is sensitive to
RF energy.
Turn your transceiver off on board aircraft when requested to do so.
Do not place your radio in front of a vehicle's air-bag. if the air-bag
deploys, it could propel the transceiver like a projectile causing bodily
injury.
Warning
TROUBLESHOOTING
If you have problems with your PMR-1000TX,
reset your unit by turning
it off and removing the batteries. And re-insert the batteries and turn
the unit on again. Check the battery power level since in many cases
low batteries cause problems such as no transmission, weak receiving
signal and low sound.
TECHNICAL SPECIFICATIONS
Operating frequency
Channel capacity
Channel spacing
Power source
446.00625 to 446.09375 MHz
8 channels
12.5KHz
4 X 1.5 V 'AA' battery
12V 500mA AC adaptor

NO
FREQ.(Hz)
NO
FREQ.(Hz)
NO
FREQ.(Hz)
1
2
3
4
5
6
7
8
9
10
11
12
13
14
15
16
17
18
19
20
21
22
23
24
25
26
27
28
29
30
31
32
33
34
35
36
37
38
OF
67.0
71.9
74.4
77.0
79.7
82.5
88.5
85.4
91.5
97.4
94.8
100.0
103.5
107.2
110.9
114.8
118.8
123.0
127.3
131.8
136.5
141.3
146.2
151.4
156.7
162.2
167.9
173.8
179.9
186.2
192.8
203.5
210.7
218.1
225.7
233.6
241.8
250.3
0
CTCSS Tone Sub-code Table
Main Channel Frequency Table
Channel Frequency
(MHz) Channel Frequency
(MHz)
1
5
446.00625 446.05625
2
6
446.01875 446.06875
3
7
446.03125 446.08125
48
446.04375 446.09375

CE DECLARATION
CE version of the PMR-1000TX that displays the "CE"
symbol on the product label, complies with the essential
requirements of the European Radio and Telecommunication
Terminal Directive 1999/5/CE.
This warning symbol indicates that this equipment operates
in non-harmonized frequency bands and / or may be subject
to licensing conditions in the country of use. Be sure to
check that you have the correct version of this radio or the
correct programming of this radio, to comply with national
licensing requirement.
For charging the rechargeable batteries, only CE-approved AC
adaptor must be used in compliance with the following specifications:
* INPUT : AC 230V 50Hz
* OUTPUT:DC 12V 500mA
The unit can be used without license and charges in:
Austria, Belgium, Denmark, Finland, France, Germany, Great Britain,
Greece, Italy, Luxemburg, Netherlands, Portugal, Spain, Sweden,
Switzerland
Safety Requirement
Table of contents
Other TTI Radio manuals

