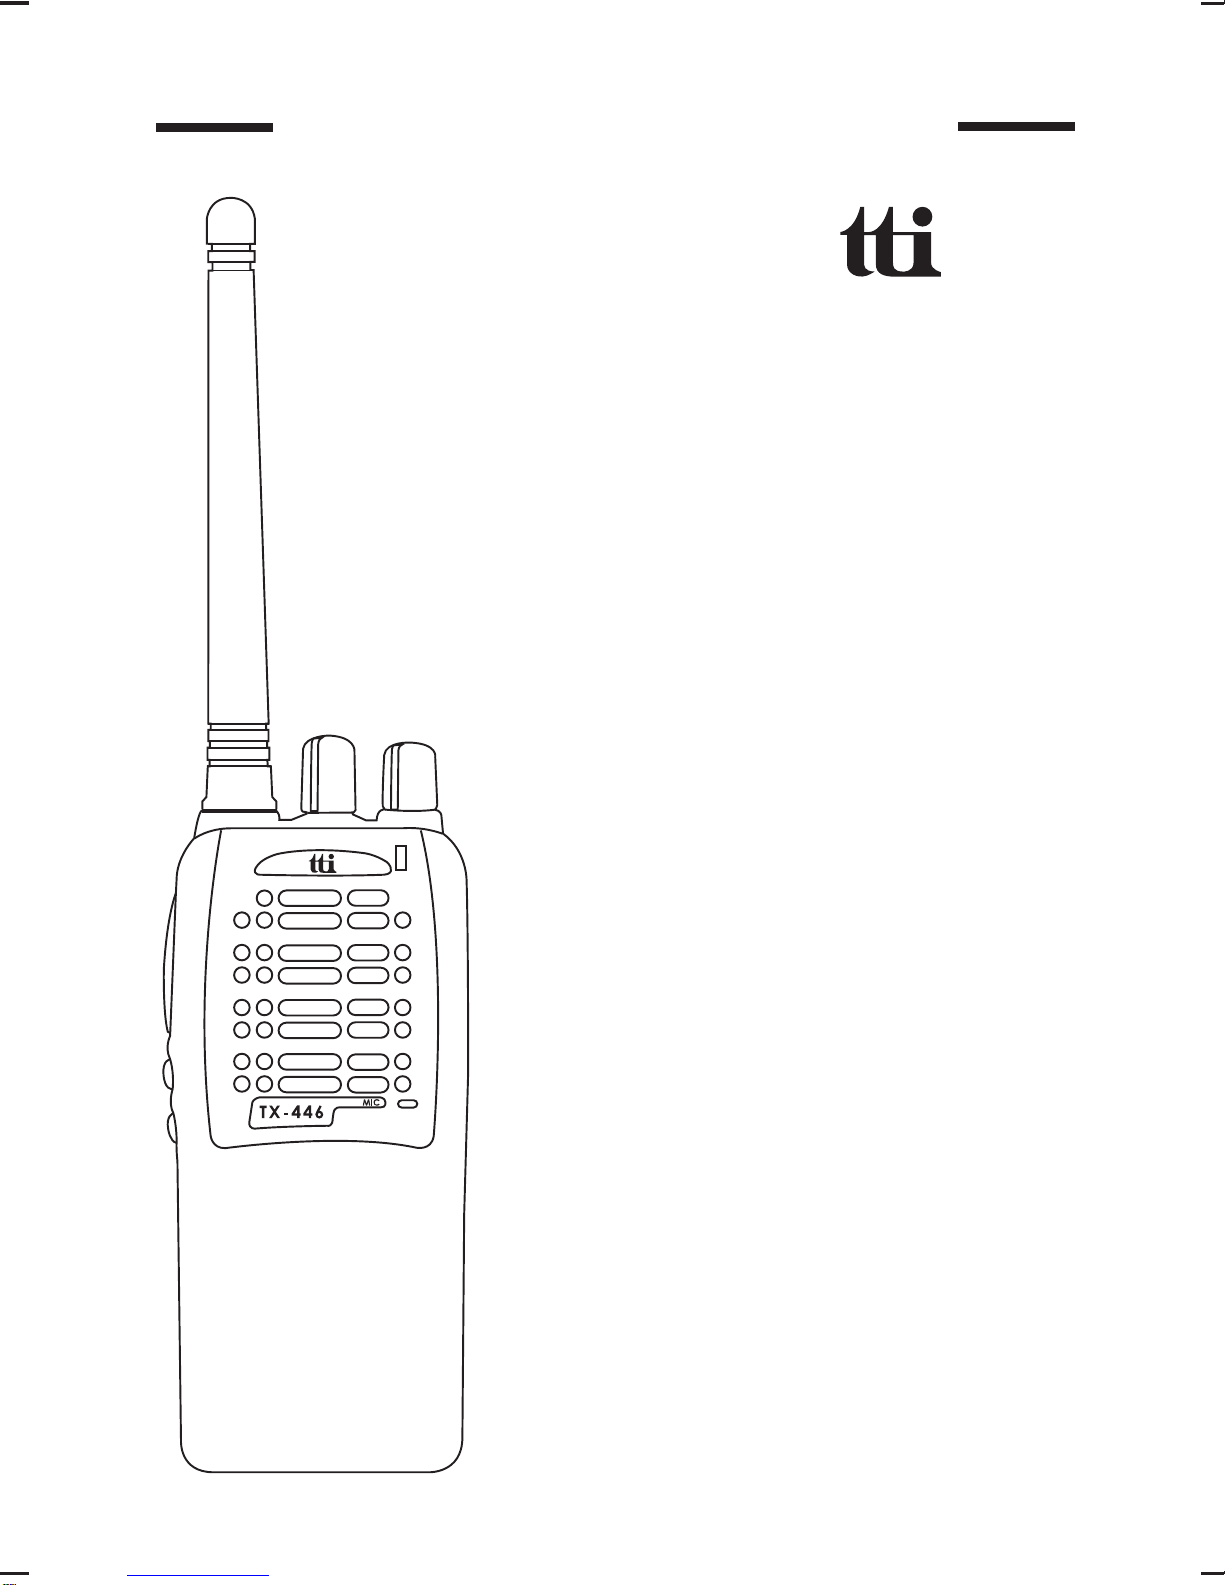
TTI TX-446 User manual
TTI TECH CO., LTD.
Eundo Bldg, 737-19, Banpo-1dong,
Seocho-ku, Seoul, Korea, 137-041
http://www.ttikorea.co.kr
Instruction Manual
Tech
Private Mobile Radio (PMR)446MHz
Model: TX-446

1
TABLE OF CONTENTS
1. Introduction
Transceiver Details
Beep
2. Getting Started
Battery Information
Installing Battery pack
Removing Battery pack
Attaching Belt clip
Removing Belt clip
3. Basic Operation
Switching Power On/Off
Adjusting Volume
Selecting a Channel
Transmitting a Message
Receiving a Message
4. Advanced Operation
Repeater/Talk-around
Setting Squelch Level
Handsfree Transmission (VOX)
Scan
Talkback
Deleting a Nuisance Channel
BCLO (Busy Channel Lock Out)
TOT (Time -out Timer)
Priority Function
Call Ringer
5. Specification
Product Specification
CE Declaration
english
2
english
1
2
3
8
4
7
6
5
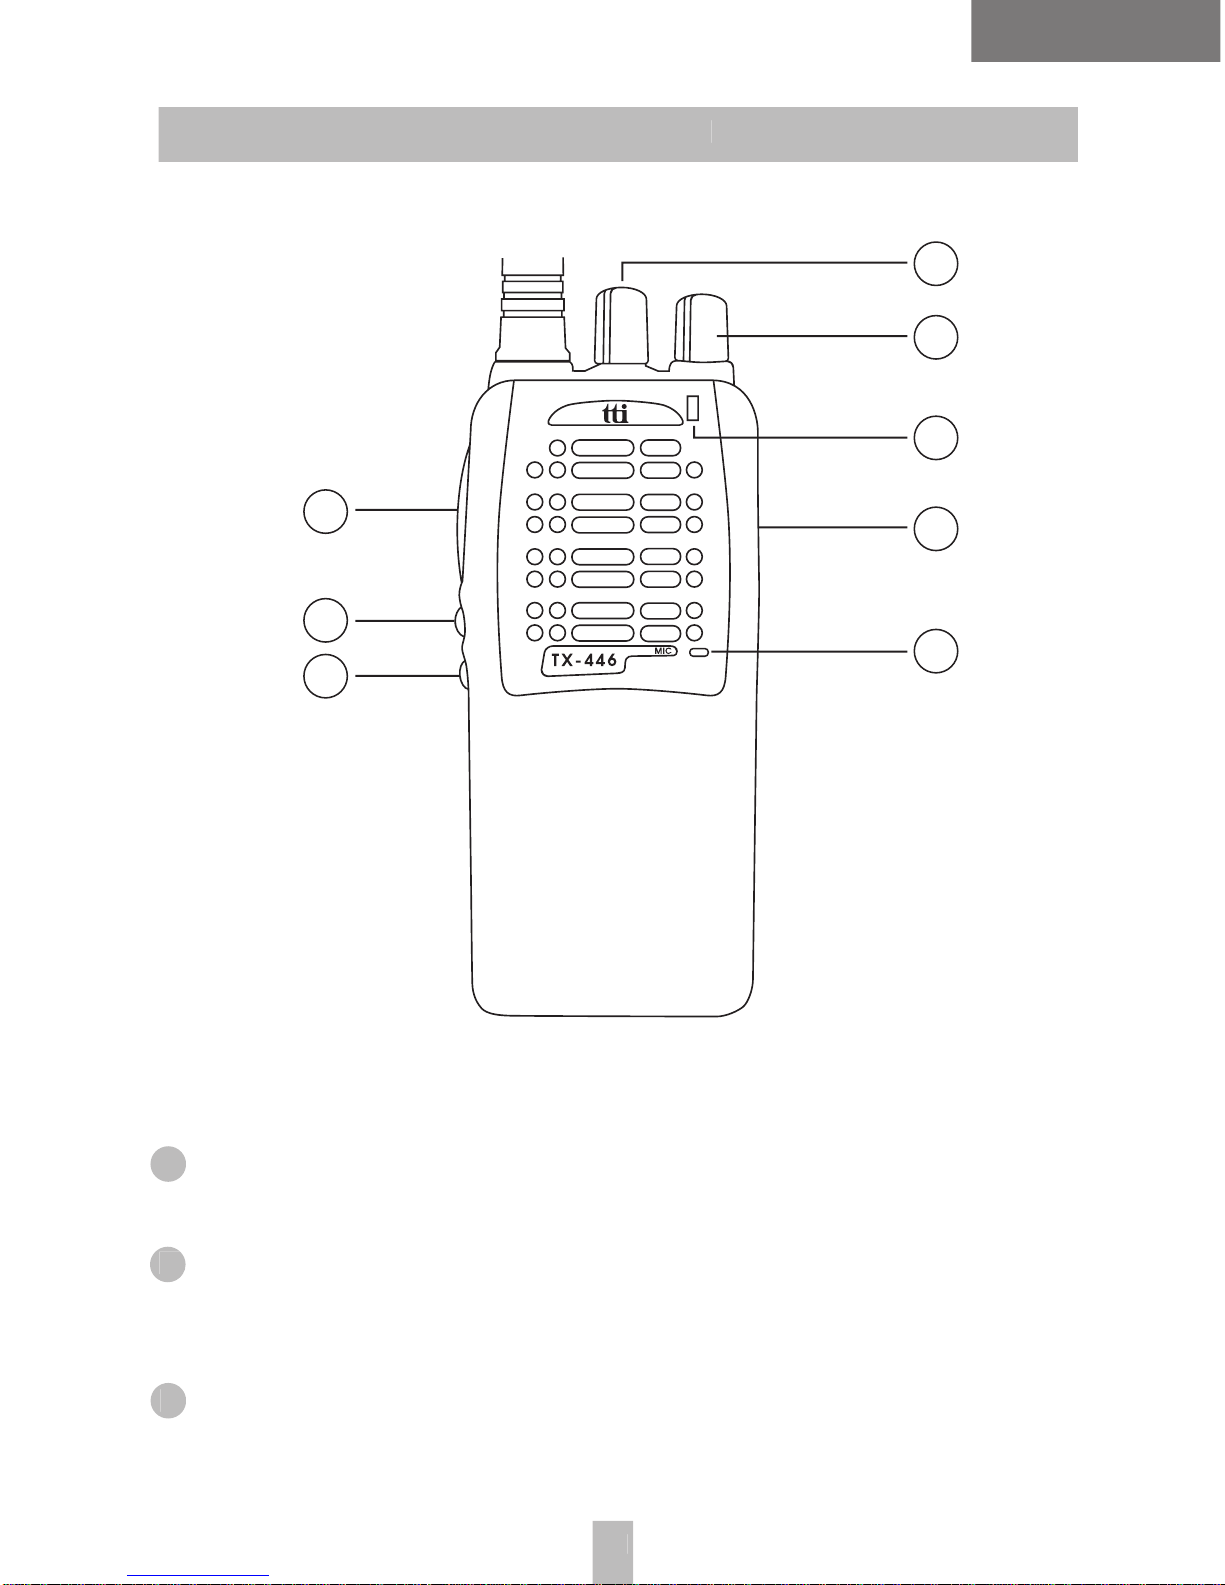
1. Introduction
1. Channel Selection Knob
1. Channel Selection Knob
This knob is used to select a channel.
2. Power/Volume Knob
2. Power/Volume Knob
This knob is used to turn the radio on or off, and to
increase or decrease the volume.
3. LED Indicator
3. LED Indicator
This LED indicates radio status.
Transceiver Details
english

english
3
english
4. Microphone
4. Microphone
Hold the radio upright and speak to the microphone
clearly and slowly.
5. PTT (Push-to-Talk) Button
5. PTT (Push-to-Talk) Button
Hold the radio as you speak into the built-in
microphone.
After you have finished speaking, release the
PTT button to get back to the receiving mode.
6. Side Button 1 (Programmable)
6. Side Button 1 (Programmable)
7. Side Button 2 (Programmable)
7. Side Button 2 (Programmable)
There are two side buttons in your radio and
various features can be programmed and assigned
to each key by your dealer.
Please contact your dealer to know which features
are programmed and assigned for your side buttons.
The following describes how to press the side buttons:
• SHORT:
click the button momentarily then release it.
• LONG:
press the button for a long time then release it.
•
HOLD:
hold down the button to check the status of radio
or adjust the radio‘s parameter.
You may operate the side buttons by pressing
SHORT
or
SHORT or SHORT
LONG
to activate one of the features.
LED color
Continuous "RED" lighting TX
Continuous "ORANGE" lighting RX with CTCSS or DCS code
matched
Continuous "GREEN" lighting RX
"GREEN" flashing "GREEN" flashing
Indication

4
english
english
Button Function SHORT/LONG HOLD
Monitor
Scan
Squelch
Call
Monior is
activated on your
selected channel
Delete
a Nuisance
Channel
Repeater/
Talk-around
To start scanning
from a current channel
or to quit scanning
To set the squelch level
between normal and tight
To page radios
Wenn scanning,
you can temporarily remove
an unwanted channel
from the scann list
To use a repeater function
or to allow communications
directly with other parties
without using a repeater
8. Accessory Connector Cap
8. Accessory Connector Cap
Beep
1. Power on and self test success beep
2. Power on and self test failure beep
3. VOX power on beep (High Sensitivity)
4. VOX Power on beep (Low Sensitivity)
5. Positive beep
6. Negative beep
Note:
mark means high voice beep.
mark means low voice beep
To access your accessory connector, remove the pro -
tection cover by removing the retaining screw.

english
5
english
Beep for side button
Some beeps of the programmed
side buttons
are program-
side buttons are program-side buttons
mable, which means the features are programmable.
Scan Start scanning Quits scanning
Tight squelch Normal squelch
Without using a repeater Using a repeater
Squelch
Repeater/Talk-around
Side Button Features Positive Beep Negative Beep
2. Getting Started
Battery Information
To maximize the battery life and performance, and to ensure
the highest performance and longest life cycle, you should
properly use the battery pack in accordance with following
simple rules:
• If you use a non-TTI supplied charger, the battery might
be damaged.
• Turn off the radio when charging the battery.
• A room temperature of 25°C is desirable to store and
charge the battery.
• Do not charge a cold battery at around 10°C or below.
This will make the battery inefficient.
• Do not charge a hot battery at above 35°C. This will
reduce the life cycle of battery.
• A new battery can be stored up to two years with no
harmful effect to the life cycle of the battery if stored
at a cool and dry place.
• Do not charge a fully-charged battery to get an
extra
boost
.
This will significantly reduce its life cycle.
• Our batteries and chargers have been designed to be

6
english
english
Battery latch
slot
operated as an integrated energy system. So, to get an
optimum performance of the battery, you should use
TTI-supplied charger only.
Installing Battery Pack
1. Put the battery pack
onto the bottom
of the Radio.
2. Place the battery pack
into the upper edge
area of the Radio,
then push the battery pack
gently until you hear
a
‘click‘
sound.
‘click‘ sound.‘click‘
Removing Battery Pack
Before removing the battery pack,
you must turn off the Radio.
1. Press down the battery latch.
2. And separate the battery pack
from the upper area.

english
7
english
Attaching Belt Clip
1. Align the mounting
rail of the radio with
the groove of belt clip
and slide the belt clip
downwards until
it sounds
‘click.‘
release tab
Removing Belt Clip
1. Press down the release tab.
2. And slide the belt clip
upwards.

8
english
english
ON OFF
3. Basic Operation
Switching Power On/Off
• To turn on the radio, turn the power/volume knob clock-
wise. You will be able to see a green and red light on
the LED cap with a beep. After the beep, the red light
goes off.
• If the beep sounds high and short, a Self-Test succeeded,
and the Self-Test failed, if the beep sounds low and long.
• To turn off the radio, turn the power/volume knob anti-
clockwise until there sounds a ‘click‘.
Adjusting Volume
• Hold down the monitor button to hear background noise.
• Adjust the volume by turning the power/volume knob to
the right or left with the monitor button being pressed.
• To increase the volume, turn the knob to the right and
to reduce the volume, turn the knob to the left.
• Release the monitor button.
Selecting a Channel
Choose a channel you want by rotating the channel
selection knob.

english
9
english
Note:
Please, check if your radio is programmed with the channel
selection function. For more details, you may ask your dealer.
Transmitting a Message
1. Turn on the radio.
2. Select a channel.
3. Press and hold down the PTT button, and speak clearly
to the microphone from a distance of around 2.5~5cm.
Release the
PTT button
to return to the receiving mode.
Receiving a Massage
1. Turn the radio on.
2. Adjust the volume
3. Select a desired channel
Note :
You can receive a message only when the other party‘s channel
and sub-tone code are the same as you have with your radio.
4. Advanced Operation
Repeater/Talk-around
At the following conditions, you can directly communicate
with the other party by using the talk-around function.
• In case that a repeater is not activated.
• When you are out of the repeater range.
To operate on/off function of talk-around, your dealer
must program a side button for the
repeater/talk-around
function.
If you hear the positive beep when you press the repeater/
talk-around button, your radio is not using the repeater.
On the contrary, if you hear the negative beep, your radio
is using the repeater.

10
english
english
Handsfree Transmission (VOX)
This option enables you to have handsfree conversation.
Your voice or sound around the radio is detected, and the
radio automatically goes to the TX mode without pressing
the PTT Button.
VOX Operations
To set your radio to VOX mode, you have to:
1. Turn the radio off.
2. Turn the radio on with the side button 1 being pressed.
3. VOX is activated through the radio built-in microphone.
4. VOX is also activated through the optional headset
microphone once the headset is connected through the
microphone connector on the radio.
Selecting VOX Sensitivity
To change the VOX sensitivity between low and high, you
should:
1. Turn the radio off.
2. Turn the radio on with the side button 2 being pressed.
Setting Squelch Level
The Squelch function plays a role in controlling the amount
of signals the radio receive. Setting the radio to the tight
squelch level, you can avoid unwanted signal or noise,
but you may not receive a weak signal. So, it will be better
for you to select the Normal Squelch level.
You can change between the tight and normal squelch level
as below:
• The
positive beep
means your transceiver is set as tight
positive beep means your transceiver is set as tightpositive beep
squelch.
• The
negative beep
means your transceiver is set as normal
squelch.

english
11
english
Scan
This feature allows you to monitor all the channels automati-
cally for valid signals. Your dealer can program more than
16 channels on the scan list.
Scan operation
By pressing a side button in which the
scan
function is
programmed, you can operate the scan function.
1. Press the
scan button
to begin scanning.
scan button to begin scanning.scan button
2. Press the
scan button
one more time to stop scanning.
scan button one more time to stop scanning.scan button
Note :
The
LED
flashes green color while scanning.
Talkback
With the talkback function being activated, if your radio has
scanned a channel on which there is a party with whom you
want to talk, you can directly communicate with the party by
pressing and holding down the PTT Button.
Deleting a Nuisance Channel
When the radio has scanned a channel which you don‘t want
to hear, you can temporarily remove the channel from the
scan list by using the
nuisance channel delete
feature.
If the radio is locked onto a unwanted channel, press the
nuisance delete
button until you hear beep two times.
nuisance delete button until you hear beep two times.nuisance delete
Note :
If the priority function is programmed by your dealer, you
cannot remove the priority channel from the scan list. The last
channel also cannot be deleted from the scan list.
Note :
To bring a deleted nuisance channel back into the scan list, you
must reset the radio.
12
english
english
TOT (Time-out Timer)
This feature prevents channel congestion and helps conserve
battery life by automatically powering down the unit after
a designated period of time. This timer can be selected to be
set from minimum 15 seconds up to maximum 225 seconds.
This feature can be switched on and off by pc programming
process.
Priority Function
This function allows the radio to assign more time to monitor
the priority channel while scanning. Your dealer can program
the priority function by using the TTI software.
ch1 ch2 ch3 ch4 ..... ch1
Inactivity
Activity
PRIORITY FUNCTION SCAN SEQUENCE
ch1 ch2 ch1 ch3 ch1 ch4 ch1
Call Ringer
The radio provides 5 selectable call ringer sounds to alert to
an incoming call.
Your dealer can assign one of the call ringer sounds.
The selected call ringer sound can be mute on the transmit-
ting radio by pc program.
BCLO (Busy Channel Lock Out)
This feature inhibits transmission whenever the unit detects
another conversation is on the same channel. This is pro-
grammablefeature and can be switched on and off by
programming process.

english
13
english
5. Specification
Product Specification
• General
Frequency:
446.00625 -446.09375 MHz
Number of Channels:
16 Channels
Power Supply:
7.5V DC
Antenna Impedance:
50 Ohms
PLL Step:
5kHz, 6.25kHz
Operating Temperature Range:
-30°C to +60°C (EIA)
-25°C to +55°C (ETS)
Dimensions With Standard
NiMH Battery:
H (132mm) X W (56mm) X D (36mm)
Weight
(With Standard Ni-MH Battery):
350g
Average Battery Life @ 5/5/90 Cycle:
10 hours
(With Standard Ni-MH Battery)
Environmental Sealing:
MIL- STD - 810 -C, D & E
and IP 54
Shock and Vibration:
Impact Resistant Housing Exceeding
MIL STD-810-C, D & E and TIA/EIA603
• Transmitter
Frequency Separation:
Full Bandsplit
Channel Spacing:
12,5 kHz
Freq. Stability (-30°C to +60°C):
+/-2.5 ppm
Power:
0.5W ERP
Modulation Limiting:
+/-2.5 kHz @ 12.5 kHz
FM Hum & Noise:
40dB
Spurious/Harmonics:
36 dBm < 1GHz, -30 dBm > 1GHz
Adjacent Channel Power:
- 60 dB @12.5 kHz
Audio Distortion:
3 % typ. (1kHz/40% dev.)
FM Modulation:
12.5 kHz 11 K0F3E

14
english
• Receiver
Sensitivity
@ 12dB SINAD (EIA) : 0.25uV typ.
@ 20dB SINAD (ETS) : 0.60uV typ.
Adjacent Channel Selection :
- 60dB @ 12.5kHz
Intermodulation :
70dB (EIA), 65dB (ETS)
Spurious Rejection :
70dB (EIA)
Hum and Noise :
-45 dB @ 12.5kHz
Rated Audio Output :
400mW typ. @ 5% distortion
Audio Distortion :
3%
Conducted Spurious Emission :
57dBm < 1GHz
CE Declaration
CE Version of the TX-446 which Display
the “CE“ symbol on the product label,
complies with the essential requirements
of the European Radio and Telecommuni-
cation Terminal Directive 1999/5/CE.
This warning symbol indicates that this
equipment operates in non-harmonized
frequency bands and /or may be subject
to licensing conditions in the country of
use. Be sure to check that you have the
correct version of this radio or the correct
programming of this radio, to comply with
national licensing requirement.
Safety Requirement
For charging the battery, only CE-approved AC adaptors
must be used for the charger cradle in compliance with the
following specifications:
* OUTPUT : DC 14V 150mA
0682
Other manuals for TX-446
1
Table of contents
Other TTI Radio manuals


