manuals.online logo
Brands
  1. Home
  2. •
  3. Brands
  4. •
  5. TubeOhm
  6. •
  7. Synthesizer
  8. •
  9. TubeOhm De-Generator User manual

TubeOhm De-Generator User manual

Other manuals for De-Generator

2

Other TubeOhm Synthesizer manuals

TubeOhm Jeannie User manual

TubeOhm

TubeOhm Jeannie User manual

TubeOhm De-Generator User manual

TubeOhm

TubeOhm De-Generator User manual

TubeOhm Phoenix/Shruthi CD4069 Filter edition User manual

TubeOhm

TubeOhm Phoenix/Shruthi CD4069 Filter edition User manual

TubeOhm Jeannie User manual

TubeOhm

TubeOhm Jeannie User manual

TubeOhm De-Generator User manual

TubeOhm

TubeOhm De-Generator User manual

Popular Synthesizer manuals by other brands

NEON CAPTAIN Radioator user manual

NEON CAPTAIN

NEON CAPTAIN Radioator user manual

Roland JD-800 owner's manual

Roland

Roland JD-800 owner's manual

Joranalogue Contour 1 user manual

Joranalogue

Joranalogue Contour 1 user manual

Full Bucket Music Mono/Fury manual

Full Bucket Music

Full Bucket Music Mono/Fury manual

IK Multimedia UNO Synth PRO X user manual

IK Multimedia

IK Multimedia UNO Synth PRO X user manual

Kawai MP7 Software update

Kawai

Kawai MP7 Software update

Roland Gaia SH-01 Quick guidebook

Roland

Roland Gaia SH-01 Quick guidebook

Behringer DEEPMIND 12 quick start guide

Behringer

Behringer DEEPMIND 12 quick start guide

Yamaha S90 ES owner's manual

Yamaha

Yamaha S90 ES owner's manual

Roland GR-30 manual

Roland

Roland GR-30 manual

Moog Minitmoog 300A Owner's service manual

Moog

Moog Minitmoog 300A Owner's service manual

Gotharman Gotharman's anAmoNo-box user manual

Gotharman

Gotharman Gotharman's anAmoNo-box user manual

QuStream HDFS-550 Technical manual

QuStream

QuStream HDFS-550 Technical manual

Yamaha V50 Authorized product manual

Yamaha

Yamaha V50 Authorized product manual

Akai AX80 Operator's manual

Akai

Akai AX80 Operator's manual

Roland GS-500 instructions

Roland

Roland GS-500 instructions

Octave Cat SRM Service manual

Octave

Octave Cat SRM Service manual

Dreadbox Murmux Initiate manual

Dreadbox

Dreadbox Murmux Initiate manual

manuals.online logo
manuals.online logoBrands
  • About & Mission
  • Contact us
  • Privacy Policy
  • Terms and Conditions

Copyright 2025 Manuals.Online. All Rights Reserved.

De-Generator
DIY sample synthesizer
Building instruction 1, the panelboard
V1.0 english
stand 08.04. 019
www.tubeohm.com
1
De-Generator part Layout
Preface
We try to write the DIY manual as detailed as possible.
If you have any questions, please contact us at Kontakt@TubeOhm.com
If you can't get on with a component, let it go first, clarify the situation with us, and then
you can move on. It is essential - check beforehand - not after !!
The power lies in peace, please choose the parts you need and check twice if they are the
right parts. LED's, electrolytic capacitors, resistor arrays, MIC etc. have a polarity. Before
you solder components in, you better check twice. The resistors should also be measured
through before soldering. Nothing is more annoying than searching for hours because a
wrong resistance has been soldered in.
For LEDs, potentiometers, buttons and encoders... one or two legs can be soldered on
first. Then it is much easier to straighten the component. If everything is straight and
consistent, the component is completely soldered.
The IC sockets can also be soldered crosswise to two pins. The socket should lay
flat on the PCB. If not, heat both pins a ain and press it onto the PCB.
-
--
1
Pannel-Board
DE-GENERATOR
POT-1 POT-2
VOLUME
PAGES
TubeOhm Instruments
MIDI-IN
ER-TFTM03 -3
ARP/ SEQRECORD
LFO3LFO2LFO1
CANCEL
DELSAVE
LOAD
MOD-MATLFOENV
VCF
OSC
R14R13
10k lo POT
74HC573N
IC1
LED-RES LED-RES
K14
So now we start with the first of three DIY manuals for the de- enerator.
We'll start with the panel board. It is relatively easy to build.
Required tools :
1:) Soldering iron, best adjustable, solder and a suction pump
:) a cutter
3:) multimeter
Here are some tips :
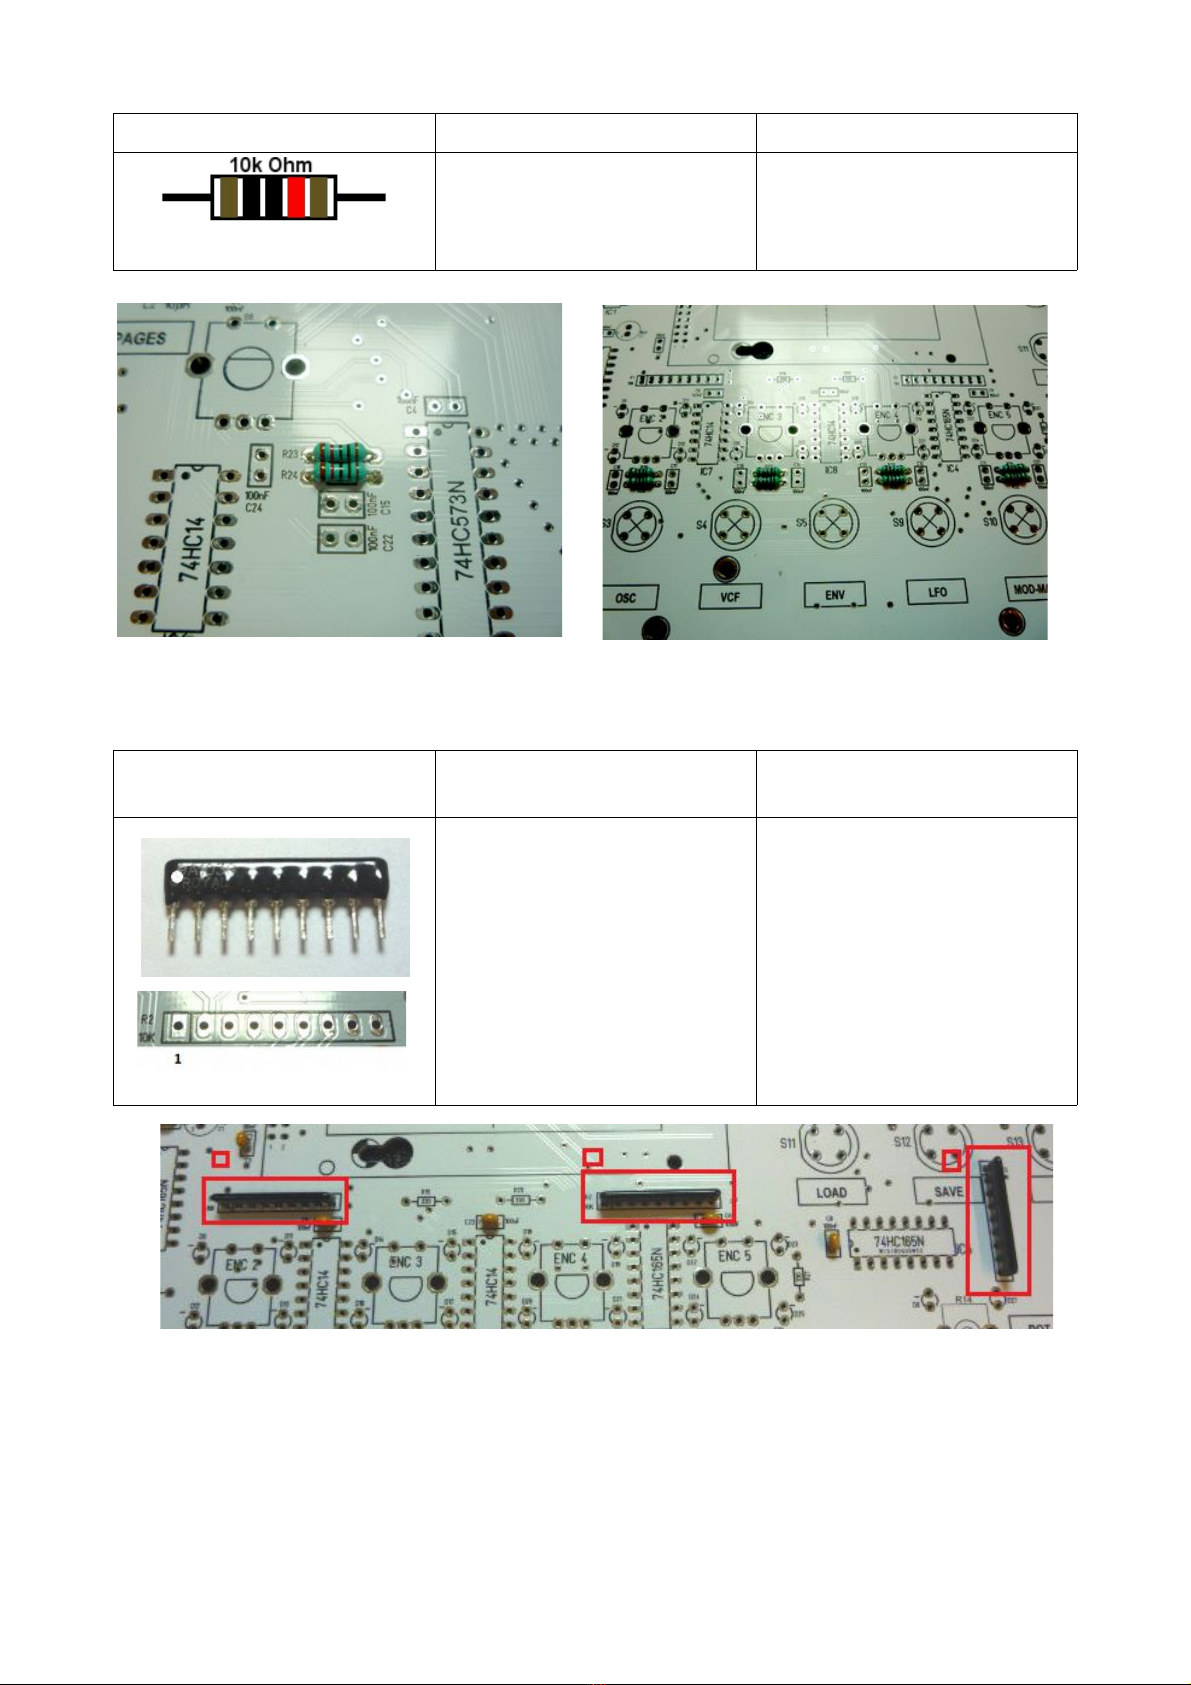
Guys, pick up the circuit board and take a look at it first.
The solder pads are so big that there should be no problems. Check that you have the
right tip on the soldering iron and also look at the regions on the board where the wires
come a little closer together. In these regions you should then solder more carefully.
Please remember - one part is quickly soldered in but it is very tricky to get it out !
If you don't know 100% exactly which part should be soldered in - leave it off and call or
mail us and ask. It's better to ask once than to search for errors for hours afterwards.
I can understand that you want the de-generator to be finished quickly, but if you work too
fast you make mistakes very quickly.
Please also check the connectors K3,K4,K14 and the MIC connector.
These are soldered in almost last, and at the bottom.
The enclosed microphone should also be soldered quickly so that it does not get too hot.
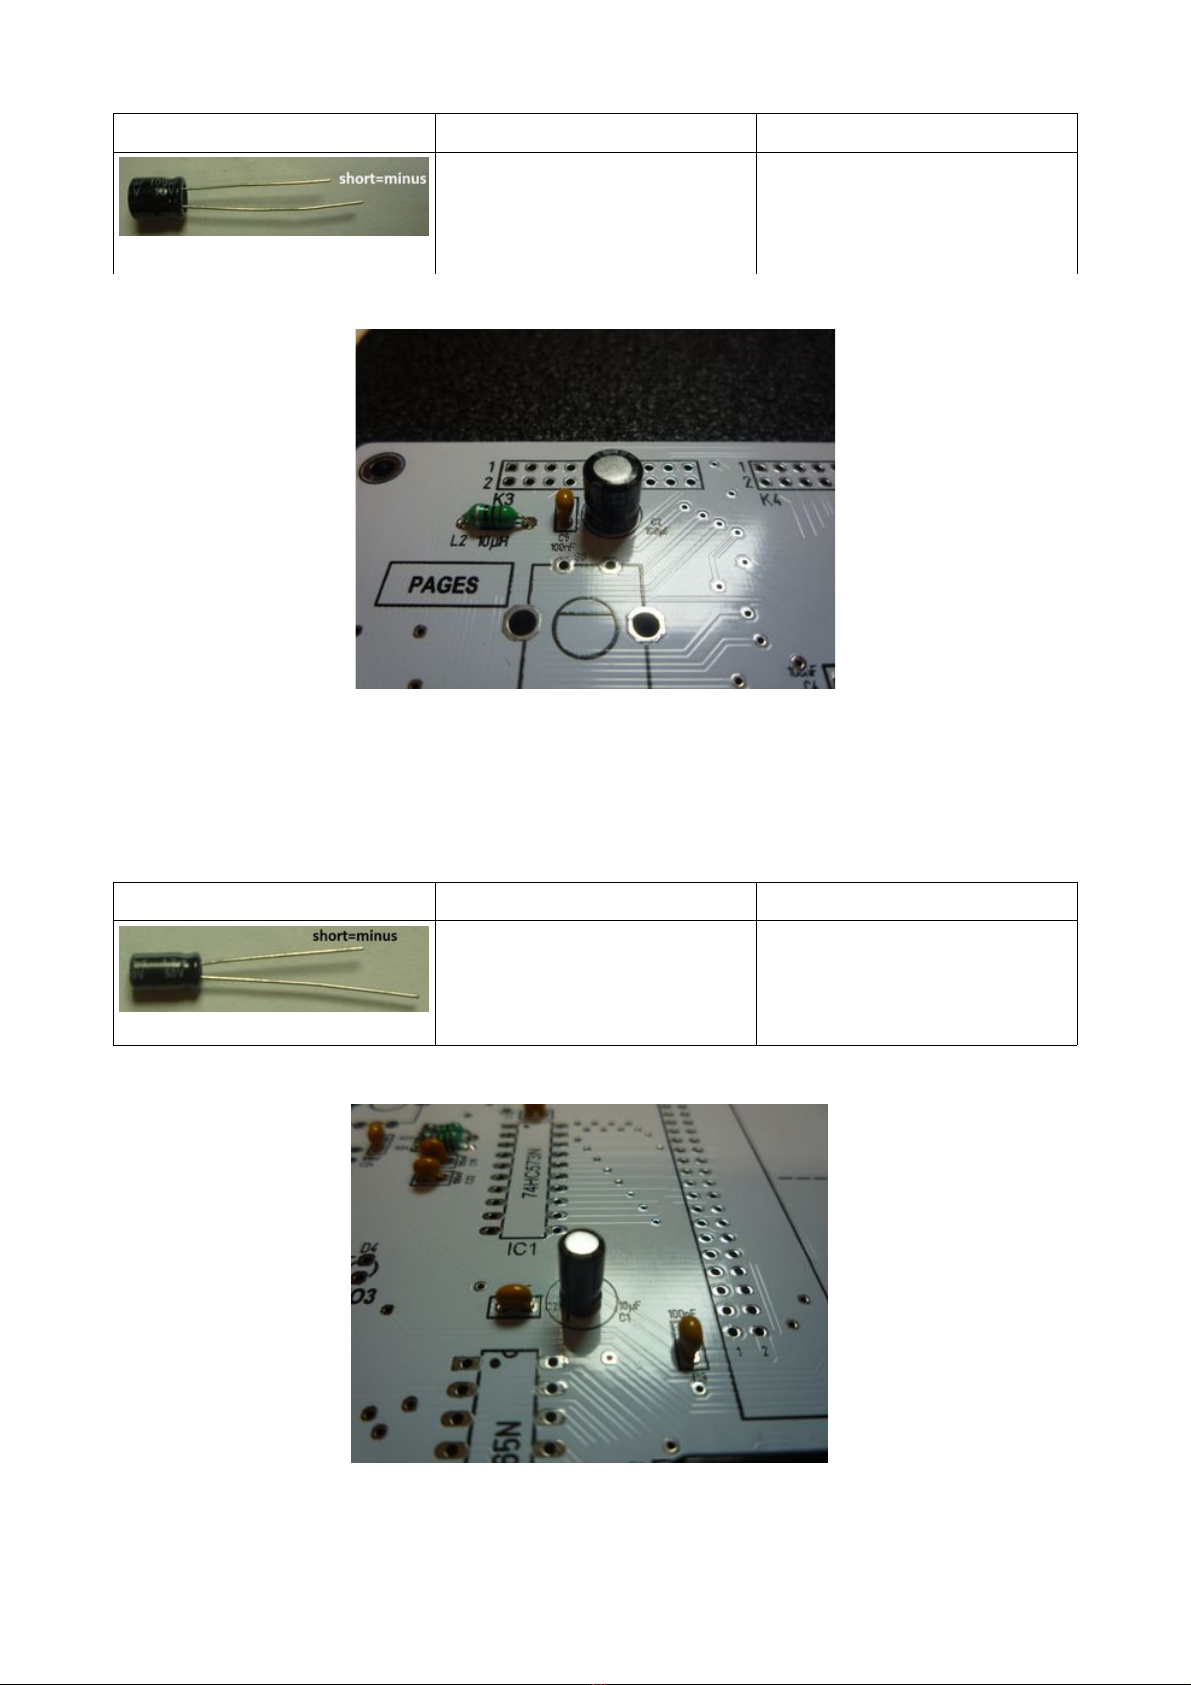
Of course you have to make sure that all potentiometers, encoders and switches are
soldered straight onto the board. If you have the Plexiglas case you can use the top side
as a template.
If the components are soldered on crooked, the housing will not fit afterwards and "it looks
sh***t (bad).
For people who want to install LEDs with other colors :
Different coloured LEDs can be used. The total current for 4 LEDs should not exceed 5..8
mA. This applies to the LEDs, the encoders ,3,4,5 and the freely programmable
potentiometers 1 and .
4 LEDs each are connected in parallel and have one series resistor. Thus the series
resistor is decisive for the total current, since the LED voltage is always the same, no
matter how many LED's are connected in parallel. The total current is divided into 4 partial
currents of the individual LEDs.
Here some information .
3
LED red V1,6 V... ,1 Volt
LED vellow/green 1,9V.. , Volt
LED blue/white ,9V..4V
The Formular.
UB = operating voltage 3,3 Volt
U_led= voltage of the LED
I_led= current of the LED
R_vor= value of the resistor in Ohm
R_vor=(UB-U_led)/I_led.
Sample calculation for 4 LED's red .
U_LED=1,6 Volt
I_LED =5 mA
R_vor =?
UB=3,3 V
R_vor=(3,3V-1,6V)/0,005A = 340 Ohm
4
All ri ht, let's et started. Is your solderin iron hot?
The following procedure.
First come the resistors / coil, then the capacitors, then the IC sockets, then the LEDs,
then the potentiometers and encoders, switches, connectors and the mic and finally the
LCD display.
First, the coil is soldered in
Coil/Spule Farbcode/colorcode Value/Position
brown, black, black, silver
'' can be the bigger or
smaller one in the kit
L , 10 uH
1xL
5
The Resistors
Resistor/Widerstand Farbcode/colorcode Value/Position
Red,red,black,black brown R4,5,6,7,8,9 = 0 Ohm
6 x 0 Ohm
6
Resistor/Widerstand Farbcode/colorcode Value/Position
Brown,black,black,red,brown R 3, 4, 5, 6, 7, 8, 9,30,31,3
10x10K
Resistorarray/Widerstands-
array
Farbcode/colorcode/code Value/Position
A103
Attention, the resistor-array
is polarized, the white point
is pin 1 and marked on the
part . On the PCB it is
marked with a rectangle.
R1, ,3=10K
3x10K resistor array
7
The Capacitors
Capacitor Farbcode/colorcode Value/Position
marked/markiert ( 104 ) C3,4,5,6,7,8,9,10,11,1 ,13,
14,15,16,17,18, 1, , 3, 4,
5, 6
x100nF
Capacitor Farbcode/colorcode Value/Position
marked/markiert ( 103 ) C19, 0
x10nF
8
Capacitor /Elko Farbcode/colorcode/code Value/Position
100 uF
Attention , this part is
polarized, short pin is minus
C = 100uF
1x100uF Elko
Capacitor/Elko Farbcode/colorcode/code Value/Position
10 uF
Attention , this part is
polarized, short pin is minus
C1 = 10uF
1x10uF
9
Now we come to the IC sockets
We need :
3x14 pin = for IC 7,8,9 =74HC14
4x16 pin = for IC 3=74HC165, IC4=74HC165, IC5=74HC165, IC6=74HC595
1x 0 pin = for IC 1=73HC573
Attention, the IC sockets are marked. Please solder the sockets right around into the
board. Later it is easier to put the IC's correctly into the sockets.
TIP:
solder the IC sockets first on two legs.
Be sure that the socket is flat on the PCB. If not , press the socket with the finger against
the PCB and solder both pins again.
Attention also to the mark. Solder it into the right direction.
10