Short Circuit or Electric Shock Hazard:
-Do not mount in places with excessive moisture.
-Do not install the product near the shower room or above the bath tub in the
bathroom or near places where it gets wet or immersed in water easily.
-Do not spray water directly on this device.
-Do not turn on the switch with wet hands.
Possible damage:
-Do not mount over heating sources such as cooking equipment , or in places with
temperatures over 40℃.
-Do not mount on windows, thin plates or in places with insufficient support
strength.
Possible damage or fire :
-Do not use power sources outside the rated voltage.
-Do not use alternative mounting methods other than what is instructed in this
manual.
Do not use alternative mounting methods other than what is instructed in this
manual.
Risk of Electric Shock Due to Inadequate Wiring :
Any alteration to the internal wiring in this device is not allowed. In case of failure,
please contact the service station.
To Prevent Accidents :
-The bottom of the unit must be installed 1.5 meters or more above the ground.
-No water pipes are allowed to pass through above the product and 2 meters
around it.
-In case of gas leakage, Do Not turn on this device.
-This device shall not be operated or maintained by children or inexperienced
individuals.
To avoid leakage of dangerous gases, please do not install the unit in the area with
odor or dangerous gases.
To avoid the poisoning of carbon oxide, please do not use the unit in the area with
Gas or Oil heater.
When the unit has abnormal behaviors, like noise, vibration, burning smell, please
turn off the unit and contact local distributors.
(for EU region) This appliance can be used by children aged from 8 years and above
and persons with reduced physical, sensory or mental capabilities or lack of
experience and knowledge if they have been given supervision or instruction
concerning use of the appliance in a safe way and understand the hazards involved.
(for EU region) Children shall not play with the appliance.
(for EU region) Cleaning and user maintenance shall not be made by children
without supervision.
(for other than EU region) The appliance is not to be used by persons (including
children) with reduced physical, sensory or mental capabilities,
or lack of experience and knowledge, unless they have been given supervision or
instruction.
(for other than EU region) Children being supervised not to play with the appliance.
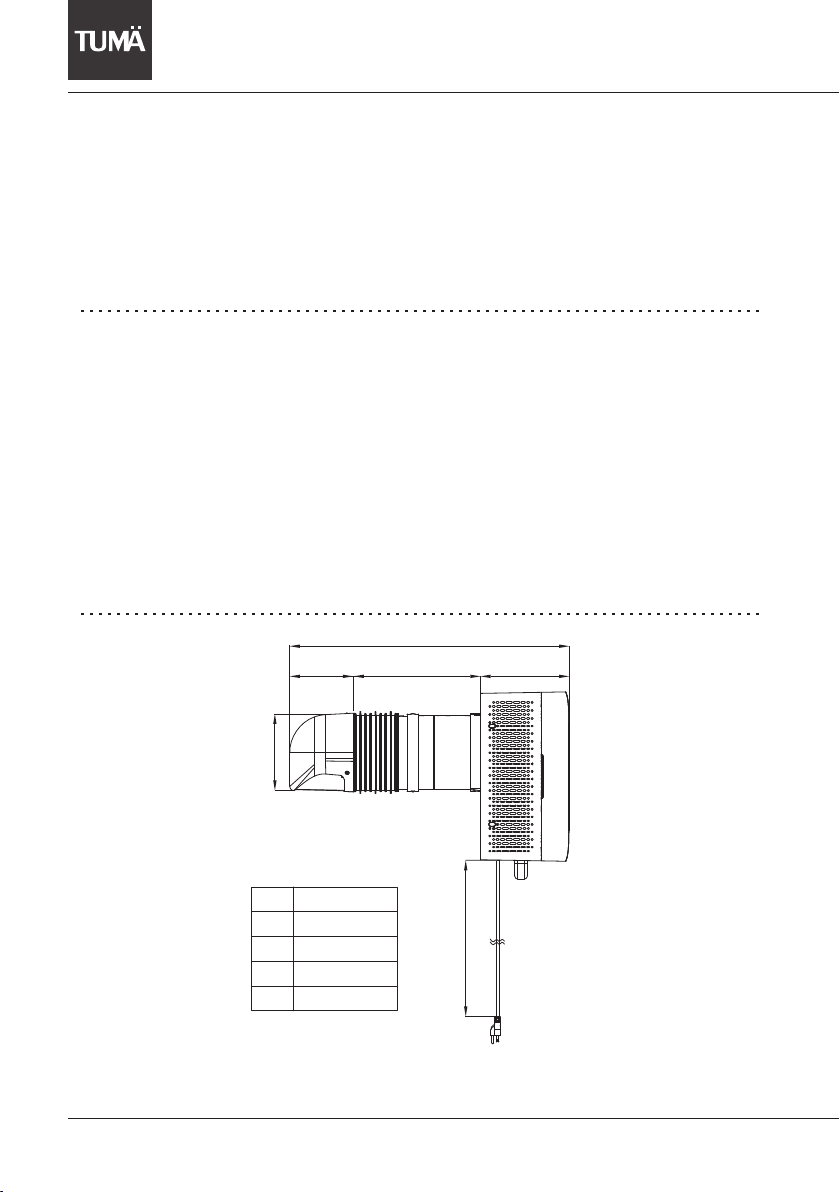
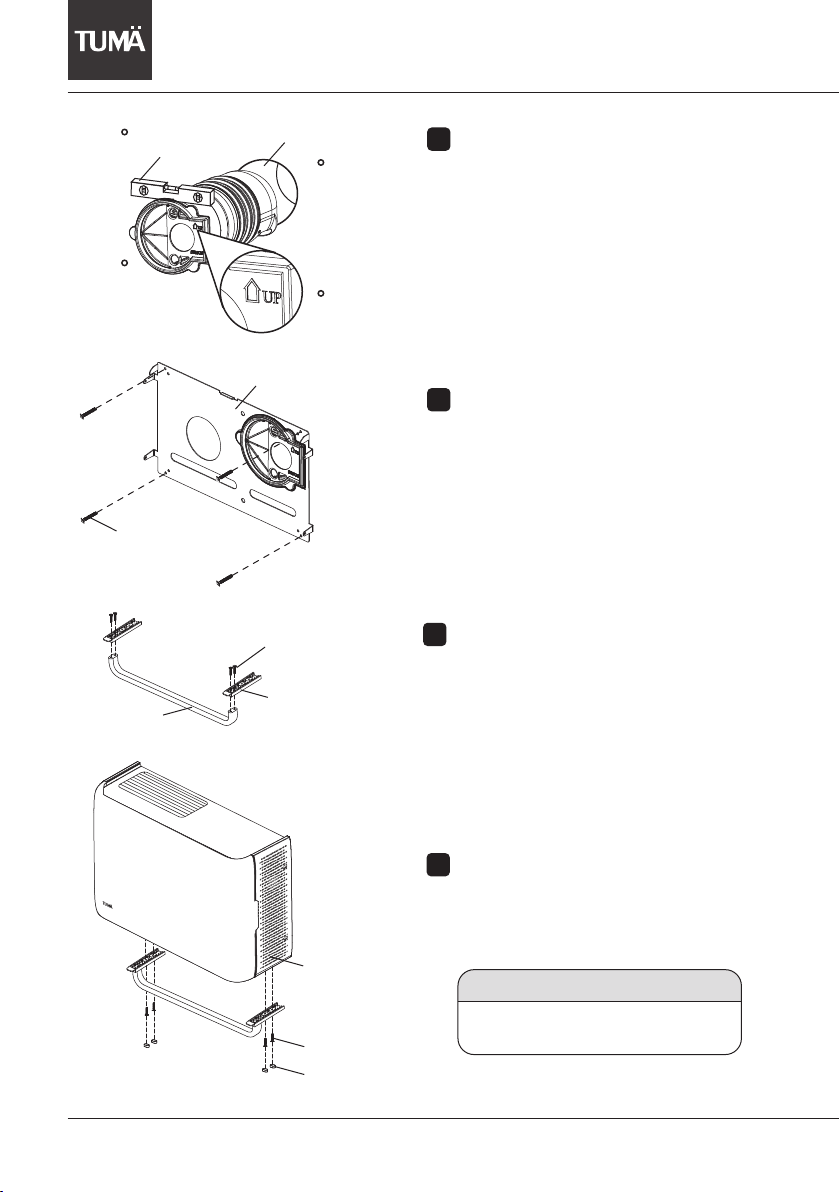
Duct Installation needs to away from the lights at least 30 cm or above. To prevent
the insect getting into your house through the duct.
08
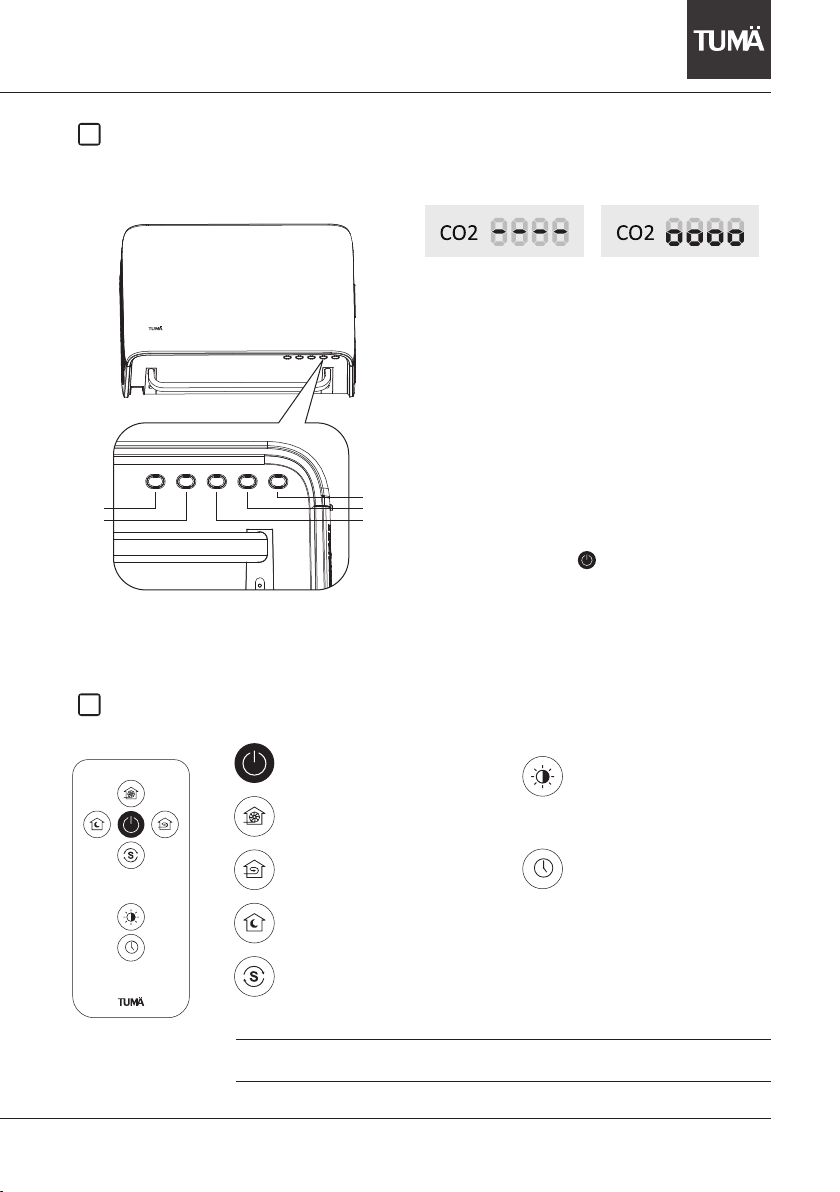
INTRODUCTION OF REMOTE CONTROL FUNCTIONS
REMOTE CONTROL AND UNIT SETTING
Figure B Figure CFigure A
※ A button cell CR2025 is a prerequisite. Any used cell should be recycled.
※ Be sure to remove the cell, if the appliance is not in use for a longer period of time.
Do not turn the product on before the pairing
setup.
<Attention>
Complete the remote pairing between remote
control and the product itself as soon as the
remote control is activated initially. Make sure
that the product is connected to the indoor
power supply, while the batteries are properly
installed in the remote control.
1.Press and hold the SMART button at the
bottom of the appliance unit (as shown in Fig.
A, the second button from the right) until the
panel screen is flashing as shown in Fig. B, and
then release the key (If you do not take the next
step within 15 seconds, the remote pairing will
fail and end. Please start over.)
2.Press and hold the POWER key on the
remote control, and then the panel screen will
be displayed as Fig. C. This means the remote
pairing setup is completed. You can now start
to use the functions through this remote
control.
Power
Turn on or off the power. Screen Light
Press this key to turn off the flashing
pattern on the panel (the appliance
is still running); press it again to turn
on the flashing pattern on the panel.
Program Timer
Press this key to select any of the
following options:
Press once-
The unit is set to turn off in 2 hours.
Press twice-
The unit is set to turn off in 4 hours.
Press for three times-
Turn off the timer.
Purify
Purify the air at high speed.
Fresh
Input fresh air at medium speed.
Sleep
Low speed with quiet operation, for
you to sleep tight.
Smart
Automatically detect the indoor air
quality and adjust the input/output
volume of fresh air.
Power
Smart
Sleep
Purify
Fresh