Tupperware Whip 'N Prep Chef User manual

Whip ‘N Prep™ Chef Visual Demoguide
Whip ’N Prep™Chef
Time Savers

Whip ‘N Prep™ Chef Visual Demoguide
Demonstration Guide Contents
• Summary Statement
• HOME Message
• Key Features and Benefits
• Competition vs.
• To Assemble
• To Disassemble
• How to Use/Suggested Uses
• Recipes
•Care

Whip ‘N Prep™ Chef Visual Demoguide
Product Summary
The Tupperware Time Savers range
includes another innovative and
cleverly designed product.
The remarkable Whip ’N Prep™Chef
beats egg whites, cream, sauces, light
batters, and desserts without the need
for electricity.
Three whisks with four prongs each
make it highly efficient. One full spin
whips 27 times!
Also, easy to use, operates quietly and
complements our other very popular
Time Savers products such as the
Quick Chef, Quick Shake®Container,
and Spin ’N Save®Salad Spinner.

Whip ‘N Prep™ Chef Visual Demoguide
H.O.M.E. Messages (Healthy, Organization, Money, Environment)
Save Time: One full spin
whips 27 times!
Save Money: No need for
electricity. No more buying
expensive whipped or
premade sauces and
dessert toppings.
Eat Healthy: No need for
expensive, unhealthy
sauces or toppings that are
filled with sugar and
preservatives. Whip and
whisk from scratch.

Whip ‘N Prep™ Chef Visual Demoguide
Key Features and Benefits
• Perfect for making whipped cream, light pancake batters, light cookie dough, crepes, omelets,
whipped eggs for soufflés and casseroles, mousse, spreads, dressings, whipped dips, sauces,
marinades, vinaigrettes, light sponge cakes, and meringues.
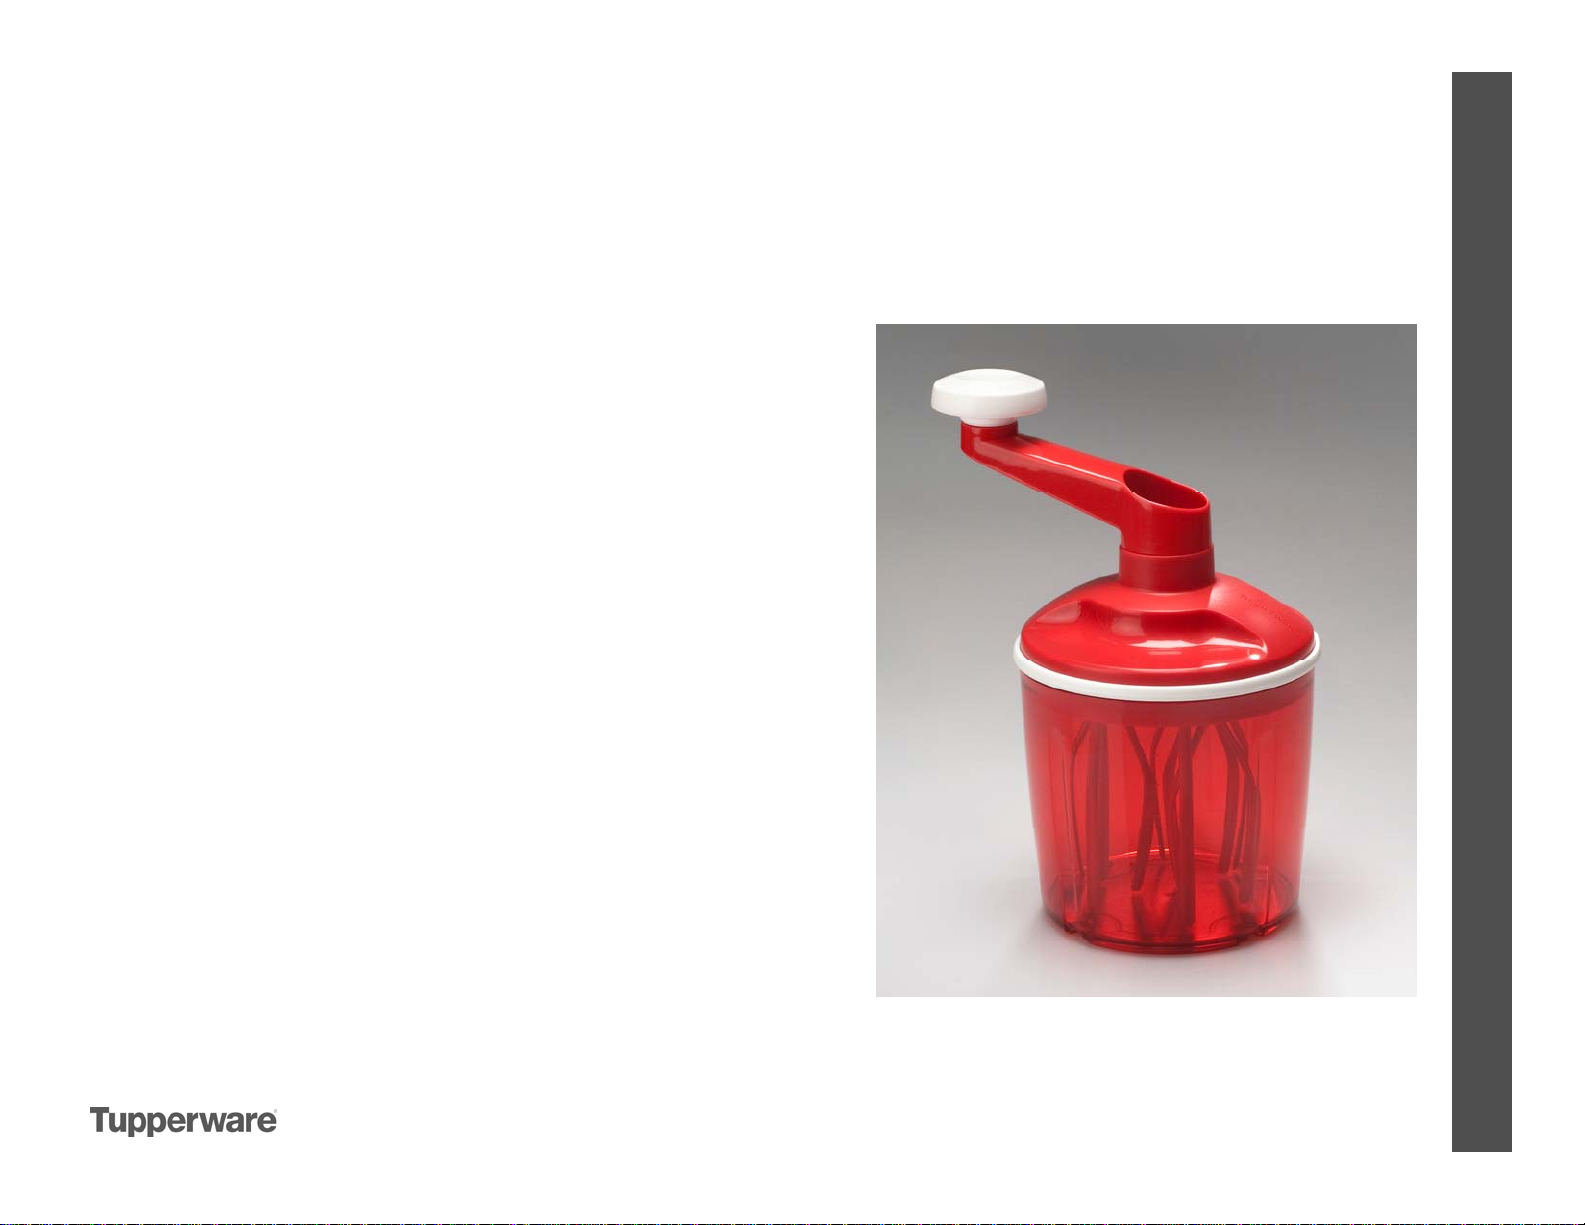
• Anti-skid base is transparent and has graduated U.S. and metric measurements etched on sides.
• Ergonomically shaped cover fits securely on the base and ensures no mess or splatters.
• Cover features three integrated beaters, funnel and ergonomic easy-turn handle. No need to
remove the cover to add oils or liquid flavorings. Simply pour through the funnel.
• Airtight seal for storing foods in your refrigerator.
• Whips faster than an electric mixer with more control. Three whisks with four prongs each. One
full spin whips 27 times.
• Uses less space than a stand mixer.
• Does not use electricity.
• Quiet, so you can prepare your dessert or whip cream at a party while still talking to your guests.
• Easy to use—no complicated manual.
• Easy to assemble.
• All parts except the foot ring are dishwasher safe. To keep the container looking its best, hand
washing is recommended. Always separate the cover ring before washing.
• When food is being whipped, the cover can be quickly removed in one smooth action. This makes
checking the correct consistency and adding extra food easy.
• No sharp objects –safe for children
• Capacity: 5½ cups/1.35 L

Whip ‘N Prep™ Chef Visual Demoguide
Competition vs. Whip ‘N Prep™ Chef
No sharp objects and and
no electricity—VERY SAFE
Steel beaters and electricity,
very unsafe
Safety
Small Hole in handle for
adding oils or liquids slowly.
Only Blend, Whip, and WiskOther Uses
Yes because you control it.None, going too fastControl of Finished
Product
Airtight seal included, just
remove beaters and seal for
storage.
Transferred into another bowl
creating another bowl or
container to wash.
Storage of Finished Food
Ergonomic cover and
handle with silicone
Non-slip base.
DifficultGrip When in Use
No, this is a “green” product.Yes, requiredElectricity
Pieces store in base.BulkyStorage
LightHeavyWeight
Whip ’N Prep™ChefHand or Stand Mixers

Whip ‘N Prep™ Chef Visual Demoguide
To Assemble
• Hold the top cover and the cover
ring. Align the two indents and
press all around to close until
you hear it click.
• Assemble the whisks on the
bottom cover by pushing each
whisk into one of the pins until
you hear a click.

Whip ‘N Prep™ Chef Visual Demoguide
To Assemble
• Place the bottom cover in the top
cover.
• Check if the cover is correctly
placed by applying your thumbs on
the bottom cover and moving them
back and forth. If the bottom cover
turns easily in the top cover, it is
correctly placed. If it does not, do
not force. Instead try attaching the
bottom cover to the top cover until it
turns easily.

Whip ‘N Prep™ Chef Visual Demoguide
To Assemble
• Hold both bottom and top covers
together and screw the handle
clockwise into the cover until you
feel it cannot be turned anymore.
• Assemble the foot ring onto the
base.
• Place the cover on top of the base.

Whip ‘N Prep™ Chef Visual Demoguide
To Disassemble
• Hold the cover with one hand
and rotate the handle in a
counter-clockwise direction
until it separates completely
from the cover.
• Remove the bottom cover and
whisks from the top cover and
cover ring.

Whip ‘N Prep™ Chef Visual Demoguide
To Disassemble
• Remove the whisks by pulling
them off the bottom cover.
• Separate the top cover from the
cover ring by gently inserting a
butter knife or spoon in the
horizontal slot between the top
and bottom covers. Slightly turn
the knife until you hear a click.
• Remove the anti-skid bottom
from the base by pulling it off the
bottom cover.

Whip ‘N Prep™ Chef Visual Demoguide
How to Use & Suggested Uses
How to Use:
• Lift the cover off the base and place food inside.
• Place the cover back on top of the base.
• Turn the handle in a clockwise direction until the food is whipped, whisked or beaten
to the desired consistency.
• Remove the cover, and using a Saucy Silicone Spatula, scoop out whipped food.
• Place the seal on the base to store leftovers in the refrigerator.
Suggested Uses:
• Prepare whipped cream for decorating cakes and desserts.
• Prepare light pancake batters, crepes, omelets, mousses, meringue cookies and
whipped eggs for soufflés and casseroles.
• Use the Whip ’N Prep™Chef to prepare spreads, sauces, dips, marinades, and
vinaigrettes. Add oil or other liquids by pouring them through the funnel in the handle.
Remove the cover to add freshly chopped herbs, vegetables or fruit.
• Prepare wonderfully light sponge cakes and light cookie doughs.
• The Whip ’N Prep™Chef is not intended for use when whipping or whisking heavy
preparations.

Whip ‘N Prep™ Chef Visual Demoguide
Recipes
EGG WHITES
• Beat up to 4 egg whites at a time.
• It takes about 25 seconds to beat them,
depending upon the size of the eggs.
MERINGUE
Servings: 1 Pie
Prep Time: 5 minutes
Ingredients
¼ tsp. cream of tartar
2 egg whites, room temperature
4 tbsp. sugar
1. Add cream of tartar to the egg whites.
2. Whip to medium-soft peaks.
3. Beat in 4 tbsp. of sugar until egg whites are
glossy and hold a firm peak.
Tip: Adding sugar early in the beating process
results in a firmer, finer-textured meringue.

Whip ‘N Prep™ Chef Visual Demoguide
Recipes
WHIPPED CREAM
Servings: 24
Prep Time: 5 minutes
Ingredients
1½ cup heavy whipping cream
1½ tsp. vanilla extract
1 tbsp. plus 1½ tsp. powdered sugar
1. Place heavy whipping cream in the
Whip ’N Prep™Chef and whip.
2. Add vanilla extract and powdered sugar.
3. Continue to whip the cream till you feel
some resistance which indicates that the
cream has become “Chantilly.”

Whip ‘N Prep™ Chef Visual Demoguide
Recipes
GARLIC MAYONNAISE
Servings: 6
Prep Time: 5 minutes
Ingredients
3 garlic cloves, crushed
1 egg yolk
¼ tsp. sea salt
1½ tsp. white wine vinegar
½ cup plus 2 tbsp. olive oil
1. Place garlic, egg yolk, salt, and vinegar in the
Whip ’N Prep™Chef and whip just enough to
mix ingredients.
2. While rotating the handle, pour the oil through
the funnel in the handle. Continue to whip until
all the oil is incorporated into the mayonnaise
and you have a thick and glossy sauce.

Whip ‘N Prep™ Chef Visual Demoguide
Recipes
SPINACH & CHICKEN QUICHE
Servings: 6
Prep Time: 5 – 10 minutes
Total Time: 1 hour
Ingredients
¼ + ¾ cup shredded cheddar cheese, divided
9” unbaked pie shell
1 cup cooked chicken, diced
½ cup frozen chopped spinach, thawed and squeezed dry
¼ cup onion, finely chopped
2 eggs
¾ cup milk
¾ cup garlic mayonnaise (see recipe)
¼ tsp. salt
⅛tsp. pepper
1. Preheat oven to 350°F/176°C.
2. Sprinkle ¼ cup cheese into the pie shell.
3. In a Thatsa®Bowl, combine chicken, spinach, onion and remaining cheese, and pour into pie shell.
4. In the Whip ’N Prep™Chef, add eggs, milk, mayonnaise, salt, and pepper and whip until mixed. Pour over
chicken mixture.
5. Place in oven and bake for 40-45 minutes or until a toothpick inserted in the center comes out clean. Let
stand for 15 minutes before serving.

Whip ‘N Prep™ Chef Visual Demoguide
Recipes
EASY CHOCOLATE MOUSSE
Serving: 6- 8
Prep Time: 20 minutes
Ingredients
13 oz. bitter or semisweet chocolate, chopped
2 tbsp. unsalted butter
2 large egg yolks
1½cups heavy cream
2 tbsp. powdered sugar
1 tsp. vanilla extract
1. In a TupperWave®Stack Cooker 3-Qt./3 L Casserole, combine chopped chocolate and the butter. Heat
in the microwave approximately 35 seconds or until melted, then stir using a Saucy Silicone Spatula.
2. Add the melted chocolate and egg yolks to the Whip ’N Prep™Chef and whisk until it starts to thicken.
Transfer the mixture back to the TupperWave®Casserole and place in freezer for 10 minutes.
3. Add the heavy cream to the Whip ’N Prep™Chef and whip until it starts to thicken.
4. Add sugar and vanilla to the whipped cream and whisk until the cream starts to form stiff peaks.
5. Using a Saucy Silicone Spatula, carefully fold vanilla whipped cream mixture into the cooled chocolate.
6. Serve layered with fresh raspberries in the Tupperware®Impressions 11-oz./330 mL Tumblers or serve
in Tupperware®Snack Cups.

Whip ‘N Prep™ Chef Visual Demoguide
Recipes
BLACK PEPPERCORN RANCH DRESSING
Servings: 10 (2 tbsp.)
Prep Time: 5 minutes
Ingredients
1 egg yolk
½ tbsp. water
½ tbsp. fresh squeezed lemon juice
½ tsp Dijon or dry mustard
4 tbsp. buttermilk
2 tbsp. parmesan cheese, grated
2 tsp. anchovy paste
1 clove garlic, minced
½ tbsp. black peppercorns
¾ cup canola oil
1. Place all ingredients except canola oil in the Whip ’N Prep™Chef and whisk until
mixed.
2. Slowly add canola oil through the funnel in the handle while turning the handle.
3. Continue to whisk until mixture is thick and can hold soft peaks.
4. Serve on a tossed salad, a cold pasta salad, or as a dip for sliced vegetables.

Whip ‘N Prep™ Chef Visual Demoguide
Recipes
Strawberry Buttermilk Pancakes
Servings: 4 – 5 (2 pancakes per serving)
Prep Time: 5 minutes
Total Time: 18 minutes
Ingredients
¼cup milk
¼cup buttermilk
2 tbsp. butter, melted
1 egg
¾cup flour
1½tbsp. sugar
½tbsp. baking powder
¼tsp. salt
8 large strawberries, stems removed and sliced
1. Place milk, buttermilk, butter and egg in the Whip ’N Prep™Chef and whisk until combined.
2. Add flour, sugar, baking powder and salt to mixture and continue to whisk until well combined.
3. Preheat Chef Series™11”/28 cm Stainless Steel Fry Pan on medium heat.
4. Once heated, put a little olive oil on a paper towel and wipe the Fry Pan.
5. Let it heat for 1 minute and pour about ¼cup of batter on the hot surface.
6. Lay slices of strawberries on top so that they can sink into the batter.
7. Using the Tupperware®Kitchen Prep Spatula, flip after 2 minutes or when the batter starts to bubble.
Cook for another minute or until golden brown.
8. Transfer to a Microwave Luncheon Plate and drizzle with syrup, or dust with confections sugar.

Whip ‘N Prep™ Chef Visual Demoguide
Care
• Do not whip more than 4 egg whites or 1.7 cups/400 mL of cream at once.
• Do not use the Whip ’N Prep™Chef for thick batters or dough.
• When preparing ingredients, if you feel some resistance, do not turn the handle
counter-clockwise as you will start to unscrew the handle.
• Ensure the cover is assembled correctly and firmly in place prior to use.
• All parts except the foot ring are dishwasher safe. To keep the container looking its
best, hand washing is recommended. Always separate the cover ring before washing.
• To remove residual odors, soak the separate parts in a solution of dishwashing soap
and warm water for one hour then rinse well.
• Avoid using metal scouring pads and brushes.
• Dry all parts well before storage.
• The complete cover needs to be assembled first as mentioned in the “to assemble”
section,” and then placed on the base.
Table of contents
Popular Mixer manuals by other brands

Wharfedale Pro
Wharfedale Pro EZ-M owner's manual

Gastroback
Gastroback DESIGN SMOOTHIE MAKER MIX & GO operating instructions

Black & Decker
Black & Decker EHC650 Use and care book

Central Machinery
Central Machinery 67536 Owner's manual & safety instructions

Scarlett
Scarlett SC-HM40S09 instruction manual

Adexa
Adexa SM799 instruction manual

Makita
Makita UT 1200 Original instructions

ACI-AppliCAD
ACI-AppliCAD VGM-1041 Installation and use

Skil
Skil 1608 Original instructions

Russell Hobbs
Russell Hobbs 22260-56 manual

Gastroback
Gastroback Design Mixer Advanced Electronic Instructions for use

Audio Technica
Audio Technica SmartMixer AT-MX381 Software manual