7
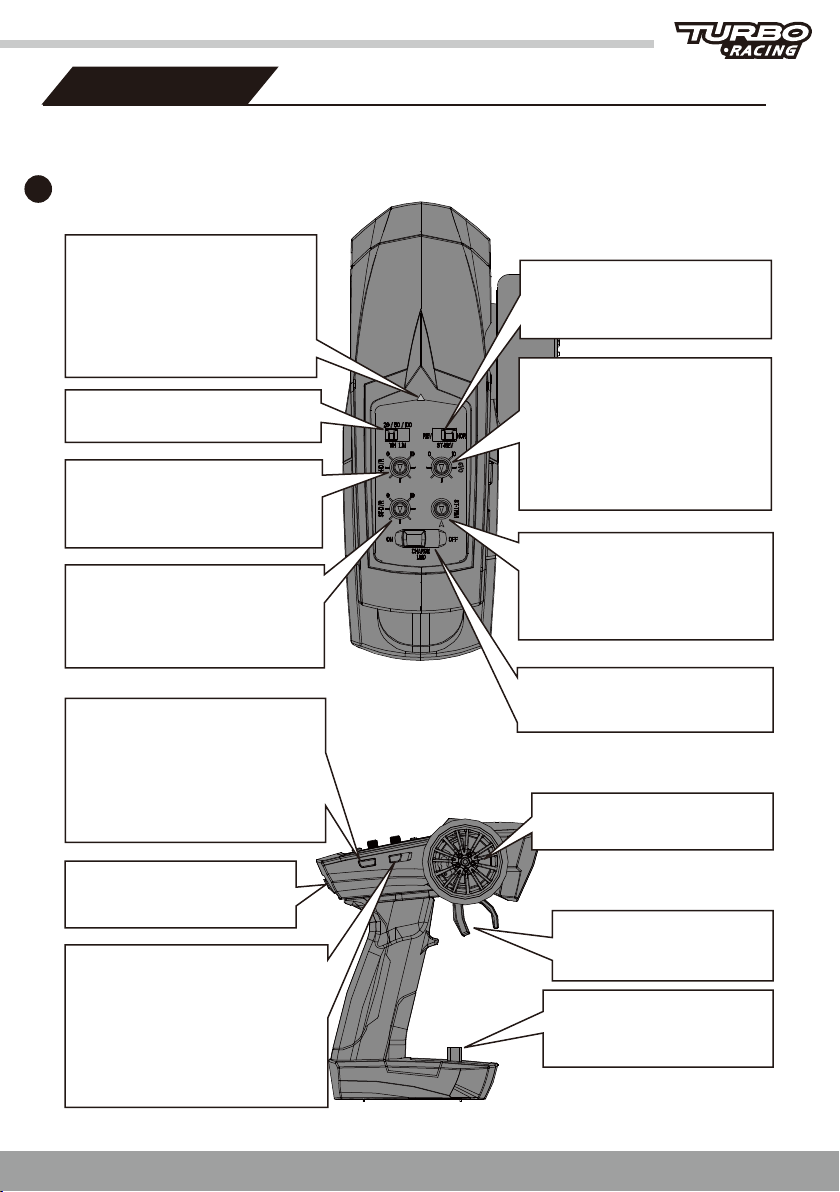
1 Functions Transmitter
Multi function indicator LED:
The remote control uses AAA or
Ni-MH battery. When the voltage is
lower than 4.5V ±0.2V, the multi-
function LED indicator light will
fash quickly, please replace the
battery.
Three section throttle speed limit
switch: 20% / 50% / 100%.
Throttle DR:
throttle DR is used to adjust the
throttle stroke and set the car speed
freely.
Steering Rev:
Use the reverse steering switch to
reversethe left and right directions.
Intelligent vehicle control (SVC):
Adjust the knob to level 0-10, and
0 is o Gyroscope, the greater the
number, the greater the modulation
The larger the pitch is, select by knob
Select the desired control eect.
(see page 11 for details)
Steering ne adjustment:
when the adjusting wheel is in the
neutral position, if the front wheel is
not go straight line,please use
steering ne adjustment.
Steering DR:
steering DR is used to adjust the
steering angle of the front wheels to
make the car reach the best turning
radius.
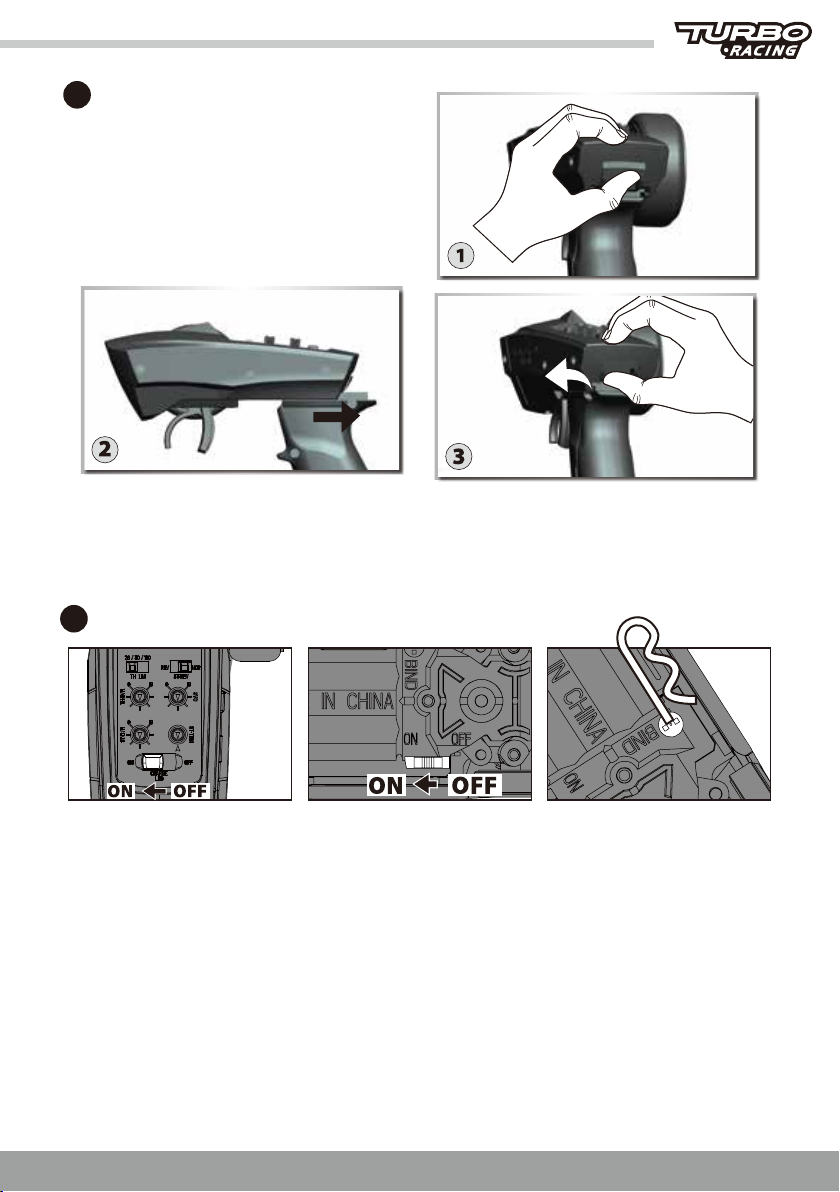
On/O Switch:
turn on / charge switch / turn o the
transmitter
Channel 3 button:
control the car chassis light on / o;
when is charging, short press
channel 3 button to switch the color
of multi-color light; Long press
channel 3 buttonto switch breathing
light.
Throttle tigger:
Control forward / brake /
backward.
Steering wheel:
control left / right steering
Channel 4 button :
Channel 4 is a three section switch,
One section switch turns o the front
and rear lamps of the vehicle;The
front and rear lights of the second
section switch are on for a long time;
The front and rear lights of the three-
stage switch ash.
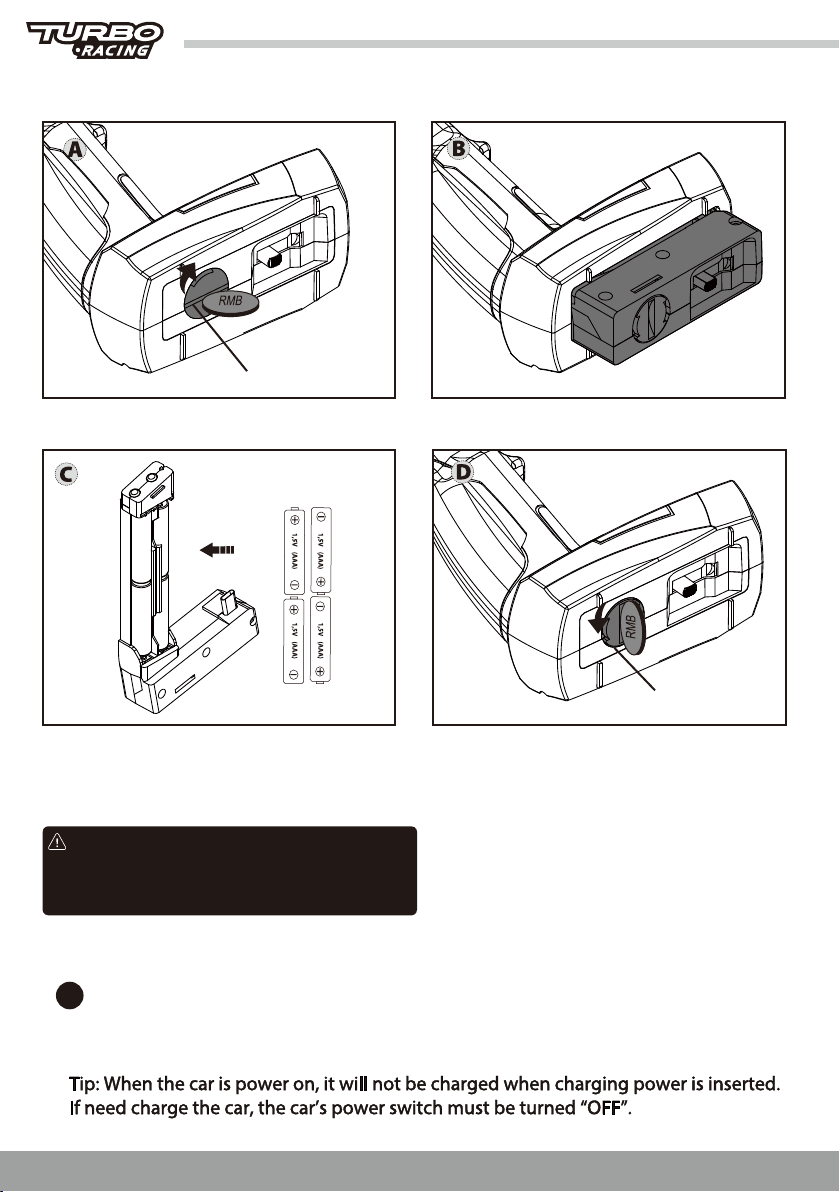
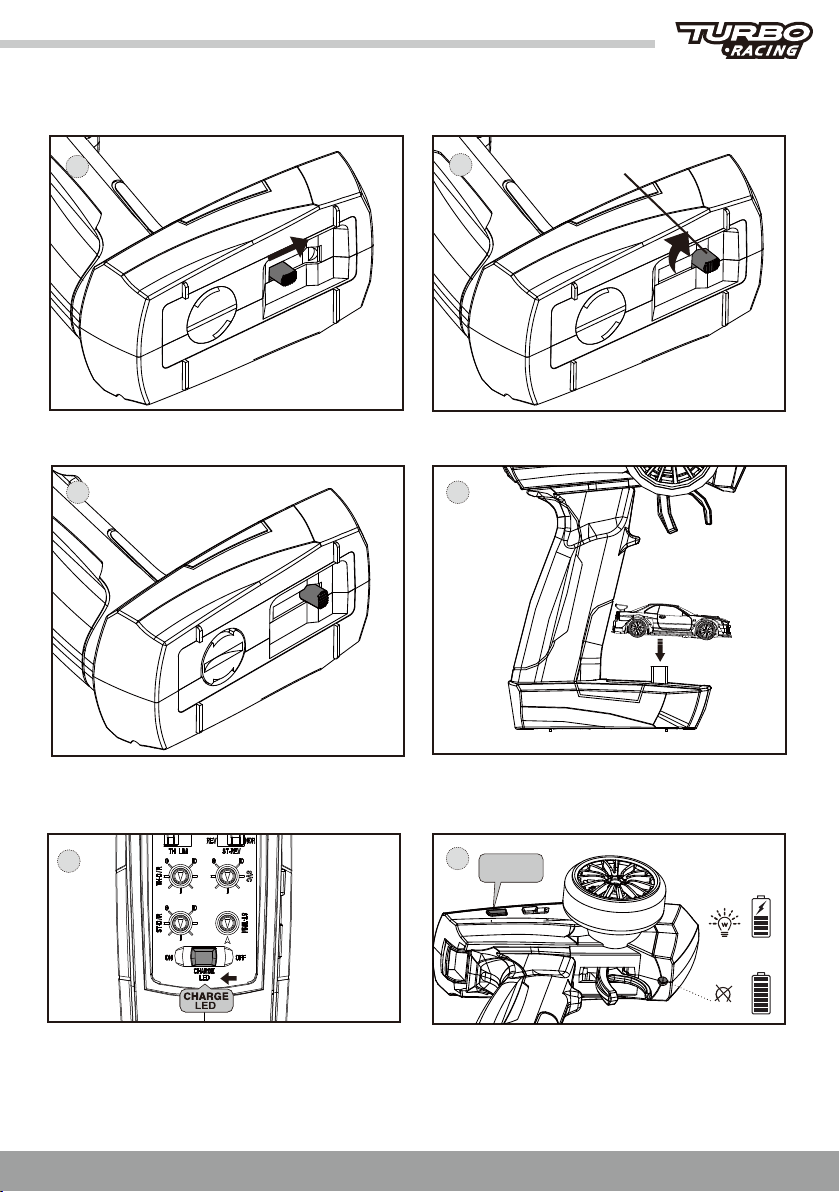
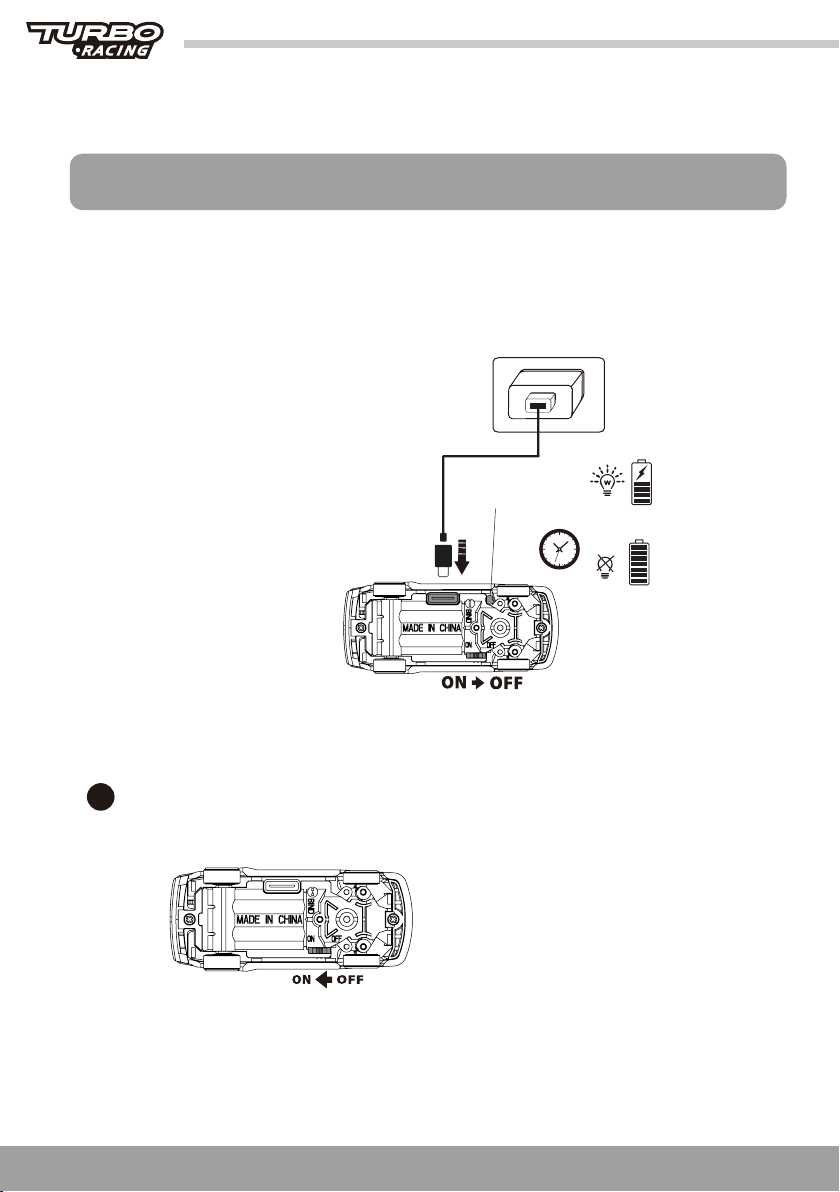
Type-C charging port:
hidden port for charging the car
(as shown in picture 2)
Disassemble the remote :
the handle can be disassembled
(as shown in picture 1)
Note: If you’re the rst time to use the 1:76 RC drift car, please take a few minutes to read
this statement carefully to get familiar with dierent features of this operation system.
OPERATION NOTE