SPRING REPLACEMENT
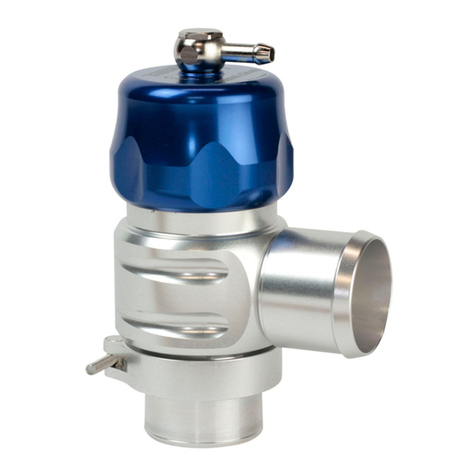
The Race Port has a variety of springs to suit different vacuum levels. Different tuning levels produce different levels of idle vacuum.
The Race Port is fitted with a standard spring which will remain closed until the engine produces more than 17 in/Hg. Using this spring
on an engine which produces less vacuum will reduce the response of the Race Port. Turbosmart has a range of springs to suit different
vacuum levels to ensure high levels response from the Race Port. Please visit our website – www.turbosmart.com.au for further details.
•Allow the engine to cool down before removing your Race Port from the intake piping
•Remove the dash 4 nipple on the top cap with a 16mm spanner
•Using a press or vice, clamp the top cap to the base ensuring not to damage the cap surface
•Slowly remove the 6 M6X10 button head screws with a 4mm allen key
•The cap is under spring tension, slowly release the clamp to open the Race port
•Replace the springs. Make sure that the diaphragm bead is inside the diaphragm groove on the base
•Align the stem inside the piston and the stem guide in the top cap
•Using a press or a vice, slowly push the cap onto the base, making sure the screw holes in the cap line up with the base
•Replace the 6 M6X10 button head screws and refit the dash 4 vacuum nipple
•Re-install the Race Port onto the intake piping
•Start the engine and check for leaks in the Race port. Make sure the valve is functioning properly by revving the engine and
watching the valve piston move
----------------------------------------------------------------------------------------------------------------------
TROUBLE SHOOTING
The following points should be checked if you find that your engine is dipping below normal idle, stalling or if the Race Port is functioning
poorly. Please note, the following checks will cure 99% of problems experienced with a Race Port.
•Check the vacuum hose for splits, cracks, loose connection, kinking or any obstruction – old or fatigued hose may collapse under
vacuum causing an obstruction
•With the engine running remove the vacuum / pressure hose from the nipple in the cap of the Race Port, there should a loud
hissing sound. The engine should idle poorly, double check by covering the end of the hose with your finger – otherwise the hose
is blocked
•Ensure that the vacuum / pressure source is not shared and that the vacuum source is directly from the inlet manifold
•Check the seal between the adapter and the Race Port – ensure that there is no gap between the Race Port base and the weld
flange
•Check the join between the adapter and the cross over pipe for leaking
•Ensure that the right spring is installed in the Race Port for your engine’s vacuum level
TURBOSMART
ONE YEA R LIMITED WARRANTY
Turbosmart is a company built on Customer Satisfaction and Service. That is why all of our products go through regimented test procedures before they are packaged and shipped. Turbosmart stands behind its products for one full year after purchase. Terms of Warranty, Service
and Returns are as follows:
Limited Warranty: Turbosmart warrants its products to be free from defects in material and workmanship under normal use and if properly installed for a period of one year from date of purchase. If found to be defective, it will be replaced or repaired if returned prepaid along with
proof of date of purchase. This shall constitute the sole remedy of the purchaser and the sole liability of Turbosmart to the extent permitted by law, the foregoing is exclusive and in lieu of all other warranties or representations whether expressed or implied, including any implied
warranty of merchantability or fitness. In no event shall Turbosmart be liable for special or consequential damages. This warranty is only valid on products purchased fromTurbosmart Authorized Dealers.
Service: After the warranty period has expired, repair service is charged based on a minimum and maximum charge rate. (Contact Customer Service for current rate).
Returns: When returning a Turbosmart product for repair, it must be accompanied by a completed Customer Warranty Form and RMA number. To access this form please go to our website www.turbosmartonline.com and you will find it on the Downloads page.
THE TURBOSMART PLED GE
DO NO T USE A NY TUR B OS M A RT PR OD U CT UN TIL YOU HA V E CA REFULLY READ A N D U N DERSTOOD T HE FOLLOWING AG R EE MENT.
Please call if you have any questions or do not understand this agreement. Refer to our brochure, website or catalogue for terms and conditions and further information regarding your product. Turbosmart appreciates your business and pride ourselves on our customer service. We
are always happy to offer you advice and will provide you with help in any way we can. The purpose of this agreement is to avoid any problems or hard feelings.
We sometimes make mistakes, as do our dealers, distributors and suppliers. Even customers can sometimes order the wrong parts. Do not use, modify, install, trial assemble, nick, drop, scratch or adjust any part until you first check for any damage. Damage must be reported
immediately. NO E X CE PTION S . If there are any components missing please contact your authorized reseller immediately upon receipt of your shipment. Missing components must be reported within five (5) business days of receipt. Parts returned for any reason MUST BE IN
RESALA BLE CONDITION. It is YOUR responsibility, “THE CUSTOMER” to carefully package any returns to avoid shipping damage. Insurance is highly recommended. Credit cannot be issued for damaged goods.
Turbosmart warranties the quality of the products it designs and manufactures to be free of defects in material and workmanship. This limited warranty is extended only to the original purchaser and may not be transferred or assigned. This limited warranty applies to any product,
which after careful inspection by Turbosmart, after receipt of the product from our authorized reseller, is found to have a defect in either material or workmanship. Any modifications to the product will void any and all warranties and will not be exchanged. Before installation, check
new car warranty. Turbosmart is not responsible for voiding any original manufactures warranty.
All warranty claims must be returned to the nearest Turbosmart Office, you must return the product and sales receipt, at your own expense,accompanied by the Customer Warranty Form stating the reason for the claim. Proofof purchase must be provided with any warranty claim
and will be verified with the authorized reseller from which the product was purchased.
If all the above procedures are followed, and the product is found to be defective in either workmanship or material, Turbosmart shall either repair or replace the product, at its sole discretion, and sole cost. This limited warranty does not cover or apply to any personal injury, labor
charges or any other incidental costs or damages caused by the defective product. The individual purchaser acknowledges and agrees that the disclaimer of any liability for personal injury is a material term for this agreement and the individual purchaser agrees to indemnify
Turbosmart and to hold Turbosmart harmless for any claim related to the itemof the equipment purchased. Under no circumstances will Turbosmart be liable for any damages orexpenses by reason of use or sale of any such equipment.
THIS LIMITED WA R RA NTY I S THE ONLY E X PR ES S W AR R ANTY, W HICH A P PLIE S TO TURB OSMA RT PR ODUC T A S E X P RE SSLY GIV EN IN LI EU OF AN Y OTHER W AR RAN TY E X PR ES S ED OR IMPLI ED, IN CLUDI NG THAT OF
MERCHANTABILITY. ANY IMPLIED W ARRA NTY INCLUDING THAT OF MERCHANTABILITY AN D/OR FITNESS FOR A PARTICC ULAR PURPOSE IS HER E BY LIMITED BY THE SA ME TERMS AND TIME LIMITATIONS SET FORTH IN THIS LIMITED
EXP R E SS W A R R ANTY A ND OTHER WISE E XCLU D ED. EXC E PT FOR THOSE OBLIGATIONS AS S UMED HE R EIN, TURBOSMAR T A S SUMES NO OTHER OBLIGATIONS IN CONN ECTION WITH THE SALE OF ITS PRODUCTS.
IN THE EVENT THAT THE INDIVIUD AL PU RCH A SER DOE S N OT AGREE WITH THIS AGREEMENT THE BUYE R MAY PROMPTLY RETURN THIS PRODU CT, IN A N EW AND UN-USED CONDITION, WITH A DATED PR OOF OF PU RC H A SE, TO
THE PL ACE OF P URCHAS E WITHIN SEV EN (7) DAYS FROM THE DATE OF PURCHA S E FOR A FULL REFUND. THE INSTALLATION OF THIS PRODU CT INDICATE S THAT THE IN DIVIDU AL PURCH AS E R H AS R E AD A ND UNDER STOOD THIS
AGRE EME NT AND ACCE PTS ITS TERMS A N D CON DITIONS.
Happy motoring!
The Turbosmart Team.
Head Office: Turbosmart Pty Limited, PO Box 264 Croydon, NSW, 2132 Australia Ph: +61(2) 9740 2866 Fax: +61 (2) 9798 2826 Email: info@turbosmart.com.au
USA Office: Turbosmart USA, 1185 Park Center Drive, Suite Q, Vista CA 92081 USA Ph: (760) 727 7610 Fax: (760) 727 7963 Email: sales@turbosmartusa.com


