Turbosound TQ Series User manual

Quick Start Guide
TQ Series
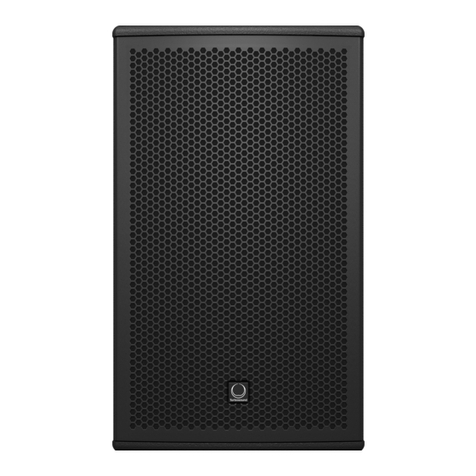
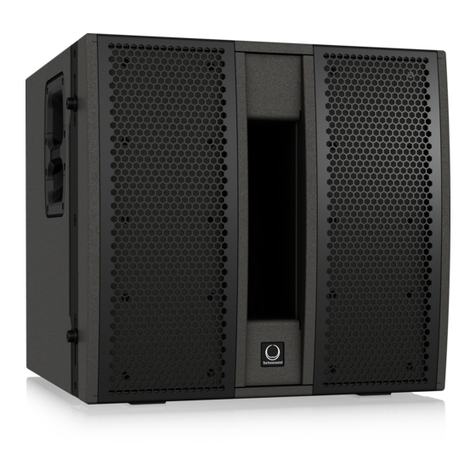
TQ15, TQ12, TQ10, TQ8
Full range 15"/12"/10"/8" Loudspeaker for Install and Touring
TQ15-SB, TQ12-SB, TQ10-SB, TQ8-SB
Swivel Bracket for TQ Loudspeakers
TQ15-YB, TQ12-YB, TQ10-YB, TQ8-YB
Yoke Bracket for TQ Loudspeakers
TQ-FB
Fly Bar for TQ and MC12-P Series Loudspeakers
SA-35
Stand Adapter for Turbosound Yoke Brackets to 35 mm Speaker Stands
V 0.0

2TQ Series Quick Start Guide 3
(DE) Wichtige Sicherhteitshinweise
1. Lesen Sie diese Hinweise.
2. Bewahren Sie diese Hinweise auf.
3. Beachten Sie alleWarnhinweise.
4. Befolgen Sie alle Bedienungshinweise.
5. Betreiben Sie das Gerät nicht in der Nähe
vonWasser.
6. Reinigen Sie das Gerät mit einem trockenenTuch.
7. Blockieren Sie nicht die Belüftungsschlitze. Beachten
Sie beim Einbau des Gerätes
die Herstellerhinweise.
8. Stellen Sie das Gerät nicht in der Nähe von
Wärmequellen auf. Solche Wärmequellen sind z.
B. Heizkörper, Herde oder andereWärme erzeugende
Geräte (auchVerstärker).
9. Verwenden Sie nur Zusatzgeräte/Zubehörteile, die
laut Hersteller geeignet sind.
10. Verwenden
Sie nurWagen,
Standvorrichtungen,
Stative, Halter oderTische,
die vom Hersteller benannt
oder im Lieferumfang des
Geräts enthalten sind. Falls
Sie einenWagen benutzen,
seien Sie vorsichtig beim Bewegen der
Wagen-Gerätkombination, umVerletzungen durch
Stolpern zu vermeiden.
11. Korrekte Entsorgung dieses
Produkts: Dieses Symbol weist
darauf hin, das Produkt
entsprechend derWEEE Direktive
(2012/19/EU) und der jeweiligen
nationalen Gesetze nicht
zusammen mit Ihren
Haushaltsabfällen zu entsorgen.
Dieses Produkt sollte bei einer autorisierten Sammelstelle
für Recycling elektrischer und elektronischer Geräte (EEE)
abgegeben werden. Wegen bedenklicher Substanzen, die
generell mit elektrischen und elektronischen Geräten in
Verbindung stehen, könnte eine unsachgemäße
Behandlung dieser Abfallart eine negative Auswirkung
auf Umwelt und Gesundheit haben. Gleichzeitig
gewährleistet Ihr Beitrag zur richtigen Entsorgung dieses
Produkts die eektive Nutzung natürlicher Ressourcen.
Für weitere Informationen zur Entsorgung Ihrer Geräte bei
einer Recycling-Stelle nehmen Sie bitte Kontakt zum
zuständigen städtischen Büro, Entsorgungsamt oder zu
Ihrem Haushaltsabfallentsorger auf.
12. Installieren Sie das Gerät nicht in einer beengten
Umgebung, zum Beispiel Bücherregal oder ähnliches.
13. Stellen Sie keine Gegenstände mit oenen
Flammen, etwa brennende Kerzen, auf das Gerät.
(PT) Instruções de Seguranç
Importantes
1. Leia estas instruções.
2. Guarde estas instruções.
3. Preste atenção a todos os avisos.
4. Siga todas as instruções.
5. Não utilize este dispositivo perto de água.
6. Limpe apenas com um pano seco.
7. Não obstrua as entradas de ventilação. Instale de
acordo com as instruções do fabricante.
8. Não instale perto de quaisquer fontes de calor tais
como radiadores, bocas de ar quente, fogões de sala
ou outros aparelhos (incluindo amplicadores) que
produzam calor.
9. Utilize apenas ligações/acessórios especicados pelo
fabricante.
10. Utilize apenas com o
carrinho, estrutura, tripé,
suporte, ou mesa
especicados pelo
fabricante ou vendidos
com o dispositivo.
Quando utilizar um
carrinho, tenha cuidado ao mover o conjunto carrinho/
dispositivo para evitar danos provocados pela terpidação.
11. Correcta eliminação deste
produto: este símbolo indica que o
produto não deve ser eliminado
juntamente com os resíduos
domésticos, segundo a Directiva
REEE (2012/19/EU) e a legislação
nacional. Este produto deverá ser
levado para um centro de recolha
licenciado para a reciclagem de resíduos de equipamentos
eléctricos e electrónicos (EEE). O tratamento incorrecto
deste tipo de resíduos pode ter um eventual impacto
negativo no ambiente e na saúde humana devido a
substâncias potencialmente perigosas que estão
geralmente associadas aos EEE. Ao mesmo tempo, a sua
colaboração para a eliminação correcta deste produto irá
contribuir para a utilização eciente dos recursos naturais.
Para mais informação acerca dos locais onde poderá
deixar o seu equipamento usado para reciclagem, é favor
contactar os serviços municipais locais, a entidade de
gestão de resíduos ou os serviços de recolha de
resíduos domésticos.
12. Não instale em lugares connados, tais como
estantes ou unidades similares.
13. Não coloque fontes de chama, tais como velas
acesas, sobre o aparelho.
(IT) Istruzioni di sicurezza importanti
1. Leggere queste istruzioni.
2. Conservare queste istruzioni.
3. Prestare attenzione a tutti gli avvisi.
4. Applicare tutte le istruzioni.
5. Non utilizzare questo dispositivo vicino l'acqua.
6. Pulire esclusivamente con un panno asciutto.
7.
Non bloccare le aperture di ventilazione. Installare in
conformità con le istruzioni del produttore.
8. Non installare vicino a fonti di
calore come radiatori, termoregolatori,
stufe o altri apparecchi (inclusi amplicatori) che
producono calore.
9. Utilizzare esclusivamente dispositivi/accessori
specicati dal produttore.
10.
Utilizzare solo carrelli,
supporti, treppiedi, stae
o tavoli indicati dal
produttore o venduti con
l'apparecchio. Utilizzando
un carrello, prestare
attenzione quando si
sposta la combinazione carrello/apparecchio per evitare
lesioni dovute al ribaltamento.
11. Smaltimento corretto di
questo prodotto: questo simbolo
indica che questo dispositivo non
deve essere smaltito insieme ai
riuti domestici, secondo la
Direttiva RAEE (2012/19 / UE) e la
vostra legislazione nazionale.
Questo prodotto deve essere
portato in un centro di raccolta autorizzato per il
riciclaggio di riuti di apparecchiature elettriche ed
elettroniche (RAEE). La cattiva gestione di questo tipo di
riuti potrebbe avere un possibile impatto negativo
sull'ambiente e sulla salute umana a causa di sostanze
potenzialmente pericolose che sono generalmente
associate alle apparecchiature elettriche ed elettroniche.
Nello stesso tempo la vostra collaborazione al corretto
smaltimento di questo prodotto contribuirà all'utilizzo
eciente delle risorse naturali. Per ulteriori informazioni
su dove è possibile trasportare le apparecchiature per il
riciclaggio vi invitiamo a contattare l'ucio comunale
locale o il servizio di raccolta dei
riuti domestici.
12. Non installare in uno spazio ristretto, come in una
libreria o in una struttura simile.
13. Non collocare sul dispositivo fonti di amme libere,
come candele accese.
(EN) Safety Instruction
1. Read these instructions.
2. Keep these instructions.
3. Heed all warnings.
4. Follow all instructions.
5. Do not use this apparatus near water.
6. Clean only with dry cloth.
7. Do not block any ventilation openings. Install in
accordance with the manufacturer’s instructions.
8. Do not install near any heat sources such
as radiators, heat registers, stoves, or other apparatus
(including ampliers) that produce heat.
9. Use only attachments/accessories specied
by the manufacturer.
10. Use only with
the cart, stand, tripod,
bracket, or table specied
by the manufacturer, or
sold with the apparatus.
When a cart is used,
use caution when moving
the cart/apparatus
combination to avoid injury from tip-over.
11. Correct disposal of this
product:This symbol indicates that
this product must not be disposed
of with household waste,
according to theWEEE Directive
(2012/19/EU) and your national
law.This product should be taken
to a collection center licensed for
the recycling of waste electrical and electronic equipment
(EEE).The mishandling of this type of waste could have a
possible negative impact on the environment and human
health due to potentially hazardous substances that are
generally associated with EEE. At the same time, your
cooperation in the correct disposal of this product will
contribute to the ecient use of natural resources. For
more information about where you can take your waste
equipment for recycling, please contact your local city
oce, or your household waste collection service.
12. Do not install in a conned space, such as a
book case or similar unit.
13. Do not place naked ame sources, such as lighted
candles, on the apparatus.
(ES) Instrucción de seguridad
1. Lea las instrucciones.
2. Conserve estas instrucciones.
3. Preste atención a todas las advertencias.
4. Siga todas las instrucciones.
5. No use este aparato cerca del agua.
6. Limpie este aparato con un paño seco.
7. No bloquee las aberturas de ventilación.
Instale el equipo de acuerdo con las instrucciones
del fabricante.
8. No instale este equipo cerca de fuentes de calor
tales como radiadores, acumuladores de calor, estufas u
otros aparatos (incluyendo amplicadores) que puedan
producir calor.
9. Use únicamente los dispositivos o accesorios
especicados por el fabricante.
10. Use únicamente la
carretilla, plataforma,
trípode, soporte o mesa
especicados por el
fabricante o suministrados
junto con
el equipo. Al transportar el
equipo, tenga cuidado
para evitar daños y caídas al tropezar con
algún obstáculo.
11. Cómo debe deshacerse de
este aparato: Este símbolo indica
que este aparato no debe ser
tratado como basura orgánica,
según lo indicado en la Directiva
WEEE (2012/19/EU) y a las
normativas aplicables en su país.
En lugar de ello deberá llevarlo al
punto limpio más cercano para el reciclaje de sus
elementos eléctricos / electrónicos (EEE). Al hacer esto
estará ayudando a prevenir las posibles consecuencias
negativas para el medio ambiente y la salud que podrían
ser provocadas por una gestión inadecuada de este tipo
de aparatos. Además, el reciclaje de materiales ayudará a
conservar los recursos naturales. Para más información
acerca del reciclaje de este aparato, póngase en contacto
con el Ayuntamiento de su ciudad o con el punto limpio
local.
12. No instale esta unidad en un espacio muy reducido,
tal como encastrada en una librería o similar.
13. No coloque objetos con llama, como una vela
encendida, sobre este aparato.
(FR) Consignes de sécurité
1. Lisez ces consignes.
2. Conservez ces consignes.
3. Respectez tous les avertissements.
4. Respectez toutes les consignes d’utilisation.
5. N’utilisez jamais l’appareil à proximité
d’un liquide.
6. Nettoyez l’appareil avec un chion sec.
7. Veillez à ne pas empêcher la bonne ventilation
de l’appareil via ses ouïes de ventilation. Respectez les
consignes du fabricant concernant l’installation
de l’appareil.
8. Ne placez pas l’appareil à proximité d’une source
de chaleur telle qu’un chauage, une cuisinière ou tout
appareil dégageant de la chaleur (y compris un ampli de
puissance).
9. Utilisez exclusivement des accessoires et des
appareils supplémentaires recommandés par
le fabricant.
10. Utilisez
exclusivement des
chariots, des diables, des
présentoirs, des pieds et
des surfaces de travail
recommandés par le
fabricant ou livrés avec le
produit. Déplacez
précautionneusement tout chariot ou diable chargé pour
éviter d’éventuelles blessures en cas de chute.
11. Mise au rebut appropriée de
ce produit: Ce symbole indique
qu’en accord avec la directive DEEE
(2012/19/EU) et les lois
en vigueur dans votre pays,
ce produit ne doit pas être jeté
avec les déchets ménagers. Ce
produit doit être déposé dans un
point de collecte agréé pour le recyclage des déchets
d’équipements électriques et électroniques (EEE). Une
mauvaise manipulation de ce type de déchets pourrait
avoir un impact négatif sur l’environnement et la santé à
cause des substances potentiellement dangereuses
généralement associées à ces équipements.
En même temps, votre coopération dans la mise au rebut
de ce produit contribuera à l’utilisation ecace des
ressources naturelles. Pour plus d’informations sur
l’endroit où vous pouvez déposer vos déchets
d’équipements pour le recyclage, veuillez contacter votre
mairie ou votre centre local de collecte
des déchets.
12. N’installez pas l’appareil dans un espace conné tel
qu’une bibliothèque ou meuble similaire.
13. Ne placez jamais d’objets enammés, tels que des
bougies allumées, sur l’appareil.
4TQ Series Quick Start Guide 5
Welcome
Thank you for choosing a Turbosound loudspeaker product for your application. If you would like further information about this or any other product,
please visit our website at turbosound.com.
Unpacking theLoudspeaker
After unpacking the unit, please check carefully for damage. If damage is found, please notify your supplier at once. You, the consignee, must instigate any claim.
Please retain all packaging in case of future returnshipment.
About this Quick Start Guide
This QSG describes details of the TQ loudspeaker and shows various options such as the TQ-FB y bar, TQ-YB yoke bracket, TQ-SB swivel bracket, and SA-35 pole mount
bracket , in readiness for suspending or pole mounting. These instructions shall only be used with these components.
The optional rigging components (TQ-FB y bar, TQ-YB yoke bracket, TQ-SB swivel bracket, and SA-35 pole mount bracket) shall only be used in conjunction with
Turbosound TQ loudspeakers as described in this quick start guide.
The instructions do not show details of external lifting equipment and do not contain details of safe lifting procedures or installation.
Possession of these instructions and procedures does not imply authorisation for their use.
General Safety
The operation of your product as part of a suspended system, if installed incorrectly and improperly, can potentially expose persons to serious health risks and
even death. In addition, please ensure that electrical, mechanical and acoustic considerations are discussed with qualied and certied (by local, state or national
authorities) personnel prior to any installation.
Installation and setup should only be carried out by qualied and authorised personnel observing the valid local, state and other safety regulations applicable in your
country. If any parts or components are missing please contact your dealer before attempting to set up the system.
It is the responsibility of the person installing the assembly to ensure that the suspension/xing points are suitable for the intended use.
We also recommend you schedule Turbosound training with our sales partners and applications team.
Equipment used to connect to the Turbosound rigging system must be properly rated and must conform to the local, state and other safety regulations. Do not
use Turbosound rigging with other types or brands of loudspeakers. This practice may compromise safety standards and Music Tribe Global Brands Ltd will not be
responsible for damage or injury so caused. Do not modify the accessories, or use them in a way other than that described in this QSG. Rigging components supplied as
part of a complete assembly are non-interchangeable and must not be exchanged with the component parts of any other assembly.
Welding, or any other means of permanently xing rigging components to each other or to cabinet xing points is not allowed. Rigging components or assemblies
must only be xed to Turbosound loudspeaker cabinets using the cabinet xing points.
Music Tribe Global Brands Ltd assumes no liability for any damage or personal injury resulting from improper use, installation or operation of the product. Regular
checks must be conducted by qualied personnel to ensure that the system remains in a secure and stable condition. Make sure that, where the product is suspended,
the area underneath the product is free of human trac. Do not suspend the product in areas which can be entered or used by members of the public.
Always refer to EASE Focus 3 modeling software error and warning indications prior to installation.
Secondary Safeties
All loudspeakers own in theatres, studios or other places of work and entertainment shall, in addition to the principle load bearing means of suspension, be provided
with an independent, properly rated, and securely attached secondary safety. Only steel wire ropes or steel chains of an approved construction and load rating shall be
used as secondary safeties. Plastic-covered steel wire ropes are not permitted for use as secondary safeties.
The secondary safety suspension must be independent of the primary suspension points and capable of carrying the total system weight. The additional safety device
must be mounted in a way that the loudspeaker is caught by the safety device without any drop and swing, in the event that the primary suspension fails.
Operational Safety
The procedures require the use of two or more authorised persons.
Produce a lift plan: before any lift takes place, you must formulate a lift plan that describes the exact steps and procedures that will be carried out.
The plan must be shared with all assistants and stake-holders in the lift so that each person will understand their responsibilities.
Observe all instructions given on the respective instruction labels of the rigging components and loudspeakers.
When using chain hoists, make sure nobody is directly underneath or in the vicinity of the loudspeakers.
During assembly pay attention to the possible risk of crushing.
Wear suitable protective clothing.
(NL) Belangrijke
veiligheidsvoorschriften
1. Lees deze voorschriften.
2. Bewaar deze voorschriften.
3. Neem alle waarschuwingen in acht.
4. Volg alle voorschriften op.
5. Gebruik dit apparaat niet in de buurt van water.
6. Reinig het uitsluitend met een droge doek.
7. Let erop geen van de ventilatie-openingen
te bedekken. Plaats en installeer het volgens de
voor-schriften van de fabrikant.
8. Het apparaat mag niet worden geplaatst in de buurt
van radiatoren, warmte-uitlaten, kachels of andere zaken
(ook versterkers) die warmte afgeven.
9. Gebruik uitsluitend door de producent
gespeci-ceerd toebehoren c.q. onderdelen.
10. Gebruik het apparaat
uitsluitend in combinatie
met de wagen, het statief,
de driepoot, de beugel of
tafel die door de producent
is aangegeven, of die in
combinatie met het
apparaat wordt verkocht. Bij gebruik van een wagen dient
men voorzichtig te zijn bij het verrijden van de combinatie
wagen/apparaat en letsel door vallen te voorkomen.
11. Correcte afvoer van dit
product: dit symbool geeft aan dat
u dit product op grond van de
AEEA-richtlijn (2012/19/EU) en de
nationale wetgeving van uw land
niet met het gewone
huishoudelijke afval mag
weggooien. Dit product moet na
aoop van de nuttige levensduur naar een ociële
inzamelpost voor afgedankte elektrische en elektronische
apparatuur (AEEA) worden gebracht, zodat het kan
worden gerecycleerd.Vanwege de potentieel gevaarlijke
stoen die in elektrische en elektronische apparatuur
kunnen voorkomen, kan een onjuiste afvoer van afval van
het onderhavige type een negatieve invloed op het milieu
en de menselijke gezondheid hebben. Een juiste afvoer
van dit product is echter niet alleen beter voor het milieu
en de gezondheid, maar draagt tevens bij aan een
doelmatiger gebruik van de natuurlijke hulpbronnen.
Voor meer informatie over de plaatsen waar u uw
afgedankte apparatuur kunt inleveren, kunt u contact
opnemen met uw gemeente of de plaatselijke
reinigingsdienst.
12. Installeer niet in een kleine ruimte, zoals een
boekenkast of iets dergelijks.
13. Plaats geen open vlammen, zoals brandende
kaarsen, op het apparaat.
(SE) Viktiga säkerhetsanvisningar
1. Läs dessa anvisningar.
2. Spara dessa anvisningar.
3. Beakta alla varningar.
4. Följ alla anvisningar.
5. Använd inte apparaten i närheten av vatten.
6. Rengör endast med torr trasa.
7. Blockera inte ventilationsöppningarna.
Installera enligt tillverkarens anvisningar.
8. Installera aldrig intill värmekällor som
värme-element, varmluftsintag, spisar eller annan
utrustning som avger värme (inklusive förstärkare).
9. Använd endast tillkopplingar och tillbehör som
angetts av tillverkaren.
10. Använd endast med
vagn, stativ, trefot, hållare
eller bord som angetts av
tillverkaren, eller som sålts
till-sammans med
apparaten. Om du
använder en vagn, var
försiktig, när du föryttar kombinationen vagn-apparat,
för att förhindra olycksfall
genom snubbling.
11. Kassera produkten på rätt
sätt: den här symbolen indikerar
att produkten inte ska kastas i
hushållssoporna, enligtWEEE
direktivet (2012/19/EU) och
gällande, nationell lagstiftning.
Produkten ska lämnas till ett
auktoriserat återvinningsställe för
elektronisk och elektrisk utrustning (EEE). Om den här
sortens avfall hanteras på fel sätt kan miljön, och
människors hälsa, påverkas negativt på grund av
potentiella risksubstanser som ofta associeras med EEE.
Avfallshanteras produkten däremot på rätt sätt bidrar
detta till att naturens resurser används på ett bra sätt.
Kontakta kommun, ansvarig förvaltning eller
avfallshanteringsföretag för mer information om
återvinningscentral där produkten kan lämnas.
12. Installera inte i ett trångt utrymme,
t.ex. i en bokhylsa eller liknande enhet.
13. Placera inte källor med öppen eld,
t.ex. tända ljus, på apparaten.
(PL) Ważne informacje o
bezpieczeństwie
1. Proszę przeczytać poniższe wskazówki.
2. Proszę przechowywać niniejszą instrukcję.
3. Należy przestrzegać wszystkich wskazówek
ostrzegawczych.
4. Należy postępować zgodnie z instrukcją obsługi.
5. Urządzenia nie wolno używać w pobliżu wody.
6. Urządzenie można czyścić wyłącznie
suchą szmatką.
7. Nie zasłaniać otworów wentylacyjnych.W czasie
podłączania urządzenia należy przestrzegać
zaleceń producenta.
8. Nie stawiać urządzenia w pobliżu źródeł ciepła
takich, jak grzejniki, piece lub urządzenia produkujące
ciepło (np. wzmacniacze).
9. Używać wyłącznie sprzętu dodatkowego i
akcesoriów zgodnie z zaleceniami producenta.
10. Używać jedynie zalecanych przez producenta lub
znajdujących się w
zestawie wózków,
stojaków, statywów,
uchwytów i stołów.
W przypadku
posługiwania się wózkiem
należy zachować
szczególną ostrożność w
trakcie przewożenia zestawu, aby uniknąć
niebezpieczeństwa potknięcia się i zranienia.
11. Prawidłowa utylizacja
produktu:Ten symbol wskazuje, że
tego produktu nie należy
wyrzucać razem ze zwykłymi
odpadami domowymi, tylko
zgodnie z dyrektywą w sprawie
zużytego sprzętu elektrycznego i
elektronicznego (WEEE) (2012/19/
EU) oraz przepisami krajowymi. Niniejszy produkt należy
przekazać do autoryzowanego punktu zbiórki zużytego
sprzętu elektrycznego i elektronicznego. Niewłaściwe
postępowanie z tego typu odpadami może wywołać
szkodliwe działanie na środowisko naturalnej i zdrowie
człowieka z powodu potencjalnych substancji
niebezpiecznych zaliczanych jako zużyty sprzęt
elektryczny i elektroniczny. Jednocześnie,Twój wkład w
prawidłową utylizację niniejszego produktu przyczynia się
do oszczędnego wykorzystywania zasobów naturalnych.
Szczegółowych informacji o miejscach, w których można
oddawać zużyty sprzęt do recyklingu, udzielają urzędy
miejskie, przedsiębiorstwa utylizacji odpadów lub
najbliższy zakład utylizacji odpadów.
12. Nie instaluj w ograniczonej przestrzeni, takiej jak
półka na książki lub podobny zestaw.
13. Nie stawiaj na urządzeniu źródeł otwartego ognia,
takich jak zapalone świece.

6TQ Series Quick Start Guide 7
Safety Inspections
Carefully inspect rigging system components and cabinets for defects or signs of damage before proceeding to assemble the speaker to be own. If any parts are
damaged or suspect, or if there is any doubt as to the proper functioning and safety of the items DO NOT USE THEM and withdraw them from use immediately.
System Requirements
TQ8, TQ10, TQ12, and TQ15 full range speakers operate as a passive system and require only one amplier channel and DSP for normal forward ring operation;
Cardioid bass set ups will require additional amplier and DSP channels.
All TQ series loudspeakers exclusively use Lake pre-sets via Lab Gruppen PLM+ and D series L platforms, Lab Gruppen IPX Series pre-sets will be released in due time.
No 3rd-party amplier and DSP platforms are supported, no raw pre-set data is released or supported.
TQ series has a powerful yet simple pre-set strategy utilizing the latest functionality of LAKE XP software.
Pre-set data is found either via Lake LOAD Library (https://www.labgruppen.com/downloads.html) or can be downloaded from https://www.turbosound.com/
downloads.html
Recommended Lab Gruppen PLM+ models for Touring applications are the PLM12k44 and PLM20k44.
For installations using Lab Gruppen D series L models, please use Lab Gruppen ‘CAFE’ software - available for download from www.labgruppen.com -
to determine the optimum amplier conguration for your system.
System Cabling Requirements
To avoid wasting amplier power, you should use heavy-duty speaker cable with a minimum wire size of 2.5 mm² (14 AWG), and preferably 4 mm² (12 AWG)
for longer runs or where total cabinet input impedance is less than 8 ohms. For extreme cable lengths, be aware of cable impedance and resistive losses.
Always observe the correctpolarity.
Use genuine NEUTRIK SPEAKON CONNECTORS for reliable operation.
Attach and support the speaker cables from your ampliers to the loudspeaker cabinets, so that no signicant additional weight or lateral force is applied to the
speakers by the input wiring. Input cables or link cables should never be used to angle the speakers or used as rigging in any way.
Stereo System Example
NOTE: Since the TQ cabinet is wired (1+/- = FR and 2+/- = Link), use (Speaker Output 1: 1 +/- and Speaker Output 2: 2 +/- ) for the output patching from the Lab
Gruppen amplier
Depending on how the other channels are used, it may be useful to use an "NL4 to 2-NL2 breakout splitter cable," as shown in the example below.
The NL4 end uses Pin 1 +/- and Pin 2 +/- and both NL2 ends need to be wired Pin 1 +/-
LAB GRUPPEN Amplier outputs
congured in LAKE software
on Pins 1+/- and 2 +/-
NL4 with
Pins 1+/- and Pins 2+/- used
NL2 - NL2
wired Pin 1+/-
NL2 - NL2
wired Pin 1+/-
Stereo System Example with Subwoofers
Note: Since the TQ cabinet is wired (1+/- = FR and 2+/- = link), the output patching can be selected from any of the 4 options (1, 2, 3, 4 +/-) from the Lab Gruppen
PLM+ amplier.
Depending on how the other channels are used (for example in a stereo system with two TQ8 and two TQ15B subwoofers) it may be useful to use "NL4 to 2-NL2
breakout splitter cables," as shown in the example below.
The NL4 end uses Pin 1 +/- and Pin 2 +/- and both NL2 ends need to be wired Pin 1 +/-
Note: in this case, do not use the TQ subwoofers front input, as it uses Pin 2+/- connected to the woofer.
LAB GRUPPEN PLM + Series Amplier outputs
congured in LAKE software
on Pins 1+/- and 2 +/-
Pins 1+/- and 2 +/-
Used
Pins 1+/-
Used
Pins 1+/-
Used
Pins 1+/-
Used
Pins 1+/-
Used
TQ8 Full Range Speaker
TQ15B Subwoofer
TQ15B Subwoofer
TQ8 Full Range Speaker

8TQ Series Quick Start Guide 9
Connections
Caution: It is mandatory to use the ocial factory Lake pre-set. Failure to do so will result in component failure of the TQ passive crossover and transducers. No other
3rd party DSP or Ampliers are supported
Mode BackPanel Connector InternalSchematic
Passive Mode
1-
2-
2+
1+
Full Range Input -
Full Range Input +
1+
1-
2+
2-
1+
1-
2+
2-
NL4
Input/
Link
NL4
Input/
Link
+
-FR
Rigging and Acoustic SimulationSoftware
The TQ speakers have 3 optional rigging accessories: TQ-FB y bar, TQ-YB yoke bracket, and the TQ-SB swivel bracket.
These accessories comply with BGV-C1 rigging standards.
The TQ speaker is not an arrayable product. It is supported in Ease Focus 3 in stand-alone use, with Manchester series subwoofers, or as a ll or delay speaker as part of
larger Manchester series systems.
EASE Focus 3 is an acoustic simulation program, available as a free download from https://www.afmg.eu/en/ease-focus
TQ Installation
Safety Warning: Only authorised and
certied personnel shall design and install
suspended congurations. Incorrect
installation may lead to death or permanent injury.
The use of a secondary safety is a mandatory safety
requirement.
The versatile TQ speaker has three feet on the
bottom for standing the speaker on a at surface,
two integral pole mount holes, and M10 mounting
holes with tted hex socket head screws.
TQ series cabinets are designed with multiple
internal rigging points to suit many possible
mounting methods in permanent installations. All
cabinets can be simply suspended using optional
M10 shoulder eyebolts coupled to the internal
rigging points provided. Remove the appropriate
countersunk screws and replace them with eyebolts,
which must have a thread length of at least 18 mm.
Cabinets may be hung upside down if required.
The optional accessories allow the TQ speaker to be
mounted in a number of dierent congurations.
Feet
M10 Mounting Holes with Screws
Badge Rotation
The Turbosound badge is spring-loaded and can be
rotated by hand to suit vertical or horizontal
positioning.
Pole Mount
Two 35 mm holes are provided for pole mounting,
one in the vertical position, and one with the TQ
tilted forward. The TQ can be pole mounted on an
MS121 subwoofer, or on a suitable tripod stand.
We recommend using a 35 mm pole with an M20
thread at the lower end. This type provides more
security and will screw into the top receptacle of the
MS121 subwoofer.
Fly Bar TQ-FB
The optional TQ-FB y bar allows the speaker to be
own. The TQ-FB ts the TQ8, TQ10, TQ12, and TQ15
speakers. It has ten pick points for attaching shackles,
and it bolts to the top or bottom of the TQ speaker.
The y bar ts to the top or bottom of the TQ speaker
using two of the existing M10 screws as shown.
Securely tighten both screws.

10 TQ Series Quick Start Guide 11
The ybar has 10x 12.5 mm diameter holes that are
used as pick points for rigging shackles. The space
between each rail of the TQ-FB allows for a standard
1 ton bow shackle to be used to pick up the TQ.
Either style of shackle will work:
W.L.L = 1 Ton
A= 10 mm
B= 11 mm
C= 17 mm
D= 36.5 mm
Yoke Bracket TQ8-YB, TQ10-YB, TQ12-YB, and
TQ15-YB
The optional yoke bracket allows the TQ speakers to
be own using suitable hook clamps or couplers to
securely mount to a own truss. The yoke bracket is
available in 4 sizes to t each of the speakers in the
TQ series: TQ8-YB, TQ10-YB, TQ12-YB, and TQ15-YB.
Ratcheting handles are provided on either side to
help angle the speakers accurately and secure them.
The yoke bracket ts to the sides of the TQ speaker,
by screwing the handles into the existing M10
mounting holes on each side. Note that the yoke
bracket is oriented as shown.
Adjust the speaker tilt to the desired angle, and then
tighten the handles to secure the speaker in position.
If the yoke bracket is to be bolted to a ceiling or other
surface, then secure the yoke bracket rst.
Then lift the speaker and attach it to the yoke
bracket with the handles. Adjust the speaker angle
and tighten the handles.
Pole Mount SA-35
The optional SA-35 bracket allows the yoke bracket
to support the TQ speaker on a 35 mm pole mount or
tripod. Note that the yoke bracket is oriented
as shown.
The SA-35 bracket attaches to the yoke bracket with
two screws.
The assembly can then be added to a 35mm pole
mounted to an MS121 subwoofer, or to a suitable
tripod. Tighten the SA-35 ratchet handle to secure
the assembly to the pole or tripod. Adjust the
speaker tilt as desired and tighten the handles on
each side.
Swivel Bracket TQ8-SB, TQ10-SB, TQ12-SB,
and TQ15-SB
The optional swivel bracket allows the TQ speakers
to be ceiling or wall mounted horizontally, or
truss-mounted using suitable hook clamps. The
swivel bracket is available in 4 sizes to t each of the
speakers in the TQ series: TQ8-SB, TQ10-SB, TQ12-SB,
and TQ15-SB.
The speaker angle can be accurately set and clamped
in position. Two concentric rows of holes allow for a
wide range of angle adjustment, and this is held in
position with a clamp/handle screw.
If the swivel bracket is to be bolted to a ceiling or
other surface, then secure the bracket rst.
Add the small bracket to the top side of the TQ
speaker, using the existing M10 mounting screws as
shown. There is a large washer there as well.
Attach the large plate to the bottom of the speaker,
using the existing M10 screws. It covers the pole
mount holes as shown.
Center the large washer, and then add the swivel
bracket and secure it with the center screw and the
handle screw.
Secure the other end of the swivel bracket with the
supplied screw. Set the speaker at the desired angle
and tighten the handle screw and center screws on
either end of the swivel bracket.
Horn Rotation
The MF/HF Horn assembly provides an 80 degree
horizontal beamwidth, and a 30 degree vertical
beamwidth, when the TQ is mounted vertically
(portrait).
The horn assembly can be removed and reinstalled in
a dierent orientation to suit desired congurations
and coverage. For example, if the speaker is used in
landscape mode, you can rotate the horn to maintain
the 80 degrees horizontal and 30 degree vertical
beamwidths. (This is a typical example of the need
for horn rotation.)
The horn is marked on the front with the
beamwidth angles.
Follow the procedure below to rotate the horn:
Remove the grille by pressing on any corner and
carefully prying it out with a generic trim
removal tool.
Remove the screws in each corner of the
horn assembly.
Carefully pull the horn assembly forward, just
enough to be able to rotate the assembly to the
desired orientation.
Reinstall the horn with the 4 screws. Make sure the
wiring is intact and not pinched.
Reinstall the grille, and make a note that the speaker
has been modied.

12 TQ Series Quick Start Guide 13
Lake Preset Overlays and ApplicationNotes
All TQ series loudspeakers exclusively use Lake XP pre-sets via Lab Gruppen PLM+ and D series L platforms and the forthcoming IPX FiR-X pre-sets.
No other amplier and DSP platforms are supported.
The TQ series has a powerful yet simple pre-set strategy utilizing the latest functionality of Lake software, along with new BLEQ overlays.
Pre-set data is found either via the Lake Load Library, or can be downloaded from www.turbosound.com
TQ8, TQ10, TQ12, TQ15 loudspeakers each have individual 1 way passive FIR base pre-sets (1 channel DSP/AMP), full range with or without Subwoofers.
CAUTION: Do not combine TQ8, TQ10, TQ12, TQ15 loudspeakers on the same amplier / DSP circuit. Failure to follow these instructions may lead to
damage to the equipment.
CAUTION: Pay careful attention to output patching.
CAUTION: Pay careful attention to the HF Horn orientation, and select the HR preset if the HF Horn has been rotated.
TQ8, TQ10, TQ12, TQ15 modules are based on the XP module from Lake software.
This QSG refers to REV1.1 XP presets.
Lake software V7.0.7 or above must be used.
LakeXP signal ow:
The download of the Lake controller includes the Lake Controller Operation Manual, which is a full tutorial of the Lake Controller and compatible hardware such as
PLM+ series ampliers
Within this QSG, we focus on the Turbosound TQ series workow and pre-set strategy, and assume basic working knowledge of the Lake Controller.
DESCRIPTION OVERLAY
1.1: Frame (Amplier) is in the Main workspace page
Here we can see a default PLM12k44 frame with no
DSP pre-set modules loaded.
How to load a module from the Lake Load Library:
Left-click on Module A in the frame.
Module A is now outlined in yellow, and the buttons
at the bottom of the workspace show various module
options. The Modules button is also highlighted there.
To Load a module :
Click the ‘ Module Store/Recall’ button.

14 TQ Series Quick Start Guide 15
DESCRIPTION OVERLAY
Four folders appear, one for each speaker in the series:
TQ8, TQ10, TQ12 and TQ15. Double-click the appropriate
folder for your speaker.
The available module folders are displayed.
Each TQ series speaker has two options, and this
depends upon the Horn rotation: Standard, and HR
(Horn Rotated).
Left-click on either of these to show more details about
the module set up. This example shows the Standard
option, where the horn assembly has not been altered
from its factory setting.
The horn rotation procedure is shown on page xx of this
quick start guide.
TIP: Please read the information!
Double-clicking the desired folder will open the
module pre-set in the highlighted module of
the Frame (amplier)
Press ‘YES’ to proceed –the selected
pre-set module is loaded!
DESCRIPTION OVERLAY
Folders now appear, and these allow you to select
where to recall the module (pre-set) from.
Double click the "Lake Load Library 5.5" folder.
Scroll using the arrow keys >> << along the bottom,
to nd the "Suitable for TURBOSOUND Loudspeakers"
folder, then double click to open it.
Now scroll again >> << to nd the "TQ REV1.1 XP"
folder, then double click to open it.

16 TQ Series Quick Start Guide 17
EQ STRATEGY ILLUSTRATION
The TQ8/10/12/15 speakers have a 2 band EQ (BLEQ)
inserted.
The BLEQ acts as a level control for LF/HF and the 2
centre frequencies of the BLEQ relate to the crossover
points of the LF/HF.
The BLEQ is oered for users to adjust tonal balance of
the system along with PEQ overlay and group overlays
(system design dependant)
Examples of BLEQ use
Flat
LF Cut and HF Boost
DESCRIPTION OVERLAY
Output Conguration:
Now you can patch the DSP module output to the
frame's amplier outputs
For the full range TQ series speakers we want full range
to pins 1. The patch is highlighted in yellow boxes with
red text
Once you have nished the correct output patch, press
enter to close the output conguration
Note: you will get access to the screen once you
go through the same process to load other pre-set
modules into the free B, C, and D modules or via the IO
option button
Now you can see the pre-set module is recalled and
loaded into A/B hardware modules
Only 1 channel of DSP and Amplier are required

18 TQ Series Quick Start Guide 19
SUBWOOFER TIMEALIGNMENT ILLUSTRATION OVERLAY
The TQ15B/TQ18B subwoofer pre-sets use
all-pass lters to set the initial time alignment
(assuming the fronts of the cabinets are in line)
this greatly reduces systemlatency.
For example: If the fronts of the TQ speaker and
TQ15B/TQ18B subwoofer are aligned, then in
both pre-sets, the delay should be set to the
default, which is0ms.
However, it is not always possible to have the
own speakers and the ground stacked bass
aligned in the verticalplane.
1. In this example, the TQ15B/TQ18B subs are
‘forward’ of the TQ speakers, and so the TQ15B/
TQ18B subs need to be delayed.
1. Subs areforward
Delay adjustment of subwoofers
2. In this example, the own TQ speaker is
‘forward’ of the TQ15B/TQ18B ground stacked
subs, and so the TQ needs to bedelayed.
How do you nd the correct delay time to align
the own speakers to the ground stackedbass?
Some basic knowledge of delay units can
get you an acceptable result by measuring
the distance between the fronts of the own
speaker and the front of the ground stacked
array. Remember within Lake software you can
choose the delay unit; ms, m, orfeet.
1 ms (milliseconds) = 0.343 m (meters) = 1.125
ft (feet)
Further ne-tuning can be done by using one
of the many industry standard measurement
software systems, reference microphones and
sound-cards. Lake software oers integration
to many of these software systems, and further
information can be found at www.labgruppen.
com
2. Flown TQ isforward
Delay adjustment of TQ speaker
Distance (time) is the dierence to add to the own array for
alignment at the listening point
EQ STRATEGY ILLUSTRATION
HF Cut
HF Boost
Other manuals for TQ Series
2
This manual suits for next models
13
Table of contents
Other Turbosound Speakers System manuals

Turbosound
Turbosound QLIGHT TQ-440 User manual

Turbosound
Turbosound Siena TSP122-AN User manual

Turbosound
Turbosound TLX LIVERPOOL Series User manual

Turbosound
Turbosound LMS-D24 User manual

Turbosound
Turbosound flexarray User manual

Turbosound
Turbosound Manchester Series Quick start guide

Turbosound
Turbosound TLX LIVERPOOL Series Quick start guide

Turbosound
Turbosound iNSPIRE iP2000 User manual

Turbosound
Turbosound NuQ-AN Series User manual

Turbosound
Turbosound QLight TQ-440SP User manual