Turnigy NITRO BUGGY 34229 User manual

lnslruction ltanual
1/1 6 scale 4WD nitro
ModelNo.;34229
powered buggy
^
,/:\ SAFETY PRECAUTIONS
THIS FAD]O CONTFOLLED RACING CAF S NOTATOY]
IHIS HIGH-PEBFOFN4ANCE R1C I\IODEL IS RECOI./]IVENDED FOF AGES ] 4 AND OLDER AND
WE SUGGEST ADULT SUPEFV]SION,
THIS S ONLY FOB YOUR BEFEFENCE BEFOREYOU OPEBATE THE \IODELCAR
FIBST-T]IVE BUILDERS SHOULD SEEK THE ADVICE OF EXPERIENCED IVODELLEBS BEFOFE
COIV IV ENC ING ASS EN/ BLY AN D LF TH EY DO NOT FU LLY U N DERSTAN D ANY PABT O F TH E
CONSTRUCTION
ASSEI!4BLE THIS KIT ONLY IN PLACESOUT OF CHILDREN S REACHI
TAKE ENOUGH SAFETY PREACUIIONS PRIOF TO OPERAT NG THIS I'"1ODEL. YOU ABE
BESPONS BLE FOB THJS N/ODEL S ASSEIVBLY AND SAFE OPEFAT ONI

BEFORE YOU RUN YOUR CAR
Required equipment for operation
1. Tools required for building and maintenance:
m
O Precision ruler or caliper
@----_t ___Ì:],
o Hobby knife
-/a
't t_
-N
-__-.=)
O Hobby scìssors
-1r=
<J?t€
<,p-_
--\,_'^
V
O Wire cutters
.--EreJI
BpcsAAalkalinebatteriesforradiosystemand 4pcsAAAbatteriesfor receiverbatterycase
o Thread locking compound
2.Additional items needed for operation:
pffi prx'ie'
ffi Ll+l,.lfll
6?Ìr§::=:
ru*___*flm
O PhiÌips screwdriver
a Needle nose pliers
1.5mm -J
2.omm J
2.5m m
5.0mm
a Hex wrench
É--nf@>ì
a CA glue & rubber cement
:::::Jl
,\-,
oCross wrench
t1
:- .-.,
Glow fuel
'-j: -t--."_--.-
Fuel bottle
Glow igniter & its charger
<=

lmportant I !
Check all the screws are tight before using the car!
Check all the screws are still tight after every battery pack
used in the carl
Recommended
Use thread lock on all screws that work loose.
PLEASE READ BEFORE STARTING!
Before you throw down this manual and unleash your new vehicle, please continue reading
for just a few short minutes. ln addition to important safety precautions, just below you will
also find some quick tips for getting the maximum enjoyment out of your new vehicle. We
would sincerely like to thank you for your purchase and hope that you enjoy the wonderful
amount of fun and excitement that come from owning a high performance R/C vehicle.
Whether you'll be hitting your local racetrack this coming weekend or just drag racing your
buddies down the driveway, experienced racers and novices alike are sure to enloy the
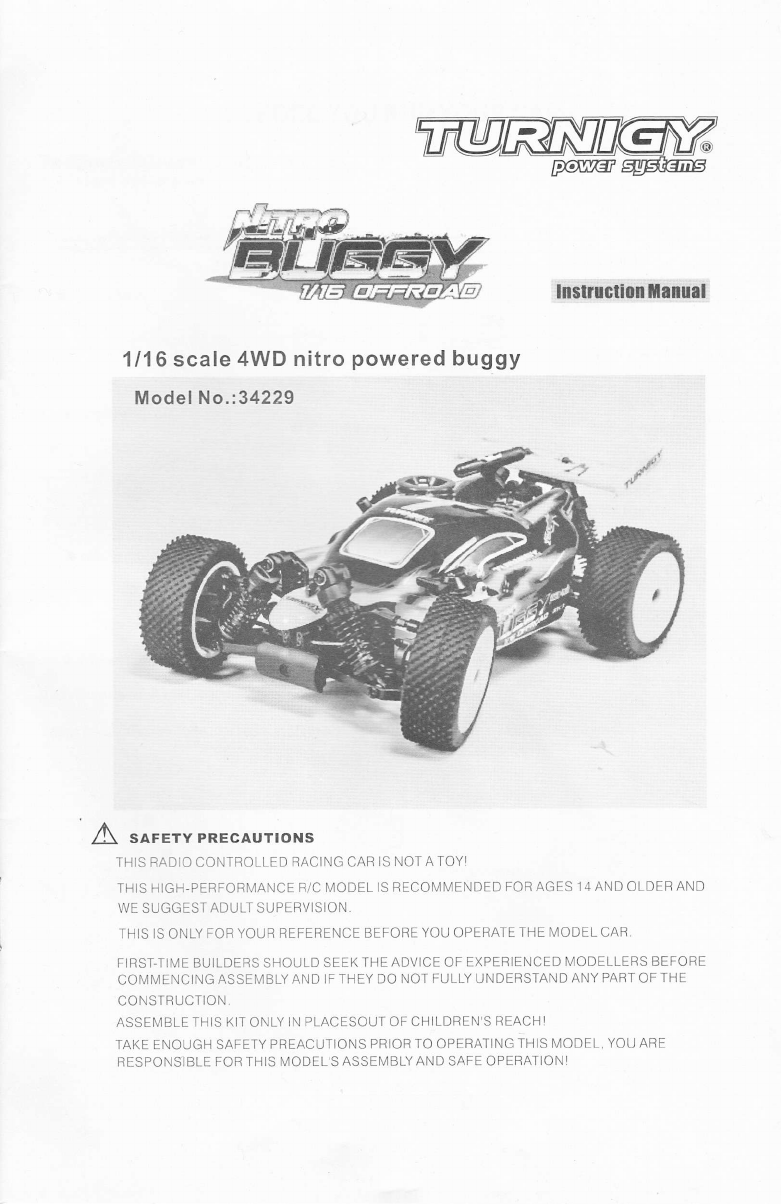
performance and versatility of the vehicle 11 6N B---1/16 4WD Nitro Buggy.
SAFETY GUIDELINES
The vehicle is not intended for use by children without direct supervisìon of a responsible,
knowledgeable adult. We shall not be liable for any loss or damages, whether direct,
indirect, special, incidental orconsequential,arisingfromtheuse,misuse,orabuseofthis
product and/or any product or accessory required to operate this product.
IMPORTANT POINTS TO REMEMBER
Always, turn on your transmitter first before turning on your vehicle's receiver switch. When turning an R/C
vehicle off, the order is just the opposite; Turn the receiver switch offfirst and then turn the transmitter off.
Just remember that when you r car is turned ON, your transm ilter shou ld always be tu rned O N. lf not,
1 1 6NB will no longer be under the control of your transmitter, and could unexpectedly take off on its own,
causing damage to itself and other people.
Never use old, worn out batteries in your transmitter or buggy. Use only fresh alkaline batteries or fuìly
charqed rechargeable batteries to ensure that you will not exceed the range of your radio system while
driviÀg your bu9gy. lt is also very important to stop your buggy immediately when you begin to see that it is
slowing down. This means the batteries in your buggy are close to beìng fully discharged, and if you
contrnuetorunyourbuggyafterithasslowed,itmayrun outofcontrol'sinceitdoesnothavesufficient
voltage left to receive the signals from your transmitter.
Only run your 116N8 in safe, open areas thatwill not put anything oranyone in dangerofa collision. Use
common sense when driving your buggy to ensure lhat you will not cause potential hazard to anyone
(crowdsof peopleandconfinedareasshouldbeavoided).Although116NB issmall andlightweight,itcan
still hurt when it runs into you at ankle height. lt can also slarlle someone who is not expecting it, so it is
extremely important to ALWAYS keep a safe distance between any people and the path of your buggy
(don't forget this includes yourseìf)!
Never run your 1 1 6NB through puddles, wet grass, snow or any other type of moisture. Also never use any
liquid cleaners around the electronic components on your vehicle. Any small amount of moisture can
cause several damage to your electronics.
lf you will be runn ing your 1 16N B with other R/C vehicles, always conf irm before turning you r transmitter
on, that no one else is using your same frequency channel. lf necessary, you may change
frequencies(Certainly this is not related to 2.4G transmìtter.)
WHAT ELSE IS NEEDED:
B "AA" alkaline batteries (for the radio transmitter)
GETTING STARTED
1. INSTALLING TRANSMITTER BATTERIES

lnstall I new "AA" batteries into your vehicle transmitter' Check the life
and proper installation of your batteries by switching the transmitter to on.
On vehicle transmitters, you should see allthree LED's light up (red'
yellow, and green). lf you do not, your batteries may be low on voltage or
you may not have installed them all correctly. As the life of yourtransmitter
batteries begins to decline, the green LED will no Ionger light. When you
notice that you are down to only the yellow and red lights, thìs ìs a caulion
siqn that it is time to instali new batteries. lfyou continue operating your
Ar003T. and see that the yellow light goes out (and only the red light is lit),
STOP I[/MEDIATELY!Your vehicle may easily travelout of range causing
you to lose all control, which could result in a collision causing damage to the vehicle or other property.
2. CHARGING YOUR VEHICLE
Charge you r A2003T battery pack. Connect the charger to your battery pack (it will only plug i n one
Oirec[ioÀ) and then plug the charger into a standard wa]l outlet. Charging takes approximately 3-4 hours.
When the battery ìs chàrged unplug the charger and connect the battery to your speed control's battery
plug. Your vehicie chargér will safely charge your battery pack and not over charge ìt. Be careful when
usiÀg after market chargers that you do not overcharge the battery pack and ruin it'
3. ASSEMBLING THE ANTENNA
Locate the plastic antenna tube (found insìde the manual bag) .
Run the anlenna wìre up through the rear antenna mount hole in the upper chassis plate and begin
feeding it into the plastic antenna tube until it comes out the other side. Pullthe remaining wire through
the tubi, and then press the tube into the antenna mount in the upper chassis plate. Bend the antenna wire
downaroundthetubeandinstalltheblack rubberantennacaponthetopofthetube.Youmaythenwrap
the remaining wire around the tube.
DO NOT cut the antenna wire off! This could shorten the range of your radio system'
Declaration for Using of Our Products
Evenifthevehicleisquitesmallatthefirstglance,thereisriskofinjuriesinthecase ofcrashwith
people(or animals), because of the high acceleration capacity and the high achievable speed.
Sharp edges and rotating parts also present a high danger!
This is why you should drive very responsibly and carefuìly, this is especially the case for inexperienced
d rivers.
So, here we declared as below:
1. please do note this manual carefully, especially the attentions parts and if you are a new player
without enough experience, we will not take any responsibility for the car damages or injuries caused
by incorrect operation!
2. We have righì to change the specification and parameter of the model and without notice in
advance, please take the material object as the standard!

]Ì f rontgearbox assembty i
l"'la jo,
\ ,ro,rrr'
.i/.) 1:l
'.12007
:107;l(i
:i200iÌ
;107:ì(i
:§§}t-
,@*
... 32005
'3',2:119
32009
30774
. 32005
?,07 7 L)077 I
32010
16 I
^l
30771
2.Reargrmbo,assembly i
@' 3 2 3.19
i2007
32005
4

-l
rl
.-&
tt
§.,ol
c0
3.Single speed 30808 30726 307,1.2 3oBo1
tJ :ì()7)to 307;t I
,1o"nruo,r-.-'ooo'[ y' t
) |J-*
'", 3 08 42
30775
I
l0lJ03
307ri0
, .,r.
,:l .
ii
{§ \i
3081{J
30707
L
&_
\§'6
W :
€§/
8-
4.Fueltank
- 30849
L

L
c
Il
U
5.Servo saver complete
-..'.
6.Receiver box
53?
OC
v
\ :ìois r
ì\
t ,'
,r'
t ,."
30720

g'-
w
q|
fi
H .-*
§§=d
"L i-=
Fi=.
w.§
EZ LJ
ryH
w
t&u.-...,,,,,
32i03
32156
It
lu
I :§*
i!§
I tÉ3
3
&
Èi:)i
ffi
w
*r4
E
-.-.- |
1e
w
§
w
{)
T
3.
7'
B'
§i
fi
#
§E'
E
w
T.Plastic shock absorber assemble (1)
S.Plastic shock absorber assemble (2)
-
ffi
--à> @
E
.- '32802
,t t:
,10771)(,. i,
\r
:
,;
_ j2104
32802
'- 30809
§
§1r:
§^*i
w
H'
Y

I
ax
\.3
§ :l-t'
o /\ :/ r-.§
-.,rrl H 7'-
. ";&\s È
\irr 3
\'t:
1 ÀP o
| È: o o
§N
Àio-o
:= z'-)Er 1Y i .
)2 -à -F, =
l- --'' 7 : É
I' I l_ ;
,'§3
7. o
t §Li-
\i - *-ft1gr,
tH-- i r .1
,§if[ 'E
', tcl-t?
e§.3.
"ilrè à 't
\ ire
1 ÀP
| È: o
§
- l-
' dip*.
ri.a
\Ò6'§
; SWB
ȧ'!\
o§\\ t\
Èt \
La \
È\
o\ \
,l \ \
!\\
\,, \
i'\. ..
\\t
\ '-l
'/
4\/
_ \E È
[ \>
à òÉ
r
3o s
N
t\
" ,.k
.{
== * Y
JaY
.tèi^
Y;
'rl
,§ ,-
i9r
é--
-
-
E
-U
t
(A.
p
{<'
k-c
I=9
3
ìo
,*!
,-j.'{
c
.o
0)
E
N
!C
o
U)
=
.9
!0)
E
o
o
Lr.l
o

W
i]
9i;
r\ e ,
i \,/
NN
h
N
o
,.i I
N
l,\
o-.,)
o
Frl
N
N
N
N
N
:\
;
PÈ
;a
i,
C
;
F
&.
=: &,
=
l.G- =-
".i
-À
à,/t"
6t<a
N
t;' :
\1,
?(ì
lE;§
) n:o
,\tÀu
'*.o
\4, \
(\*
'sH
)é
3iì
.al
o -tra--
. {'E
\o
\N O
È
C
.9
a
o
q)
!6
o
o
-
=
o
.;
!o
!o
o
u.l
o
N
È
*''
m
§\!)r
È
,ì_
\
à
t
3
iù
ìv^
xt
\§f
N

11.Engine
30818
30818
30732
1 2, Tyre/wheel/foam assemble
307 37
i1 1161
30867
;§;*
ro-
V \ -iLry
30867
*Ll
/
/
12

116N8 SPARE PARTS LIST
30028-Antcnna pipc & cnp
il g
r1
30083-M3 lock nuts I0pcs
"f*,".".. §§§§§
§§§e§
30097-Bl'2.6*6 scret l0pcs 10106-B'1 2*8 screws l{)pcs
?????
?????
701-Erhaust pipc lstt 301I2-Servo saver complete
Tq I pcs
,0-l ().1-Front bulkhcatl I pcs
30705-Front uprights l/r lset
,o 30706-Knucklc arm spaccr
$/screrì.lsets
oooo
aaaa
-Fuel tilnk I sct 30708-Front knuckle arms l/r
lset dt
17lo-F'ront uppcr sus. Ar
'lsrt 7l l-Front lorrrr sus. Arnrs
I sct
30713-Spacers for liont
uppcr sus. Arms 4pcs
§33
,l-Rear lorlcr sus.,\rm
kct(plastic) lpcs 30715-l\lud guard l/r
Isct(l cllo*)
&
30716-Bodv mounts lset
30717-lSO3*8 FH scr$v
l0pcs &
xÒ
à$!sa
" E?à
3071 8-Rcar torquc rod set
I sct (;
lrt \! §
l9-Rcar ìring brackcl
rplctc I sct -30720-lleceiver cnse Iset
l-Batter) case lset 722-Servo horn lset
§
10723-Serro nì0unts lset
a
I3072,1-Srvavbar backplate
"- ggBg
?t?t
ttt?
ì0725-\\'hccl hub,lpcs
co
o
e
30726-l ront shock toucr
I pcs -Rcilr slÌock to\lcr Ipcs 30730-Balls(Front sus. Arm)
2pcs §
§
sc'( Er

116N8 SPARE PARTS LIST
3l-Front tyres 2pcs 30732-Front wheel§
2pcs(Yellow)
§g»
3073-1-Front t) re insert 2Pcs 3073,1-lìcar \rhcels
2pc§(\ cllorv)
30735-Spur gear 30T lPcs 30736-Gearbox hou§ing lset
rBr
30737-Rcar t] rcs 2Pcs
§o 3073tì-['ucl piPc 2Pcs
.:l '
lt
-107-19-Siliconc tul)c I §tt 30740-Srvay bar tie rods 4Pcs
-F
^r-!g
-lll9
r-(2
30742-Sttcring turnbuckle
2sets ,l
II
I
I
307,13-Air filter w/sponge
lset z307.1,1-Brakc rod sct lsci 307'17 -Crntril drivt shall
l pcs
307.11'l-lìear tl rc inscrt 2Pc\ Fr0nt 0utdrive &
res 2pcs 3l)750-Rear outdri\ c &
dogl)ones 2pcs
\\
30751-Singlc sPecd gear shaft
lset
-
E
30753-Front §sa) bar lsct 1075,1-Pin for front uPPcr
susp. Arrn 2pcs
§
30755-Pin for front lo$ cr
susp,,\rm 2Pc§ -10756-Pin firr rcar susP.
Arms 2pcs
\
Stopper rv/grub scr(
I30759-Brake Pole lset
!l
-10760-Brake disc 30765-lSO2*lJ FH scrol
I 0pcs NITr
TIIIi
-10767-Front loter sus. Arm
bracket (plastic) I Pcs
30772-Front upPer §u§. .{rm
brrcket lpcs 30773-Ball bearing'l*8*3
Spcs
oZYoZ
3077-l-Ball bcaring 6" | 0"3
SPcs .-. (,"-r.
., " 'l'iì:r
t.,l t'"'
- tz+-
307-ll -Steering turnbucklc
2§cts
7.15-Throttle sct l§et
3
,,.1r: _P,, (9
\P-
É=x
oo

116N8 SPARE PARTS LIST
30775-Ball bcaring 5*9*3
.lpcs u/»
kà1/
B"'
Y
10776-Ball bcaring.l*7*2.5
lucr
'-t - r(
\" -'
Ll't
30777-Rcar wing w/spaccr
I sct(Volloù'ì
è
3077{t-1SO2.5"6 FH screrv
l0pcsì(.* 14, :(,É
>é ,x >/-,:4 .!(
30779-2.3*0.4 E-clip l0pcs
r% ]0780-3*0.4 E-clip lOpcs
Ar.
%"8%
"a
ì0781-Clip A l0pcs
ooo,égo
V-.**'o,.
-Strering rack */scrcrrs
-30785-M3*3 grub screw
I 0pcs§8&@&
B@@&B
30786-lI3*10 grub screrv
ll)pcs aaeaa
waBa
30790- I Pl-2.6*6 FH screrv
lopcs
?????
?????
3079I-TPF2.6*tt FII scrc$'
lOpcs?????
?????
30792-Rear torque set
bracket lpcs
*" a
-10793-Serro tie rod lsct
e
TPF2.6*16 FH screw
rm
nm
30795-
l0pcs 30796-BNI3* l2 BH screlv
I Opcs
?3939
393?g
-10797-lll\13*I0 BII scrov
I 0pcs
33933
99$3§
30791t-TPF2.6*10 FH scret
l0pcs?????
????? ;;ffi
B3E83
30799-
I tlpc5 10800-4*0.4 E-clip I2pcs
%
30801-TPF2*tì Fll scrcs'
lopcs?????
?????
301102-Gear 22T lpcs
*
ì0803-Pin 1.5*7.5 l0pcs
w!0804-Pin 2*18 l0pcs
N
30805-R't2.6*6 llll screu
(§hite) l0pcs
9?83?
3?3??
J0lì07-Lo$cr sus. Arm
bracket 17r (mctal) lsct
ab
10808-Gear 35'l lpcs
*
ì0t109-Bxll S 5.tlnrm l0pcs
§&&@&@
-.*"^-r"^
ry3rryry§,
30tll0-Ball M2*S4mm l0pcs
ttltt
llltt
30811-Ball M3*S4.7 l0pcs
t0tte
rtttt
3081 2-Erhaust pipr holder
I pcs
tP
4c*
ì0lJl-l-llc:ìr s\rrì] bar sct lsct
&§
-'15-

116NB SPARE PARTS LIST
3081s-Dri\c coupler C lpcs 3Ottl6-Upright pins,lPcs 30817-Gear l7T lpcs
*
3081 ti-Clutch shocs rv/sPrings
2pcsf.tre
llutch gear lpcs ì0823-Tlvo speed clutch
x)mplctc lset
s' .Transmission shafts
-
-
l0tt2d-
I sct
30tt2s-Gcar 30T lpcs
*
30826-Gear 35T lpcs
*
30827-lS()3*7 FH scror
l0pcs
??AQ?
?????
30t129-Front upper susP' Arnr
rods 2sets
30831-Rear lorver susP. Arm
2pcs 10832-Pin 1.5*7 l0pcs
"&
ì01ì.13-Clip D ltlpcs
.é.
v>" vé-'
V>, €?-
vc=. v>'.
v>'" v>'
€-
3083-l-lS()]*10 FH scrcÌ1
l0pcsrnr
nnr
30835-BT 3*6 BH screw
l0pcs
???99
???99
30lt-17.
I 0pcs -RT3"l2 BH scrcw
ggSgg
§§E§§
30838-BNt2.5i6 BH screu
lopcs
lxxxl
308-19-8\Il*17 BH scr§v
l0pcs nfiI
tnfi
-10840-TPF2.6*8 FII screl
l0pcs
,]1§lr,É,,:!*r r*;**:
v&éeé
:).. ilc:ir§,i}(.i}{:
§ gB g s
30tl{l-NI3"5 Cruh scror
l0Dcs
@@@a@
@aagia
308-12-Single speed comPletc
I set 301ì13-lS02*6 FH screw
lOtrcs
?§?§§
??§§?
30844-BTl.7*5 BH screw
l0pcs
?"r-E
.Y??
308,16-BT2*8 BH screw
l0pcs
ililr
3t|8J8-B\12.5* l0 RH l/2
screu 'lOpcs
ilIil
ilIil
ì0tl,l9-BM3*6 scres I 0pcs
?'TTI
??tt?
jl\ro spccd tomplete I 30853-PWB3*6 BH screw
l0pcs
?????
?????
30{t5,1-TPI"2.6+6 I'H §cr§Y
I 0pcs(white)
'opper spaccr 2Pcs
-1 6-
9-Fl1 u'heel w/shaft &
lset

116N8 SPARE PARTS LIST
30ti57-tì'l'2.6*lt BH scrov
l0pcs 99??
????
30861-DitTgears lsct ,2-Front dogbotres 2pcs car dogbotres 2pcs
1086,1-Front drive shafts 2pc!
\§
30tì65-Rear driYe shàfts 2pcs 'Alunr. Tuncd pipc lsct 10867-lltnilbld l\ct
%
2003-Rear di11. Box
omplctc lset 32005-NIetal dill. Spur geir
rhnft I pcs\outdrivc lpcs
&
r
3091 7-rngine nrount I pcs
titaniunr
I2006-Nletal diff. Pinion gcar
ìpcs §8>
i2007-Nletal Diff gcar 2(L)
tr/outdrive lpcs
7
12008-NIctal drivc gear
r/outdrive
w§
32009-Nlctal diff. Spur gear
I pcs
§
32010-Nf ctal drive gear
w/outdrilc lset
§w
l-Front diff. Box
)lete lset I 0-l-Front shock
ring(hlrck) 2pcs 04-Rcar shock
ing(black) 2pcs
321-56-Front shocks(plastic)
ts\
r
-32 I 57-Rear shocks(plastic)
2scts -1231 7-\rasher q5.7*e1.0*l.l
.lpcs
()()()()
l8l-1\I2.5*5 scr§vs l0pcs
33 188-\I3*7 screws l0pcs 80009P-Hl -printed b0d)'
lpcs 80009P-tl2-Clcar bod) lpcs
,l<,
.tg
Bl l6l-.07 engine
-17 -
\

L
30868-Ntanifold I set(nickel
phting)
%
30870-Front difi Box
completc I set(Ìnetal gears Ì0871-rvheel hub,lpcs
t3€,
6(}
301172-Rear ditl. Bor
conrplctc I set(metirl getrs
30873-Alurn. Tunctl pipe
lset(For 07 engine) 30900-Front Alum. Shocks
I pair-titanium 30901-Rcar ^lum. Shocks
I pair-titanium
q ,a.
1$q
30902-Scrvo savcr complcte
I set-titaIium
acket f/r (metal) -titanium
SEr
ont bulkhcad I pcs 30905-!'ront uprights l/r
I sel-tittr[ium
IÉ
3090GFront shock t0rìcr
I pcs--titaniunr
3(19(ì7-llear shock to\\ cr
I pcs--titaniunr 30908-Front knucklc arms l/r
lsct -titÌniunr
I3-30909-Rc:ìr hubcarrier l/r
I sct -titrniunr
?
-1091 0-I ront upper' sus. .\rms
l/r I sct -(itanium
rl
309I [-[ront loner sus. ^rnrs
l/r lsrt -titaniunt 3091 2-Rcar loncr susp.,\rm
2pcs -titaniunl 30{)l-1-t ronl ( \ l) lpcr
.*i
-1l19l-l-Rcir CvD 2pcs
J4*-""--1
ì09I8-Snalbar backplatt
lpcs-titanium
88
116N8 Upgraded Parts
-1 B-
20{3-O3
E
Table of contents
Other Turnigy Motorized Toy Car manuals