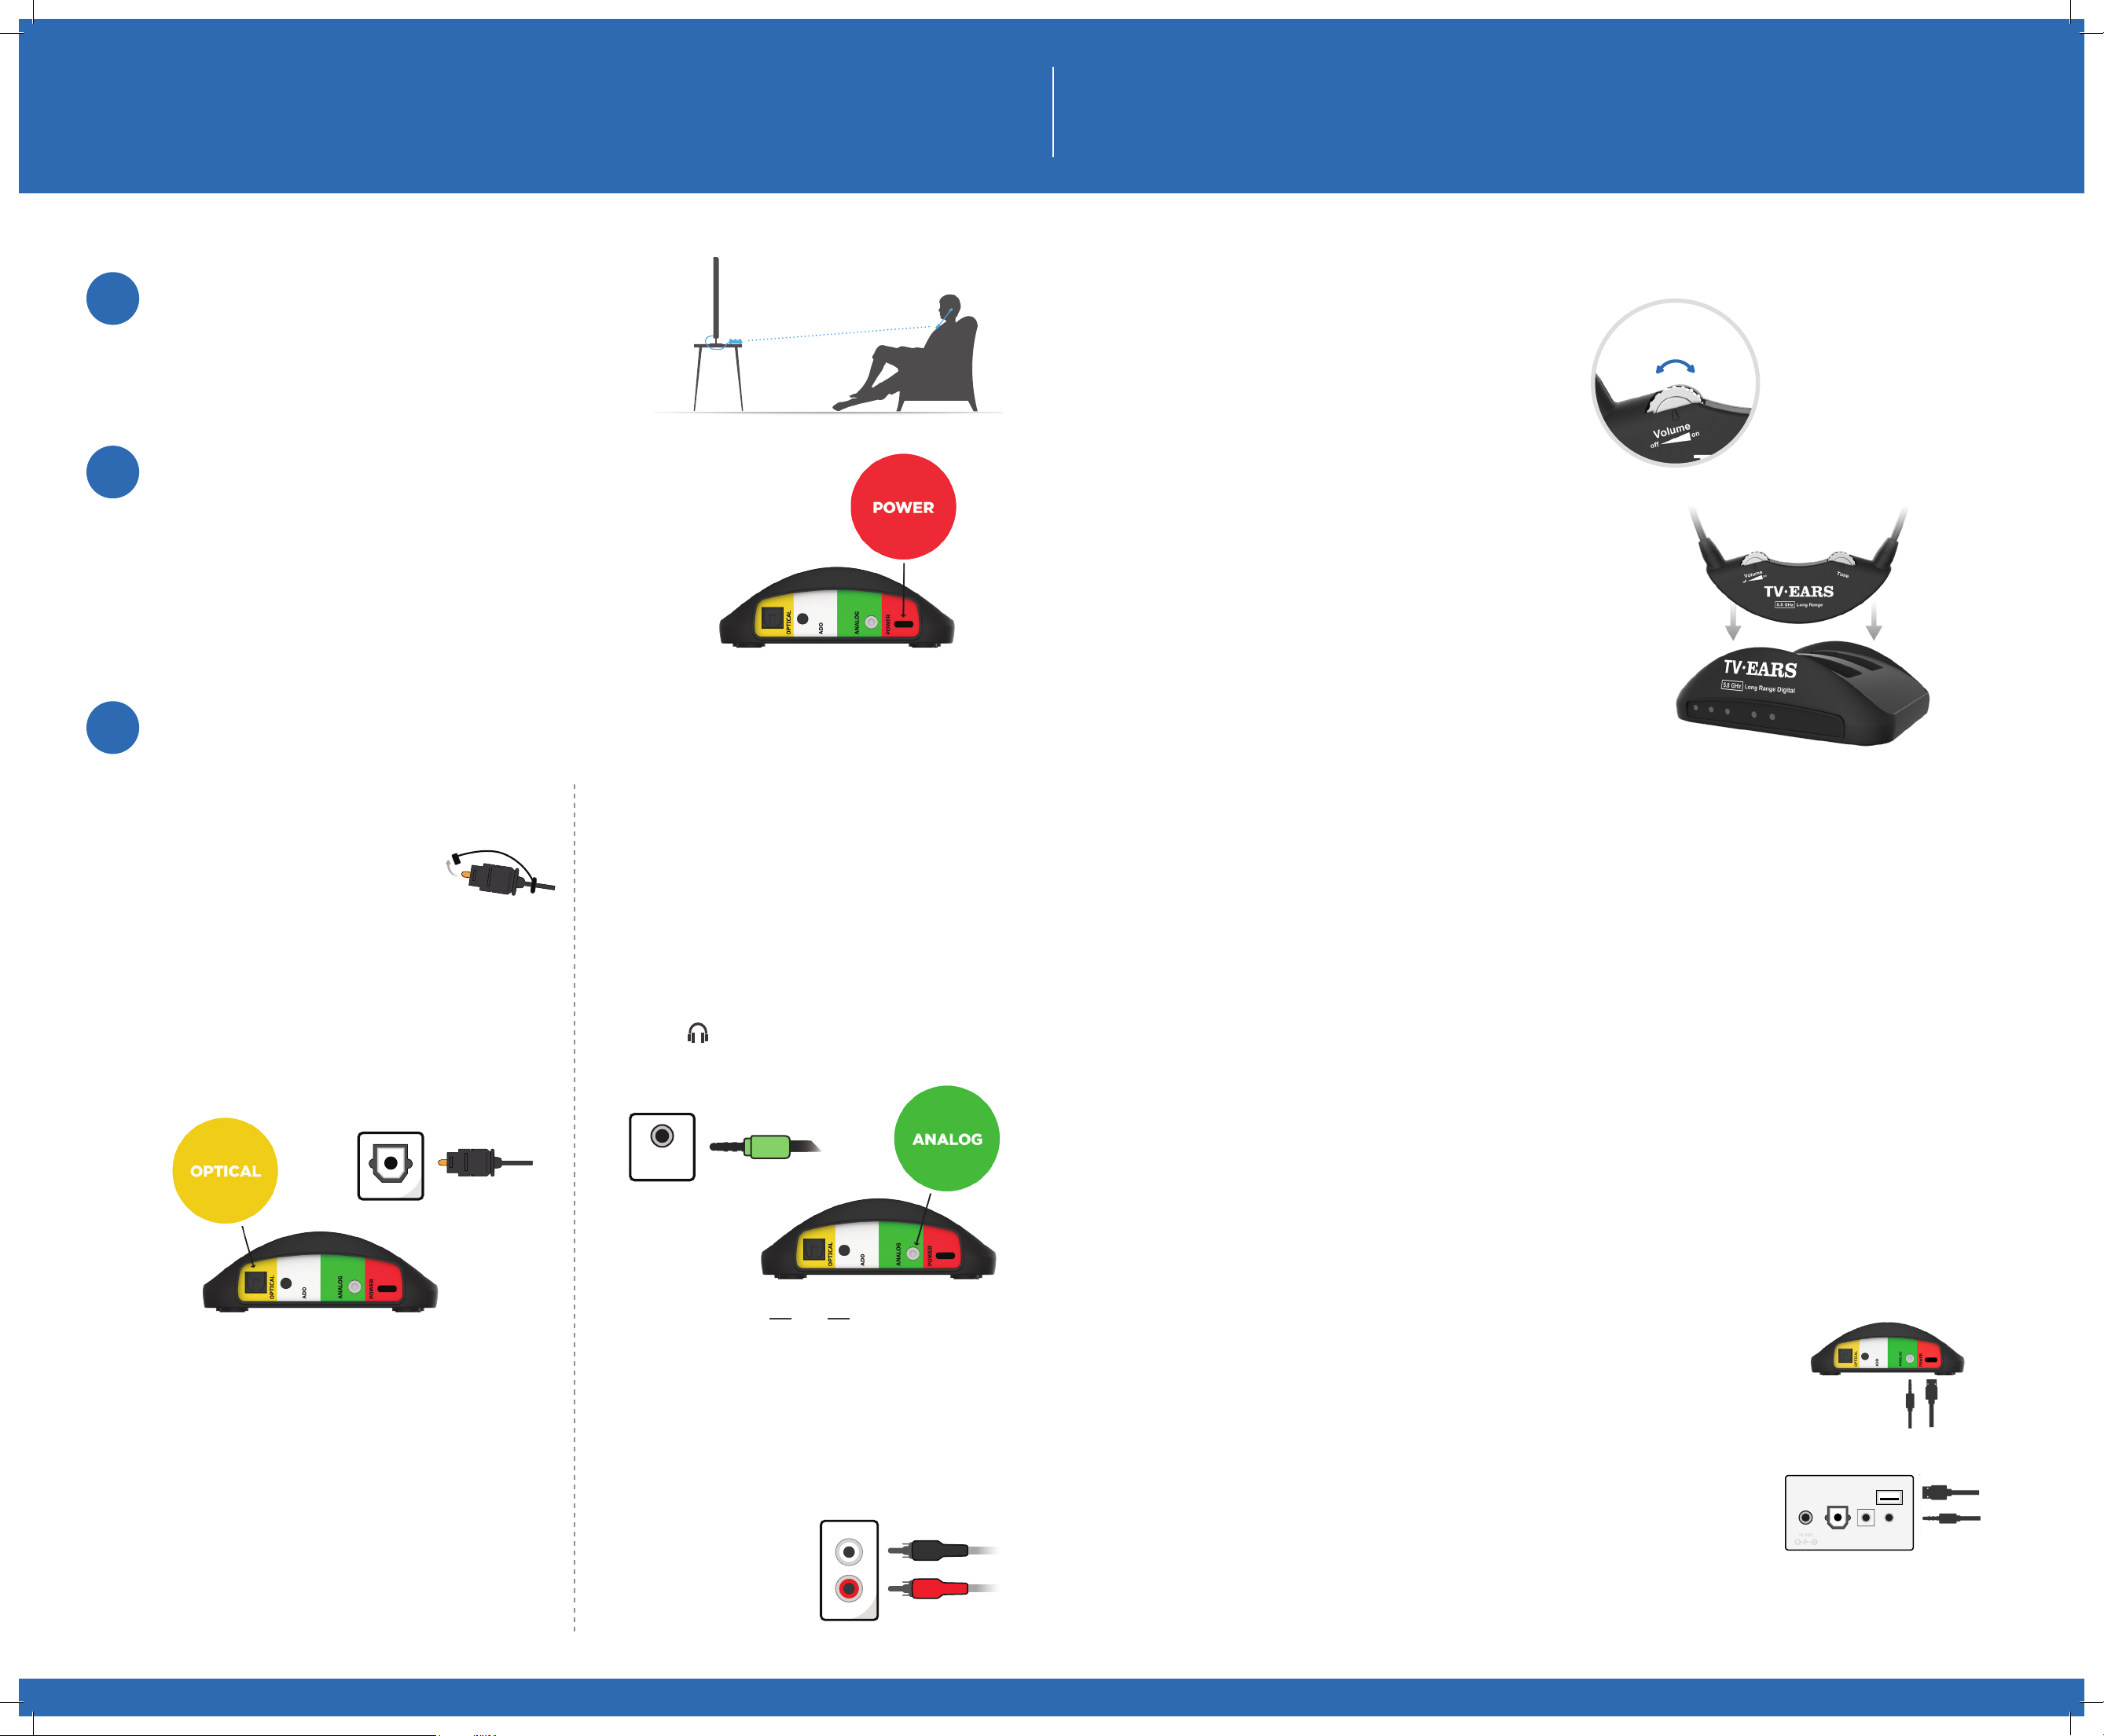
RCA Analog Installation
Plug the dual end of the 3.5mm RCA cord (red and black
ends) into the analog “Audio Out” ports on the back of
the television, satellite, or cable box.
Plug the single (black) end of the 3.5mm RCA cord into
the Analog Audio Cord (green). Plug the other end of the
Analog Audio Cord (green)
into the port labeled
“Analog” on the back of the
transmitter. The correct
port has a green border
around it.
OR
Long Range Headset System ™QUICK INSTALLATION GUIDE
Charging theHeadset
All Long Range headsets should be charged for 4 hours
BEFORE rst use. This step will instruct you on how to
appropriately charge the headset to make sure you’re
getting the best use possible.
Turn the volume knob of the headset to the “o” position. You
should hear and feel a ‘click’ when the knob has been turned
all the way o.
Place the headset into the transmitter’s charging cradle
and be sure the front of the headset is facing towards you.
The TV.Ears logo should be visible on both the front of the
headset as well as the front of the transmitter. Press down
on the headset when it is in the cradle until it is secure. The
headset should slightly stick in the cradle when you try
to remove it. The charging light will illuminate when the
headset is in the correct position. When fully charged, the
headset should last about 4-6 hours.
1. Red LED – When the USB Type C port is plugged with
5V/1A power source, the red LED becomes solid.
2. Blue LED / Pairing Function
Adding Up to 2 headsets at a time
a) Press the “ADD” button for 3 seconds until the blue
LED is ickering and is ready for pairing. Then turn
On the headset right next to the transmitter for
auto pairing. The connection will be made in 10-30
seconds with up to 2 headsets at a time. The blue
LED will turn OFF when the connection is successful.
b) To pair another headset, press the “ADD” button
for 3 seconds to start pairing. When pairing, please
ensure that your TV or cable box is turned o. Any
headset which has been paired successfully with
the transmitter will be auto connected again.
3. Blue LED – Optical audio in
The blue LED will icker when the transmitter is rst
turned on. If you are plugged into the optical audio out
on both the TV and the transmitter, the blue LED will
become solid to indicate a successful connection.
If unplugged from the optical audio source, the blue
LED will turn OFF after a few seconds.
4. Green LED – Front charging cradle
When charging the headset in the front cradle, the
rst green LED becomes solid. After the headset is
fully charged the green LED will be OFF.
5. Green LED – Back charging cradle
When charging the headset in the back cradle, the
second green LED becomes solid. After the headset
is fully charged the green LED will be OFF.
Connecting the Transmitter to the TV•Ears Sound Bar
Place the transmitter close enough so that you can connect
it to the television. Keep the transmitter accessible so you
can easily charge your headset after use.
STEP 1
Place the transmitter
1
Using the provided USB to USB-C cable, please connect the cord to
the supplied power block. Plug the AC adapter into a standard electrical
outlet or surge protector (a surge protector is recommended to protect
against power surges).
Plug the other end of the AC adapter into the port labeled “Power”
on the back of the transmitter.
Connection for Digital Audio
Sometimes located underneath plastic tray
Remove the plastic caps from both
ends of the digital audio cord.
Plug either end of the digital audio cord into the
“Digital Audio Out” port on the back of the TV.
Plug the other end of the digital audio cord into
the port on the back of the transmitter labeled
“Optical”. You should hear and feel a ‘click’ when
it has been pushed in all the way.
Connection for Analog Audio
Plug one end of the Analog Audio Cord (black) in the
“Audio Out” port on the back of the television, satellite
box, or cable box.
Plug the other end of the Analog Audio Cord (black) into
the port labeled “Analog” on the back of the transmitter.
The correct port has a green border around it.
If you connect to your Headphone port of your TV, the
port is usually labeled with an icon that looks like the
following: , your TV may be muted. If this is the case
then connect using the RCA Analog Installation method.
STEP 2
Plug in
STEP 3
Installation of the Transmitter
2
3
AUDIO
OUT
AUDIO OUT
L
R
Contact our US Based Customer Support at 1-866-611-9934
Use the USB to USB-C cable in the box to connect the transmitter with two easy connections.
Connect the USB-C side to the power jack on the back of the transmitter. Connect the
regular USB end to the to the 5VDC output jack on the back of the speaker.
Connect the 3.5 mm to the analog jack on the transmitter and connect
the other 3.5 mm end to the “Transmitter” jack on the back of the Sound Bar.
Once the Sound Bar is powered and a transmitter is connected, the TV·Ears Headphone
or Headset will work independently from your Sound Bar or TV audio so the TV·Ears
Headphone or Headset user can control their own audio comfort level.
DC IN
Optical
Analog Transmitter
5VDC Output
BACK OF TV•EARS SOUND BAR
Function of the LED lights:
Your TV’s digital audio out format may be set to
Dolby digital or DTS. If you get static from your TV
Ears after installing the digital audio cord, you need
to change this option to PCM in your TV’s setup
menu. The setup menu is dierent per brand but it
should be similar to the following sequence - Audio
Settings>Additional Audio Settings>Digital Audio Out
Format>Change format from Dolby or DTS to PCM
NOTE: The optical plug and jack are not square. Position the
optical plug so it matches the orientation of the optical jack, then
push the plug into the jack. You should hear and feel a “click”
when the plug is correctly inserted into the optical jack.
DIGITAL
AUDIO OUT
OPTICAL
AUDIO
OUT
DIGITAL
AUDIO OUT
OPTICAL


