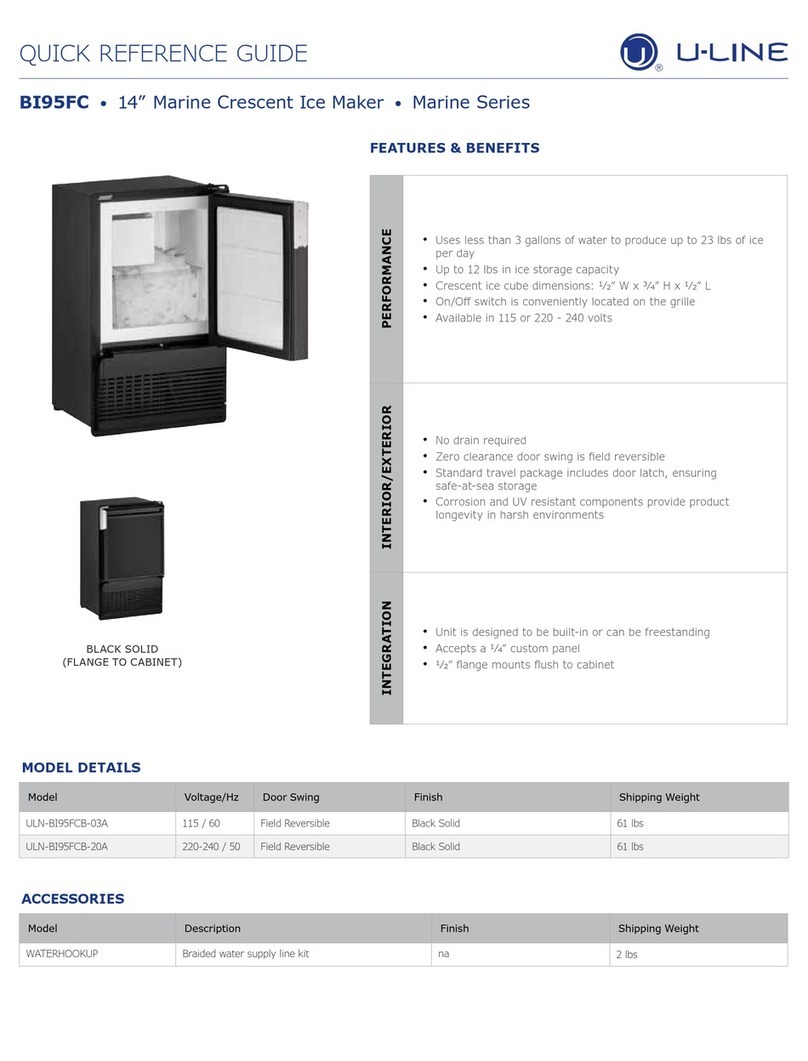
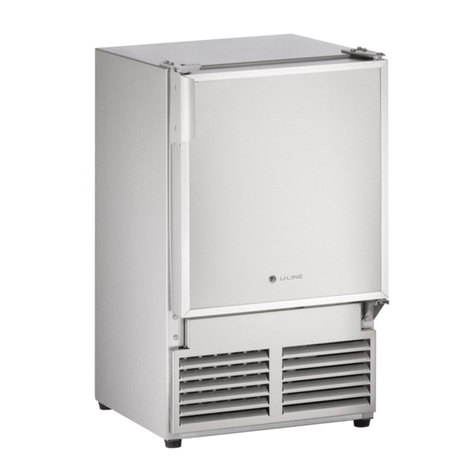
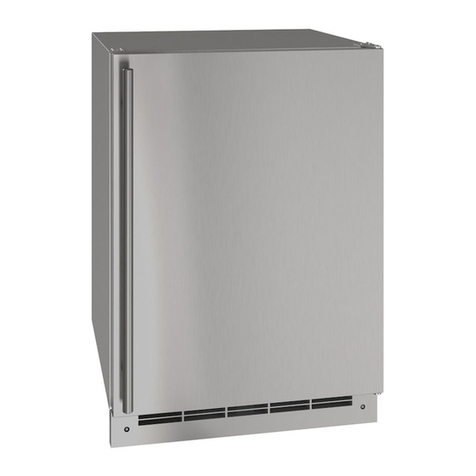
manuals.online logo
Brands
  1. Home
  2. •
  3. Brands
  4. •
  5. U-Line
  6. •
  7. Ice Maker
  8. •
  9. U-Line UACP115-SS01A Installation manual

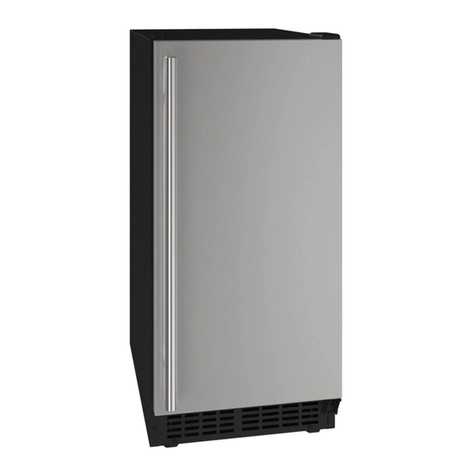
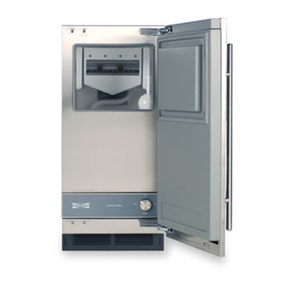
U-Line UACP115-SS01A Installation manual

Other manuals for UACP115-SS01A

1

This manual suits for next models

2

Other U-Line Ice Maker manuals

U-Line BI Series User manual

U-Line

U-Line BI Series User manual

U-Line UACP115-SS01A Installation manual

U-Line

U-Line UACP115-SS01A Installation manual

U-Line UANP115 Installation manual

U-Line

U-Line UANP115 Installation manual

U-Line ADA151M User manual

U-Line

U-Line ADA151M User manual

U-Line UHNP115-S01B Installation manual

U-Line

U-Line UHNP115-S01B Installation manual

U-Line SS-98 User manual

U-Line

U-Line SS-98 User manual

U-Line Marine Series WH95FC User manual

U-Line

U-Line Marine Series WH95FC User manual

U-Line ECHELON CLR2060 Owner's manual

U-Line

U-Line ECHELON CLR2060 Owner's manual

U-Line BI95FCB20A User manual

U-Line

U-Line BI95FCB20A User manual

U-Line UHNPB115 Installation manual

U-Line

U-Line UHNPB115 Installation manual

U-Line UOCL115 Installation manual

U-Line

U-Line UOCL115 Installation manual

U-Line Acr115 Installation manual

U-Line

U-Line Acr115 Installation manual

U-Line 95 Icemaker Building instructions

U-Line

U-Line 95 Icemaker Building instructions

U-Line Marine Combo Series Installation manual

U-Line

U-Line Marine Combo Series Installation manual

U-Line U-CLR1215 Installation manual

U-Line

U-Line U-CLR1215 Installation manual

U-Line UONP115-SS01A Installation manual

U-Line

U-Line UONP115-SS01A Installation manual

U-Line UACR014-SS01A Installation manual

U-Line

U-Line UACR014-SS01A Installation manual

U-Line UONB115-SS01A Installation manual

U-Line

U-Line UONB115-SS01A Installation manual

U-Line U-3018CLRS-00A User manual

U-Line

U-Line U-3018CLRS-00A User manual

U-Line UHNP315 Installation manual

U-Line

U-Line UHNP315 Installation manual

U-Line CO1175 User manual

U-Line

U-Line CO1175 User manual

U-Line CLR1215 User manual

U-Line

U-Line CLR1215 User manual

U-Line UCNP115 User manual

U-Line

U-Line UCNP115 User manual

U-Line SS1095 User manual

U-Line

U-Line SS1095 User manual

Popular Ice Maker manuals by other brands

camry CR 8073 user manual

camry

camry CR 8073 user manual

Sub-Zero 315I Planning information

Sub-Zero

Sub-Zero 315I Planning information

Kenmore 2217402A Use & care guide

Kenmore

Kenmore 2217402A Use & care guide

Cornelius WM600 Installation & owner's manual

Cornelius

Cornelius WM600 Installation & owner's manual

GE XPIO43SCSS owner's manual

GE

GE XPIO43SCSS owner's manual

Hoshizaki KMD-901MAH Specifications

Hoshizaki

Hoshizaki KMD-901MAH Specifications

Whynter FIM-450HA instruction manual

Whynter

Whynter FIM-450HA instruction manual

Unold 48945 Instructions for use

Unold

Unold 48945 Instructions for use

Andrew James AJ000522 manual

Andrew James

Andrew James AJ000522 manual

Scotsman CME1356 user guide

Scotsman

Scotsman CME1356 user guide

Scotsman ACM 25 Service manual

Scotsman

Scotsman ACM 25 Service manual

Kärcher IP 120 manual

Kärcher

Kärcher IP 120 manual

Maytag MIM1554WRS - Ice Maker User instructions

Maytag

Maytag MIM1554WRS - Ice Maker User instructions

Igloo ICE102-WHITE user manual

Igloo

Igloo ICE102-WHITE user manual

Hoshizaki KM-630MAH instruction manual

Hoshizaki

Hoshizaki KM-630MAH instruction manual

Princess Yonanas user manual

Princess

Princess Yonanas user manual

Unold 48946 Instructions for use

Unold

Unold 48946 Instructions for use

Electrolux E15IM60GP Factory parts catalog

Electrolux

Electrolux E15IM60GP Factory parts catalog

manuals.online logo
manuals.online logoBrands
  • About & Mission
  • Contact us
  • Privacy Policy
  • Terms and Conditions

Copyright 2025 Manuals.Online. All Rights Reserved.

USER GUIDE & SERVICE MANUAL
Model: UACP115-SS01A
USER GUIDE & SERVICE MANUAL
Table of Contents
Click on any section below to jump directly there
Intro
Safety
Safety and Warning
Disposal And Recycling
Installation
Environmental Requirements
Electrical
Cutout & Product Dimensions
Side by Side Installation
Water Hookup
Drain
General Installation
Grille Installation
Door Swing
Door Adjust
Maintenance
Cleaning
Cleaning Condenser
Extended Non-Use
Operating Instructions
First Use
Control Operation
Ice
Airflow and Product Loading
Service
Troubleshooting
Wire Diagram
Product Liability
Warranty Claims
Parts
Ordering Replacement Parts
R600a Specifications
System Diagnosis Guide
Compressor Specifications
Control Operation - Service
Thermistor
Warranty
USER GUIDE
Introduction
WELCOME TO U-LINE
Congratulations on your U-Line purchase! Your product comes from a company with decades of premium modular ice
making, refrigeration, and wine preservation experience. U-Line creates products focused on functionality, style, and
inspired innovations — paying close attention to even the smallest details. Applications include residential, outdoor, ADA
height compliant, marine, and commercial. Product categories include Beverage Centers, Wine Refrigerators, Ice Machines,
Refrigerators, Freezers, and Dispensers. Our advanced refrigeration systems, large and exible capacities, and clean
integrated look are what makes our products Built-In to Stand Out®. Since 2014, U-Line has been part of the Middleby family
of brands. Products are designed, engineered, and assembled in Milwaukee, Wisconsin, USA, and select products are available
worldwide.
U-Line — RIGHT PRODUCT. RIGHT PLACE. RIGHT TEMPERATURE.®
PRODUCT INFORMATION
Looking for additional information on your product? User Guides, Spec Sheets, CAD Drawings, and Product Warranty
information are available digitally on u-line.com.
PROPERTY DAMAGE / INJURY CONCERNS
In the unlikely event property damage or personal injury is suspected related to a U-Line product, please take the following
steps:
1. U-Line Customer Care must be contacted immediately at +1.414.354.0300.
2. Service or repairs performed on the unit without prior written approval from U-Line is not permitted. If the unit has been
altered or repaired in the eld without prior written approval from U-Line, claims will not be eligible.
GENERAL INQUIRIES
U-Line Corporation
8900 N. 55th Street
Milwaukee, Wisconsin 53223 USA
Monday - Friday 8:00 am to 4:30 pm CST
T: +1.414.354.0300
Email: sales@u-line.com
u-line.com
CONNECT WITH US
SERVICE & PARTS ASSISTANCE
Monday - Friday 8:00 am to 4:30 pm CST
T: +1.414.354.0300
Service Email: onlineservice@u-line.com
Parts Email: onlineparts@u-line.com
Designed, engineered and assembled in WI, USA
3
USER GUIDE
Safety and Warning
Safety and Warning
NOTICE
Please read all instructions before installing,
operating, or servicing the appliance.
Use this appliance for its intended purpose only and follow
these general precautions with those listed throughout this
guide:
SAFETY ALERT DEFINITIONS
Throughout this guide are safety items labeled with a
Danger, Warning, or Caution based on the risk type:
Danger means that failure to follow this safety
statement will result in severe personal injury or
death.
Warning means that failure to follow this safety
statement could result in serious personal injury
or death.
Caution means that failure to follow this safety
statement may result in minor or moderate
personal injury, property, or equipment damage.
This unit contains R600a (Isobutane) which is a
ammable hydrocarbon. It is safe for regular
use. Do not use sharp objects to expedite
defrosting. Do not service without consulting the
“R600a specications” section included in the
User Guide. Do not damage the refrigerant
circuit.
Service must be done by factory authorized
service personnel. Any parts shall be replaced
with like components. Failure to comply could
increase the risk of possible ignition due to
incorrect parts or improper service.
CALIFORNIA PROPOSITION 65
This product contains chemicals known to the
state of California to cause cancer and birth
defects or other reproductive harm.
www.P65warnings.CA.gov
This equipment is to be installed with adequate
backow protection to comply with applicable
federal, state and local codes.
DANGER
!
DANGER
!
WARNING
!
CAUTION
!
CAUTION
!
WARNING
!
4
USER GUIDE
Disposal and Recycling
RISK OF CHILD ENTRAPMENT. Before you throw
away your old refrigerator or freezer, take o
the doors and leave shelves in place so children
may not easily climb inside.
If the unit is being removed from service for disposal,
check and obey all federal, state, and local regulations
regarding the disposal and recycling of refrigeration
appliances, and follow these steps completely:
1. Remove all consumable contents from the unit.
2. Unplug the electrical cord from its socket.
3. Remove the door(s)/drawer(s).
DANGER
!
5
USER GUIDE
Environmental Requirements
This model is intended for indoor/interior applications only
and is not to be used in installations that are open/
exposed to natural elements.
This unit is designed to operate between 50°F (10°C) and
100°F (38°C). Higher ambient temperatures may reduce
the unit’s ability to reach low temperatures and/or reduce
ice production on applicable models.
For best performance, keep the unit out of direct sunlight
and away from heat generating equipment.
In climates where high humidity and dew points are
present, condensation may appear on outside surfaces.
This is considered normal. The condensation will
evaporate when the humidity drops.
CAUTION
!
Damages caused by ambient temperatures of
40°F (4°C) or below are not covered by the
warranty.
6
USER GUIDE
Electrical
Electrical
WARNING
!
SHOCK HAZARD — Electrical Grounding
Required. Never attempt to repair or perform
maintenance on the unit until the electricity has
been disconnected.
Never remove the round grounding prong from
the plug and never use a two-prong grounding
adapter.
Altering, cutting or removing power cord,
removing power plug, or direct wiring can cause
serious injury, fire, loss of property and/or life,
and will void the warranty.
Never use an extension cord to connect power to
the unit.
Always keep your working area dry.
NOTICE
Electrical installation must observe all state and
local codes. This unit requires connection to a
grounded (three-prong), polarized receptacle
that has been placed by a qualified electrician.
The unit requires a grounded and polarized 115 VAC,
60 Hz, 15A power supply (normal household current). An
individual, properly grounded branch circuit or circuit
breaker is recommended. A GFCI (ground fault circuit
interrupter) is usually not required for fixed location
appliances and is not recommended for your unit because
it could be prone to nuisance tripping. However, be sure
to consult your local codes.
See CUTOUT & PRODUCT DIMENSIONS for recommended
receptacle location.
7
USER GUIDE
Cutout & Product Dimensions
PREPARE SITE
Your U-Line product has been designed for either free-
standing or built-in installation. When built-in, your unit
does not require additional air space for top, sides, or
rear. However, the front grille must NOT be obstructed,
and clearance is required for an electrical connection in
the rear.
CAUTION
!
Unit can NOT be installed behind a closed cabinet
door.
If you would like to align the face of the unit with
other adjacent cabinet doors, you may need to
alter the wall just behind the drain connection on
the unit to accommodate the drain.
CUTOUT DIMENSIONS
PRODUCT DIMENSIONS
REAR
FRONT
TOP
SIDE
4"
(102 mm)
7"
(178 mm)
15"
(381 mm)
Preferred location
for electrical outlet
is in adjacent
cabinet.
24"
(610 mm)
5⁄8"
(16 mm)
31 ⁄”to 32 ⁄”
(794 mm to
819 mm
3 ⁄”
(89 mm)
1 ⁄”
(32 mm)
Drain
Water In
Power
Cord
6 ⁄”
(175 mm)
3 ⁄”
(89 mm)
1 ⁄”
(44 mm)
4 ⁄”
(105 mm)
14 ⁄”
(378 mm
31 ⁄” to 32 ⁄”
(794 mm to
819 mm
3 ⁄”
(95 mm
28”
(711 mm)
21 ⁄”
(537 mm
16”
(406 mm
1 ⁄
”
(48 mm
25 ⁄”
(648 mm
7”
(178 mm
23 ⁄”
(610 mm
2 ⁄ ”
(54 mm
8
USER GUIDE
Side-by-Side Installation
OTHER SITE REQUIREMENTS
Side-by-Side Installation
Units must operate from separate, properly grounded
electrical receptacles placed according to each unit’s
electrical specications requirements.
Cutout width for a side-by-side installation is the total of
the widths listed under Cutout Dimensions in each unit’s
Installation Guide. Each door can be opened individually
(one at a time) without interference.
However, to ensure unobstructed door swing (opening both
doors at the same time), 1/4” (6.4 mm) of space needs to
be maintained between the units.
Hinge-by-Hinge Installation (Mullion)
When installing two units hinge-by-hinge, 13/16” (22 mm)
is required for integrated models. Additional space may be
needed for any knobs, pulls or handles installed.
Stainless steel models which include the standard stainless
handle will require 4-9/16” (116 mm) to allow both doors to
open to 90° at the same time.
1⁄4” (6 mm)
⁄” (22 mm
⁄” (116 mm
9
USER GUIDE
Water Hookup
Water Hookup
WATER SUPPLY
Observe and follow all local building codes when installing
this appliance.
This ice machine must be connected to a potable cold
water supply line. delivering water pressure between a
minimum of 20 psi and a maximum of 120 psi.
Use 1⁄4” copper tubing for your water supply which is
available at any local hardware or plumbing supply store.
Route the 1⁄4” copper tubing to suit your installation being
sure not to kink the tubing. Purchase enough copper
tubing length to allow a coil to be formed behind the unit
for a “service loop” which will allow the appliance to be
pulled out from the installation for servicing or cleaning.
(See Figure 11). Connect the copper tubing to the “top
side” of a cold water pipe to prevent the ice-maker from
plugging with sediment.
A shuto valve is recommended on the water supply line
to ease servicing the appliance. NOTE: A SELF-PIERCING
TYPE VALVE IS NOT RECOMMENDED as they are prone
to clogging with sediment which will create pressure drop
reducing the water supply to the unit.
Connect the copper tubing water supply to the water valve
inlet with a 1⁄4” compression nut tting.
IMPORTANT: Secure the water supply line to the back of
the cabinet with the screw and strain relief clamp provided
in the corner of the back panel.
Make certain all connections are watertight after
installation. Form the tubing so that it will not vibrate
against the cabinet body or kink when your appliance is
moved in and out of position.
This ice machine is designed to make clear ice from the
majority of water sources on a daily basis. If your results
are unsatisfactory, your water may need to be ltered or
treated. A water specialist can recommend proper water
treatment.
To prevent water leaks:
•The water line tting is to be used with copper tubing
only. Do not use with plastic tubing.
• Do not use any thread sealers on this water line
tting.
NOTE:
Reverse osmosis (RO) water, softened water, and
de-ionized water are not recommended as they
can adversely affect the quality and quantity of
the ice.
CAUTION
!
CAUTION
!
Water
Supply Line
Clamp and
Screw
Water Supply
Service Loop
to Shut-Off Valve
Water Valve
Inlet
Compression
Fitting
Water Supply
Line
10