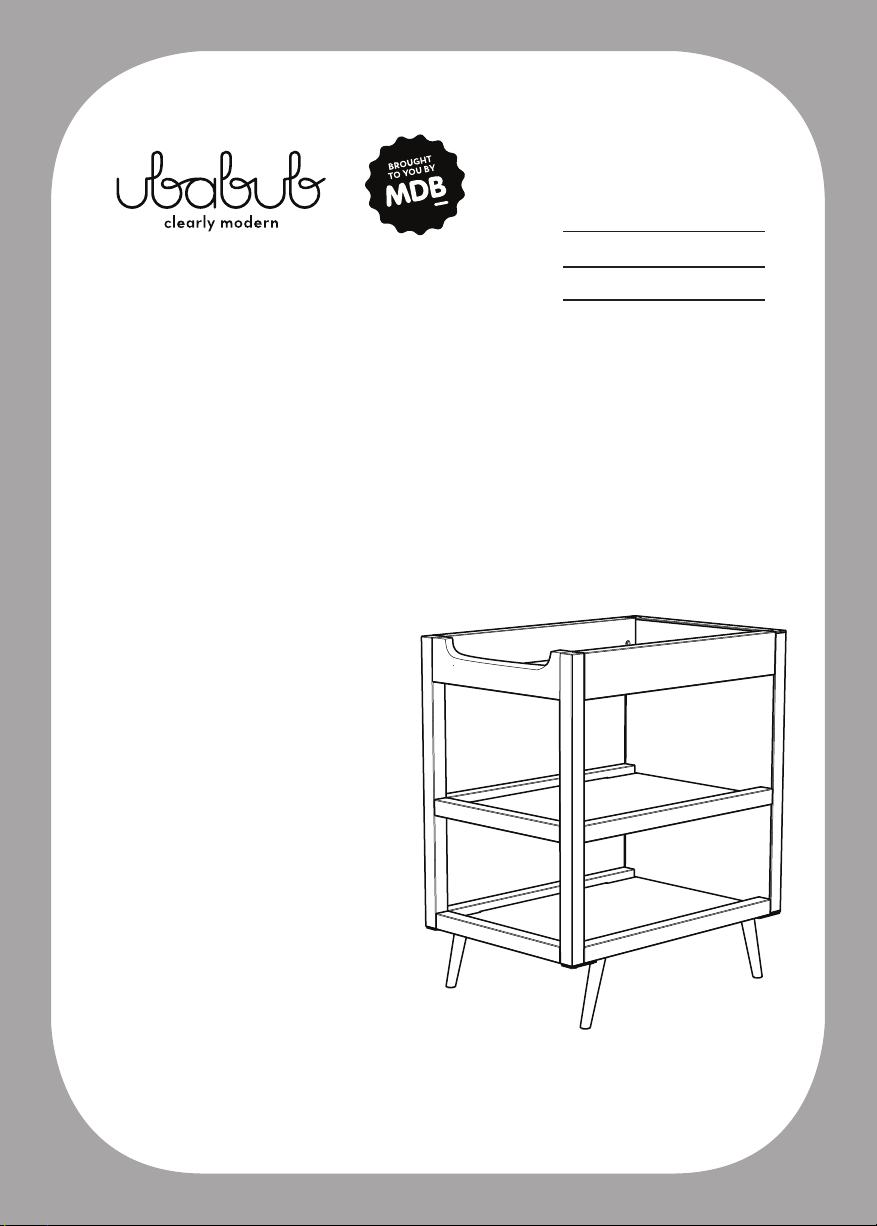
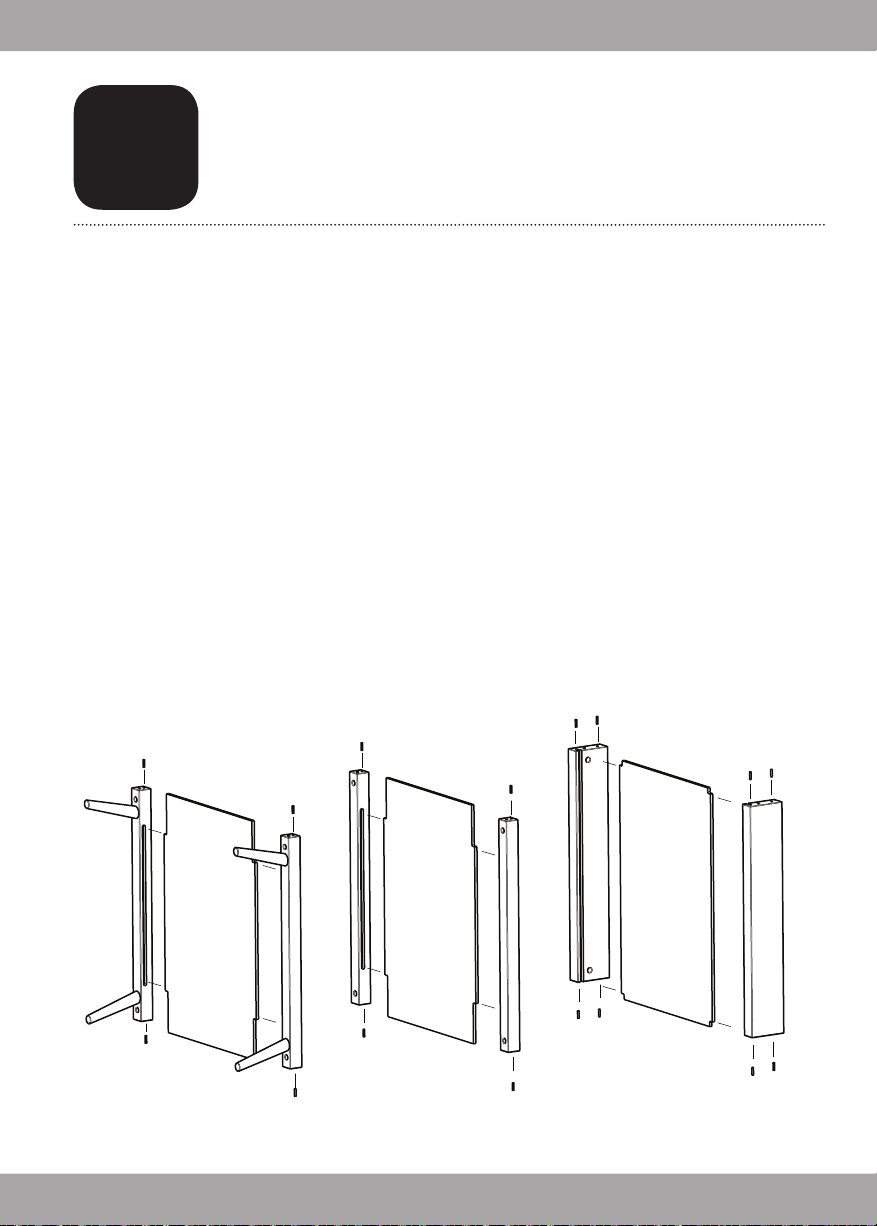
Install shelves position
Step 1 Lay End panel on the ground with the slots, holes
and connecting pins facing up.
Step 2 Select lower shelf joined to leg rails.
Step 3 Align with the bottom edge of the end panel,
align the shelf, connecting pin and support pin,
then slide the leg rails, including lower shelf onto
the end panel until it fits tightly to the end
panel as per diagram.
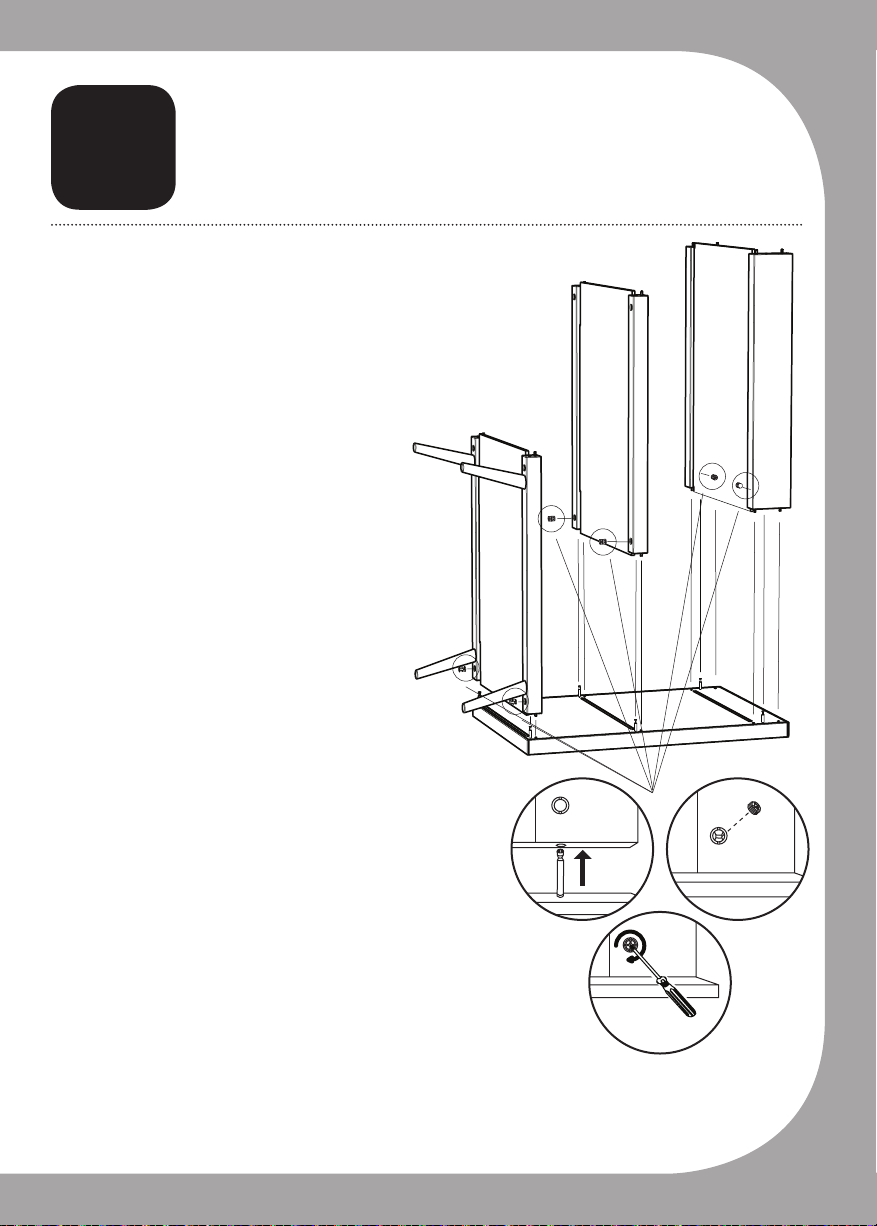
Step 4 Insert Locking Cams on both
rails.
Step 5
Step 6 Select lower shelf joined to mid rails.
Step 7 Align with the middle slot
of the end panel, align the
shelf, connecting pin and
support pin, then slide the
mid rails, including lower shelf
onto the end panel until it fits tightly
to the end panel as per diagram.
Step 8 Repeat steps 4 & 5.
Step 9 Select Top shelf joined to top rails.
Step 10 Align with the top slot of the end panel,
align the shelf, connecting pin and support pins,
then slide the top rails, including top shelf onto
the end panel until it fits tightly to the end panel
as per diagram.
Step 11 Repeat steps 4 & 5.
C
9
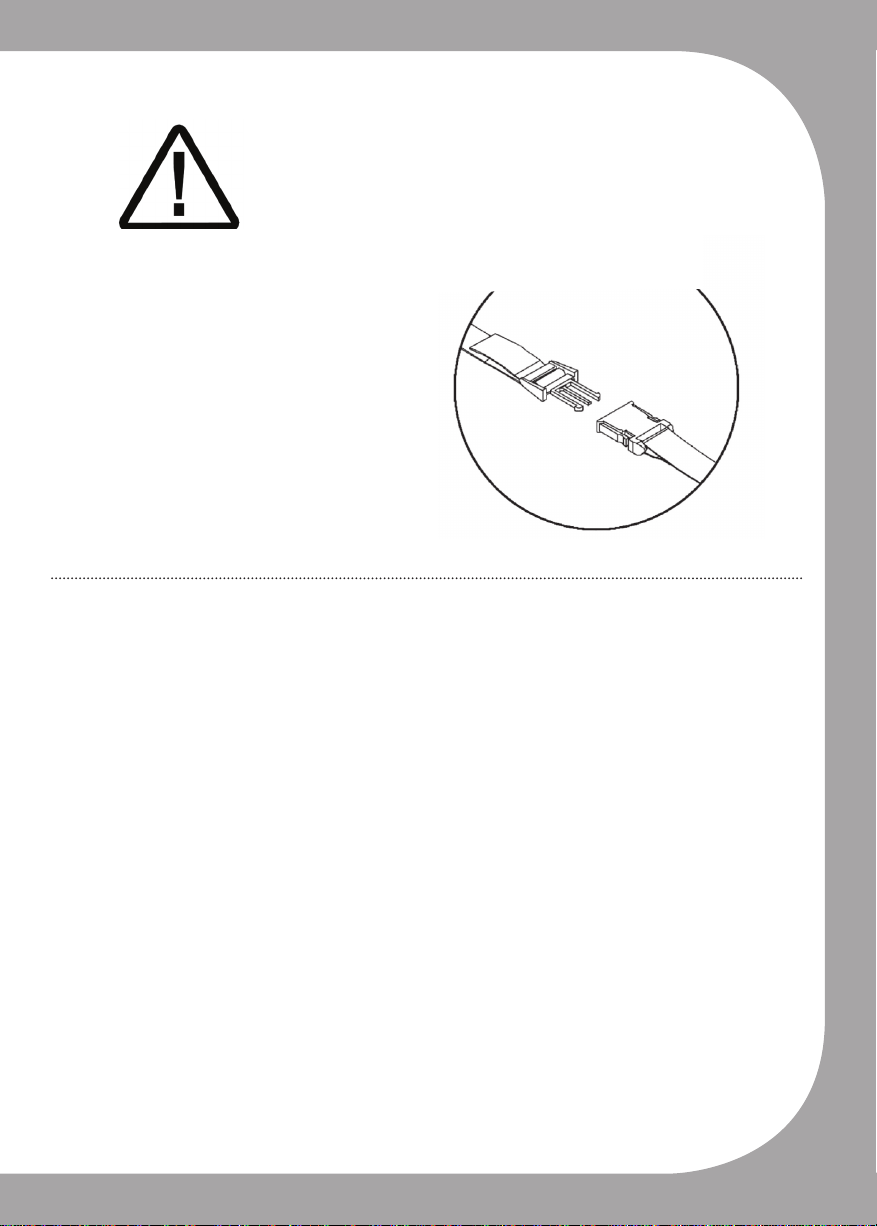
Align the Locking Cams and connecting
pins. Insert the connecting pins to the
rails. Make sure connecting pins are
passing through the Locking Cams.
Insert the Locking Cam nut. Use
screwdriver to turn Locking Cam nuts
clockwise until tight.
Insert the
Locking Cam
nut.
Use screwdriver to turn Locking
Cam nuts clockwise until tight.
x 6
5.1
5.2
5.3
Insert the
connecting pins
to the rails.