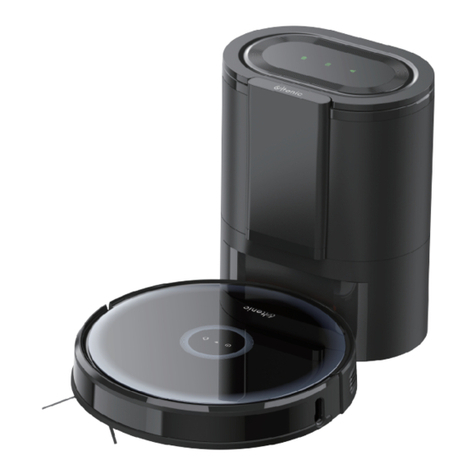
Ultenic T10 PRO User manual

Model: T10 PRO
USER MANUAL


TABLE OF CONTENTS
Safety Warning ·································································································· 02
Inside the Box ···································································································· 04
Product Description ··························································································· 05
Product Operation ···························································································· 08
Product Maintenance ························································································ 13
Product Specications ······················································································· 16
Troubleshooting ·································································································· 17

SAFETY WARNING
IMPORTANT SAFETY INSTRUCTIONS FOR
HOME USE ONLY
Basic precautions should always be observed
when using any electrical equipment, including
the following:
WARNING: READ ALL SAFETY INSTRUCTIONS
AND THE ENTIRE MANUAL. Failure to heed the
warnings and instructions may result in electric
shock, re, or serious injuries. Please read all
instructions before using this robot.
WARNING:
·This robot is intended for children 8 years of
age and older. People with reduced physical,
sensory, or intellectual abilities, or those who
lack experience and knowledge, should be
supervised or instructed in safely using the
robot; they must also be aware of possible
hazards. Children should not play with this
robot. Cleaning and user maintenance should
not be performed by children without
supervision.
·The robot must be used in accordance with
the instructions in this manual. The company
is not responsible for any damage or injury
caused by improper use.
To reduce the risk of injury or damage, please
observe the following safety precautions when
installing, using and maintaining the robot:
·Please read all instructions regarding safety
and operation before using the robot.
·Keep the safety and user manual for future
reference. If you accidentally lose the manual,
you may visit the official website to download
the electronic version.
(https://www.ultenic.com).
·Heed all warnings on the robot, battery,
charging station, and user manual.
RESTRICTIONS
·This robot is for indoor use only. Do not use it
outside, or in commercial and industrial
environments.
·Before using the robot, remove fragile items
such as clothing, loose-leaf paper, rope or
curtains, and power cords from the floor. The
robot may snag onto an object, table, or shelf
if it gets stuck on a cable.
·This robot is not a toy. Do not sit or stand on
this robot. Children and pets should be
supervised while the robot is operating.
·Store and operate the robot at room
temperature.
·Do not use this robot to clean anything that is
burning or smoking.
·Do not use the robot to clean bleach, paint, or
other chemicals, or anything wet.
·If the cleaning area involves a balcony, a
physical barrier should be set up to prevent
the robot from accessing the balcony and
ensure it operates safely.
·People (including children) with reduced
physical, sensory, or intellectual abilities, or
those who lack experience and knowledge,
should be supervised or instructed in safely
using the robot.
Follow all operating and usage instructions.
The product's labels or packaging indicate that:
Do not dispose of the electrical appliances as
unsorted waste or, use a separate waste
collector.
Contact your local authority for information on
the appropriate disposal method. If electrical
appliances are discarded in landfills, hazardous
substances can leach into groundwater, enter
the food chain, and damage people's health.
Contact your local or regional waste
management agency for more information on
their recycling and reuse programs.
·Children should be supervised to ensure they
do not play with the robot. Further, cleaning
and maintenance must not be performed
without adult supervision.
·Do not place anything on the robot.
·Please note the robot will move on its own. Try
to be careful when walking in the operating
area to avoid stepping on it.
·Do not operate the robot in an area where a
ground power outlet is exposed.

RESTRICTIONS
·This robot is for indoor use only. Do not use it
outside, or in commercial and industrial
environments.
·Before using the robot, remove fragile items
such as clothing, loose-leaf paper, rope or
curtains, and power cords from the floor. The
robot may snag onto an object, table, or shelf
if it gets stuck on a cable.
·This robot is not a toy. Do not sit or stand on
this robot. Children and pets should be
supervised while the robot is operating.
·Store and operate the robot at room
temperature.
·Do not use this robot to clean anything that is
burning or smoking.
·Do not use the robot to clean bleach, paint, or
other chemicals, or anything wet.
·If the cleaning area involves a balcony, a
physical barrier should be set up to prevent
the robot from accessing the balcony and
ensure it operates safely.
·People (including children) with reduced
physical, sensory, or intellectual abilities, or
those who lack experience and knowledge,
should be supervised or instructed in safely
using the robot.
BATTERY AND CHARGING
·Only use rechargeable battery packs with
specifications approved by our company.
·Use the standard complimentary charging
station for charging. This product must not be
used with any type of power adapter; the use
of other power adapters will immediately void
the warranty.
·Do not use a charging station with a damaged
power cord or plug. If the power cord or plug is
damaged, it must be repaired by the
manufacturer or a similarly qualified party.
·Ensure to charge and remove the batteries in
the robot and accessories before long-term
storage or transportation.
·The remote control battery type is AAA
alkaline battery.
·To replace the remote control�s batteries,
slide the battery cover on the back of the
remote control open, remove the battery
cover, and replace the batteries.
·Charge the robot indoors only.
·Your robot's charging station may be
protected by a surge protector to prevent
power surges.
·Do not operate the charging station with wet
hands.
·Children should be supervised to ensure they
do not play with the robot. Further, cleaning
and maintenance must not be performed
without adult supervision.
·Do not place anything on the robot.
·Please note the robot will move on its own. Try
to be careful when walking in the operating
area to avoid stepping on it.
·Do not operate the robot in an area where a
ground power outlet is exposed.
·Before cleaning or maintaining the robot, the
plug must be removed from the socket.
·Ensure the voltage rating of the enclosed
charging station matches the voltage of the
standard outlet.
·Used battery packs should be placed in a
sealed plastic bag and disposed of safely in
accordance with local environmental
regulations.
·Before each use, inspect the battery pack for
signs of damage or leakage. Do not charge
damaged or leaking battery packs.
·If the battery pack leaks, please contact
Customer Service.
·The battery pack must be removed from the
robot before disposal.
·Do not crush or disassemble the battery pack.
Do not apply heat to the battery pack or
place it near any heat source.
·Do not incinerate the battery pack. Do not
short-circuit the battery pack.
·Do not immerse the battery pack in any liquid.
·Do not crush or disassemble the robot.

USER MANUAL
Model: T10 PRO
INSIDE THE BOX
User Manual
Cleaning BrushHEPA Filter
Side BrushRag Bracket*2Mop*4
Remote ControlCharging StationRobot
Dust Bag

PRODUCT DESCRIPTION
Recharge Buon
Reset Buon
360°LIDAR Module Dustbin and
Water Tank
Charging Contacts
Power Buon/
Clean Buon
Speaker Mopping
Modules
Dustbin
Release Buon
Infrared Sensors
The Robot
Reset
Cli Sensors
Omnidirectional Wheel
Side Brush
Right Driving
Wheel
Main Brush
Le Driving
Wheel
Main Brush
Cover

Hepa Filter
Mop
Rag Bracket
Secondary Filter Sponge
Primary lter holder
Charging Station
2-in-1 Dual Rotating Dustbin and Water Tank
Dustbin Release
Buon
Dust Outlet
LED Display Panel
Charging Contacts Point
Dustbin Latch
Water Inlet
Cover
Dust Collector Port
Pads
PRODUCT DESCRIPTION
NOTE :
1: One dust bag already pre-installed in Charging Station.
2: It is normal for the dust bag may appear"deflated".
3: Dust bag handle must be fully lowered as shown in order for debris to enter properly.
Dust Bag
Fan Filter
Dust Bag Handle
Dust Collector Cover
Air Outlet
Power Cable Winding Board
Power Interface
UVC lamp

Robot Indicator Lights
Power Button
·Long press 3S to turn on/off.
·Short press to start/pause cleaning.
Status Indicator
·Solid white light: Collecting dust.
·Flashing red light: Fan overheating/fan error/cover
not closed.
Recharge Button / Recharge & Power Indicator
Press the button to return the robot to the charging
station.
Press and hold the recharge and start/stop buttons at
the same time for 5s to enter network configuration
mode.
Blue breathing light: power on/upgrading firmware
Steady blue light: standby/normal working state
Blinking yellow light: low battery
Green breathing light: charging
Steady green light: fully charged
Flashing red light: error
Charging Station Indicator Light
PRODUCT DESCRIPTION
Power Indicator
·Flashing green light: Charging.
·Solid green light: Standby.
Sterilization Indicator
·Solid white light: Sterilizing on
·Light off: Sterilizing off
Dust Bag Indicator
·Solid white light: Dust bag is full/dust duct is blocked
·Flashing red light: Dust bag is not installed/dust bag
is not installed correctly

Before use, remove all protective parts from
the robot and charging station.
1. Assemble the pads.
3. Assemble power cord for charging station.
4. Charge Robot.
2. Set up the charging station.
The Charging Station is designed to
automatically empty and charge the Robot.
Place on a at, hard surface at least 0.2 feet
(6cm) away from the wall. Ensure that there is
a clear space in front and on both sides so
that your Robot can return to Station to
recharge and empty.
Note: The charging station must always be
connected to the power supply. Avoid using
power supplies that may be accidentally
turned o (e.g. power strips, outlets
controlled by light switches, GFCI).
PRODUCT OPERATION
Before Using
0.2 feet(6cm) away from the wall
2 feet(0.6m) 2 feet(0.6m)
5/1.5m

Before starting, ensure to:
Manual connection
1. Connect your phone to a Wi-Fi network.
2. Activate the 2.4 GHz band on the router.
3. Check whether the wi indicator light on the
robot is ashing.
1. Press and hold the " " buon and the " "
buon for 5 seconds until the indicator light
ashes and the network converges.
2. Select the wi router your phone is
connected to, and enter the password.
3. Go to seings and WLAN list to connect to
the hotspot "Ultenic-T10 Pro-XXXX".
4. Go back to the Ultenic app and complete
the wi connection.
Bluetooth Connection
1. Turn on Bluetooth on your phone and scan
for nearby Bluetooth devices.
2. Select the robot's model number.
3. Enter the wi password to complete the
connection.
Operate via the Robot's Control Panel
Start / Pause
Recharge
To use all available functions, we recommend
using the app to control your robot.
App Connection
1. Download app from the App Store (for iOS) or
Google Play (for Android).
2. Open the app and create an account.
3. Tap "+" icon to add "T10 Pro" to your account.
4. Follow instructions in the app to set up Wi-Fi
connection.
APP Downloading and Installation
PRODUCT OPERATION

Note:
1. For a beer experience of the remote control
function, it is recommended to operate it
right in front of the robot.
2. The remote control's control range is 10-20
feet.
Operate via Remote Control
10-20 feet
Recharge
Navigation Keys
Start/ Pause
Quiet Mode
Suction Power
Designated
Area
Cleaning
Mopping
Mode
Press the "" buon on the robot to activate.
Note: The robot control panel will stop lighting
up aer the robot has stopped for a few
minutes. Press the "" buon on the robot to
activate.
Note: When the robot is not in use, it is
recommended to keep it on and charged.
Start / Pause
Navigation Keys
Recharge
PRODUCT OPERATION

Mopping System
Note:
1. To extend the life of the dustbin and water
tank, it is recommended to use deionized or
demineralized water for mopping.
2. Remove the mop modules before cleaning
any carpets.
3. Empty the water tank aer mopping is
nished.
Dust Collection System
Note: The charging Station will not collect dust
when the dust bag is removed.
1. Open Cover;
2. Pull up the dust bag from the handle;
3. Discard the old dust bag;
4. Replace with new dust bag;
5. Close Cover.
The Auto Empty Station will indicate when the
dust bag is full on the smart LED display panel.
("" is white)
➀
➃
➄
➁
➂
➅
PRODUCT OPERATION

A. Please remove power cords and small objects
from the oor that may entangle the robot.
B. Please fold the tasseled edges of area rugs
underneath to prevent tangling.
C. We strongly recommend prohibiting the use of
robots in front of replaces and in certain
areas (eg: vents).
D. Keep the robot away from wet areas.
E. The Robot can climb over objects less than
0.59 in/15 mm in height. Remove these objects
if possible.
F. Anti-drop sensors can prevent the robot from
tumbling down stairs and dropping. While
reective or dark-colored oors may aect
the sensors'eectiveness, we recommend
physically blocking o areas where the robot
may fall.
PRODUCT OPERATION
Cleaning Precautions

PRODUCT MAINTENANCE
Mopping Modules
Before cleaning and maintaining the robot, turn
the robot o and unplug the charging station
from the outlet.
➀
➁
➂
➃
➄
➅
1. Remove the mop modules from the robot
aer each use.
2. Thoroughly rinse the mop cloth and water
tank with water and empty the tank.
3. Sun-dry or dry wipe the mop cloth and water
stains in the water tank to avoid mildew or
odor.

1. Press the release buon and pull out the
dustbin.
2. Open the cover.
5. Rinse the Primary lter holder and HEPA lter
with water.
6. Please completely air dry the HEPA lter
before next use.
7. Put the HEPA lter back in the dustbin.
8. Aaching the dustbin back to the robot.
3. Remove the HEPA lter.
4. Tap the HEPA lter and primary lter holder
to remove dust.
PRODUCT MAINTENANCE
Dustbin and Filter
Main Brush
NOTE: It can be used with a cleaning brush
during maintenance. Please use the cleaning
brush carefully.
➀
➁

PRODUCT MAINTENANCE
Mapping Sensors
Other Parts
Charging Station Side Brush
If the Robgot dustbin is not emptied or the "
" is solid white it may indicate that the charging
station duct is blocked. Refer to the image:
Unplug and turn over the charging station.
Remove the pipe cover with a Phillips
screwdriver and remove dirt or debris.

PRODUCT MAINTENANCE
PRODUCT SPECIFICATIONS
Maintain and replace parts at the following intervals to keep the robot running at optimal
performance:
Note: Our company manufactures a wide range of parts and accessories. For more information on
accessories, please contact Customer Service.
Regular Maintenance
Parts Maintenance Frequency Replacement Frequency
Mop
Side Brush
Roller Brush
HEPA Filter
Dustbin
Primary lter holder
Sensors, omnidirectional
wheel, bumpers,
robot
Wash mop aer each use
Every 2 Weeks
Every Week
Every Week
Every Week
Every Week
Every Week
Name Parameters
Model T10 Pro
Charing Time ≤5.5H
Robot Power Rating 50W
Rated Working Voltage 14.4V
Baery Capacity 5200mAh
Every 3-5 Months
Every 3-6 Months
Every 6-12 Months
Every 3-6 Months
Every 3-6 Months
/
/

Conditions Possible Issues Solution
The robot can not
connect to the app
Can not recharge.
TROUBLESHOOTING
Incorrect router username
and password.
When connecting to the router
network, please ensure you enter the
correct "user name" and "password".
The robot does not support 5G
networks at the moment. Please use a
2.4G network when connecting to the
Internet.
Ensure the robot is within the router�s
network coverage.
The robot must enter the network
conguration mode to connect to the
wi.
Please scan the QR code on this
product or visit the app market to
download the app.
Ensure the robot is fully docked with
the charging station�s charging
contacts, and ensure the power
buon is ashing. Check whether the
main unit�s charging contacts and
station are dirty. Please refer to the
manual for cleaning instructions.
The robot is not within the
router�s network coverage.
The robot is not in a pending
conguration mode.
Failure to use a 2.4G network.
The wrong app may have been
downloaded.
The charging contacts of the
robot and the charging station
are not fully connected.
You can refer to the chapter on
precautions for correct placement of
the charging station.
The charging station is not placed
in the correct position and/or was
not placed as required.
Dirty lenses may disrupt signals from
being received. Please refer to the
maintenance chapter for cleaning
instructions.
The signal receiving lens is dirty.
Aer the robot and the charging
station are fully in connect, and when
the robot and charging station�s
status indicator light are in a
breathing status, please check
whether the charging contacts are
dirty. Please refer to the maintenance
chapter for cleaning instructions.
Charging contacts are dirty and
not in full connect.

Can not recharge.
The robot became
stuck while operating.
The red light ashes
when the robot is
operating.
Excessive noise
when operating.
The robot keeps
bumping into objects.
Please ensure the charging station
has 2 feet of clear space on either
side and 5 feet in front.
Too many obstacles near the
charging station.
Please ensure the power cord is
connected (reference: charging
station indicator light)
The charging station is not
connected to a power source.
If the baery is not used for a long
period and if the baery can not be
charged due to over-discharge,
please contact Customer Service.
Prolonged inactivity, resulting in
over-discharge of the baery.
Move the robot close to the charging
station to re-establish the connection.
The robot will try various methods to
disengage itself. If it fails, please
manually untangle the robot.
The robot is out of the charging
station range.
The robot is entangled or blocked
by scaered wires on the ground,
drooping curtains, carpet fringe,
etc.
The robot may snag on a nearby
piece of furniture.
Periodically wipe the sensors with a
dry cloth.
The infrared obstacle avoidance
sensor lenses are dirty.
Regularly check the omnidirectional
wheel for entangled hair, wool, and
other small objects.
The omnidirectional wheel are
stuck.
Handle according to the robot�s
voice and app prompts.
Abnormal prompt sound from the
robot.
Change to standard cleaning mode.
The robot entered ultra cleaning
mode.
We recommend regularly cleaning
and maintaining side brush, roller
brush, dustbin, lter materials, etc.
Side/roller brushes are entangled,
dustbin or lter materials are
blocked, etc.
Table of contents
Other Ultenic Vacuum Cleaner manuals

Ultenic
Ultenic T10 User manual

Ultenic
Ultenic T10 User manual

Ultenic
Ultenic T10 User manual

Ultenic
Ultenic WashVac AC1 User manual

Ultenic
Ultenic U10 PRO User manual

Ultenic
Ultenic D5 Series User manual

Ultenic
Ultenic T10 User manual

Ultenic
Ultenic T10 User manual

Ultenic
Ultenic U11 PRO User manual

Ultenic
Ultenic U10 User manual