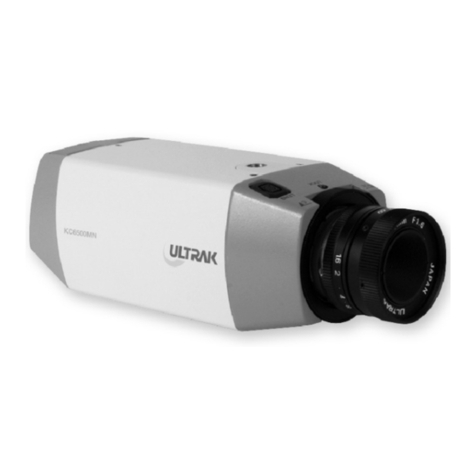
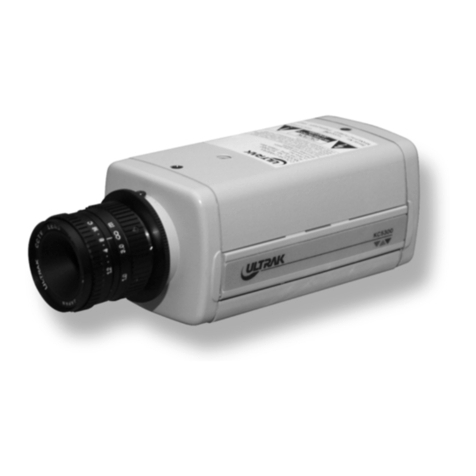
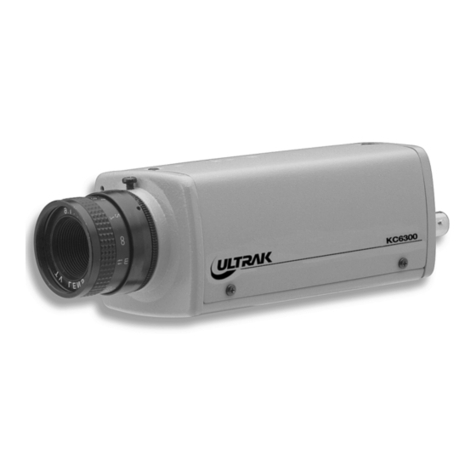
Ultrak KC4300E User manual

KC4300E
1/3” CCD BLACK-
AND-WHITE
CAMERA
1/3” CCD SCHWARZ/WEIß-
KAMERA
CAMÉRA
CCD 1/3” NOIR ET BLANC
TELECAMERA B/N CON
CCD 1/3”
INSTALLATION
INSTRUCTIONS
Groupe Bisset
98 Ter, boulevard Héloïse 95103 Argenteuil Cedex France
(33) 0134/234747 FAX (33) 0134/234745
Casarotto Security
Via Treviso, 2/4 31020 San Vendemiano (Treviso) Italy
(39) 0438/410245 FAX (39) 0438/370471
Intervision
Bridge House, Garstang Road Broughton, Preston PR3 5JA England
(44) 01772/861999 FAX (44) 01772/863176
VideV GmbH
Großenbaumer Weg 10 D-40472 Düsseldorf Germany
(49) 0211/41509-0 FAX (49) 0211/424019
INSTALLATIONSANLEITUNG
INSTRUCTIONS D’INSTALLATION
ISTRUZIONI PER L’INSTALLAZIONE

2
ISSUE 1 - April 1997
AUSGABE 1 - April 1997
RÉVISION 2 - Avril 1997
EDIZIONE 4 - Aprile 1997
1997 BY ULTRAK
ALL RIGHTS RESERVED
PRINTED IN KOREA
ALLE RECHTE VORBEHALTEN TOUS DROITS RESERVES TUTTI I DIRITTI RISERVATI
GEDRUCKT IN KOREA IMPRIME IN COREE STAMPATO IN COREA
ULTRAK
1220 CHAMPION CIRCLE, #100
CARROLLTON, TEXAS 75006
(972) 280-9675
ALL RIGHTS RESERVED. NO PART OF THIS PUBLICATION MAY BE REPRODUCED
BY ANY MEANS WITHOUT WRITTEN PERMISSION FROM ULTRAK.
THE INFORMATION IN THIS PUBLICATION IS BELIEVED TO BE ACCURATE IN ALL
RESPECTS. HOWEVER, ULTRAK CANNOT ASSUME RESPONSIBILITY FOR ANY
CONSEQUENCES RESULTING FROM THE USE THEREOF. THE INFORMATION
CONTAINED HEREIN IS SUBJECT TO CHANGE WITHOUT NOTICE. REVISIONS OR
NEW EDITIONS TO THIS PUBLICATION MAY BE ISSUED TO INCORPORATE SUCH
CHANGES.
ALLE RECHTE VORBEHALTEN. KEIN TEIL DIESER VERÖFFENTLICHUNG DARF OHNE SCHRIFTLICHE
ZUSTIMMUNG SEITENS ULTRAK VERÖFFENTLICHT, VERVIELFÄLTIGT ODER AN DRITTE
WEITERGEGEBEN WERDEN.
DIE INFORMATION IN DIESER VERÖFFENTLICHUNG WURDE NACH BESTERN WISSEN UND GEWISSEN
ERSTELLT. ULTRAK LEHNT JEDWEDE REGRESSANFORDERUNGEN FÜR EVENTUELLE ENSTEHENDE
FOLGEN AUS DER NUTZUNG DIESER INFORMATION AB. ÄNDERUNGEN VORBEHALTEN. NEUE ODER
ÜBERARBEITETE AUSGABEN KÖNNEN SOLCHE ÄNDERUNGEN BEINHALTEN.
TOUS DROITS RESERVES. AUCUNE PARTIE DE CETTE PUBLICATION NE PEUT ÊTRE REPRODUITE
PAR QUELQUE MOYEN QUE CE SOIT SANS ACCORD ECRIT DE ULTRAK.
LES INFORMATIONS SONT REPUTEES VRAIES. TOUTEFOIS,UTRAK NE PEUT PAS ÊTRE TENU
RESPONSABLE DE TOUTES CONSÉQUENCES RÉSULTANT DE LEUR UTILISATION. LES INFORMATIONS
CONTENUES SONT SUJETS À CHANGEMENT SANS PRÉAVIS. DES RÉVISIONS OU NOUVELLES
ÉDITIONS DE CETTE PUBLICATION PEUVENT ÊTRE FAITES POUR INCORPORER CES CHANGEMENTS.
TUTTI I DIRITTI RISERVATI. NESSUNA PARTE DI QUESTA PUBBLICAZIONE PUO’ ESSERE RIPRODOTTA
PER NESSUNO SCOPO SENZA AUTORIZZAZIONESCRITTA DELLA ULTRAK.
SI PRESUME CHE LE INFORMAZIONI CONTENUTE IN QUESTA PUBBLICAZIONE SIANO ACCURATE E
CORRETTE. COMUNQUE, ULTRAK NON SI ASSUME NESSUNA RESPONSABILITA’ PER LE
CONSEGUENZE DERIVANTI DALL’USO DI QUESTO MANUALE. LE INFORMAZIONI DI SEGUITO
RIPORTATE SONO SOGGETTE A CAMBIAMENTI SENZA PREAVVISO. REVISIONI O NUOVE EDIZIONI DI
QUESTA PUBBLICAZIONE POSSONO ESSERE RILASCIATE PER INCORPORARE QUESTI CAMBIAMENTI.

3
TABLE OF CONTENTS
IMPORTANT SAFEGUARDS & WARNING........................................................ 4
1.1 PURPOSE .......................................................................................................... 5
1.2 SYSTEM INSTALLATION................................................................................... 5
1.3 MANUAL IRIS LENS ADJUSTMENT.................................................................. 7
1.4 VIDEO TYPE AUTO IRIS LENS INSTALLATION AND ADJUSTMENT.............. 7
1.5 DC IRIS LENS INSTALLATION AND ADJUSTMENT......................................... 8
1.6 BACK FOCUS ADJUSTMENT............................................................................ 9
1.7 PHASE ADJUSTMENT..................................................................................... 10
2.1 TROUBLESHOOTING...................................................................................... 11
2.2 PREVENTIVE MAINTENANCE ........................................................................ 11
SPECIFICATIONS............................................................................................ 12
INHALTSVERZEICHNIS
WICHTIGE SICHERHEITSMAßNAHMEN & WARNHINWEIS.......................... 13
1.1 VERWENDUNGSWECK .................................................................................. 14
1.2 INSTALLATION DES SYSTEMS ...................................................................... 14
1.3 EINSTELLUNG VON OBJEKTIVEN MIT MANUELLER BLENDE.................. 16
1.4 INSTALLATION UND EINSTELLUNG VON AI-OBJEKTIVEN MIT
AUTOMATISCHER BLENDE............................................................................ 17
1.5 INSTALLATION UND EINSTELLUNG VON DC-OBJEKTIVEN ........................ 18
1.6 EINSTELLUNG DER TIEFENSCHÄRFE .......................................................... 19
1.7 PHASENEINSTELLUNG .................................................................................. 20
2.1 FEHLERBEHEBUNG........................................................................................ 21
2.2 VORBEUGENDE WARTUNG UND PFLEGE ................................................... 21
LEISTUNGSMERKMALE.................................................................................. 22
TABLE DES MATIERES
MISE EN GARDE IMPORTANTE & ATTENTION............................................. 23
1.1 GENERALITES................................................................................................. 24
1.2 INSTALLATION ................................................................................................ 24
1.3 REGLAGE D’OBJECTIF MANUEL ................................................................... 26
1.4 INSTALLATION ET REGLAGE D’OBJECTIF A DIAPHRAGME ASSERVI
VIDEO .............................................................................................................. 26
1.5 INSTALLATION ET REGLAGES DES OBJECTIFS DC.................................... 27
1.6 REGLAGE DU TIRAGE OPTIQUE ................................................................... 28
1.7 AJUSTEMENT DE PHASE............................................................................... 28
2.1 RECHERCHE DE DEFAUTS............................................................................ 30
2.2 MAINTENANCE PREVENTIVE ........................................................................ 30
SPECIFICATIONS............................................................................................ 31
INDICE
IMFORMAZIONI IMPORTANTI & ATTENZIONE.............................................. 32
1.1 INTRODUZIONE............................................................................................... 33
1.2 INSTALLAZIONE DEL SISTEMA...................................................................... 33
1.3 REGOLAZIONE DEGLI OBIETTIVI MANUALI.................................................. 35
1.4 INSTALLAZIONE E REGOLAZIONE DEGLI OBIETTIVI AUTOIRIS................. 35
1.5 INSTALLAZIONE E REGOLAZIONE DEGLI OBIETTIVI AUTOIRIS ND........... 37
1.6 REGOLAZIONE DEL FUOCO MECCANICO.................................................... 38
1.7 REGOLAZIONE DELLA FASE ......................................................................... 38
2.1 MALFUNZIONAMENTI ..................................................................................... 39
2.2 MANUTENZIONE PREVENTIVA...................................................................... 39
SPECIFICHE TECNICHE ................................................................................. 40
English4
IMPORTANT SAFEGUARDS
1. READ INSTRUCTIONS - Read all safety and operating instructions before operating this product.
2. RETAIN INSTRUCTIONS - Retain the safety and operating instructions for future reference.
3. CLEANING - Unplug all equipment before cleaning. Do not use liquid cleaners or aerosol cleaners. Use a
damp cloth for cleaning.
4. ATTACHMENTS - Use only attachments recommended by the manufacturer. Non-recommended
attachments may result in the risk of fire, electric shock, or injury.
5. WATER AND MOISTURE - Keep all equipment away from liquids or any other type of moisture.
6. ACCESSORIES - Do not place this television equipment on an unstable cart, stand or table. The television
equipment may fall causing serious injury to a child or adult, and serious damage to the equipment. Wall or
shelf mounting should follow the manufacturer’s instructions, and should use a mounting kit approved by
the manufacturer.
7. POWER SOURCE - The camera should only be operated from the type of power source indicated in this
Instruction Manual.
8. POWER CORDS - Do not allow anything to rest on the power cord. Do not locate this product where the
cord will be abused by persons walking on it.
9. LIGHTNING - When this product is left unattended or unused for long periods of time, unplug it from the
power supply and disconnect it from other equipment. This will prevent damage to the video product due to
lightening and power-line surges.
10. OVERLOADING - Do not overload wall outlets and extension cords as this can result in a risk of fire or
electric shock.
11. FOREIGN OBJECTS - Never insert objects of any kind into this product through openings as they may
touch dangerous voltage points or short-out parts that could result in a fire or electric shock.
12. SERVICING - Do not attempt to service this product yourself as opening or removing covers may expose
you to dangerous voltage or other hazards. Refer all servicing to qualified service personnel.
13. DAMAGE REQUIRING SERVICE - Disconnect the camera equipment and refer servicing to qualified
service personnel under the following conditions:
14. When the power-supply cord or the plug has been damaged.
15. If the video product has been exposed to moisture.
16. The video product does not operate normally by following the operating instructions, adjust only those
controls that are covered by the operating instructions as an improper adjustment of other controls may
result in damage and will often require extensive work by a qualified technician to restore the video product
to its normal operation.
17. If the video product has been dropped, or the cabinet damaged.
18. When the video product exhibits a distinct change in performance - this indicates a need for service.
USERS OF THE PRODUCT
ARE RESPONSIBLE FOR
CHECKING AND
COMPLYING WITH ALL
FEDERAL, STATE
AND LOCAL LAWS AND
STATUTES CONCERNING
THE MONITORING
AND RECORDING
OF VIDEO AND
AUDIO SIGNALS.
ULTRAK SHALL NOT
BE HELD RESPONSIBLE
FOR THE USE OF THIS
PRODUCT IN VIOLATION
OF CURRENT LAWS
AND STATUTES.

English 5
SECTION 1
KC4300E CCD BLACK & WHITE CAMERA
1.1 PURPOSE
The KC4300E CCD Black & White Camera provides a low cost solution
to closed circuit television and security surveillance applications. The
KC4300E Camera features:
•1/3” Interline Transfer CCD Image Sensor
•Supports standard CS or C-mount lens
•Equipped with electronic iris
•Compatibility with Video or dc auto-iris lens
•Operates on 230V ac with line lock and LED power indicator
•Excellent picture quality
•Two-year warranty
This manual describes how to setup and operate the KC4300E
Camera.
1.2 SYSTEM INSTALLATION
Installation of the KC4300E Camera must be performed by qualified
service personnel in accordance with all local and national electrical
and mechanical codes. Perform the following steps to install the
KC4300E Camera.
A. Remove all components from the package and identify the items
that will be used during installation:
•KC4300E Camera with CS-mount
•Mini Din connector (for dc-type auto iris lens)
•C-mount
Other items used during the installation that are NOT supplied with
the KC4300E Camera may include:
•230V ac power supply
•Camera lens
•Mounting hardware
•Camera stand or mounting bracket
•Video cable
•Monitor
Refer to Figure 1 for identification of the KC4300E Camera.

English6
FIGURE 1. KC4300E CAMERA

English 7
B. Select a suitable location for the camera. Install the camera stand
or mounting bracket in the selected location using a suitable
fastener. The camera stand or mounting bracket must be attached
to a structural object, such as a wall stud or ceiling rafter, that
supports the weight of the camera and mount.
C. The KC4300E Camera has a camera mounting block attached to
the bottom of the camera housing. The ¼”-20 UNC threaded
mounting hole attaches to the bolt on the camera stand or
mounting bracket.
D. The two screws on the camera mounting block allow the block to
be removed and repositioned on top of the camera housing.
E. NOTE: Do not aim or point the camera towards the sun or into a
strong light.
F. Attach a CS-mount lens directly to the front of the camera. If a C-
mount is used, attach the CS/C lens adapter before attaching the
C-mount.
G. Connect a video coaxial cable from the VIDEO OUT connector on
the back of the KC-4300 camera to the input port of the monitor.
H. Wire the 230V ac power supply to the green ac power connector
on the back of the camera. Use only a UL listed Class 2 power
transformer.
I. Apply 230V ac power to the camera. The power LED on the back
of the camera illuminates and remains illuminated as long as
power is applied to the camera.
J. Adjust the lens focus and iris controls for an optimum picture.
1.3 MANUAL IRIS LENS ADJUSTMENT
When using the Manual Iris lens, turn the Iris to the ON position and
adjust the manual iris for the appropriate range. Adjust during the
brightest conditions, opening the lens without saturating the picture. Set
the EI switch to ON. Adjust the lens opening for the minimum F-number
yielding a good picture under the brightest scene conditions.
The Manual Iris is used in indoor applications where lighting from
windows can considerably affect the light level of the room.
1.4 VIDEO TYPE AUTO IRIS LENS INSTALLATION AND ADJUSTMENT
The KC4300E Camera supports video-type auto iris lenses to adjust for
changing light levels. Perform the following steps to install and adjust a
video-type auto iris lens.
A. Thread the video-type auto iris lens on to the lens mount.
B. Connect the lens control wiring to the three position terminal block
on the back of the camera. The following diagram illustrates the Pin
connections. Red, white, and black are the most common colors
used for wiring on video-type auto iris lens.

English8
Pin Name Wire Color
+B Voltage + Red
VI Video White
G Ground Black
C. Set the EI switch on the back of the camera to OFF.
D. Apply power to the camera.
E. Adjust the focus ring on the lens for an optimum picture. If a picture
is not visible, set the lens for proper exposure by adjusting the ALC
(automatic level control) and Level on the lens. The ALC setting
can range between AVG (average) or PK (peak). A mid-range
setting is appropriate for most applications.
For ALC adjustments:
AVG To slow the reaction of the lens to changing light, set
the range to the AVG setting to average the video level
from the camera. Use when there are bright spots in the
picture such as lights or glare from the sun.
PK To increase the speed of the lens reaction to the
changing light, set the lens adjustment to PK so the
lens will adjust to the brightest or peak object in the
video. Use this setting if you want to see the brightest
object and not the background objects.
For Level adjustments:
Adjust the Level control for the best picture during the day. A night
adjustment may not provide the proper setting for controlling the
light during the day.
F. Set the back focus of the camera before the final adjustment of the
video level.
G. If the auto iris has a gain adjustment:
a) If the lens oscillates between open and closed under bright
lights, slowly turn the gain adjustment counter clockwise until
the oscillating stops.
b) Increase the light getting to the camera by adjusting the level
control and re-adjusting the gain control as necessary.
c) Reset the level control as noted in step E.
1.5 DC IRIS LENS INSTALLATION AND ADJUSTMENT
The KC4300E Camera supports dc iris lens. Perform the following
steps to install and adjust a dc-type auto iris lens.
A. Thread the dc iris lens to the lens mount on the front of the
camera.
B. Solder the lens control wires to the mini DIN connector supplied
with the camera.

English 9
Pin Name Wire Color
1 Damp Coil - Blue
2 Damp Coil + Red
3 Drive Coil + White
4 Drive Coil - Green
C. Plug the connector into the DC IRIS jack on the back of the
camera. The connector is polarized and can only be inserted into
the jack one way.
D. The EI switch should be in the OFF position.
E. Apply power to the KC4300E Camera.
Adjust the dc iris lens for an optimum picture. Use the IRIS LEVEL
control on the back of the camera for optimum picture quality.
1.6 BACK FOCUS ADJUSTMENT
For best results, perform back focus adjustments at night or while using
a #6 or #8 welders glass in front of the lens. The focus of the camera
will change slightly if the camera iris was adjusted on a light scene,
then changes to a dark scene. However, the camera will remain in
focus if the iris was focused on a dark scene and the scene lightens.
A. The lens should be mounted on the camera, then apply power.

English10
B. If a picture is visible, focus on the picture. If the picture is not
visible, open the iris on the lens. Open the lens as wide as possible
by adjusting the iris ring on the lens for the brightest picture or by
placing the welders glass in front of the lens and forcing the lens to
automatically open.
C. When the iris is open to the widest point, re-adjust the focus for a
clear picture. It a clear picture is not possible, set the focus ring to
midrange.
D. Loosen the Back Focus Lock Screw.
E. Adjust the Back Focus Ring for a clear picture.
F. Tighten the Back Focus Lock Screw.
G. Fine tune the focus with the focus ring on the lens.
H. Remove the welders glass from in front of the lens.
I. Adjust the iris of the lens for the best picture quality.
1.7 PHASE ADJUSTMENT
Phase Adjustment is used in multi-camera systems when power is
supplied from different sources, causing the cameras to be out of
phase. This situation affects auto switching of the cameras by causing
a vertical flip or roll during the switch interval. The vertical phase
adjustment allows the camera’s line lock sync to by adjusted from 0 to
260 degrees with reference to the zero line crossing the ac frequency.
A. Ensure that all cameras are powered from the same electrical
source and wired in a similar fashion.
B. Adjust the phase control on the back of the camera until there is no
vertical flip or roll on the monitor when using the auto switcher.

English 11
SECTION 2
TROUBLESHOOTING AND MAINTENANCE
2.1 TROUBLESHOOTING
If problems occur, verify the installation of the camera with the
instructions in this manual and with other operating equipment. Isolate
the problem to the specific piece of equipment in the system and refer
to the equipment manual for further information.
Problem Possible Solution
No Video 1. Verify power to all pieces of equipment
in the system.
2. Verify that the power switches are in
the ON position.
3. Verify that the lens cap has been
removed from the lens or that the iris
of the lens is open.
Video, but no control 1. Power down the system for one
minute, then turn power back ON.
2.2 PREVENTIVE MAINTENANCE
Preventive maintenance allows detection and correction of minor faults
before they become serious and cause equipment failure.
Every three months, perform the following maintenance:
a) Inspect all connecting cables for deterioration or other damage.
b) Clean components with a clean damp cloth.
c) Verify that all the mounting hardware is secure.

English12
SPECIFICATIONS
Dimensions (WxHxD) 2.3 x 2.0 x 4.8 in
(58 x 52 x 123 mm)
Power supply 230V ac +/- 10%, 50Hz +/- 1Hz
Power consumption 3.5W (3.75W max. with auto-iris)
Image pickup element 1/3 inch CCD image area sensor
(4.9mm H x 3.7mm V)
Scanning system 2:1 interlace
Scanning frequency 15.625kHz (H), 50Hz (V)
Synchronization Line lock
Resolution Horizontal 380 TV lines
Min. illumination 0.2 Lux (F 1.2, 50% IRE)
AGC Internal, automatic
Gamma 0.45
S/N Ratio 46dB (AGC Off)
Video output 1.0Vp-p CCIR
Output Impedance 75 ohms unbalanced
Ambient temperature 14°F - 114°F (-10°C - 45°C)
Ambient humidity 30% - 90% (non-condensing)
Lens mount CS-mount (C-mount optional)
Back Light Compensation 40% (center of screen)

Deutsch 13
WICHTIGE SICHERHEITSMAßNAHMEN
1. LESEN DER ANLEITUNGEN - Lesen Sie vor Inbetriebnahme dieses Gerätes alle Sicherheits- und
Betriebsanleitungen.
2. AUFBEWAHRUNG DER ANLEITUNGEN - Bewahren Sie die Anleitungen zur späteren Verwendung auf.
3. REINIGUNG - Ziehen Sie vor Reinigung dieses Gerätes den Stecker aus der Wandsteckdose. Verwenden Sie
keine Flüssig- oder Aerosolreiniger. Verwenden Sie füdie Reinigung ein feuchtes Tuch.
4. ZUBEHÖR - Benutzen Sie kein Zubehör, das vom Hersteller dieses Gerätes nicht empfohlen wurde. Nicht
empfohlenes Zubehör beinhaltet die Gefahr von Feuer, Elektroschock oder Verletzung.
5. WASSER UND FEUCHTIGKEIT - Halten Sie alle Geräte von Flüssigkeiten und jeder Art von Feuchtigkeit fern.
6. AUFSTELLUNGSFLÄCHEN - Stellen Sie dieses Gerät nicht auf instabile Wagen, Regale, Stative, Konsolen oder
Tische. Das Gerät kann herabfallen und Kinder oder Erwachsene ernsthaft verletzen und das Gerät erheblich
beschädigen. Verwenden Sie nur vom Hersteller empfohlene oder in Verbindung mit diesem Gerät verkaufte
Wagen, Regale, Stative, Konsolen oder Tische. Alle Gestellmontagen des Gerätes müssen gemäß den
Anleitungen des Herstellers und mit dem vom Hersteller empfohlenen Montagezubehör vorgenommen werden.
7. SPANNUNGSQUELLEN - Dieses Gerät darf nur mit den Spannungsquellen betrieben werden, die in der
Bedienungsanleitung ausgewiesen sind.
8. SPANNUNGSKABEL - Stellen Sie keine Gegenstände auf das Kabel. Plazieren Sie das Gerät so, daß keine
Personen auf das Kabel treten.
9. BLITZSCHLAG - Ziehen Sie zur zusätzlichen Sicherung dieses Geräts während eines Gewitters oder wenn das
Gerät über eine längere Zeitdauer unbeaufsichtigt und unbenutzt bleibt, den Stecker aus der Wandsteckdose und
schalten Sie das Antennen-oder Kabelsystem ab.
10. ÜBERLASTUNG - Wandsteckdosen and Verlängerungskabel aufgrund Brand- oder Stormschlaggefahr nicht
überlasten.
11. FREMDOBJEKTE - Niemals Gegenstände jeglicher Art durch die Öffnungen des Gerätes einführen, da diese
gefährliche Spannungspunkte oder Überbrückungen berühren und einen Brand- oder Stromschlag auslösen
könnten.
12. WARTUNG - Versuchen Sie nicht, dieses Gerät selbst zu warten, da Sie durch Öffnen oder Entfernen von
Abdeckungen möglicherweise gefährlichen Stromspannungen oder anderen Gefahren ausgesetzt werden.
Überlassen Sie die Wartung ausschließlich qualifizierten Kundendienst-Mitarbeitern.
13. BESCHÄDIGUNGEN; DIE DEN KUNDENDIENST ERFORDERLICH MACHEN - Unterbrechen Sie die
Spannungszufuhr und beauftragen Sie einen qualifizierten Kundendienst mit der Wartung unter folgenden
Umständen:
14. Das Spannungskabel oder der Spannungsstecker wurde beschädigt.
15. Das Gerät war Feuchtigkeit ausgesetzt.
16. Das Gerät funktioniert trotz Einhaltung der Bedienungsanleitungen nicht einwandfrei. Regulieren Sie nur die
Bedienselemente, die in der Bedienungsanleitung abgehandelt werden. Eine falsche Regulierung anderer
Bedienelemente kann zur Beschädigung führen und zur Wiederherstellung der normalen Funktionstüchtigkeit des
Gerätes häufig umfassende Reparaturarbeiten durch einen qulifizierten Techniker erforderlich machen.
17. Das Gerät wurde fallengelassen oder das Gehäuse wurde beschädigt.
18. Wenn das Gerät deutliche Leistungsveränderungen zeigt, ist dies ein Hinweis auf die Notwendigkeit einer
Wartung.
BENUTZER DIESES PRODUKTES
SIND VERANTWORTLICH FÜR
DIE KONTROLLE UND
ERFÜLLUNG DER
BEDINGUNGEN ALLER
FÖDERALEN, STAATLICHEN
UND KOMMUNALEN GESETZE
UND STATUTEN IN BEZUG AUF
DIE ÜBERWACHUNG UND
AUFNAHME VON OPTISCHEN
UND AKUSTISCHEN SIGNALEN.
ULTRAK/VIDEV KANN NICHT
FÜR DEN MIßBRAUCH DIESES
PRODUKTS IN BEZUG AUF
GELTENDE GESETZE UND
STATUTEN BELANGT WERDEN.

Deutsch14
ABSCHNITT 1
KC4300E CCD SCHWARZ/WEIß-KAMERA
1.1 VERWENDUNGSZWECK
Die KC4300E Schwarz/Weiß-Kamera stellt eine kostengünstige Lösung
für interne Fernseh- und Überwachungsanlagen dar. Die KC4300E
Kamera verfügt über folgende Leistungsmerkmale:
•1/3” CCD Interline-Transfer-Sensor
•Geeignet für Objektive mit CS- oder C-Gewinde
•Ausgestattet mit elektronischer Blendensteuerung
•Kompatibel mit AI- und DC-Objektiven mit automatischer Blende
•230V Wechselspannungbetrieb mit Line-Lock und LED-
Betriebsanzeige
•Hervorragende Bildqualität
•Zwei Jahre Garantie
Diese Bedienungsanleitung beschreibt den Aufbau und Betrieb der
KC4300E-Kamera.
1.2 INSTALLATION DES SYSTEMS
Die Installation der KC4300E Kamera muß durch qualifizierte
Kundendienst-Mitarbeiter den örtlichen und nationalen, elektrischen
und mechanischen Vorschriften entsprechend durchgeführt werden.
Führen Sie die folgenden Schritte aus, um die KC4300E Kamera zu
installieren.
A. Entnehmen Sie alle Geräteteile der Verpackung und legen Sie die
Bestandteile bereit, die Sie während der Installation benötigen:
•KC4300E Kamera mit CS-Gewinde
•Mini Din Gewinde (für DC-Objektive mit automatischer Blende)
•C-Gewinde
Nachstehende Aufstellung führt die Bestandteile auf, die während
der Installation benötigt werden, aber NICHT im Lieferumfang der
KC4300E Kamera enthalten sind.
•230V Wechselspannungsversorgung
•Kameraobjektiv
•Befestigungsmaterial
•Kamerawandhalter oder Konsole
•Video Kabel
•Monitor

Deutsch 15
BESCHREIBUNG KC4300E CAMERA SIEHE ABBILDUNG 1

Deutsch16
B. Wählen Sie einen geeigneten Aufstellungsort für die Kamera.
Installieren Sie den Kamerawandhalter oder die Konsole an der
ausgewählten Stelle und wählen Sie eine geeignete Befestigung
aus. Der Kamerawandhalter oder die Konsole muß an einem
Bauelement (Pfosten oder Dachsparren) befestigt werden, der das
Gewicht der Kamera und der Aufhängung stützt.
Die KC4300E Kamera verfügt über einen Kamera-Montagesockel
an der Unterseite des Kameragehäuses. Das 1/4”-20 UNC
Gewinde der Montageöffnung dient zur Aufnahme der Schraube
auf dem Kamerawandhalter oder an der Konsole. Die beiden
Schrauben auf dem Kamera-Montagesokkel erlauben es, den
Sockel zu entfernen und auf der Oberseite des Kameragehäuses
zu positionieren.
ANMERKUNG: Versuchen Sie nicht die Kamera auf die Sonne
oder auf starke Lichtquellen zu richten.
D. Montieren Sie ein Objektiv mit CS-Gewinde auf die Kamera. Wird
ein Objektiv mit C-Gewinde benutzt, verwenden Sie einen CS-/C-
Objektivadapter bevor Sie das Gewinde befestigen.
E. Verbinden Sie den Videosignal-Ausgang auf der Rückseite der
KC4300E Kamera mit einem Video-Koaxialkabel mit der
Eingangsbuchse des Monitors.
F. Schließen Sie die 230V Wechselspannungsversorgung an den
grünen Wechselspannungsanschluß auf der Rückseite der
Kamera an. Verwenden Sie nur einen VDE-geprüften Klasse 2
Transformator.
G. Versorgen Sie die Kamera mit 230V Wechselspannung. Die
Betriebs-LED an der Rückseite der Kamera leuchtet auf und
erlischt nicht, solange der Kamera Spannung zugeführt wird.
H. Justieren Sie den Brennpunktabstand und die Blendenkontrolle für
eine optimale Bildeinstellung.
1.3 EINSTELLUNG VON OBJEKTIVEN MIT MANUELLER
BLENDE
Wird ein Objektiv mit manueller Blende verwendet, stellen Sie die
Blende auf Position ON und justieren Sie die manuelle Blende auf den
gewünschten Aktionsradius. Die Einstellung sollte bei hellsten
Lichtbedingungen vorgenommen werden. Öffnung Sie die Blende, ohne
das Bild überzubelichten. Stellen Sie den EL-Schalter auf ON. Stellen
Sie Öffnung der Blende so ein, daß unter den hellsten
Lichtbedingungen bei kleinster Blendenzahl ein gutes Bild erzeugt wird.
Die manuelle Blende wird für Anwendungen im Innenbereich
gebraucht, bei denen Lichtreflexionen von Fernstern das Lichtniveau
des Raumes erheblich beeinträchtigen können.

Deutsch 17
1.4 INSTALLATION UND EINSTELLUNG VON AI-OBJEKTIVEN MIT
AUTOMATISCHER BLENDE
Die KC4300E Kamera kann mit AI-Objektiven mit automatischer Blende
betrieben werden, um sie wechselnden Lichtverhältnissen anzupassen.
Führen Sie die folgenden Schritte durch, um ein AI-Objektiv mit
automatischer Blende zu installieren und einzustellen.
A. Montieren Sie das AI-Objektiv mit automatischer Blende auf die
Objektivfassung.
B. Verbinden Sie die Leitung der Blendenkontrolle mit der dreipoligen
Anschlußbuchse auf der Rückseite der Kamera. Das folgenden
Diagramm veranschaulicht die einzelnen Steckerverbindungen.
Rot, weiß und schwarz sind die gebräuchlichsten
Farbmarkierungen für Anschlußverbindungen von AI-Objektiven
mit autmatischer Blende.
Pin Name Farbe der Leitung
+B Spannung + rot
VI Video weiß
G Erde schwarz
C. Schieben Sie den Schalter EL auf der Rückseite der Kamera auf
Position OFF.
D. Versorgen Sie die Kamera mit Spannung.
E. Stellen Sie den Fokussierring am Objektiv ein, um ein optimales
Bild zu erhalten. Ist kein Bild sichtbar, stellen Sie das Objektiv für
eine korrekte Belichtung ein, indem Sie die automatische
Belichtungskontrolle (ALC/automatic level control) und den Grad
der Belichtung (Level) am Objektiv justieren. die automatische
Belichtungskontrolle (ALC) reicht von AVG (average =
Durchschnitt) bis PK (peak = Spitzlichtaussteuerung). Eine mittlere
Einstellung ist für die meisten Anwendungen geeignet.
Für ALC (Automatische Blendenkontrolle) Einstellungen:
AVG Stellen Sie den Regler auf AVG um die Reaktion des
Objektivs auf wechselnde Lichtbedingungen zu
verlangsamen und um das Bildniveau der Kamera zu
normalisieren. Verwended Sie diese Funktion, wenn
das Bild helle Flecken z.B. durch Sonneneinwirkung
aufweist.
PK Stellen Sie den Regler auf PK um die Reaktion des
Objektivs auf wechselnde Lichtbedingungen zu
beschleunigen. Das Objektiv stellt sich nun auf das
hellste Objekt bzw. den hellsten Punkt im Bild ein.
Verwenden Sie diese Einstellung, wenn Sie das hellste
Objekt betrachten wollen, nicht aber im Hintergrund
befindliche Objekte.

Deutsch18
Für Einstellung des Belichtungsgrades:
Justieren Sie die Belichtungskontrolle auf eine optimale
Bildwiedergabe während des Tages. Eine Justierung bei
Dunkelheit könnte zu einer beeinträchtigten Einstellung der
Tageslichtkontrolle führen.
F. Stellen Sie die Tiefenschärfe der Kamera ein, bevor Sie die
Bildwiedergabe abschließend aussteuern.
G. Wenn die Blendenautomatik über eine Verstärkereinstellung
verfügt:
a) Schwankt die Blendeneinstellung bei hoher Lichteinwirkung
zwlschen offen und geschlossen, drehen Sie die
Verstärkereinstellung gegen den Uhrzeigersinn bis die
Schwankungen aufhören.
b) Erhöhen Sie die Lichtausbeute der Kamera, indem Sie die
Belichtungskontrolle justieren und die Verstärkerung, wenn
nötig, nachregeln.
c) Stellen Sie die Belichtungskontrolle emeut ein, wie in Punkt E
beschrieben.
1.5 INSTALLATION UND EINSTELLUNG VON OBJEKTIVEN MIT
DC-BLENDE
Die KC 4300 Kamera arbeitet mit Objek-tiven mit DC-Blende. Fiihren
Sie die folgende Schn'tte durch, um ein DC-Objektiv mit automatischer
Blende zu installieren und einzustellen.
A. Montieren Sie das DC-Objektiv auf die Objektivfassung an der
Frontseite der Kamera.
B. Verioten Sle die Objektivkontroll-Leitungen mit dem Mini DrN
Verbindungsstijck, das mit der Kamera gellefert wurde.
Pin Name Farbe der Leitung
1 Abschirmung - blau
2 Abschirmung + rot
3 Steuerung + weiß
4 Steuerung - grün
Abschirmung +
Abschirmung -
Steuerung +
Steuerung -

Deutsch 19
C. Stecken Sie den Verbindungsstecker in die DC Blendenbuchse an
der Rückselte der Kamera. Der Verbindungsstecker ist so
ausgerichtet, daß nur eine Befestigungsmöglichkelt vorhanden ist.
D. Der Schalter EL sollte sich in Position OFF befinden.
E. Versorgen Sle die KC 4300 Kamera mit Spannung.
F. Stelien Sle das DC-Objektiv aufein optimales Bild ein. Benutzen
Blendenkontrolle auf der Rückseite der Kamera für eine optimale
Blldqualität.
1.6 EINSTELLUNG DER TIEFENSCHÄRFE
Um optimale Resultate zu erzielen stellen Sie Tiefenschärfe bei
Dunkelheit ein oder verwenden Sie einen #6 oder #8 Filter vor dem
Objektiv. Der Brennpunkt der Kamera ändert sich geringfügig, wenn
die Blende der Kamera auf eine hefle Umgebung justiert wurde und
dann auf eine dunklere Umgebung wechselt. Die Bildschärfe der
Kamera bleibt jedoch erhalten, wenn die Blende auf eine dunkle
Umgebung eingestellt wurde und die Umgebung sich erhellt.
A. Das Objektiv sollte erst auf die Kamera montlert werden, danach
erst sollte die Spannungsversorgung erfolgen.
B. Ist ein Bild sichtbar, stellen Sie das Bild scharf. Wenn kein Bild
sichtbar ist, öffnen Sle die Blende am Objektiv. Öffnen Sie die
Blende so weit wie möglich, indem Sie den Blendenring am
Objektiv auf das hellste Bild einstellen oder indem Sie einen Filter
vor dem Objektiv verxenden, damit sich die Blende automatisch
öffnet.
C. Ist die Blende so weit wie möglich geöffnet, regeln Sie die
Scharfeinstellung nach, um ein klares Bild zu erhalten. Ist die
Scharfeinstellung des Bildes nicht möglich, stellen Sie den
Fokussierring auf Mittelposition.

Deutsch20
D. Lockem Sie die Halteschraube des Fokussierrings.
E. Justieren Sie den Fokussierring, um ein klares Bild zu erhalten.
F. Ziehen Sle die Halteschraube des Fokussierrings wieder an.
G. Fiihren Sie die Feineinsteflung der Bildschärfe mit Hilfe des
Fokussierrings am Objektiv durch.
H. Entfemen Sie den Filter vom Objektiv.
I. Stellen Sle die Blende des Objektivs auf eine optimale Bildqualität
ein.
1.7 PHASENEINSTELLUNG
Die Phaseneinstellung wird bel Systemen mit mehreren Kameras
gebraucht, wenn die Spannungszufuhr fiber verschiedene Stromquellen
erfolgt, die eine Phasenverschiebung der Kameras verursachen. Dies
beeinträchtigt die automatische Umstellung der Kameras, indem ein
vertikales Flackem oder Rollen (des Bildes) wdhrend des
Umschaltungsintervalls verursacht wird. Die Zeilensynchronisation der
Kamera ermöglicht es, die vertikale Phaseneinstellung von 0-260 Grad
zu justieren unter Bezug auf die Null-Linie, die die
Wechselspannungsfrequcnz krcuzt.
A. Stellen Sie sicher, daß alle Kameras fiber die gleiche Spannungs-
quelle versorgt werden und in gleicher Weise verkabelt sind.
B. Justieren Sie die Phasenkontrolle auf der Rückseite der Kamera
bis kein vertikales Flattem oder Rollen aufdem Monitor erscheint,
wenn Sie die automatische Umschaltung benutzen.
Table of contents
Languages:
Other Ultrak Security Camera manuals

Ultrak
Ultrak DuraCam User manual

Ultrak
Ultrak KC-2A User manual

Ultrak
Ultrak DuraCam VK74A36C User manual

Ultrak
Ultrak KC7400CN User manual

Ultrak
Ultrak KC452xMx Series User manual

Ultrak
Ultrak KD6 Z-SERIES Assembly instructions

Ultrak
Ultrak KC4500MN User manual

Ultrak
Ultrak KC450xMP User manual

Ultrak
Ultrak KD5 Series User manual

Ultrak
Ultrak KC5300 User manual

Ultrak
Ultrak KC440xMP User manual

Ultrak
Ultrak CSC100BU User manual

Ultrak
Ultrak HEG14 User manual

Ultrak
Ultrak KC6300 User manual

Ultrak
Ultrak KD6 Z Series Owner's manual

Ultrak
Ultrak KC5520CN User manual

Ultrak
Ultrak TVC-500 User manual

Ultrak
Ultrak KC-3P User manual

Ultrak
Ultrak HEB10 User manual

Ultrak
Ultrak KC2200CN User manual