Ultrak KD6 Z-SERIES Assembly instructions

518854-2960-D KDMU040013
7/20/01
KD6 Z-SERIES DOME
INSTALLATION TIPS
AND
MAINTENANCE
Manual Number 518854-2960
Ultrak®
4465 Coonpath Road
Carroll, OH 43112
(800) 443-6680•(740) 756-9222•FAX (740) 756-4237
Buy Ultrak
Cameras & Parts
@ TLS Electronics

518854-2960-D KDMU040013
7/20/01
WARNING
THIS IS A CLASS A PRODUCT. IN A DOMESTIC ENVIRONMENT,
THIS PRODUCT MAY CAUSE RADIO INTERFERENCE IN WHICH
CASE THE USER MAY BE REQUIRED TO TAKE ADEQUATE
MEASURES.
WARNING
TO REDUCE A RISK OF FIRE OR ELECTRIC SHOCK, DO NOT
EXPOSE THIS PRODUCT TO RAIN OR MOISTURE UNLESS
ENCLOSED IN A WATERPROOF HOUSING.
NOTE
This equipment has been tested and found to comply with the limits for a
Class A digital device, pursuant to Part 15 of the FCC Rules. These
limits are designed to provide reasonable protection against harmful
interference when the equipment is operated in a commercial
environment. This equipment generates, uses, and can radiate radio
frequency energy and, if not installed and used in accordance with the
instruction manual, may cause harmful interference to radio
communications. Operation of this equipment in a residential area is
likely to cause harmful interference in which case the user will be
required to correct the interference at his own expense.

518854-2960-D KDMU040013
7/20/01
Issue 1 – December 22, 2000
Issue 1, Revision A – January 05, 2001 – revised name.
Issue 1, Revision B – February 22, 2001 – added 24Vac interface in 4x4 electrical box.
Issue 1, Revision C – May 17, 2001 – added weather dome top and bottom, added camera replacement
procedure.
Issue 1, Revision D – July 20, 2001 – revised outdoor weather dome temperature from 14°F to -40°F.
©2000-2001 By Ultrak®, Inc.
All Rights Reserved
Printed In The United States Of America
Ultrak, Incorporated
4465 Coonpath Road NW
Carroll, Ohio 43112
(740) 756-9222
Sales 1-800-443-6680 (Toll Free USA)
Technical Support 1-800-443-6681 (Toll Free USA)
ALL RIGHTS RESERVED. NO PART OF THIS PUBLICATION MAY BE REPRODUCED BY ANY MEANS WITHOUT WRITTEN
PERMISSION FROM ULTRAK®, INCORPORATED.
THE INFORMATION IN THIS PUBLICATION IS BELIEVED TO BE ACCURATE IN ALL RESPECTS. HOWEVER, ULTRAK,
INCORPORATED CANNOT ASSUME RESPONSIBILITY FOR ANY CONSEQUENCES RESULTING FROM THE USE THEREOF.
THE INFORMATION CONTAINED HEREIN IS SUBJECT TO CHANGE WITHOUT NOTICE. REVISIONS OR NEW EDITIONS TO
THIS PUBLICATION MAY BE ISSUED TO INCORPORATE SUCH CHANGES.

518854-2960-D KDMU040013
7/20/01

518854-2960-D i KDMU040013
7/20/01
TABLE OF CONTENTS
Page
1.0 DESCRIPTION.............................................................................................................................1
2.0 RECOMMENDED INSTALLATION TOOLS & CABLING............................................................1
3.0 EQUIPMENT HANDLING............................................................................................................1
4.0 FIELD WIRING.............................................................................................................................2
5.0 KD6 Z-SERIES DOME SETUP....................................................................................................3
6.0 TROUBLESHOOTING PROCEDURES ......................................................................................4
6.1 REMOVING THE BOTTOM DOME FROM THE TOP DOME.....................................................5
7.0 MAINTENANCE...........................................................................................................................5
8.0 REPLACEMENT PARTS.............................................................................................................6
9.0 SPECIFICATIONS.....................................................................................................................17

518854-2960-D KDMU040013
7/20/01

518854-2960-D 1 KDMU040013
7/20/01
1.0 DESCRIPTION
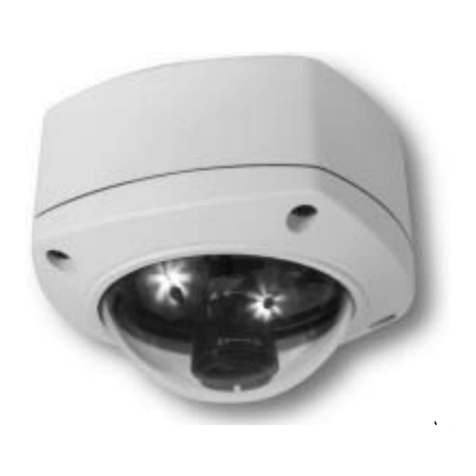
A KD6 Z-Series Dome is a pan and tilt mechanism containing a camera and lens that is controlled
remotely by an operator using a Diamond series control system. The KD6 Z-Series Dome
consists of a top dome, pan and tilt unit, and a bottom dome. The KD6 Z-Series Dome can be
mounted indoor on a ceiling pendant or wall pendant mounting bracket, in a dropped ceiling or a
hard ceiling. There is also a Weather Dome version of the KD6 Z-Series Dome for outdoor
applications. The whole assembly is often referred to as a "dome". The pan and tilt mechanism
with camera and lens is often referred to as a “yoke or "scan".
The indoor pendant top dome can be mounted on Ultrak’s indoor pendant ceiling dome mount or
indoor wall dome mount. The weather dome can be mounted on Ultrak’s outdoor wall mount.
2.0 RECOMMENDED INSTALLATION TOOLS & CABLING
Standard electrical technician tools are required for installing the KD6 Z-Series Dome.
Table 1. RECOMMENDED CABLING AND CONNECTORS
Type Recommended Cable Ultrak
Part Number Maximum Distance
Video Coax, RG-59/U, 75 Ohms
BNC Connector, Crimp On for RG-59/U
BNC Connector, Screw Type for RG-
59/U
849518-0054
842374-0194
842374-0391
1500 Feet (457 Meters)
Data 1 Twisted-Shielded-Pair RS-485 Cable 849518-0334 4000 Feet (1219 Meters)
Power 18 AWG 2-Conductor , Vinyl Jacket 849518-0336 See Gauge Chart for Each
Unit
3.0 EQUIPMENT HANDLING
Domes - It is extremely important to treat the surface of all domes with the same care as you
would a fine camera lens. The surface is easily scratched.
A. Always handle the dome from its outside surface.
B. Only use non-abrasive cleaners for acrylic plastic on the clear and smoked domes.
Pan and Tilt Assembly - The pan and tilt assembly consists of the pan and tilt mechanism, the
camera with zoom lens, power supply board, and digital receiver board. Do not attempt to
remove the camera from the scan assembly. If a camera or lens requires service, the entire
scan assembly must be sent back to the factory.
CAUTION
The Receiver Board and Power Supply Board On The Scan Assembly Have
Static Sensitive Devices. The KD6 Z-Series Dome Assembly Is Shipped In A
Pink Bag That Is Static Dissipating. The Unit Should Be Handled In This Bag
Until Installed. If The Unit Is Shipped, It Must Be Shipped In The Pink Bag Or
An Equivalent Static Dissipating Enclosure.
Camera Lens – Handle the camera lens with extreme care. Never touch the lens surface. Refer
to paragraph 7.0 Maintenance for cleaning the camera lens.

518854-2960-D 2 KDMU040013
7/20/01
4.0 FIELD WIRING
The field wiring for a KD6 Z-Series Dome is terminated at the interface board. Refer to the
installation guide provided for wiring connections.
1. Power - Each KD6 Z-Series Dome requires a separate power source. A 12Vdc or 24Vac
interface board may be provided with the dome.
12Vdc – A 12Vdc - 15Vdc power supply @ 1.1A is required. A minimum of 12Vdc is required
at each dome for proper operation of the scan. The terminal strip accepts 22-14AWG wire
sizes. The following wire sizes and distances represent one power source for one KD6 Z-
Series Dome.
12V DC @ 1.1A
MAX. DISTANCE
AWG FEET METERS
14 215 65
16 135 40
18 85 25
20 50 15
22 30 9
24Vac – A 24Vac ±10% @ 0.75A power supply is required. The terminal strip accepts 22-
14AWG wire sizes. The following wire sizes and distances represent one power source for
one KD6 Z-Series Dome.
24V AC @ 0.75A
MAX. DISTANCE
AWG FEET METERS
14 630 190
16 400 120
18 250 75
20 150 45
22 100 30
2. Control Data - One shielded twisted-pair RS-485 cable is required. The data terminal strip
accepts 24-14 AWG wire sizes. The data lines can be home-run wired or daisy-chain wired
from the control output. Home-run wiring is one scan per control output. Daisy-chain
(parallel) wiring is up to 32 scans per data run with the control output at one end of the run or
in the middle of the run.
The data cable shield should be connected together at each dome, but is not connected at
the dome. Connect the cable shield at the control unit. The maximum distance to the last
dome is 4000 feet.

518854-2960-D 3 KDMU040013
7/20/01
12Vdc Interface Board
Home-Run Wiring Daisy-Chain Wiring (parallel)
Control Output Dome
Interface Board Control Output 1st Dome
Interface Board 2nd Dome
Interface Board
TX+ TB1-1 (+) TX+ TB1-1 (+)
TX- TB1-2 (-) TX- TB1-2 (-)
TB1-3 (+) TB1-1 (+)
TB1-4 (-) TB1-2 (-)
24Vac Interface Board (4x4 Electrical Box)
Home-Run Wiring Daisy-Chain Wiring (parallel)
Control Output Dome
Interface Board Control Output 1st Dome
Interface Board 2nd Dome
Interface Board
TX+ TB2-4 (+) TX+ TB2-4 (+)
TX- TB2-3 (-) TX- TB2-3 (-)
TB2-2 (+) TB2-4 (+)
TB2-1 (-) TB2-3 (-)
3. Video – RG-59/U coaxial cable is recommended for cable runs less than 1500 feet (455
meters). For distances greater than 1500 feet, use RG-11 for distances up to 2500 feet (760
meters). If RG-11 coaxial cable is used, a UHF to BNC connector adapter is required. The
video must be terminated in 75 ohms at the last video device. If the video is not terminated
or double terminated, the resulting picture is poor and ghosting is displayed.
5.0 KD6 Z-SERIES DOME SETUP
Each KD6 Z-Series Dome must be given a unique address. The address (camera number) is
used by the operator at the control system to control the scan. The address is defined using a
JPD series controller. The serial number of the KD6 Z-Series Dome is required to set the
address. The serial number is located on the mounting bracket of the pan and tilt mechanism.
Refer to the KD6 Z-Series Dome operation and programming manual or the JPD Series
Controller manual for setting the address.

518854-2960-D 4 KDMU040013
7/20/01
6.0 TROUBLESHOOTING PROCEDURES
Refer to the drawings in paragraph 8.0 for assistance in locating and identifying parts discussed
in the following table. Refer to paragraph 6.1 and 6.2 for removing the bottom dome and the pan
and tilt mechanism from the top dome. If the solutions in the table do not fix the problem, consult
the factory for technical assistance at 1-800-443-6681 (toll free USA) or 740-756-9222. Any
equipment returned to Ultrak for warranty or service repair must have an Authorization to Return
Material Number (ARM#) for its repair. The ARM# must be clearly marked on all return
packages.
Problem Possible Solution
a. No Video 1. Verify power to all pieces of equipment in the system.
2. If multiple scans and a video switcher are in the system:
a. Make sure the camera is called up on a monitor at the
controller.
b. Bypass the video through the switcher and hook up the scan
directly to a monitor. If video is present, verify correct video
connections to switcher.
3. Power down all system components for 15 seconds and then
return power.
4. On standard units, make sure the video cabling is connected
properly at the BNC connector at the interface board.
5. If multiple scans are in the system, exchange one of the domes.
Set the address of the exchange unit to the existing unit. Call up
the scan using the controller (each unit has a unique address). If
video is present, the problem is isolated to the scan assembly.
b. Video, But No Control 1. Make sure the controller is addressed to the correct scan
(camera).
2. Ensure the camera has been given an address. A JPD series
controller is used to setup the address. Note: You must know the
serial number of the dome to define the address.
3. JPD Series Controllers - Ensure LED or LCD display is lit on the
controller. Unplug the controller, wait 30 seconds, and plug it
back in.
4. Power down all system components for 15 seconds and then
return power. Allow scan to count down.
5. Make sure the data wiring is connected to the terminal strip on the
interface board. Make sure bare wires are not touching each
other. Make sure the wire insulation is stripped back far enough
for a good connection.
6. Make sure the connector from the top dome is plugged into the
RJ-45 connector (J1) on the interface board.
c. Scan operates by itself. 1. Diamond JPD Series Controller – recenter the joystick.
OPT> 3> 3
2. Remove power from all system components and then return
power.
d. Erratic Scan Operation 1. Verify data lines are not broken and are connected properly at the
terminal strip on the interface board.
2. Verify the interface cable from the top dome is seated properly in
the RJ-45 connector on the interface board.
e. Lens Out Of Optical
Focus Power down the unit to reset the camera and lens. If still out of focus
when power is returned to unit, consult factory.
f. Cannot find home or
does not go to PreShot Verify the pan and the tilt rotates freely.
518854-2960-D 5 KDMU040013
7/20/01
Problem Possible Solution
g. Scan drifts in one
direction (up, down, left,
right).
Joystick on JPD series controller out of adjustment. Recenter joystick
and verify coordinate settings.
OPT> 3> 3
View coordinate display of joystick on LCD display.
OPT> 3> 2
Display shows: P-### T-### Z-###
### should be 128 ±10.
If this does not correct problem, consult factory.
h. Scan is jerky. 1. Verify both data lines are connected.
2. A motor may be defective or the wiring to the motor may be
broken.
6.1 REMOVING THE BOTTOM DOME FROM AN INDOOR TOP DOME
Always handle the dome from the outside surface.
Pendant Dome
1. Remove power to the unit.
2. Press in gently on the bottom dome and pull the dome down.
Dropped Ceiling or Hard Ceiling Dome
1. Remove power to the unit.
2. Rotate the bottom dome counterclockwise and lower the dome. If the unit is installed for CE
compliance, remove the screw in the trim ring, then rotate the bottom dome.
6.2 REMOVING THE PAN AND TILT ASSEMBLY
Pendant Dome
1. Remove the power to the unit.
2. Remove the dome from the mount by removing the three M4/8 screws that secure the top
dome to the mount.
3. Remove the bottom dome.
4. Hold on to the pan and tilt assembly and remove the three (3) nuts and lockwashers from
the mounting plate on the top dome. The three (3) nuts secure the pan and tilt assembly to
the top dome.
Dropped Ceiling or Hard Ceiling Dome
1. Remove the power to the unit.
2. Remove the bottom dome.
3. Remove the locking screw on the scan mounting bracket in the top can (refer to the
illustrations on pages 11 and 12).
4. Loosen (do not remove) the two retaining screws in the top can.
5. Rotate the mounting bracket counterclockwise so the retaining screws are aligned with the
large key holes and lower the unit.
7.0 MAINTENANCE
Every three months, perform the following:
1. Make sure the mount is secured.
2. Make sure the dome is secured to the mount.
3. Inspect all connecting cabling for deterioration or other damage.
4. Clean the domes (only if required) using the procedure defined for your dome type.

518854-2960-D 6 KDMU040013
7/20/01
5. Clean the camera lens (only if required). Ultrak recommends purchasing an optical lens
cleaning kit and following the procedures provided with the kit. Do not use facial tissues,
paper toweling, or clothing to clean the lens. Use only a lens cleaning tissue.
Clear Dome and Smoked Dome Cleaning Procedure:
The inside and outside surface of the dome can be cleaned with any non-abrasive cleaning cloth
and cleaning agent that is safe for use on acrylic plastic such as Windex, Glass Plus, or lens
cleaner. To polish the dome, Meguiar’s Mirror Glaze 6 Professional Cleaner/Wax or equivalent
mirror cleaner/wax is recommended.
8.0 REPLACEMENT PARTS
The following drawings and partial material lists are provided to assist in installing and servicing
the KD6 Z-Series Dome. All servicing must be performed by qualified technicians who have
attended an Ultrak training course.
8.1 REPLACING THE CAMERA
Perform the following procedures to replace the camera.
1. Remove power to the pan and tilt.
2. Remove the existing camera.
3. Install the replacement camera.
4. Power up the unit to activate camera.
5. Power down the unit to reset the camera’s baud rate. The unit automatically resets the baud
rate.
6. Power up unit.

518854-2960-D 7 KDMU040013
7/20/01
Pendant Ceiling Mount
Part Number 518855-1030
Item Description
1 Sheet, 14 gauge (.0747) Thk x 4” x 9” Lg. CRS
2 Tube, 1” Dia. X .065 Wall x 6” Lg. CS
3 Plate, 3/16 Thk x 2.875 Dia. CS

518854-2960-D 8 KDMU040013
7/20/01
Wall Pendant Mount
Part Number 518856-1030
Item Description
1 Sheet, 14 gauge (.0747) Thk x 4” x 9” Lg. CRS
2 Tube, 1” Dia. X .065 Wall x 6.75” Lg. CS
4 Plate, 3/16 Thk x 2.875 Dia. CS

518854-2960-D 9 KDMU040013
7/20/01
KD6 Z-Series Dome Indoor Pendant Top Dome
518878-1040 (12vdc)
Replacement Parts
Item Part Number Description
1 518865-1130 Mounting Bracket Ring
2 518866-1120 Spacer Ring
3 518867-1130 8” Upper Dome
4 518868-1120 Interface Cable, 4-foot
5 518852-1020 Assembly, 12V Dome Interface Board
7 873020-1000 Nut, Regular Hex 7mm SST, M4
8 871018-1000 Lockwasher, Spring, SS

518854-2960-D 10 KDMU040013
7/20/01
KD6 Z-Series Dome Indoor Pendant Bottom Dome
Part Number Description
518861-1130 Clear Bottom Dome
518861-2130 Smoked Bottom Dome

518854-2960-D 11 KDMU040013
7/20/01
KD6 Z-Series Dome Indoor Dropped Ceiling Top Can
Part Number 518921-1040
Replacement Parts
Item Part Number Description
1 518461-2140 7” Back Can
2 518916-1130 Mounting Bracket, Scan
4 518868-1120 Interface Cable
9 517082-8130 Drop Ceiling Mount
10 871024-1240 Screw, Pan Phil. Hd., SST, M4 x 24mm Lg.

518854-2960-D 12 KDMU040013
7/20/01
KD6 Z-Series Dome Indoor Hard Ceiling Top Can
Part Number 518940-1040
Replacement Parts
Item Part Number Description
1 518461-3140 7” Back Can
2 518916-1130 Mounting Bracket, Scan
4 518868-1120 Interface Cable

518854-2960-D 13 KDMU040013
7/20/01
Hard Ceiling and Dropped Ceiling Bottom Domes
Part Number Description
518630-1000 Bottom Dome, Smoked with Black Trim Ring
518630-2000 Bottom Dome, Smoked with White Trim Ring
518630-4000 Bottom Dome, Clear with Black Trim Ring
518630-5000 Bottom Dome, Clear with White Trim Ring

518854-2960-D 14 KDMU040013
7/20/01
Outdoor Wall Mount
Part Number 518999-1040
Item Part Number Description
1 519018-1140 Mount
2 519003-1120 Seal
Table of contents
Other Ultrak Security Camera manuals

Ultrak
Ultrak DuraCam VK74A36C User manual

Ultrak
Ultrak KD6 Z Series Owner's manual

Ultrak
Ultrak CSC100BU User manual

Ultrak
Ultrak KC452xMx Series User manual

Ultrak
Ultrak DuraCam User manual

Ultrak
Ultrak HEB10 User manual

Ultrak
Ultrak KC4300E User manual

Ultrak
Ultrak TVC-500 User manual

Ultrak
Ultrak KC440xMP User manual

Ultrak
Ultrak KC5520CN User manual

Ultrak
Ultrak KC-3P User manual

Ultrak
Ultrak KC7400CN User manual

Ultrak
Ultrak KD5 Series User manual

Ultrak
Ultrak HEG14 User manual

Ultrak
Ultrak KC2200CN User manual

Ultrak
Ultrak KC5300 User manual

Ultrak
Ultrak KC-2A User manual

Ultrak
Ultrak KC6300 User manual

Ultrak
Ultrak KC450xMP User manual

Ultrak
Ultrak KC4500MN User manual