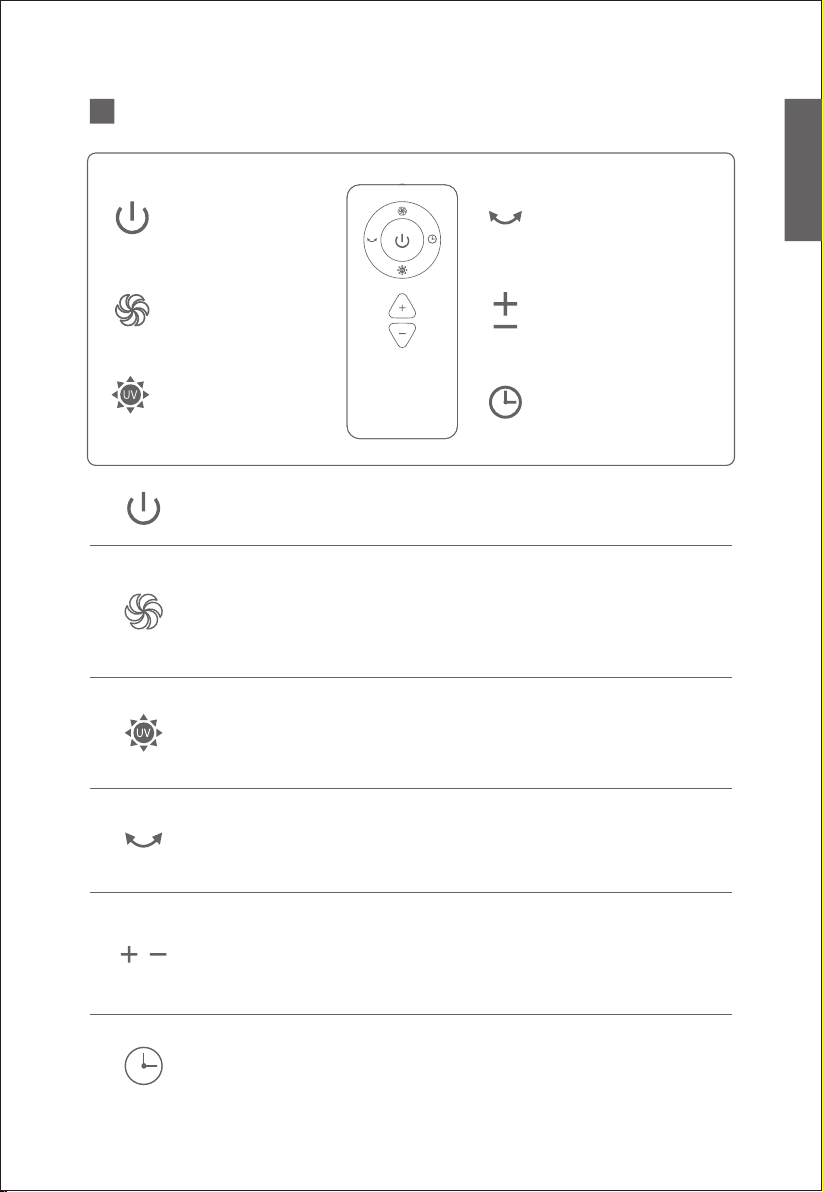
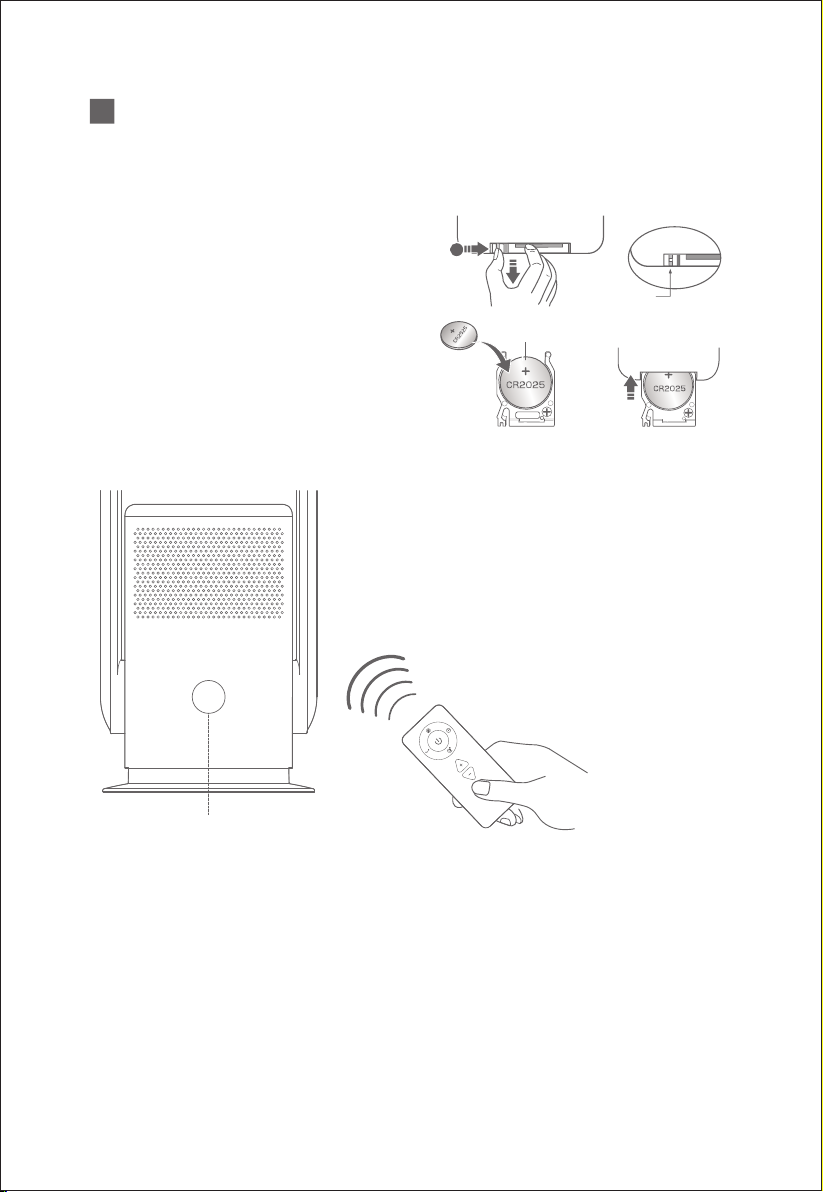
ULTTY SKJ-CR021U User manual

SKJ-CR021U
Air Purifier Bladeless Fan
Manual
Please read this manual before using the machine

Safety Warning
To avoid fire, electric shock, and injury,
you must meet the following requirements.
Otherwise, please follow the respective
national and local electricity regulations.
WARNING
2

3

Air outlet
Air duct
Air inlet
Top cover of
air purifier filter
Touch Screen
button
Base
Power
connection
Air inlet
Top cover of
air purifier filter
Air duct
Host
Product introduction
Oscillation:80±5°
Size:235*230*592mm
Rated Voltage:24V
Rated power:35W
Timer:1-8H
Weight:2.84kg
Scope of delivery: host, power supply, operating instructions
Product Specifications
Model:SKJ-CR021U
Operating voltage/Rated frequency:100-240V~ 50/60Hz
Product Name:Air Purifier Bladeless Fan
4

Remote Control
US
5
Swing:
Start and stop swing
Power button:
Turn the fan on and off
Increase Airflow
Decrease Airflow
9speed levels to choose from
Sleep Timer
1to8 hours of
timed shutdown
Max mode:
Maximum power
Strong airflow
Press the timer button on the remote control to set 1 to 8 hours.
After the timer function is set, other functions can be used normally.
When the device is turned off, the timing setting is also canceled
Press the "strong wind mode" button on the remote control.
The display will show H and the wind strength will increase.
Press again to exit strong wind mode.
(You can also exit the current mode by pressing the " + - "Exit button.)
The device can be switched on and off by pressing the
"ON & OFF" button.
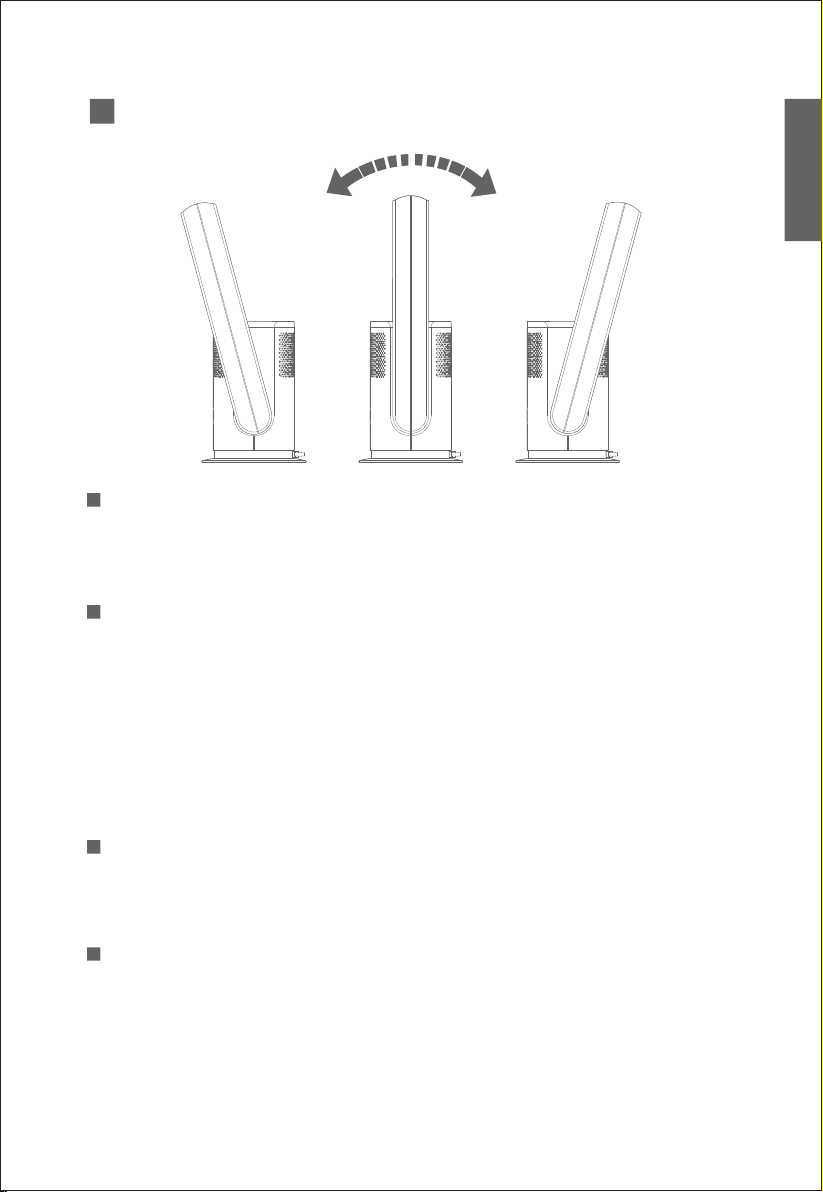
Press the "Oscillation" button on the remote control to switch on
the oscillating function. This fan can swing 80 ° left and right.
Press this button again to end the shaking process.
Press the "+" button on the remote control to increase the air volume.
Press the "-" button to decrease the air volume
There are 9-speed settings.
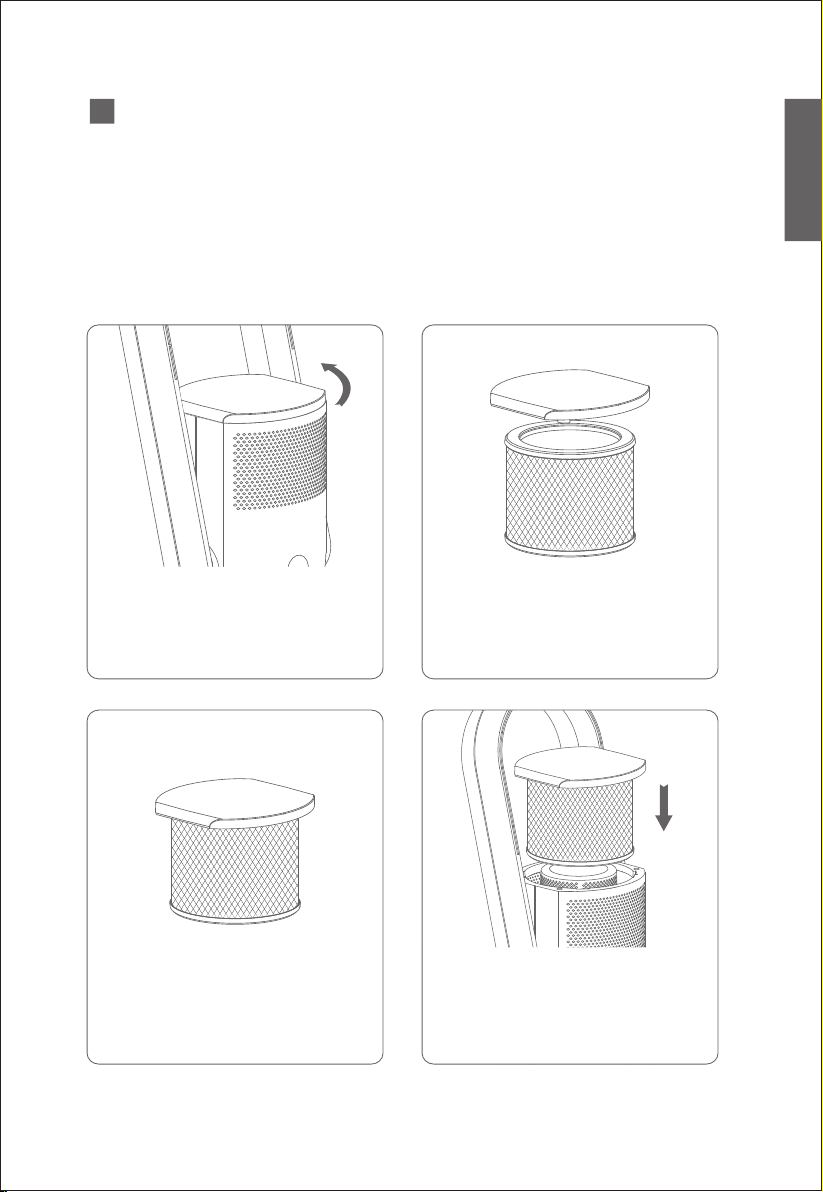
UV sterilization
Sterilization function
Press once to turn on UV sterilization, press again to turn off
UV sterilization.
UV sterilization will automatically shut down after 1 hour.

1.Battery replacement method: as shown in the picture.
Please note the battery direction.
2.Battery:
• Do not charge the battery
• NOT a toy, out reach of kids
• If you are swallowed, see a doctor
Buckle
Signal Receiver
The remote control should be pointed at
the remote control signal receiver on the
display to maximize the remote control
signal.
Possible phenomenon
1. This fan may respond to the remote control of other devices.
2. If you use the remote control of this fan, other devices may respond.
This is due to the overlapping frequencies of the remote control.
There is no quality problem in the product itself. To avoid misuse,
keep the remote control away from other electrical devices during
operation.
6
Remote Control

Host operation
Oscillation
When the host is operating, press and hold the screentouch button
for 1 second. The buzzer beep once and the fan starts to oscillating.
Press and hold the screentouch button again for 1 second. The buzzer
beep once and the fan stops oscillating.
Set the air volume
When the host is operating: Click the button to adjust the air volume
from 1 to 9.
Switch on and off
Connect the power supply, the LED display lights up and the machine
goes into standby mode.
Click the host's power button, the buzzer will beep once and the fan
will start.
Press and hold the power button for 2 seconds, the buzzer will beep
twice and the fan will stop running after you release your hand.
Air outlet setting
Set the wind outlet after fan has stopped.
Hold fan body with one hand and set the wind outlet 15 ° before and after.
US
7

away from
curtains
Please use the fan on a flat platform. Do not place the fan in an
unstable place, such as an inclined or soft surface, to avoid damage
or malfunctions caused by the fan tipping over.
Avoid blocking the air inlet when using. Stay away from the curtains
to avoid objects blocking the air inlet and the fan not working.
Do not place any objects within 30 cm of the air outlet, otherwise
the blower effect will be impaired.
Installation
8

This machine is equipped with an air cleaning filter.
Before using the fan, the filter should be installed in the fan so
that the air can be cleaned.
Installation and replacement method of air cleaning filter:
3. The new filter and top cover
are attached and assembled
with a buckle.
2.Disconnect the old filter
from the top cover.
4.After assembling, put it
back in the main unit and
turn it clockwise to secure it.
Filter replacement
1.Turn the filter system top
cover counterclockwise to
unlock and remove the filter.
US
9

Auto reminder of Filter Replacing
10
display“U”
When the fan turns on the UV
sterilization function,
The UV lamp inside the fan can
effectively kill white
staphylococcus in the air.
UV sterilization function
The fan has a memory function. After a total of 720 hours of
operation, the display (as shown in the figure) lights up cycle in
dicator light when turned on, the buzzer sounds 5 times and the
gear is displayed after 5 seconds.
After replacing the filter screen, the power button on the
remote control device can clear the alarm for 5 seconds and the
operating time is converted again.

Gently wipe the surface of the remote control with a soft, dry
cloth. If it will not be used for a long time, please remove the
button battery in the remote control.
Remote control
Maintenance
Before maintenance work, pull the mains plug
out of the socket.
Use a soft brush or vacuum cleaner to clean the dust at the
air inlet and outlet. If there is too much dust, this can affect
the fan.
Air inlet & air outlet
Power plug
Please clean the power plug with a soft, dry cloth.
1.After the fan has been cleaned, it can
be stored in a plastic bag.
2.Keep away from vibrations and
electrical devices with cooling / heating
function.
3.Do not expose it to direct sunlight,
hot and humid places.
4.Keep out of the reach of kids.
Safekeeping
Gently wipe the fan surface with a soft, dry cloth If the surface
of the fan is dirty, dilute it with a mild detergent and wipe the
surface of the fan with a soft cloth. Then wipe them off with
a dry, soft cloth.
Surface
US
11

Warranty Card
Customer
Name
Address
Tel
Date
12 months
warranty
Inspectors
Dealer
signature
Please fill in the warranty card in detail and stamp the
dealer seal, otherwise it will be invalid.
1.This product is free of charge for service under
normal use within 12 months from the date of purchase.
2.When the warranty card deadline is exceeded and the
parts need to be replaced, the maintenance fee will be
charged as appropriate.
3.During the warranty period, repairs will not be free as
followings:
a. Failure to present warranty card or proof of purchase
(invoice or receipt)
b. Maintenance beyond the warranty period
c. Damage caused by disassembly
d. Damage caused by mistake/negative use (such as
long-term use in harsh environments)
e. Surface aging when in use.
Any quality issue please contact us:
Email:service@u-ultty.com
Web:https://u-ultty.com
12
Other manuals for SKJ-CR021U
1
Table of contents
Other ULTTY Air Cleaner manuals
Popular Air Cleaner manuals by other brands

Powermatic
Powermatic PM1200 Specifications

Alen
Alen T500 user manual

Mainstream Engineering
Mainstream Engineering QwikPure TripleGuard QT2730 installation instructions

TEINNOVA
TEINNOVA covix onair 1600 user manual

iLiving
iLiving ILG8AF8000 owner's manual

American Standard
American Standard IFD AIR CLEANER Service manual