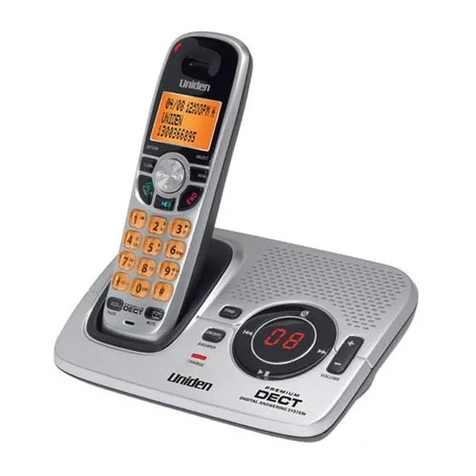
Uniden UCIS-3050C User manual


D’UTILISATION
GUIDE
UCIS-3050C
TÉLÉPHONE MAINS
LIBRES AVEC
AFFICHEUR DE L’APPEL
EN ATTENTE

MANUAL
OWNER’S
UCIS-3050C
Caller ID / Call Waiting,
Speakerphone
Telephone


TABLE DES MATIÈRES
Table des matières
RÉGLAGE ET INSTALLATION DE VOTRE TÉLÉPHONE.......... 1
Introduction ................................................................................ 1
Mesures de sécurité importantes ................................................ 1
Contenu de l’emballage............................................................... 2
Commande et fonctions .............................................................. 3
Installation................................................................................... 5
Installation murale....................................................................... 7
Composition à tonalité“Tone”ou à impulsions“Pulse”............... 8
Réglage de l’angle de visionnement de l’affichage...................... 8
Réglage du contraste de l’affichage ............................................. 8
UTILISATION DU TÉLÉPHONE ............................................... 9
Faire un appel.............................................................................. 9
Éditer un numéro de téléphone avant de le composer ............... 9
Recevoir un appel ....................................................................... 9
Réglage du niveau de volume du combiné ............................... 10
Réglage du niveau du volume du haut-parleur mains libres...... 10
Recevoir un appel en attente .................................................... 10
Permuter entre le combiné et le haut-parleur mains libres....... 11
Recomposition .......................................................................... 11
Mettre un appel en attente........................................................ 11
Mettre un appel en soudine ...................................................... 12
Utiliser le clavier pour entrer un nom....................................... 12
Entrer un nouveau numéro et nom dans la mémoire................ 12
Copier le nom et le numéro de l’appelant sur une
touche de composition abrégée................................................ 13
Touches d’accès aux services du réseau ................................... 14
Annuler l’appel en attente......................................................... 15
Accéder à la boîte vocale........................................................... 15
Reprogrammer les touches d’accès au services du réseau........ 15
Programmer un touche de composition abrégée pour le
service de renvoi d’appel .......................................................... 15
UTILISATION DE L’AFFICHEUR............................................ 17

TABLE OF CONTENTS
Table of Contents
SETTING UP AND INSTALLING YOUR PHONE ....................... 1
Introduction ................................................................................ 1
Important Safety Instructions...................................................... 1
Parts Checklist ............................................................................. 2
Controls and Functions ............................................................... 3
Installation................................................................................... 5
Wall Mounting ............................................................................. 7
ChoosingTouchTone or Pulse Dialing ........................................ 8
Adjusting the DisplayAngle......................................................... 8
Adjusting the Display Contrast .................................................... 8
USING THE TELEPHONE......................................................... 9
Making a Call ............................................................................... 9
EditingTelephone Number before Dialing.................................. 9
Receiving a Call ........................................................................... 9
Adjusting Handset ReceiverVolume.......................................... 10
Adjusting Speakerphone ReceiverVolume................................ 10
Receiving a CallWaiting Call ..................................................... 10
Switching Between the Handset and the Speakerphone .......... 11
Redialing.................................................................................... 11
Putting a Call on Hold ............................................................... 11
Muting a Call ............................................................................. 12
Using the Keypad to Enter a Name ........................................... 12
Storing a New Number and Name in the Memory Buttons ...... 12
Copying the Caller’s Name and Number to a Memory Button . 13
Network ServiceAccess Buttons ............................................... 14
Stop CallWaiting ....................................................................... 15
AccessingVoice Mailbox ........................................................... 15
Re-Programming Network Service Buttons ............................... 15
Programming for One-Touch Call Forwarding .......................... 15
CALLER ID ............................................................................. 17

Caller ID Service and CallWaiting Caller ID Service ................. 17
Caller ID Display........................................................................ 17
New Calls andTotal Calls........................................................... 18
Viewing the Caller ID List ......................................................... 18
Calling Back a Number From the Caller ID List......................... 19
Deleting a Call From the Caller ID List ...................................... 19
DeletingAll Calls from the Caller ID List................................... 20
Using CallWaiting Caller ID ...................................................... 20
In Use Indication ....................................................................... 20
Message Indication .................................................................... 20
Clearing the MessageWaiting Indicator .................................... 21
UNAVAILABLE,PRIVATE CALL and ERROR Messages................ 21
IN CASE OF DIFFICULTY ...................................................... 22
ResettingYourTelephone’s Programming ................................. 22
Maintenance Information .......................................................... 23
Troubleshooting ........................................................................ 23
LIMITED WARRANTY ............................................................ 24

Service de l’afficheur et de l’afficheur de l’appel en attente..... 17
Affichage des données de l’appelant......................................... 17
Nouveaux appels et total des appels......................................... 18
Réviser les données de l’appelant à partir du répertoire de
l’afficheur .................................................................................. 18
Recomposer un appel à partir du répertoire de l’afficheur ...... 19
Effacer un appel du répertoire de l’afficheur............................ 19
Effacer toutes les entrées du répertoire de l’afficheur .............. 20
Utiliser l’afficheur de l’appel en attente.................................... 20
Voyant d’utilisation.................................................................... 20
Voyant de message en attente ................................................... 20
Désactiver le voyant de message en attente dans la
boîte vocale ............................................................................... 21
NON DISPONIBLE,APPEL CONFIDENTIEL et
messages d’ERREUR .................................................................. 21
EN CAS DE PROBLÈMES ....................................................... 22
Réinitialiser les réglages de votre téléphone ............................. 22
Renseignements sur l’entretien................................................. 23
Guide de dépannage.................................................................. 23
GARANTIE LIMITÉE .............................................................. 24

Introduction
INTRODUCTION
Nousvousfélicitonsd’avoirfaitl’acquisitiondevotrenouvelappareil
UNIDEN.Ce téléphone a été conçu et fabriqué selon les normes les
plusstrictesdel’industrieafindevousprocurerfiabilitéetdurabilité,
ainsi qu’une performance exceptionnelle. Ce téléphone peut être
utilisé avec le service de l’afficheur et/ou l’afficheur de l’appel en
attente offerts par votre compagnie de téléphone locale. Ces ser-
vices requièrent un abonnement auprès de votre compagnie de
téléphonelocaleetpeuventnepasêtredisponiblesdansvotrerégion.
Lorsque les services sont disponibles, votre téléphone affichera
toujours le numéro de téléphone et le nom de l’appelant avant que
vous répondiez au téléphone,vous permettant de filtrer vos appels.
En plus des services de l’afficheur,si vous êtes également abonné au
service de la messagerie vocale auprès de votre compagnie de
téléphonelocale,lesvoyantsdemessageenattentevousindiqueront
qu’un nouveau message est présent dans la boîte vocale.
Mesures de sécurité importantes
Vous devez suivre certaines mesures de précaution lorsque vous utilisez
ce dispositif téléphonique; vous réduirez ainsi les risques d’incendie,
d’électrocution et de blessure corporelle.Voici un aperçu de ces mesures:
1. Lire et comprendre toutes les instructions que contient ce
guide d’utilisation.
2. Suivre toutes les mises en garde et avertissements inscrits
sur l’appareil et dans le guide d’utilisation.
3. Débrancher cet appareil des prises téléphoniques avant
de procéder au nettoyage. Ne pas utiliser de nettoyeurs
liquides ni en aérosol. Utiliser un chiffon doux légèrement
humecté d’eau pour le nettoyage.
4. Ne pas utiliser cet appareil près des sources d’humidité ni
lorsque vous êtes mouillé(e). Par exemple, ne pas l’utiliser
dans un sous-sol humide ni près d’une piscine, baignoire,
douche, évier de cuisine ou cuve de lessive.
5. Veiller à stabiliser cet appareil sur les surfaces
d’installation. Des dommages permanents pourraient être
causés à l’appareil si celui-ci tombait, ce qui annulerait
automatiquement sa garantie.
6. Acheminer les cordons d’alimentation et modulaire de
façon à ce que les passants ne les écrasent pas ni ne
trébuchent dessus.
7. Cet appareil doit fonctionner uniquement en respectant
le type d’alimentation indiqué sur la plaque signalétique.
1
Introduction
INTRODUCTION
Congratulationsonthepurchaseofyournewtelephone. Ithasbeen
manufactured to very high quality standards for convenient and
reliable service.This telephonecanbeusedwith“CallIdentification
(Caller ID) Service” and/or “Call Waiting Caller ID Service” that is
provided by your local telephone company. There is a fee for these
services by your local telephone company, and they may not be
availableinallareas.Whenusedwiththeseservices,yourtelephone
displays the telephone number or the telephone number and name
of each caller before you answer the call allowing you to screen
your calls.
InadditiontoCallerIDservices,ifyousubscribetovoicemailservices
from your local telephone company, voice mail waiting indicators
willinformyouthatthereisamessagewaitinginyourvoicemailbox.
Important Safety Instructions
Before using your telephone equipment, basic safety precautions
should always be followed to reduce the risk of fire,electric shock
and injury to persons,including the following:
1. Read and understand all instructions.
2. Follow all warnings and instructions marked on the product.
3. Unplug this product from the telephone jack and the
power outlet before cleaning. Do not use liquid or aerosol
cleaners. Use a damp cloth for cleaning.
4. Do not use this product near water, such as near a bathtub,
sink, laundry tub, in a wet basement, or near a swimming
pool.
5. Do not place this product on an unstable cart, stand, or
table. Serious damage may result if the product falls.
6. Slots or openings in the cabinet and the back and bottom
are provided for ventilation to protect the phone from
overheating. These openings must not be blocked or
covered. The product should never be placed near or over
a radiator or heater.
7. This product should be operated only from the type of
power source indicated on the marking label.
1

8. Do not allow anything to rest on the power cord. Do not
place this product where the cord will be abused by per-
sons walking on it. Do not attach the power cord to build-
ing surfaces.
9. Do not overload wall outlets and extension cords as this
can result in the risk of fire or electric shock.
10. Never push any objects into this product through cabi-
net slots as they may touch dangerous voltage points or
short out parts that could result in a fire or electric shock.
Never spill liquid of any kind on the product.
11. If this product does not operate normally, see the “In
Case of Difficulty” section in this owner’s manual. If you
cannot resolve the problem, or if the product is dam-
aged, refer to the “Limited Warranty” section of this
owner’s manual. Opening the product or reassembling
it incorrectly may expose you to dangerous voltages or
other risks, and will void the warranty.
12. Unplug this product from the wall outlet and refer ser-
vicing to qualified service personnel under the follow-
ing conditions: (a) When the power supply cord or plug
is damaged or frayed. (b) If liquid has been spilled into
the product. (c) If the product has been exposed to rain
or water. (d) If the product does not operate normally
by following the operating instructions. Adjust only
those controls that are covered by the operating instruc-
tions. (e) If the product has been dropped or the cabinet
has been damaged. (f) If the product exhibits a distinct
change in performance.
13. Avoid using a telephone during an electrical storm. There
may be a remote risk of electric shock and/or hearing
damage from lightning.
14. Do not use the telephone near a gas leak even to report
the leak. Parts Checklist
Remember to save your sales receipt in case you ever need
warranty service. Check to make sure your package includes
the items described below:
1.Telephone Base 4.AC/DC Adapter
2.Telephone Handset 5.Handset Cord
3.Telephone Line Cord
Make sure you have a modular wall jack near the place you have
chosen to install the telephone. If you have an older phone jack,
you will need to buy a modular jack adapter.
2

8. Ne pas déposer, sur les cordons, des objets qui pourraient
les écorcher ou les endommager. Ne pas placer l’appareil
là où les personnes risqueraient de piétiner les cordons.
Ne fixez pas le cordon d’alimentation sur les murs.
9. Ne surchargez pas les prises de courant et les rallonges
électriques, ceci risquerait de créer un risque d’incendie.
10. Ne jamais insérer d’objets à travers les fentes d’ouverture
du boîtier de cet appareil. Ceux-ci pourraient entrer en
contact avec des points de tension dangereux ou court-cir-
cuiter des pièces, ce qui risque de déclencher un incendie
ou causer une électrocution. N’échappez jamais de liquide
sur l’appareil.
11. Si cet appareil ne fonctionne pas normalement, se référer à
la section “En cas de problèmes” de ce guide d’utilisation.
Si le problème ne peut pas être résolu, ou si l’appareil est
endommagé, se référer à la section “Garantie limitée” de ce
guide d’utilisation. Le démontage et le remontage incorrects
de l’appareil peut vous exposer à des tensions dangereuses
ou autres risques, ce qui annulerait automatiquement la
garantie.
12. Débranchez l’appareil de la prise de courant et confiez-le à
un centre de service qualifié dans l’une des situations
suivantes : (a) Lorsque le cordon d’alimentation ou la fiche
est endommagé ou écorché. (b) Si du liquide est entrée en
contact avec l’appareil. (c) Si l’appareil a été exposé à la
pluie ou à l’eau. (d) Si l’appareil ne fonctionne pas
normalement en respectant les instructions du guide
d’utilisation. (e) Si l’appareil a été échappé ou si le boîtier
a été endommagé. (f) Si l’appareil démontre une nette
déficience dans sa performance.
13. Évitez d’utiliser le téléphone (autre qu’un téléphone à cor-
don) pendant un orage électrique. Il peut y avoir un faible
risque d’électrocution causé par la foudre.
14. N’utilisez pas l’appareil pour rapporter une fuite de gaz
survenue près de l’endroit où le téléphone est installé.
Vérifier le contenu de l’emballage
Veuillez conserver votre facture d’achat afin de vous prévaloir
de service sous garantie. Assurez-vous que les items suivants se
trouvent dans l’emballage :
1. Socle 2. Combiné 3. Cordon téléphonique
4. Adaptateur CA/CC 5. Cordon du combiné
Assurez-vousd’avoiruneprisemodulaireprèsdel’endroitoùvousdésirez
installerletéléphone. Si vous détenez uneancienne prise téléphonique,
vous devrez vous procurer un adaptateur pour prise modulaire.
2

Commandes et fonctions
COMMANDES
3
ET FONCTIONS
Touche “Clear Msg.” : Appuyez sur cette touche pour mettre le
voyant de message en attente hors fonction.
Touce “Messages” : Appuyez sur cette touche pour composer le
numéro d’accès à la boîte vocale.
Touche de transfert d’appels en/hors fonction“Call Forward On/
Off” : Appuyezsurcettetouchepouractiveroudésactiverletransfert
d’appels.
Touche“Stop Call Wtg.” : Appuyez sur cette touche avant de faire
un appel pour désactiver l’appel en attente pendant cet appel.
LCD Display
Voyant de
messages Contraste
de l’écran
ACL Voyant
d’utilisation
Menu
Plongeon
“Flash”
Touches de
composition
abrégée
Mise en
attente
Hook Switch
Effacer messages
Messages
Sauvegarder
Transfert d’appel
en/hors fonction
Clavier des
touches
Révision/
Recherche
Volume
Désactiver le
transfert d’appel
Mémoire
Touche
“Dial/Enter”
Effacer
Haut-parleur
mains libres
au revoir
Pause Recomposition
Mise en sourdine

Controls and Functions
CONTROLS
3
AND FUNCTIONS
Clear Msg. button:Press to turn off message waiting light.
Messages button:Press to dial voice mailbox access code.
Call Forward on/off buttons:Press to activate or to deactivate call
forwarding.
Stop Call Wtg. button:Before making a call,press to deactivate call
waiting feature for this call.
Review/Search buttons:PresstoreviewcallerIDrecordsortomove
cursor.
LCD Display
Message
light LCD
contrast
In Use
Light
Menu
Flash
Memory
Hold
Hook Switch
Clear Msg.
Messages
Save
Call Forward
on/off
Keypad
Review/Search
Volume
Stop Call
Wtg.
Memory
Dial/Enter
Delete
Mute
Speaker
“Goodbye”
Pause Redial

Volume button:Pressto increase or todecreasespeakeror handset
receiver volume.
Delete button:Presstodeleteonerecord;orpressandholdtodelete
all caller ID records.
Save button:Press to begin programming of a memory button.
Redial button:Press to redial the last number dialed.
Pause button:Presstoinserta3-seconddelayinthedialingsequence
during memory button or directory programming.
LCD Contrast: Press to adjust LCD contrast.
Dial/Enter button: Press to dial the number displayed. Press to
“enter”information during programming.
Menu button:Press to begin or to end display language selection
and area code programming.
Flash button:Press during a call to access calling features by the
telephone company.
Memory buttons:These memory buttons can be pre-programmed
with number and name for one-touch dialing.
Hold button:Press to put a call on hold.
Speaker button:Press to activate or to deactivate speakerphone.
Goodbye button:Press to hang up a call at any time.
Message light:Flash to indicate message is at telephone company’s
voice mailbox.
In Use light:Flash toindicate this phoneor anotherextension is in
use.
4

Touches de volume :Appuyez sur ces touches pour augmenter ou
diminuer le niveau de volume.
Touche“Delete”: Appuyezsurcettetouchepoureffacerunedonnée
del’afficheurou appuyezsurcette toucheetmaintenez-laenfoncée
pour effacer toutes les données de l’afficheur.
Touche “Save” : Appuyez sur cette touche pour débuter la
programmation de la touche de composition abrégée.
Touche“Redial” : Appuyez sur cette touche pour recomposer le
dernier numérocomposé.
Touche“Pause” : Appuyez sur cette touche pour insérer une pause
de trois secondes dans la séquence de composition pendant la
programmation.
Touche“LCD Contrast” : Appuyez sur cette touche pour régler le
niveau de contraste de l’écranACL.
Touche“Dial/Entrer” : Appuyez sur cette touche pour composer
le numéro affiché. Appuyez sur cette touche pour“entrer”des in-
formations pendant la programmation.
Touche“Menu”:Appuyezsurcettetouchepourdébuteretterminer
lasélectiondelalangued’affichageetlaprogrammationdel’indicatif
régional.
Touche“Flash” (Plongeon) : Appuyez sur cette touche pendant un
appel pour accéder aux fonctions offertes par la compagnie de
téléphone locale.
Touchesdecomposition abrégée“Memory” : Cestouchespeuvent
être programmées afin de permettre la composition abrégée à une
touche.
Touche de mise en attente“Hold” : Appuyez sur cette touche pour
mettre un appel en attente.
Touche du haut-parleur mains libres“Speaker” : Appuyez sur cette
touche pour activer ou désactiver le haut-parleur mains libres.
Touche “Goodbye” : Appuyez pour raccrocher un appel en tout
temps.
Voyant “Message” : Clignote pour vous indiquer la présence de
messages dans la boîte vocale.
Voyant“In Use” : Clignote pour vous indiquer que cet appareil ou
un autre poste est en cours d’utilisation.
4

Installation
INSTALLATION
Installation
1. Insérezuneextrémitéducordontéléphoniqueplatdanslaprise
portant l’inscription “TEL.LINE” (à la ligne téléphonique) du
socle et l’autre extrémité,dans votre prise modulaire murale.
2. Raccordez l’adaptateur CA dans une prise électrique et l’autre
extrémité dans la prise“DC 9V”(9V CC) située sous le socle du
téléphone. N’utilisez l’appareil qu’avec une source
d’alimentation polarisée de classe 2 de 9V CC.300 mA dotée
d’un adaptateur secteur CA/CC.
Remarque importante : UnadaptateurCAestnécessaire
pour alimenter cet appareil. Si vous désirez conserver la
mémoire et le fonctionnement de l’afficheur pendant une
panneélectrique,vouspouvezyinstallertroispilesdetype
‘AA’(non incluses) à l’intérieur du combiné, qui agiront
comme source d’alimentation de sauvegarde. Si vous
installez les piles,assurez-vous de respecter la polarité,tel
qu’inscritsurlediagramme(lessignesplusoumoins)situé
à l’intérieur du compartiment des piles. Avertissement :
Cet appareil n’est pas conçu pour fonctionner avec
des piles rechargeables. Ne les utilisez pas.
3. Raccordez une extrémité du cordon spiralé du combiné à la
prise du combiné et l’autre extrémité,à la prise du combiné se
trouvant sur le côté du socle.
4. Si vous désirez utiliser un répondeur téléphonique, un
télécopieur ou autre appareil conjointement avec votre 5

Installation
INSTALLATION
Installation
1. Plugone endof theflat telephoneline cordintothe linejackon
the back of the phone where it is labeled“TEL.LINE” and plug
the other end into your modular telephone wall jack.
2. Connect the AC adapter to an electrical wall outlet and then
connect theAC adapter plug to the“DC 9V” jack on the back of
the phone. Use only with a Class 2 power source, plug
polarity, 9V DC, AC adapter.
Important Note: AnACadapterisusedtopowerthisunit.
If you want to maintain full operation of phone duringAC
power failure, you may also install 3AA batteries (not
included)intothebatterycompartmentasabackuppower
source. If you install batteries, be sure to install them
correctlybyfollowingthepolaritydiagram(plusandminus
signs)ontheinsideofthebatterycompartment. Warning:
This unit is not designed to work with rechargeable
batteries. Do not use them.
3. Connect one end of the coiled Handset Cord to the jack on
the left side of the phone and connect the other end of the
coiled Handset Cord to the jack on the handset
4. If you wish to use anAnswering Machine,Modem,Fax Machine
or other devices along with your Caller ID telephone,you may
5

6
plugoneof thesedevices intothe“DATA”jackon theright side
of the phone. The important thing to remember is that for the
CallerIDfeaturestoworkproperlytheCallerIDtelephonemust
be plugged directly into the wall jack and other devices must
be plugged into the Caller ID phone.
5. Selecting a language
When the phone is powered up for the first time,the display
flashes“SELECT LANUGAGE” and“>ENG ESP FRA”.
To select English, press the “1”
button.
To select Spanish, press the “2”
button.
To select French, press the “3”
button.
Then,press the Dial/Enter but-
ton to confirm the selection.
6. Program your area code
(A) After selecting the language,the
display flashes “ENTER AREA
CODE” and“7 DIGITS DIAL”.
(B) If you dial your local calls using
7 digits (e.g.,555-1212),then en-
teryourlocalareacode,pressthe
Dial/Enter button, and go to
Step C.
If you dial your local calls using
10 digits (e.g., 303-555-1212),
then enter“000”as the area code
for 7 digits dial,and press the Dial/Enter button to go to Step
C.
(C) The display flashes “ENTER AREA CODE” and “10 DIGITS
DIAL”.
Table of contents
Other Uniden Telephone manuals

Uniden
Uniden CEZAI998A Service manual

Uniden
Uniden FP1355 User manual

Uniden
Uniden DSS8955 User manual

Uniden
Uniden FP103 User manual

Uniden
Uniden DXI860 User manual

Uniden
Uniden CEZ260 User manual

Uniden
Uniden DECT1035 User manual

Uniden
Uniden D1688 User manual

Uniden
Uniden FP100 User manual

Uniden
Uniden FP1100 User manual

Uniden
Uniden XS215 User manual

Uniden
Uniden DECT1363 Series User manual

Uniden
Uniden FP105H User manual

Uniden
Uniden DECT1363 Series User manual

Uniden
Uniden MC 722 User manual

Uniden
Uniden EVOC2 User manual

Uniden
Uniden D3588 User manual

Uniden
Uniden DGMax DGA940 User manual

Uniden
Uniden FP101 User manual

Uniden
Uniden FP204 User manual