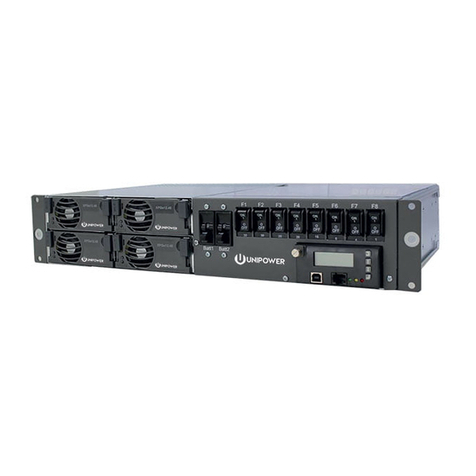
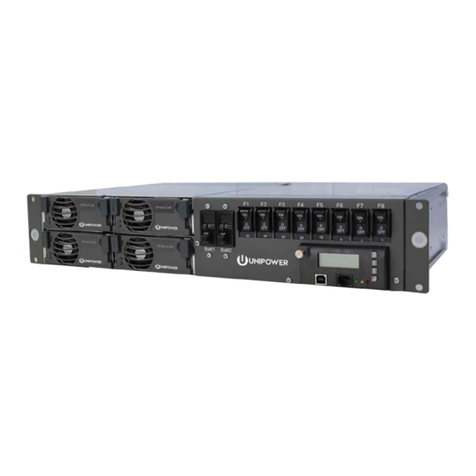
Unipower Bluestrak Series User manual

Page 2
BLUESTREAK SERIES
INSTALLATION & OPERATING MANUAL
POWERING TECHNOLOGY
Document Number: BLUESTREAK-MAN Rev. 6 bluestreak-man-rev6-0719.indd
Contents
1.0 INTRODUCTION ...............................................................................................................4
2.0 STANDARD FEATURES ...................................................................................................5
3.0 SUMMARY OF PRODUCT LINE .....................................................................................5
4.0 SAFETY WARNINGS.........................................................................................................6
5.0 WARRANTY (summary) ....................................................................................................6
6.0 UNPACKING AND INSPECTION.....................................................................................6
7.0 MODULE SPECIFICATIONS............................................................................................7
8.0 FRONT PANEL DESCRIPTION........................................................................................7
9.0 DESCRIPTION OF OPERATION......................................................................................9
10.0 MECHANICAL SPECIFICATIONS.................................................................................14
11.0 SAFETYAND INDUSTRY STANDARDS......................................................................15
13.0 PARALLEL OPERATION ................................................................................................19
14.0 MODULE INSTALLATION.............................................................................................20
15.0 COMPATIBLE 19-INCH POWER SHELVES .................................................................21
16.0 MECHANICAL DIMENSIONS .......................................................................................26
17.0 SHELF INSTALLATION..................................................................................................27
18.0 MAINTENANCE..............................................................................................................29
19.0 SETUPAND TESTING ....................................................................................................30
20.0 PMBUS DEMONSTRATION PROGRAM......................................................................32
21.0 TROUBLESHOOTING GUIDE.......................................................................................35
REV DESCRIPTION CHK’d & APPR’d / DATE
6 PCO# 45394 MM / 07-31-19

Page 3
BLUESTREAK SERIES
INSTALLATION & OPERATING MANUAL
POWERING TECHNOLOGY
Document Number: BLUESTREAK-MAN Rev. 6 bluestreak-man-rev6-0719.indd
FIGURES
Figure 1 - BLUEstreak Module & Power Shelf...............................................................................4
Figure 2 - Front Panel Detail ...........................................................................................................7
Figure 3 - Possible LED Combinations...........................................................................................8
Figure 4 - Timing Diagram............................................................................................................13
Figure 5 - Module Dimensions......................................................................................................14
Figure 6 - Module Rear View showing connection details............................................................15
Figure 7 - Mating Interface Board.................................................................................................16
Figure 8 - Connection Diagram for Parallel Operation .................................................................19
Figure 9a - Model TBSR1U4Awith IEC Connectors ...................................................................21
Figure 9b - Model TBSR1U4B with Terminal Block Connections...............................................21
Figure 10a - Model TBSR1UC with IEC Connectors...................................................................23
Figure 10b - Model TBSR1U4D with Terminal Block Connections.............................................23
Figure 11 - Power Shelf Outline ....................................................................................................26
Figure 12 - AC Screw Terminal Detail ..........................................................................................27
Figure 13 - DC Bus Bar Terminal Detail.......................................................................................28
Figure 14 - PMBus Demonstration Program Screen Shot.............................................................32
Figure 15 - PMBus Command Summary.......................................................................................34

Page 4
BLUESTREAK SERIES
INSTALLATION & OPERATING MANUAL
POWERING TECHNOLOGY
Document Number: BLUESTREAK-MAN Rev. 6 bluestreak-man-rev6-0719.indd
OPERATING MANUAL
BLUESTREAK SERIES FRONT-ENDS & RECTIFIERS
1.0 INTRODUCTION
This Operating Manual should be read through carefully before installing and operating the
BLUEstreak Series Front-Ends and Rectiers.
BLUEstreak is a family of high density hot-swappable, modular Front-Ends and Rectiers producing
up to 2000 watts output power. There are 6 standard models with dierent output voltages and power
levels. The modules are ultra-compact with power density up to 24 watts per cubic inch. The modules
have automatic load sharing and active output ORing circuit so they can be hot-swapped while the
system is operating. Using PMBus compliant serial communications, status and control data can be
passed between a host system or power management unit and the module..
Front panel mounted LEDs indicate various status or fault conditions and +5V & 12V standby outputs
are included. Operating temperature range is -40°C to +70°C.
BLUEstreak modules can be fully integrated into an OEM host system or alternatively installed into
one of 4 dierent 1U high 19” rack-mount power shelves. These power shelves may be connected
in parallel for increased system capacity.
Figure 1 below shows a BLUEstreak module and four modules installed into one of the power shelves.
.
Figure 1 - BLUEstreak Module & Power Shelf

Page 5
BLUESTREAK SERIES
INSTALLATION & OPERATING MANUAL
POWERING TECHNOLOGY
Document Number: BLUESTREAK-MAN Rev. 6 bluestreak-man-rev6-0719.indd
2.0 STANDARD FEATURES
Up to 92% Eciency Power Density to 24W/Cu. Inch
1U High: 1.6” Hot Swappable
-40°C to +70°C Operation Integral Active Output ORing Circuit
Wide Range AC Input Class B EMI Filter
Up to 2000W Output LED Indicators
>0.98 Power Factor PMBus Serial Communications
Output Voltages: 12 to 54.4VDC Variable Speed Cooling Fans
3.0 SUMMARY OF PRODUCT LINE
3.1 Standard Modules
FRONT-END / RECTIFIER MODULES
MAX.
POWER OUTPUT
VOLTAGE OUTPUT
CURRENT INPUT
VOLTAGE1, 2 INPUT
CURRENT3 MODEL
NO.
2000W
1500W 54.4VDC 37.0A
28.0A 180-264VAC
85-132VAC 10A
14A RBSR48/37
1500W 54.4VDC 28.0A 85-264VAC 14A/7.5A RBSR48/28
2000W
1500W 48.0VDC 42.0A
31.0A 180-264VAC
85-132VAC 10A
14A TBSR7000
1632W
1469W 27.2VDC 60.0A
54.0A 180-264VAC
85-132VAC 8.2A
13.5A RBSR24/60
1469W 27.2VDC 54.0A 85-264VAC 13.5A/7.6A RBSR24/54
1440W 24.0VDC 60.0A 85-264VAC 13.3A/7.3A TBSR5000
1360W 13.6VDC 100.0A 85-264VAC 12.5A/7A RBSR12/100
1200W 12.0VDC 100.0A 85-264VAC 11.0A/6.5A TBSR3000
Notes:
1. Models showing two output power levels with dual AC input ranges will operate over the
full range from 85VAC to 264VAC, automatically limiting output current according to the
actual input voltage range applied.
2. All units also operate from 90-420VDC, taking into account the same conditions as note 1.
3. Input currents shown are nominal values at 120VAC/240VAC as appropriate.
3.2 Power Shelves
4-BAY 19” SHELF SYSTEM ORDERING GUIDE
MAX.
POWER DESCRIPTION MAX.
CURRENT MODEL
NO.
8000W Single Output Bus
IEC60320-C20 Input (AC only) 400A TBSR1U4A
8000W Single Output Bus
Terminal Block Input (AC or DC) 400A TBSR1U4B
8000W Dual Output Bus
IEC60320-C20 Input (AC only) 200A/200A TBSR1U4C
8000W Dual Output Bus
Terminal Block Input (AC or DC) 200A/200A TBSR1U4D
Blanking kit for unused position, order pt. no. 775-1501-0000.

Page 6
BLUESTREAK SERIES
INSTALLATION & OPERATING MANUAL
POWERING TECHNOLOGY
Document Number: BLUESTREAK-MAN Rev. 6 bluestreak-man-rev6-0719.indd
4.0 SAFETY WARNINGS
4.1 These power supplies have hazardous external and internal voltages. They should be handled,
tested and installed only by qualied technical persons who are trained in the use of power
systems and are well aware of the hazards involved.
4.2 The input terminals are at hazardous voltage potentials. Do not touch this area when power
is applied.
4.3 When operating this power supply, the chassis ground terminal must be connected to safety
ground by means of a three-wire AC power line to minimize electrical shock hazard and to
ensure low EMI (electromagnetic interference).
4.4 The internal voltages are at hazardous potentials. The power supply cover should not be
removed. There are no user-serviceable components in these units. Removing the cover
of the power supply will void the warranty.
5.0 WARRANTY (summary)
BLUEstreak Series Front-Ends and Rectiers are warranted for three (3) years from date of shipment
against defects in material and workmanship. This warranty does not extend to products which have
been opened, altered or repaired by persons other than persons authorized by the manufacturer or to
products which become defective due to acts of God, negligence or the failure of customer to fully
follow instructions with respect to installation, application or maintenance.
For a complete text of UNIPOWER’s warranty conditions please request a copy from your local
Sales Oce.
6.0 UNPACKING AND INSPECTION
6.1 This unit was carefully tested, inspected and packaged for shipment from our factory. Upon
receipt the unit should be carefully unpacked and inspected for any damage in shipment.
6.2 If there is evidence of damage, do not attempttoinstall theunit. The freight carrier should
be notied immediately and a claim for the cost of the unit should be led with the carrier
for direct reimbursement. Be sure to include the model and serial number of the damaged
unit in all correspondence with the freight carrier. Also save the shipping carton and packing
material as evidence of damage for the freight carrier’s inspection.
6.3 UNIPOWER LLC will cooperate fully in case of any shipping damage investigation.
6.4 Always save the packing materials for later use in shipping the unit. Never ship this unit
without proper packing.

Page 7
BLUESTREAK SERIES
INSTALLATION & OPERATING MANUAL
POWERING TECHNOLOGY
Document Number: BLUESTREAK-MAN Rev. 6 bluestreak-man-rev6-0719.indd
7.0 MODULE SPECIFICATIONS
The following specications are typical at 25°C unless otherwise noted.
INPUT
Voltage Range..................................................................See Model Table
Power Factor......................................................................................>0.98
Total Harmonic Distortion, Max.............................................................. 5%
Frequency......................................................................................47-63Hz
Inrush Current Limiting, Max. ..................................................... 50A Peak
EMI Filter, Conducted.......................................FCC20780 pt. 15J Curve B
.........EN55022
Curve B
Fast Transients......................................................................EN61000-4-4
Surges...................................................................................EN61000-4-5
Remote Adjust...............................................................................0 to +5V
Input Protection 1 ...........................................................Internal Fuse, 25A
OUTPUT
Current & Voltage........................................................................See Table
Output Power..........................................................................1200-2000W
Voltage Adjustment Range 2
48V / 54.4V.................................................................................30-60V
24V / 27.2V.................................................................................15-30V
12V / 13.6V................................................................................7.5-15V
Standby Output 3.......................................................................[email protected]
.............
Line & Load Regulation, Max. ............................................................ 0.3%
Holdup Time ..................................................................................10msec.
Overvoltage Protection................................................................................
Latch O
Filtering: Wideband Noise, 20MHz BW........................................... 200mV
Current Limit 4..........................105-115% Rated Current (Programmable)
Eciency (54.4VDC @ 2000W rated)
100% Load ...............................................................................to 91.6%
75% Load ...............................................................................to 92.0%
40% Load ...............................................................................to 91.0%
SAFETY CERTIFICATIONS
UL60950-1 2nd Ed., CSA22.2 No. 60950-1 2nd Ed., EN60950-1 2nd Ed.
STATUS INDICATORS
STATUS.................................................................................... Green LED
FAULT...........................................................................................Red LED
ALARM SIGNALS (open drain, TTL compatible)
ACOK ................................................... AC present, 5V standby operating
DCOK.................................................... DC output within -10% of nominal
TEMPOK .................................................Internal temperature within limits
FANOK ....................................................................Fans running correctly
PM Bus
Version Compliance............................................................................... 1.1
ENVIRONMENTAL
Operating Temp. Range 5 ..................................................-20°C to +70°C
Output Current Derating......................................... 2.5%/°C, 50°C to 70°C
Storage Temp. Range........................................................ -40°C to + 85°C
Humidity........................................................0% to 95%, Non-Condensing
ESD..........................................Bellcore GR-1089-Core and EN61000-4-2
MTBF, 35oC (Bellcore)........................................................200,000 Hours
Cooling ..............................................................Integral Ball Bearing Fans
PHYSICAL SPECIFICATIONS
Case Material ......................................................................................Steel
Case Dimensions, Inches (mm) ....................... 1.60 H x 4.00 W x 13.70 D
......(40.6 x 102 x
347.9)
Weight ...............................................................................4.8 lbs. (2.2 kg.)
Notes:
1. External protection required when operating from HVDC.
2. When programmed via PMbus and may require adjusting DCOK and OVP settings.
3. Total standby power limited to 9.6W.
4. Subject to absolute power limit of 2000W + tolerance.
5. Startup at -40C, but output is not enabled until internal temperature reaches -20C
8.0 FRONT PANEL DESCRIPTION
Figure 2 - Front Panel Detail

Page 8
BLUESTREAK SERIES
INSTALLATION & OPERATING MANUAL
POWERING TECHNOLOGY
Document Number: BLUESTREAK-MAN Rev. 6 bluestreak-man-rev6-0719.indd
8.1 PUSH BUTTONS
The two push buttons located just above the LEDs can be used to adjust the output voltage
when the output is enabled. These buttons are labelled V▲ and V▼. Short presses for a
fraction of a second adjust the output voltage at the output voltage setting resolution. If the
button is held down, the rate of change increases to around 1V/s after 10s. If both buttons
are pressed together, the button adjust is cleared to zero. The PMBus can read the button
adjust value and also clear the value. The PMBus can also be used to enable or disable the
buttons. Note that it may be necessary to adjust the settings of DCOK and OVP using the
PMBus in order not to encounter these when adjusting with the push buttons over a wide
voltage range.
8.2 FRONT PANEL INDICATORS
The two front panel indicators together indicate the status of the power module.
Green LED (top)
LED
Status Condition
ON DCOK is TRUE
FLASHING DCOK is FALSE - unit inhibited
OFF DCOK is FALSE - unit not inhibited
Red LED (bottom)
LED
Status Condition Possible causes
ON DC output OFF Temperature above/below allowed limits.
OVP.
Overcurrent or Short Circuit (DCOK goes FALSE).
Processor Failure. (Green LED OFF).
FLASHING DC output ON
(warning) Fans below expected speed.
Temperature high/low.
Output current close to maximum.
Output on but DCOK FALSE.
AC input voltage outside range.
OFF DC output ON
All posible conditions for the LEDs are shown opposite.
Figure 3 - Possible LED Combinations

Page 9
BLUESTREAK SERIES
INSTALLATION & OPERATING MANUAL
POWERING TECHNOLOGY
Document Number: BLUESTREAK-MAN Rev. 6 bluestreak-man-rev6-0719.indd
9.0 DESCRIPTION OF OPERATION
9.1 Power Outputs
The power output terminals provide the main output power of the unit. The output voltage
is adjustable by means of the front panel recessed push buttons or by programming with the
PMBus or by using the analogue remote adjust pin. Note that all of the power pins must
be used for correct operation and to avoid overheating of the connector. The power output
terminals are isolated from chassis ground to a maximum voltage of 2000Vdc.
9.2 I/O Signals
The # symbol in the following text is used to denote an active low signal.
9.2.1 Sense +Ve, Sense –Ve
The sense signals are intended to be connected to the point of load so that voltage drop in
the load cables can be compensated for. The amount of compensation is limited to 0.25V
per wire. Care must be taken when using the sense signals as if the power connections to
the load are interrupted by disconnection or circuit breaker with the senses still connected
then damage may occur to the power supply and sense wiring. Sense +Ve and Sense -Ve
are internally connected to the module output power terminals using 10 Ohm resistors so
that if the senses are not connected the output will still be regulated.
Sense -Ve is also used as the return path for some of the other I/O signals.
9.2.2 Current Share
This signal is connected between all modules required to share a load. This signal is capable
of driving up to 16 modules. The return path for this signal is Sense -Ve and that signal
should also be connected between all modules for correct sharing operation.
9.2.3 Current Monitor
This analogue signal provides a voltage proportional to the output load current of the module.
The return path for this signal is Sense -Ve. The full scale voltage for nominal full load
current is 3.0V.
9.2.4 Standby Return
This is the return path for many of the module signals. It and the associated signals are
isolated from the main power outputs with isolation voltage of up to 100Vdc. It is also
isolated from chassis ground up to 2000Vdc.
9.2.5 Remote Adjust
This signal can be used to adjust the output voltage. The return path for this signal is Sense
-Ve.
The characteristic of remote adjust varies for dierent BLUEstreak models. The table below
shows the typical characteristic for a TBSR7000 model which has its default output set to
48.00V.

Page 10
BLUESTREAK SERIES
INSTALLATION & OPERATING MANUAL
POWERING TECHNOLOGY
Document Number: BLUESTREAK-MAN Rev. 6 bluestreak-man-rev6-0719.indd
Remote Adjust
Voltage Output Voltage
48VDC 24VDC 12VDC
0 24.0 11.82 6
0.5 29.0 14.35 7.25
1.0 34.2 16.84 8.5
1.5 39.4 19.35 9.75
2.0 44.2 21.9 11.01
2.5 49.1 24.3 12.2
3.0 54.2 26.82 13.5
3.5 OVP Operation 29.32 14.7
V/V slope 10V/V 5V/V 2.5V/V
9.2.6 5VSB, 12VSB
These are the standby supplies. The 5V and 12V supplies are always present when theAC
is within the operating range of the module. The maximum current available from 5VSB
pin is 1.8A and from 12VSB is 0.8A. However these maximum currents are not available
simultaneously and a maximum of 9.6 Watts is available from the two outputs combined.
The return for these power rails is standby return. Both of these standby supplies have
internal ORing diodes so that they may be connected to the same outputs of additional units
directly on the backplane.
9.2.7 #ACOK
This signal provides an open drain output that indicates the status of the AC input. The
signal is normally low for the OK state but is programmable to be normally high using the
PMBus. The output is capable of supporting voltages of up to 30V and will sink current
up to 30mA. The return path for this signal is standby return. The #ACOK signal is also
available within the status bytes of the PMBus. The #ACOK signal will give typically 2ms
of warning at full load (TBSR7000 2000W) before the output loses regulation.
9.2.8 #DCOK
This signal provides an open drain output that indicates that the DC output voltage is
below a dened threshold. The default level is 90% of the nominal output voltage but is
programmable to other levels by the PMBus. The signal is normally low for the OK state but
is programmable to be normally high using the PMBus. The output is capable of supporting
voltages of up to 30V and will sink current up to 30mA. The return path for this signal is
standby return. The #DCOK signal is also available within the status bytes of the PMBus.
9.2.9 #TEMPOK
This signal provides an open drain output that indicates that the power supply internal
temperature is within a safe operating range. The default levels are greater than -20°C and
less than 95°C but are programmable to other temperatures by the PMBus. The signal is
normally low for the OK state but is programmable to be normally high using the PMBus.
The output is capable of supporting voltages of up to 30V and will sink current up to 30mA.
The return path for this signal is standby return. The #TEMPOK signal is also available
within the status bytes of the PMBus.

Page 11
BLUESTREAK SERIES
INSTALLATION & OPERATING MANUAL
POWERING TECHNOLOGY
Document Number: BLUESTREAK-MAN Rev. 6 bluestreak-man-rev6-0719.indd
9.2.10 #FANOK
This signal provides an open drain output that indicates that the fans speeds are more than
80% of the required speed. The signal is normally low for the OK state but is programmable
to be normally high using the PMBus. The output is capable of supporting voltages of up
to 30V and will sink current up to 30mA. The return path for this signal is standby return.
The #FANOK signal is also available within the status bytes of the PMBus.
9.2.11 #Module Present
This signal can be used to detect if a module is present. It is connected to standby return
when the module is present. This signal can sink up to 30mA.
9.2.12 #Enable
This signal is used to enable the power supply. This pin engages after the power terminals
when plugging in the module and disengages before the power terminals when unplugging
the module. It is intended to control hot-plugging to avoid burning connector pins caused
by arcing of high currents. The return path for this signal is Sense –Ve. The #Enable pin
should be connected to Sense -Ve on the backplane for correct operation.
9.2.13 Control
This signal can be used to control the main output of the power supply in order to turn it
on and o. The default is that a low signal on this pin will turn the main output o. This
function can be changed using PMBus so that either a high signal will turn the main output
o or the pin is ignored altogether. This behaviour can allow a system to be setup so that
the main output will not come on until commanded by a supervisory circuit. The control pin
is returned to standby return. The driving circuit should be capable of sinking and sourcing
at least 0.5mA.
9.2.14 SCL, SDA
These are the serial data bus (PMBus) signals used for digital communication. This
communication bus is similar to the standard I²C bus but does vary in some ways. The
voltage levels and timing behaviour are consistent with the SMBus standard revision 1.0.
Please refer to this standard for details. For details of the PMBus protocol and commands
implemented, please refer to the PMBus standard revision 1.1 and the BLUEstreak software
manual respectively. The PMBus signals are returned to standby return. They require pull-
up resistors or active pull-up circuits to 3.3V or 5V.
9.2.15 #SMBAlert
This signal can be used in conjunction with the SCLand SDAserial bus signals to determine
when a fault or warning condition exists. The signal is latching so that if a warning or fault
condition disappears the signal will not be cleared. To clear the signal the PMBus master
must respond to the alert as detailed in the PMBus specication. Using this method provides
for a more ecient way of detecting faults than polling but polling the PMBus registers
can still be done. The #SMBAlert signal is returned to standby return. It requires pull-up
resistors or active pull-up circuits to 3.3V or 5V.

Page 12
BLUESTREAK SERIES
INSTALLATION & OPERATING MANUAL
POWERING TECHNOLOGY
Document Number: BLUESTREAK-MAN Rev. 6 bluestreak-man-rev6-0719.indd
9.2.16 GA0, GA1, GA2, GA3, GA6
These are the PMBus interface address lines. They are used to set the hardware address of
each module on the backplane. Each module should have a unique address when connected
using the same serial bus.
The address lines should either be tied high (to 5VSB) for ‘1’ or low (standby return) for
‘0’. The return path for these lines is standby return.
9.3 Timing
The following table and diagram give details of signal and power timing during power up
and power down cycles.
Value Min. Typ. Max. Description
TACON_DELAY 500ms 550ms 1000ms Delay fromAC input voltage applied to output in
regulation
TVOUT_HOLDUP 10ms 12ms - Time from loss of AC input to DC output voltage falling
to 90% of original value.
Timing given is for 2000Watt load on 48V model.
TVSB_HOLDUP 20ms 30ms - Time from loss of AC input to VSB going out of
regulation. Typical timing for full load on all outputs.
TVSB_ON 50ms 70ms 200ms Delay fromAC input voltage applied to VSB in
regulation.
TACOK_ON 50ms 70ms 200ms Time from AC input voltage applied to ACOK being low
(good)
TACOK_OFF 9ms 10ms 11ms Time from loss of AC input to ACOK output being high.
Timing given is for 2000Watt load on 48V model.
TON_RISE 50ms Time for DC output to rise to nal regulated value.
This is reprogrammable with PMBus.
T5VSB_RISE 3ms 5ms 10ms Time for 5VSB to rise to nal regulated voltage.
T12VSB_RISE 3ms 5ms 10ms Time for 12VSB to rise to nal regulated voltage.
TCONTROL_DELAY_ON 0ms Time from CONTROL pin going high to main output
coming on. (Default, reprogrammable with PMBus).
TCONTROL_DELAY_OFF 0ms Time from CONTROL pin going low to main output
going o. (Default, reprogrammable with PMBus).
TDCOK_ON 40ms 45ms 48ms Time from main output beginning to rise and DCOK
going low (with default 50ms rise time of main output).
TDCOK_OFF 2ms 4ms 6ms Time from main output going out of regulation to DCOK
going high (typical at 2000Watt load on 48V model).
TDCOK_FALL 50ns 100ns 1000ns Time for DCOK signal to transition from high to low*
TDCOK_RISE 1µs 2µs 10µs Time for DCOK signal to transition from low to high*
TACOK_FALL 50ns 100ns 1000ns Time for ACOK signal to transition from high to low*
TACOK_RISE 1µs 2µs 10µs Time for ACOK signal to transition from low to high*
TTEMPOK_FALL 50ns 100ns 1000ns Time for TEMPOK signal to transition from high to low*
TTEMPOK_RISE 1µs 2µs 10µs Time for TEMPOK signal to transition from low to high*
TFANOK_FALL 50ns 100ns 1000ns Time for FANOK signal to transition from high to low*
TFANOK_RISE 1µs 2µs 10µs Time for FANOK signal to transition from low to high*
*ACOK, DCOK, TEMPOK & FANOK pulled up to 5V with 10kOhm resistor.

Page 13
BLUESTREAK SERIES
INSTALLATION & OPERATING MANUAL
POWERING TECHNOLOGY
Document Number: BLUESTREAK-MAN Rev. 6 bluestreak-man-rev6-0719.indd
ACV Input
DC Main Output
ACOK
DCOK
5V SB
12V SB
CONTROL
AC ON AC ON
TON-RISE TVOUT-HOLDUP
TACOK-FALL
TACOK-ON
TACOK-RISE
TACOK-OFF
TDCOK-FALL
TDCOK-ON TDCOK-OFF
TDCOK-RISE
T5VSB-RISE
T12VSB-RISE
TVSB-ON
AC Input on/off cycle CONTROL
on/off cycle
Figure 4 - Timing Diagram

Page 14
BLUESTREAK SERIES
INSTALLATION & OPERATING MANUAL
POWERING TECHNOLOGY
Document Number: BLUESTREAK-MAN Rev. 6 bluestreak-man-rev6-0719.indd
10.0 MECHANICAL SPECIFICATIONS
The mechanical dimensions of the BLUEstreak module are shown.
Note that BLUEstreak modules are designed for hot-swap applications only and are not provided
with any xing points.
4.00
[101,6]
1.60
(40.6)
4.00
(101.6)
.13
(3.4) .09
(2.3)
Figure 5 - Module Dimensions

Page 15
BLUESTREAK SERIES
INSTALLATION & OPERATING MANUAL
POWERING TECHNOLOGY
Document Number: BLUESTREAK-MAN Rev. 6 bluestreak-man-rev6-0719.indd
11.0 SAFETY AND INDUSTRY STANDARDS
11.1 BLUEstreak modules and power shelves meet the following safety standards:
UL60950-1, 2nd Edition
CSA22.2 No. 60950-1, 2nd Edition
EN60950-1, 2nd Edition
11.2 BLUEstreak modules and power shelves are CE Marked to indicate conformance with the
European Union’s Low Voltage Directive.
11.3 Input conducted EMI meets FCC20780 part 15J Curve B and EN55022 Curve B.
11.4 Input harmonics, meets EN61000-3-2 Class D
11.5 Immunity, meets the following:
Input fast transients, line to line – EN61000-4-4, level 3, criteria A
Input surges, line to line – EN61000-4-5, level 3, criteria A
Input surges, line to ground – EN61000-4-5, level 4, criteria A
ESD – EN61000-4-2, level 4, criteria A
Radiated – EN61000-4-3, criteria A (10V/m)
Dips, Interruptions & Variations – EN61000-4-11, criteria B/C
12.0 OPERATING INFORMATION
12.1 Input Voltage and Connection - The BLUEstreak Series operates from worldwide AC
input voltages in the range of 85 to 264 VAC at 47 to 63 Hz. There are restrictions to the
available total output power when operating at low line, 85-132VAC. The three-wire AC
connection is made to pins P1, P2 & P3 on the rear mounted connector. See the connector
diagram and Pin Connections table in Figure 5.
12.2 Output Connections - The main output is provided on pins P4 to P9 on the connector.
Three pins (P4 to P6) are connected together internally for the +V Out; three other pins (P7
to P9) are connected together internally for the V Return. The output is fully oating and
may be congured for positive or negative operation.
Figure 6 - Module Rear View showing connection details

Page 16
BLUESTREAK SERIES
INSTALLATION & OPERATING MANUAL
POWERING TECHNOLOGY
Document Number: BLUESTREAK-MAN Rev. 6 bluestreak-man-rev6-0719.indd
SIGNAL PIN CONNECTIONS
PIN FUNCTION PIN FUNCTION
A1
#MODULE PRESENT
C1
Sense +Ve 4
A2
GA6
C2 Current Monitor
4
A3
GA3
C3
GA1
A4
Standby Return
C4
5V Standby 1, 3
A5
#FANOK
C5
#DCOK
A6
#SMBALERT
C6
SCL
B1
Sense -Ve
D1
Remote Adjust 4
B2
Control
D2
Current Share 4
B3
GA2
D3
GA0
B4
Standby Return
D4
12V Standby 2, 3
B5
#TEMPOK
D5
#ACOK
B6
SDA
D6
#ENABLE
Notes:
1. Current rating of +5V standby is 1.8A.
2. Current rating of +12V standby is 0.8A.
3. Total standby consumption limited to 9.6W.
4. Referenced to -Ve Sense.
12.3 Mating Interface Board - Figure 7 shows a mating interface board which is available for
simplifying the testing of a BLUEstreak module. As shown in the photograph, provision
is made for input and output connections as well as the control and monitoring signals and
PMBus interface.
Figure 7 - Mating Interface Board

Page 17
BLUESTREAK SERIES
INSTALLATION & OPERATING MANUAL
POWERING TECHNOLOGY
Document Number: BLUESTREAK-MAN Rev. 6 bluestreak-man-rev6-0719.indd
12.4 Output Voltage - The output voltage is factory set to its nominal value to an accuracy of
±1%. The voltage can be adjusted to any value within the range given in the table below
using the PMBus interface.
MODEL ADJUSTMENT
RANGE
TBSR3000, RBSR12/100
7.5-15V
TBSR5000, RBSR24/54, RBSR24/60
15-30V
TBSR7000, RBSR28/28, RBSR48/37
30-60V
12.5 Output Power & Current - The following table shows the maximum output power and
current ratings for the various models:
MAX.
POWER OUTPUT
VOLTAGE OUTPUT
CURRENT INPUT
VOLTAGE INPUT
CURRENT MODEL
NO.
2000W
1500W 54.4VDC 37.0A
28.0A 180-264VAC
85-132VAC 10A
14A RBSR48/37
1500W 54.4VDC 28.0A 85-264VAC 14A/7.5A RBSR48/28
2000W
1500W 48.0VDC 42.0A
31.0A 180-264VAC
85-132VAC 10A
14A TBSR7000
1632W
1469W 27.2VDC 60.0A
54.0A 180-264VAC
85-132VAC 8.2A
13.5A RBSR24/60
1469W 27.2VDC 54.0A 85-264VAC 13.5A/7.6A RBSR24/54
1440W 24.0VDC 60.0A 85-264VAC 13.3A/7.3A TBSR5000
1360W 13.6VDC 100.0A 85-264VAC 12.5A/7A RBSR12/100
1200W 12.0VDC 100.0A 85-264VAC 11.0A/6.5A TBSR3000
Models showing two output power levels with dual AC input ranges automatically limit the
output current according to the actual input voltage present.
When the output voltage is adjusted below the nominal voltage shown in the table the
maximum current indicated will apply. Conversely, when the output voltage is adjusted
above the nominal voltage shown the maximum power indicated will apply.
The maximum output power may be drawn up to +50°C air inlet temperature. Above +50°C
the total output power must be derated by 2.5%/°C, up to an absolute maximum air inlet
temperature of +70°C. Note that dependent on actual airow through the unit output power
may be further limited or a temperature alarm indicated at lower temperatures.
The two standby outputs of +5V @ 1.8Aand +12V @ 0.8Aare limited to a combined output
power of 9.6W.

Page 18
BLUESTREAK SERIES
INSTALLATION & OPERATING MANUAL
POWERING TECHNOLOGY
Document Number: BLUESTREAK-MAN Rev. 6 bluestreak-man-rev6-0719.indd
12.6 Overvoltage Protection- The power supply has two internal O.V.P. protection circuits. One
operates at a xed voltage level and the other is programmable by the PMBus. The xed
O.V.P. levels are dened below:
MODEL FIXED OVP POINT
(nominal)
TBSR3000, RBSR12/100
21.1V
TBSR5000, RBSR24/54, RBSR24/60
31.9V
TBSR7000, RBSR28/28, RBSR48/37
59.4V
The default values for the programmable O.V.P. circuit can be found in the BLUEstreak
software manual. In order to reset the O.V.P. latch, the AC input must be cycled o for at
least 5 seconds before turning back on.
The O.V.P. latch is not resettable by PMBus command.
12.7 Overcurrent and short circuit protection - The power supply will provide a constant
current limit in the event of an overload on the output. If the output voltage of the power
supply falls below a certain level, the power supply will enter a ‘hiccup’ mode of operation.
Removing the overload or short circuit will allow normal operation to resume. The voltage
at which the ‘hiccup’ mode of operation occurs is programmable down to the minimum
default setting.
12.8 Remote Sensing- Remotesensing connections are made to pins B1and C1 on the connector.
Remote sensing is not available on the +5V or +12V Standby outputs. Remote sensing is
used to regulate the output voltage at the point of load by compensating for the voltage drop
in the wires to the load. The +Sense lead (pin C1) must be connected to the +Ve side of the
load and the - Sense lead (pin B1) to the –Ve side of the load. The sense leads should be a
color-coded, twisted pair ofAWG no. 22 or 24 copper wire.
Remote sensing can compensate for a total voltage drop of 0.5V, or 0.25V per load wire. The
sense leads should not exceed 10 feet (3 meters) in length. If remote sensing is not required,
the sense leads may be left open for local sensing at the output terminals. Be careful not
to reverse the sense lead connections, as this could damage the unit.
12.9 Alarm, Control & Supervisory Signals - All alarm, control and supervisory signals are
available on the connector at the rear of the unit. See section 9.2 for a complete description.
All logic signals are TTL level compatible are referenced to Standby Return and are isolated
from the main DC output.
12.10 PMBus - The PMBus is available on the connector at the rear of the unit. BLUEstreak
modules can be addressed in the ranges 0x20 to 0x3E and 0xA0 to 0xBE.

Page 19
BLUESTREAK SERIES
INSTALLATION & OPERATING MANUAL
POWERING TECHNOLOGY
Document Number: BLUESTREAK-MAN Rev. 6 bluestreak-man-rev6-0719.indd
13.0 PARALLEL OPERATION
13.1 Parallel Connection - Two or more BLUEstreak modules can be operated in parallel by
connecting their outputs in parallel and connecting their current sense terminals together
(pin D2). The BLUEstreak 19-inch rack power shelves permit conveniently operating two,
three or four units in parallel in either redundant mode or non-redundant mode.
13.2 Redundant Operation - Connecting two BLUEstreak modules in parallel, with or without
the compatible 19-inch rack, so that the full output load current can be carried by one unit
results in 1+1 redundant operation. While operating normally, the load current is shared
approximately equally between the two units. Should one BLUEstreak module fail, the full
load is then maintained by the other unit. The failed unit can then be replaced (hot-swap)
without aecting the load current. This operation is facilitated by an active ORing circuit
built into the module. 1+1 redundancy with quick replacement of a failed unit results in
virtually innite MTBF. 2+1 or 3+1 redundancy works the same way except that the full
load is carried by two out of three or three out of four units respectively.
13.3 Non-Redundant Operation - Higher output load currents can be realized by operating
two or three or four modules in the non-redundant mode to achieve up to 4000 watts for
two modules, 6000 watts for three modules or 8000 watts for four modules. The units are
connected in parallel the same as before. In this case if one unit fails, the load will lose
power since only part of the load current can now be supplied by the remaining module(s),
which will go into current limit. The failed unit can be quickly replaced, however, without
turning the power o (hot-swap) to restore load current.
The number of BLUEstreak modules that can be operated in parallel is 16. The most
convenient way to parallel large numbers of units is to connect multiple BLUEstreak 19-
inch rack power shelves in parallel.
LOAD
+VOUT (P4,5,6)
+Sense (C1)
Current Share (D2)
-Sense (B1)
-VOUT (P7,8,9)
+VOUT (P4,5,6)
+Sense (C1)
Current Share (D2)
-Sense (B1)
-VOUT (P7,8,9)
+VOUT (P4,5,6)
+Sense (C1)
Current Share (D2)
-Sense (B1)
-VOUT (P7,8,9)
Figure 8 - Connection Diagram for Parallel Operation

Page 20
BLUESTREAK SERIES
INSTALLATION & OPERATING MANUAL
POWERING TECHNOLOGY
Document Number: BLUESTREAK-MAN Rev. 6 bluestreak-man-rev6-0719.indd
14.0 MODULE INSTALLATION
BLUEstreak Series modules are designed for mounting into the BLUEstreak Series power shelves
or similar OEM housing. Fixing in place is achieved by means of a latching mechanism that is also
used to push the module home into the mating connector.
For OEMs wishing to install the BLUEstreak modules in their own system enclosure detailed
dimension information is available as a 3D CAD model. Please consult your nearest sales oce.
A mating interface board is available for module evaluation or testing, see section 12.3 on page 16
of this manual.
This manual suits for next models
12
Table of contents
Other Unipower Power Supply manuals

Unipower
Unipower Aspiro 1UMS22 User manual

Unipower
Unipower Gravitas X100 User manual

Unipower
Unipower TMN6000 User manual

Unipower
Unipower Gravitas X100 Installation instructions

Unipower
Unipower Aspiro 1U User manual

Unipower
Unipower Aspiro 1U Enclosure User manual

Unipower
Unipower XPGe12.48 User manual

Unipower
Unipower ARE Series User manual

Unipower
Unipower Guardian Access User manual

Unipower
Unipower Guardian Access 3U User manual