UniqAir Uniq 2 User manual

Uniq 2 Air Purifier
User’s Manual

The Bluetooth® word mark and logos are registered trademarks owned by
Bluetooth SIG, Inc. and any use of such marks by UniqAir Oy is under
license. Other trademarks and trade names are those of their respective
owners.
Wi-Fi® is a registered trademark of Wi-Fi Alliance®.
UniqAir Oy (2626040-9)
Tuomikatu 28
53810 Lappeenranta
www.uniqair.fi

U n i q A i r | 1
Table of Contents
1SAFETY INSTRUCTIONS 2
2PRODUCT DESCRIPTION 3
2.1 PACKAGE CONTENTS 3
2.2 TECHNICAL SPECIFICATIONS 4
2.3 TYPE PLATE 4
3SETUP 5
3.1 UNPACKING 5
3.2 ATTACHING THE STAND OR WALL MOUNT 5
3.3 POSITIONING THE DEVICE 6
3.4 CONNECTING THE POWER CORD 7
4OPERATING THE DEVICE 8
4.1 FRONT PANEL USER INTERFACE 8
4.2 MOBILE APPLICATION 9
5SERVICE AND MAINTENANCE 10
5.1 REPLACING THE PREFILTER 10
5.2 REPLACING THE MAIN FILTER 10
5.3 CLEANING THE DEVICE 10
5.4 RECYCLING 11
6TROUBLESHOOTING 12
6.1 PROBLEMS AND POSSIBLE SOLUTIONS 12
6.2 RESTORING THE DEVICE TO FACTORY SETTINGS 13
7ANNEXES 14
7.1 COLORS OF THE BLUETOOTH®-BUTTON 14
7.2 WARRANTY CONDITIONS 15
7.3 REPLACING THE MAIN FILTER 16

2 | U n i q A i r
1Safety Instructions
Read this manual carefully before use. Use the device only as instructed in
this manual. The operating instructions do not cover all possible operating
situations or conditions. The manufacturer is not liable for personal injury
or damage to property resulting from improper use.
General safety instructions:
•Only use UniqAir approved filters and replacement parts.
•Do not place the device higher than two meters from ground.
•Do not block or cover the air inlet or outlet.
•Do not insert items or fluids into the air inlet or outlet.
•Do not place the device in a place where it may become wet.
•Do not pull on the power cord when unplugging it. Pull only on the
plug when disconnecting the power cord.
•User must be able to easily reach the power plug in the mains
outlet when device is in use.
•Mains power outlet must be grounded.
•Only use the appliance with both filters in place.
•Only use the device indoors.
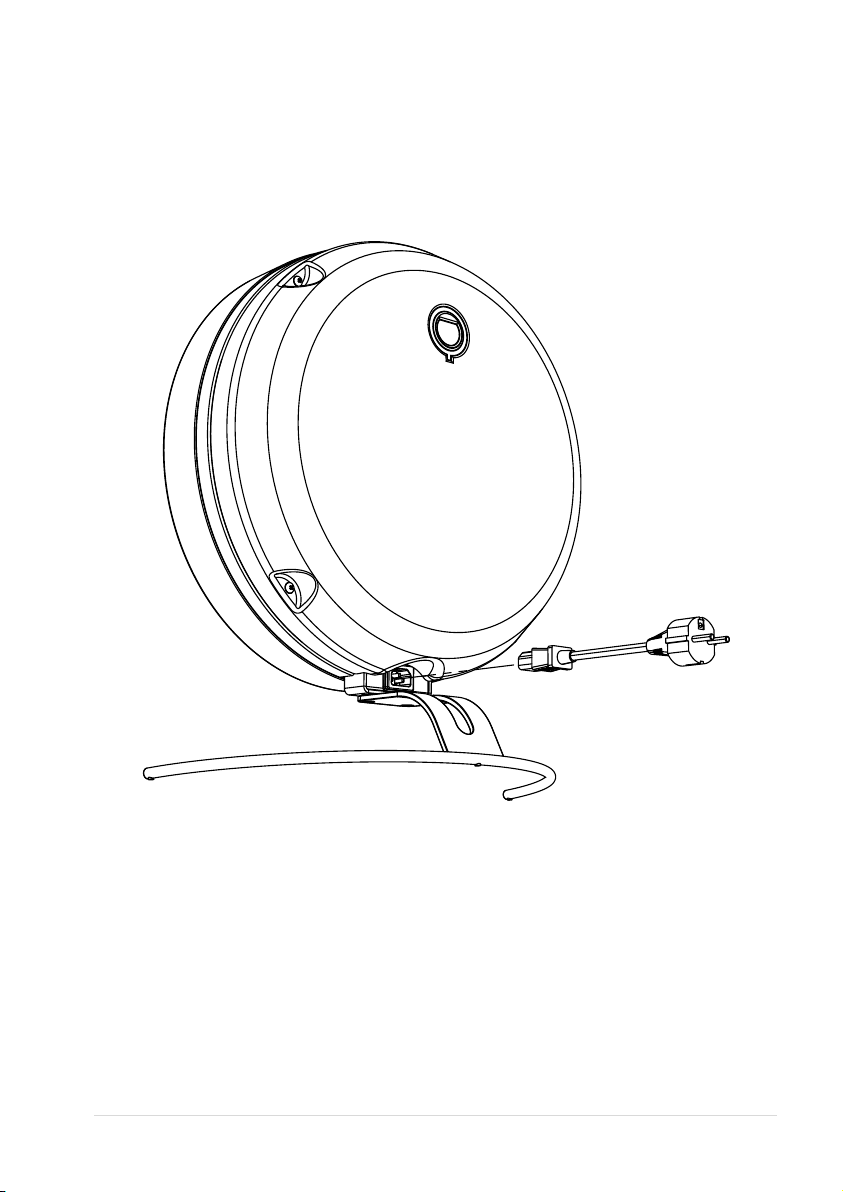
•Use only the original power cord.
•Use protective gloves when handling filters.
NOTE! The device is intended for indoor air purification only. The purifier
should not be used to clean industrial contaminants such as welding fumes
or paint fumes. Device should not be used to clean flammable gases.
NOTE! In the event of faults that might endanger people or the
environment (smell of burning, smoke, sparks, etc.), unplug the device
immediately and contact UniqAir Customer Service.

U n i q A i r | 3
2Product Description
UniqAir Uniq 2 is an efficient air purifier designed for indoor air. The Uniq 2
air purifier can be controlled manually or by a mobile device via Bluetooth®
connection.
Air is pulled in from the outer edge of the circular aluminum frame and the
air outlet is located at the front side of the device.
The device removes:
•Allergens
•Mold spores
•Viruses
•Bacteria
•Microbes
•Dust and pollen
•Odors
•Ozone and nitrogen oxides
•Ammonia
•Organic compounds
•Inorganic compounds
Examples of additional features:
•Dimmable backlighting
•Weekly timers for purification power
•Filter lifetime indicator
•Over-the-air firmware update capability
2.1 Package contents
The air purifier is supplied with the following parts:
•UniqAir Uniq 2 -device
•Stand and mounting screws
•Ready-to-use filters installed
•Power cord
•User’s manual

4 | U n i q A i r
2.2 Technical Specifications
2.3 Type Plate
A type plate with information is located on the
lower edge of the device, in front of the stand. See
the adjacent image.
Model
UniqAir Uniq 2
Operating
voltage
220–
240 V
Dimensions
Height 450 mm
Width 445 mm
Depth 185 mm
Frequency
50/60
Hz
Dimensions with
stand
Height 534 mm
Width 445 mm
Depth 217 mm
Max power
consumption
78 W
Dimensions with
wall mount
Height 467 mm
Width 445 mm
Depth 200 mm
Operating
temperature
0–60 C
Weight (with filters)
9 kg
WiFi standards
IEEE
802.11
b/g/n
Noise-level
27-64 dB(A)
WiFi frequency
2.4 GHz
Clean air delivery
rate (CADR)
20-140 m3/h
Bluetooth®-
version
4.2

U n i q A i r | 5
3Setup
3.1 Unpacking
Carefully remove the device from its plastic cover. After attaching the stand
or optional wall mount (section 3.2), remove the film covering the glass
front panel by peeling it gently from the tab at the top.
See section 5.4 for instructions on recycling the packaging material.
3.2 Attaching the Stand or Wall Mount
a) Stand
1. Place the device on a flat clean surface with the glass panel facing down
and be careful of not scratching the glass.
2. Use two screws to attach the stand that came with the product package
to the base of the device. See the picture below.

6 | U n i q A i r
b) Wall Mount (optional)
1. Use four screws to attach the
wall mount to the desired
place on a wall.
2. Use two screws to attach the
base of the Uniq 2 device to
the wall mount. See the
adjacent image.
WARNING! Provided mounting
screws should be used only with
hard materials like wood and
concrete.
3.3 Positioning the Device
To ensure the greatest effectiveness, make sure that the airflow is as
unobstructed as possible in front and on the sides of the device. If possible,
place the device so that no wall, cabinet, or other furniture impedes airflow
in the vicinity of the device.
For safety reasons, device should not be placed higher than two meters
from the ground.

U n i q A i r | 7
3.4 Connecting the Power Cord
1. Check that the power cord is externally intact. If the cord is
damaged, contact UniqAir’s customer service.
2. Connect the power cord to the connector on the bottom of the
device as shown on the picture below.
3. Plug the other end of the power cord into a grounded electrical
outlet.
NOTE! The mains voltage of the outlet must correspond to the voltage
indicated on the type plate.
WARNING! Electrical safety hazard. Only connect the appliance to a
grounded outlet.

8 | U n i q A i r
4Operating the device
The basic functionalities of the device, such as purification power and
brightness of the lights, can be controlled directly from the capacitive
buttons on the glass front panel. Adding timers, monitoring the condition of
the filter, performing updates, and many other features require the use of a
mobile application. Both usage methods will be presented in the following
sections.
4.1 Front Panel User Interface
The user interface of the device's front panel consists of four illuminated
buttons and a six-step (5 + "MAX") light circle indicating the purification
power.
1) Bluetooth® button. The color of the light indicates the status of
Bluetooth® and Wi-Fi connection.
2) Minus button reduces the purification power or brightness of the
lights.
3) Indicator of the normal purification power range (20–80 m3/h).
4) Maximum power indicator. The LED light indicates when the
maximum power (140 m3/h) is in use.
5) Plus button increases the purification power or brightness of the
lights.
6) Timer button, illuminated when the timer is activated. Pressing the
button toggles the timer on or off. Timers can be added only with
the mobile app. This button is also used for factory reset.

U n i q A i r | 9
The device can be operated manually with the buttons on the glass front
panel.
1. If none of the lights on the power range indicator are on, start the
device by pressing the plus button. The device will start working at
level 1, indicated by the first light turning blue.
2. Adjust the purification power to desired level using the plus and
minus buttons. The round power range indicator shows the
selected power setting. To activate maximum power, press the plus
button once more when all the lights on the power indicator are
on. The "MAX" text in the middle of the power scale will turn blue.
3. If desired, turn off the unit by pressing the minus button several
times until none of the blue power-setting lights are on.
The brightness of the front panel lights may need to be dimmed, for example,
if the device is in a bedroom. The lights will dim when the minus button is
held down. The brightness can be restored to normal by pressing and
holding the plus button.
4.2 Mobile application
Many of the device's features can only be accessed with the UniqAir Uniq
mobile application. Examples of features in the app:
•Automatic adjustment of fan speed using timers.
•The application shows the estimated condition of the main
filter and notifies the user when it's time to replace it.
•Firmware of the Uniq 2 purifier can be updated with the
application. Downloading the update requires the device to
be connected to a WiFi network.
The UniqAir Uniq application can be downloaded from the Google Play
and App Store for Android and iOS devices. Detailed instructions on
connecting the device and using the features can be found in the
application.

10 | U n i q A i r
5Service and Maintenance
IMPORTANT! Turn the device off and unplug the power cord before
performing any maintenance. The fan will not stop rotating immediately:
after switching the device off, wait a moment before starting maintenance
work.
5.1 Replacing the prefilter
We recommend a prefilter change interval of 4-6 months when the device
is in continuous use. The prefilter can also be vacuumed and/or washed if
necessary, enabling a longer change interval. If you wash the prefilter, let it
dry completely before installation.
To replace the prefilter, follow the instructions on section 7.2, down to the
prefilter handling instructions.
5.2 Replacing the main filter
We recommend replacing the main filter every 12 months if the estimate
provided by the mobile application is not used. The air purifier calculates an
estimate of the filter's condition based on usage, which can be viewed as a
percentage from 0 to 100% in the mobile application. The main filter should
be replaced when the estimated filter condition approaches zero.
The estimate does not take into account the actual quality of the filtered air.
Therefore, the main filter should be replaced at shorter intervals if the user
notices a decline in filtering efficiency.
Instructions for replacing the main filter can be found in section 7.2 and at
www.uniqair.fi/downloads.
5.3 Cleaning the device
Dust and other dirt can be removed from the external surface of the device
with a damp cloth. The felt back cover can be vacuumed with a brush
nozzle.
NOTE! Exercise caution when vacuuming the back cover, which is easily
scratched.

U n i q A i r | 11
5.4 Recycling
NOTE! Always follow local regulations when disposing of the device, its
parts, or the transport packaging.
Transport packaging
The transport packaging of the air purifier is completely recyclable. Sort the
packaging parts (cardboard, plastic) into the appropriate collection
containers.
Prefilters
Dispose of used prefilters as energy waste.
Main filters
We recommend that you return used main filters to your UniqAir contact
person or reseller. This will allow us to ensure their proper recycling.
When ordering a new main filter, you can return the used filter in the
packaging in which the new filter arrived. We will provide a return form and
address label with the new filter if you order it from our online store.
If returning used filters is not possible, they can be disposed of as landfill
waste.
If you have any questions about recycling or disposing of filters, contact
your local authority or your UniqAir dealer.

12 | U n i q A i r
6Troubleshooting
6.1 Problems and Possible Solutions
The touch buttons on the control panel do not respond and/or the fan
does not start or change power level.
•Disconnect and reconnect the power cord to the outlet. If this does
not help, reset the device to factory settings according to section
Error! Reference source not found. instructions.
Adding the purifier to the UniqAir Uniq application for the first time fails.
•Make sure you have the latest version of the UniqAir Uniq
application. Update the application from the app store (Google Play
or App Store) if necessary.
•Make sure you are trying to connect the device via Bluetooth®. The
application also supports the previous generation Uniq device,
which is connected to the mobile device via WiFi.
•Make sure the Bluetooth button flashes white when pairing the
device to the phone.
•Make sure you have correctly entered the six-digit pairing code
from the device's type plate.
The paired device no longer connects to the mobile application.
•Turn off the device by disconnecting the power cord and
reconnecting it. Also, restart the mobile device.
•If restarting the air purifier and mobile device does not help,
remove the paired device from the mobile application and make
sure it does not appear on the phone's Bluetooth® device list. Try
to pair the device again.
•If the connection still fails, remove the device from the application,
reset the device to factory settings (section Error! Reference source
not found.), and try again.

U n i q A i r | 13
6.2 Restoring the Device to Factory Settings
To fix possible malfunctions, the device can be restored to factory settings.
This will clear the Wi-Fi settings, Bluetooth® bonding, timers, and other
user data stored in the device’s memory. All device firmware updates will be
removed, and the device will revert to its original factory version.
To restore factory settings, follow these steps:
1. If the device is added to the mobile application, remove it from the
application and ensure that it is not visible in the Bluetooth®
device list of the phone's operating system.
2. If the device is powered on, unplug the power cord from the outlet.
3. Place the device so that you can touch the buttons on the glass
front panel and simultaneously plug the power cord back into the
outlet.
4. Plug the power cord back into the outlet, and the device will start
up, and all front panel lights will turn on.
5. Restoring to factory settings is done by holding down the timer
button until the lights start blinking while the lights are on.
6. The device will restart, and the factory settings will be restored.
NOTE: It is recommended to update the device firmware to the latest
version after restoring the factory settings.

14 | U n i q A i r
7Annexes
7.1 Colors of the Bluetooth®-button
The multicolored light of the Bluetooth® button indicates the status of
the device's Wi-Fi and Bluetooth® connection. Below are the
explanations for the different colors.
White
The device is not connected to a Wi-Fi access point.
Blinking white
Bluetooth® pairing mode is enabled.
Blinking blue
Device is trying to connect to a Wi-Fi access point.
Blue
Wi-Fi-is successfully connected.
Red
Fault. The most common cause is an incorrect Wi-Fi
password. In case of Wi-Fi connection problems,
error messages can be found in the mobile
application. If the red light is on and you are unable
to connect to the device through the mobile app,
please follow the instructions in section 6.

U n i q A i r | 15
7.2 Warranty conditions
These warranty conditions apply to all new UniqAir air purifiers.
1. UniqAir air purifiers have a manufacturer's warranty.
2. The warranty is two (2) years from the date of delivery of the
product.
3. The warranty covers defects and faults that occur during the
warranty period due to manufacturing defects or faults in the
product’s materials.
4. The warranty only applies to air purifiers used indoors or in
equivalent weather-protected conditions to filter air impurities. Any
other use is not covered by the warranty and the warranty will be
void if the device is used for purposes other than those for which it
was intended and/or other than in the aforementioned conditions.
5. The warranty does not cover defects caused by improper use,
negligence or intentional damage to the product. In addition, the
warranty does not cover normal wear and tear of the product, or
normal staining and wear of the replaceable filters.
6. The warranty will remain valid even if the product changes owners.
However, the intended use of the product must not materially
change, for example, from end-user use to professional use where
the purifier is used as part of a service provided by a professional
or company for its own customers. The warrantor requires a
written notification about the change of ownership.
7. These warranty terms are valid until further notice.
8. UniqAir reserves the right to make changes.

16 | U n i q A i r
7.3 Replacing the Main Filter
1. Unplug the air purifier.
2. Place the purifier on a flat surface with the glass panel facing down.
NOTE! If you place the air purifier on a hard surface, you should protect
the glass panel with a cloth or other soft material.

U n i q A i r | 17
3. Using a cross-head screwdriver, turn the rear cover quick-release
screws (4 screws) 90 degrees counterclockwise, until the screws
pop out.
4. After loosening all four quick-release screws, lift the back cover
vertically upwards. NOTE! The quick-release screws should remain
in the holes in the back cover.
5. Remove the EPP disc from on top of the filter and lift the filter out
of the air purifier.
6. If necessary, replace or wash the pre-filter fitted around the outer
circumference of the main filter.
7. Fit the newly cleaned pre-filter around the outer circumference of
the new main filter, and place the filter assembly perpendicularly
back into the air purifier.
8. Place the EPP disc on top of the filter assembly with the convex
side facing out.
9. Replace the back cover by aligning the screws on the four brackets,
keeping the logo at the top and fitting the semi-circular opening on
the edge of the cover against the stand.
NOTE! The edge of the back cover should fit inside the perforated band
around the perimeter of the air purifier. The easiest way to do this is to
place the top edge (logo side) of the back cover inside the perforated
band first, and then the bottom edge.
10. Lock the screws into their brackets by pressing them with your
finger or lightly with a screwdriver, for example. NOTE! There is no
need to turn the screws.
11. Lift the air purifier back into place and plug in the power cord. The
device will be operational again.
Table of contents
Other UniqAir Air Cleaner manuals
Popular Air Cleaner manuals by other brands

London Cool
London Cool PA2000CR instruction manual

Oregon Scientific
Oregon Scientific i.fresh Compact user manual

TEFAL
TEFAL INTENSE PURE AIR PU4065 manual

PremierOne
PremierOne MUV-401H Installation & maintenance instructions

Samsung
Samsung AX60R5080WD/ST user manual

Sunbeam
Sunbeam SAP2400W-CN Instruction leaflet