manuals.online logo
Brands
  1. Home
  2. •
  3. Brands
  4. •
  5. United Technologies
  6. •
  7. Control Unit
  8. •
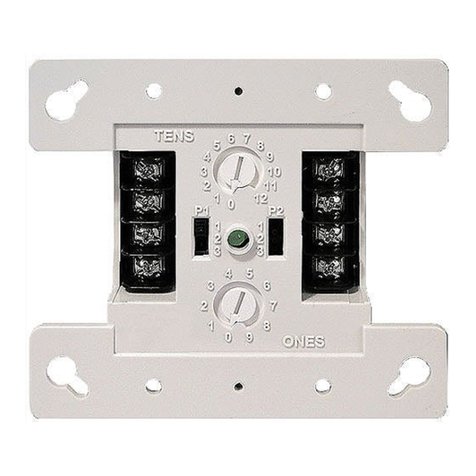
  9. United Technologies Edwards SIGA-CT1 Assembly instructions

United Technologies Edwards SIGA-CT1 Assembly instructions

© 2017 United Technologies Corporation 1 / 3 P/N 387021P-EN • REV 14 • ISS 14MAR17
SIGA-CT1 Single Input Module Installation Sheet
Description
The SIGA-CT1 Single Input Module is an addressable device
used to connect a Class B initiating device circuit (IDC) to a
Signature loop controller.
The module requires one address on the signaling line circuit
(SLC). Addresses are assigned electronically. There are no
address switches.
Diagnostic LEDs provide visible indication of the state of the
module:
• Normal: Green LED flashes
• Alarm/active: Red LED flashes
Personality codes
Use the personality codes listed in Table 1 to configure the
SIGA-CT1 module.
Table 1: Personality codes
Code Description UL/ULC EN 54-18
1 Alarm – NO latching (Class B) (default) 
2 Alarm – NO delayed latching (Class B) 
3 Active - NO nonlatching (Class B) 
4 Active - NO latching (Class B) 
18 Alarm - soft short latching, European
Style C (Class B)

Installation
Install this device in accordance with applicable national and
local codes, ordinances, and regulations.
Notes
• The module is shipped from the factory as an assembled
unit; it contains no user-serviceable parts and should not
be disassembled.
• This module does not operate without electrical power. As
fires frequently cause power interruption, discuss further
safeguards with the local fire protection specialist.
• This module does not support conventional smoke
detectors.
To install the module:
1. Write the address assigned to the module on the label
provided, and then apply the label to the module. Remove
the serial number label from the module, and then attach it
to the project documentation.
2. Wire the module as shown in “Wiring” on page 2.
3. Using the self-tapping screw provided, attach the wall
plate to the module. See Figure 1.
4. Using the two machine screws provided, attach the wall
plate and module to the electrical box.
2 / 3 P/N 387021P-EN • REV 14 • ISS 14MAR17
Figure 1: Installing the SIGA-CT1 module
(1) Compatible electrical box
(2) SIGA-CT1 module
(3) Wall plate
(4) #6-32 × 5/8 machine screw
(2X)
(5) #4 × 1/2 self-tapping screw
Wiring
Wire this device in accordance with applicable national and
local codes, ordinances, and regulations.
Notes
• Refer to the Signature loop controller installation sheet for
SLC wiring specifications for additional details.
• All wiring is power-limited and supervised.
• A test resistor is supplied with the SIGA-CT1 to prevent
trouble signals on unused circuits during installation.
When connecting field wires, remove the test resistors and
install a UL/ULC Listed 47 kΩEOLR at the end of the
circuit.
To wire the module:
1. Verify that all field wiring is free of opens, shorts, and
ground faults.
2. Strip 1/4 in. (about 6 mm) from the ends of all wires that
connect to the terminal block of the module.
When stripping wire ends, exposing more wire may cause
a ground fault; exposing less wire may result in a faulty
connection.
3. Make all wiring connections as shown in Figure 2.
Figure 2: Wiring diagram
(1) EOL resistor (PN EOL-47)
(2) 22 kΩresistor for use with
personality code 18
(3) Typical NO initiating device
(4) 10 VDC at 350 µA, max.
(5) Red LED (alarm/active)
(6) Green LED (normal)
(7) Signaling line circuit (from
previous device)
(8) Signaling line circuit (to next
device)
Specifications
Operating voltage 15.20 to 19.95 VDC
Current
Standby
Activated
300 µA
450 µA
Ground fault impedance 10 kΩ
Initiating device circuit (IDC)
EOL resistor value
Circuit resistance
Circuit capacitance
47 kΩ, UL/ULC Listed
50 Ω(25 Ωper wire), max.
0.1 µF max.
Circuit designation
Signaling line circuit
Notification line circuit
Class A, Style 6 or Class B, Style 4
Class B, Style B
Wire sizes 12 to 18 AWG wire (1.0 to 4.0 mm²)
Compatible electrical boxes 2-1/2 in. (64 mm) deep single-gang
box; 4-in. square box 1-1/2 in (38 mm)
deep with single-gang cover
LPCB/CPR electrical box
Requirements
Minimum (W × H × D)
Plastic box with cover plate, no gaps or
unused holes
2.4 × 3.5 × 1.5 in. (60 × 85 × 38 mm)
Operating environment
Temperature
Relative humidity
32 to 120°F (0 to 49°C)
0 to 93% noncondensing
Storage temperature range −4 to 140°F (−20 to 60°C)
(1)
(2) (3)
(4)
(4)
(5)
7
8
12
3
4
++
––
(1)
(3)
(4)
(6)
(8)(7)
(5)
(2)
(4)
(1)
(3)
P/N 387021P-EN • REV 14 • ISS 14MAR17 3 / 3
Regulatory information
North American
standards
CAN/ULC-S527, UL 864, UL 1638, CE; FCC Part
15, Subpart J, Class B; DOCClass/MDC class B
FCC compliance This device complies with part 15 of the FCC
Rules. Operation is subject to the following two
conditions: (1) This device may not cause harmful
interference, and (2) this device must accept any
interference received, including interference that
may cause undesired operation.
EU compliance
EN 54 EN 54-18:2005 Input/output devices
CPR certificates 0832-CPR-F0331
LPCB reference 262y/08
2002/96/EC (WEEE directive): Products marked
with this symbol cannot be disposed of as
unsorted municipal waste in the European Union.
For proper recycling, return this product to your
local supplier upon the purchase of equivalent
new equipment, or dispose of it at designated
collection points. For more information see:
www.recyclethis.info.
Contact information
For contact information, see www.edwardsfiresafety.com.

Other United Technologies Control Unit manuals

United Technologies Kidde FX-NAC Assembly instructions

United Technologies

United Technologies Kidde FX-NAC Assembly instructions

United Technologies FSUIM Assembly instructions

United Technologies

United Technologies FSUIM Assembly instructions

United Technologies Interlogix  ATS7310 Assembly instructions

United Technologies

United Technologies Interlogix ATS7310 Assembly instructions

United Technologies Carrier Unit Vent Open Quick setup guide

United Technologies

United Technologies Carrier Unit Vent Open Quick setup guide

Popular Control Unit manuals by other brands

NTI GB-ND 057-DO Replacement instructions

NTI

NTI GB-ND 057-DO Replacement instructions

Vertiv MPUIQ-VMCHS installation guide

Vertiv

Vertiv MPUIQ-VMCHS installation guide

Velleman VM134 quick guide

Velleman

Velleman VM134 quick guide

YURAKU A-P 196 Safety and installation instructions

YURAKU

YURAKU A-P 196 Safety and installation instructions

Audioplex CSVC1550 installation manual

Audioplex

Audioplex CSVC1550 installation manual

Pettinaroli U2W2E Technical specifications

Pettinaroli

Pettinaroli U2W2E Technical specifications

ITRON OpenWay Riva 500W ERT installation guide

ITRON

ITRON OpenWay Riva 500W ERT installation guide

AppconWireless RF1276 Series manual

AppconWireless

AppconWireless RF1276 Series manual

CMS cPAD Configuration manual

CMS

CMS cPAD Configuration manual

mercor mcr R0424-1 Operation and maintenance manual

mercor

mercor mcr R0424-1 Operation and maintenance manual

Velleman VM151 manual

Velleman

Velleman VM151 manual

Danfoss EKF Series installation guide

Danfoss

Danfoss EKF Series installation guide

Huawei RTN 380H Quick installation guide

Huawei

Huawei RTN 380H Quick installation guide

EI Ei3000 Series instruction manual

EI

EI Ei3000 Series instruction manual

aion LUNA manual

aion

aion LUNA manual

SMC Networks SYJ300 Installation and maintenance manual

SMC Networks

SMC Networks SYJ300 Installation and maintenance manual

ACO Triplex Series Instructions for use

ACO

ACO Triplex Series Instructions for use

Edwards SCU-XL800 instruction manual

Edwards

Edwards SCU-XL800 instruction manual

manuals.online logo
manuals.online logoBrands
  • About & Mission
  • Contact us
  • Privacy Policy
  • Terms and Conditions

Copyright 2025 Manuals.Online. All Rights Reserved.