FUDIO DIGITAL DVR
1
1.
Product Introduction
..............................................................................................................................
2
2
.
Safety Information
..................................................................................................................................
3
3. Packing List
...............................................................................................................................................
3
4
.
Panel Function Introduction
..............................................................................................................
4
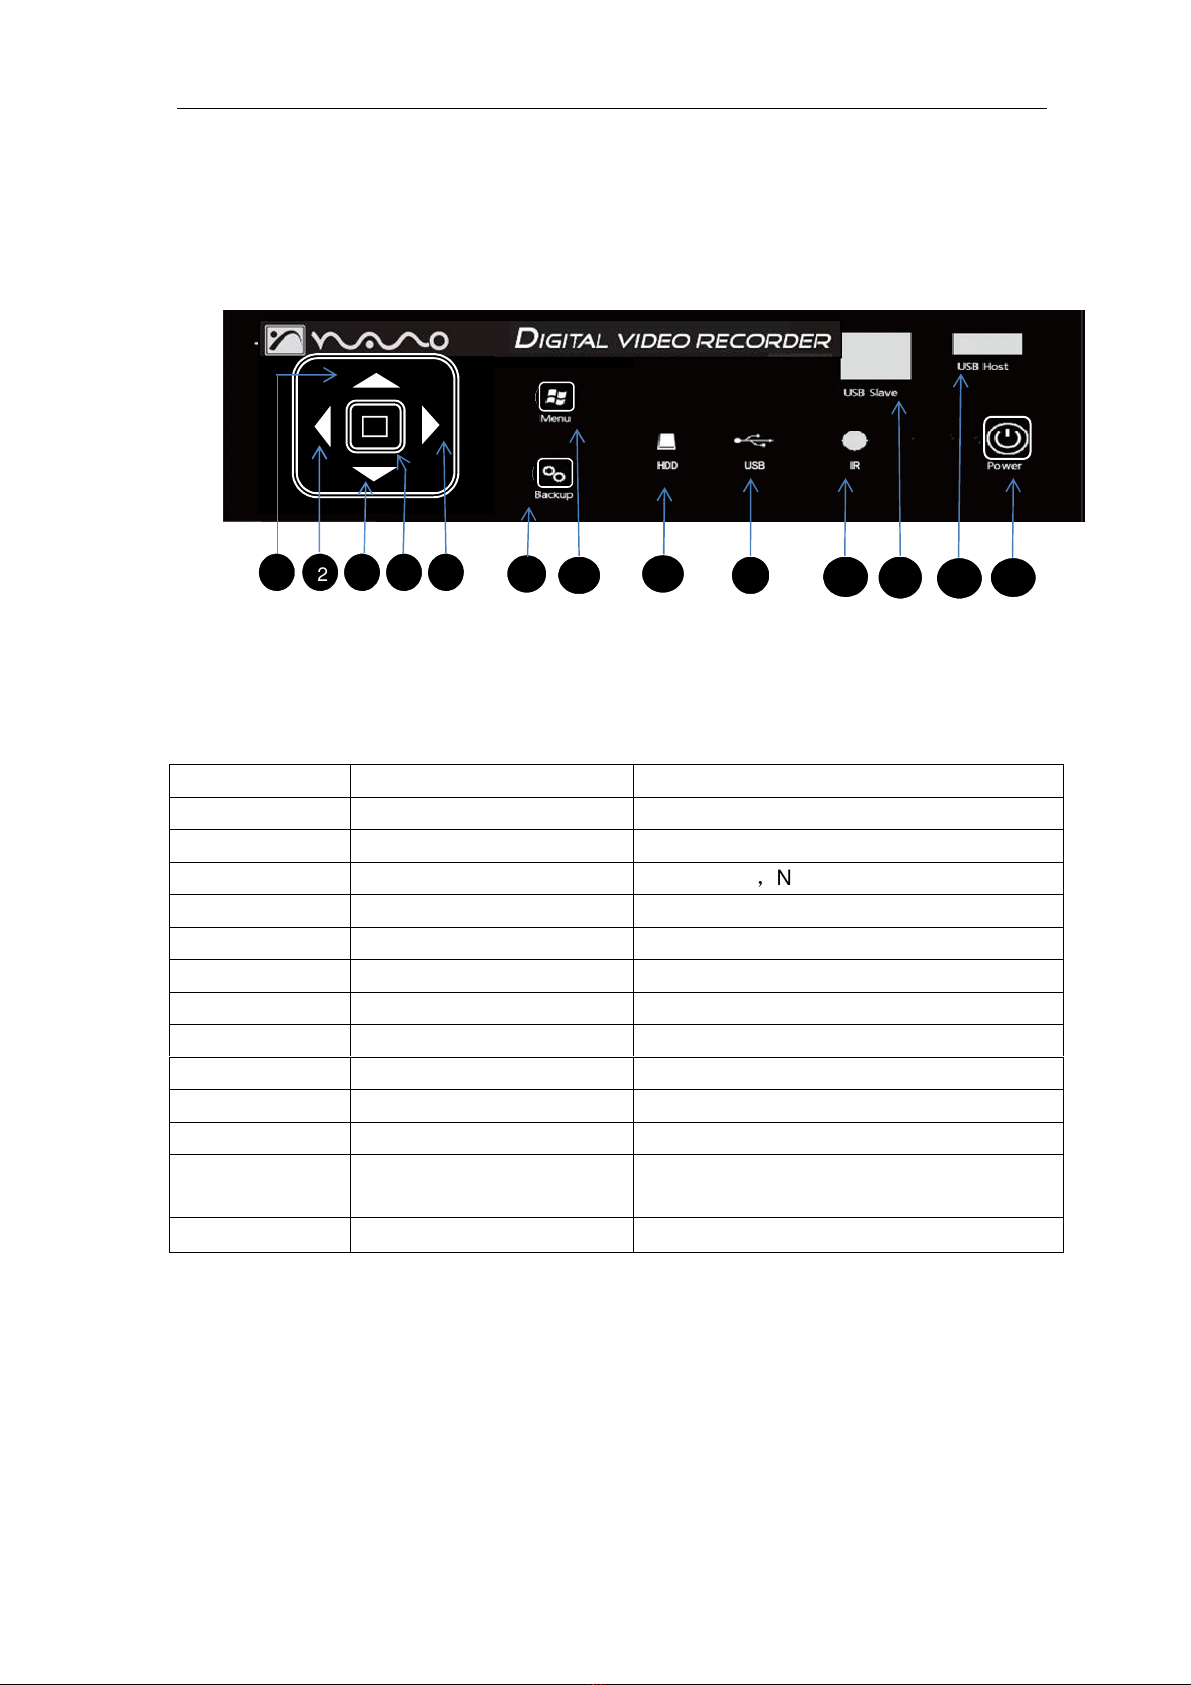
4.1
Front Touch Sense Panel Layout (For reference only)
.........................................
4
4.2
Front Touch Sense Panel Function Indication
: ..........................................................
4
4.3
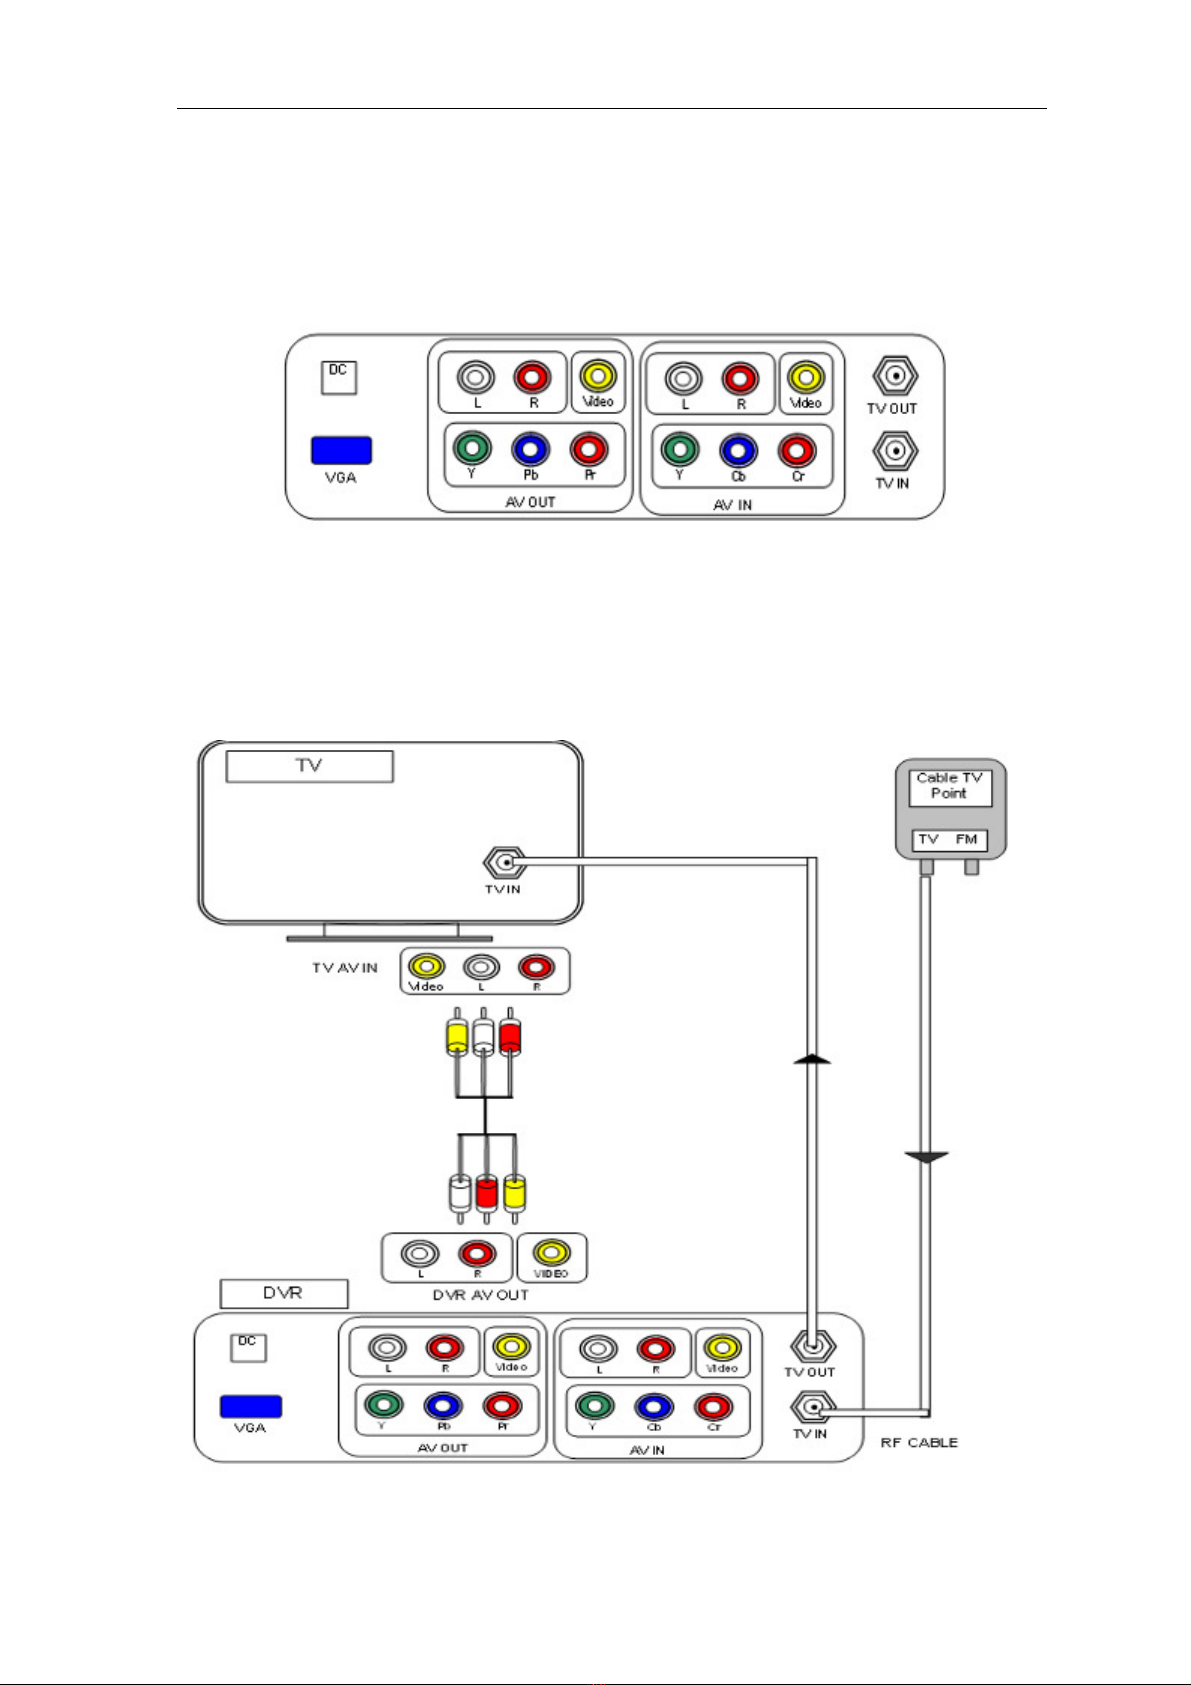
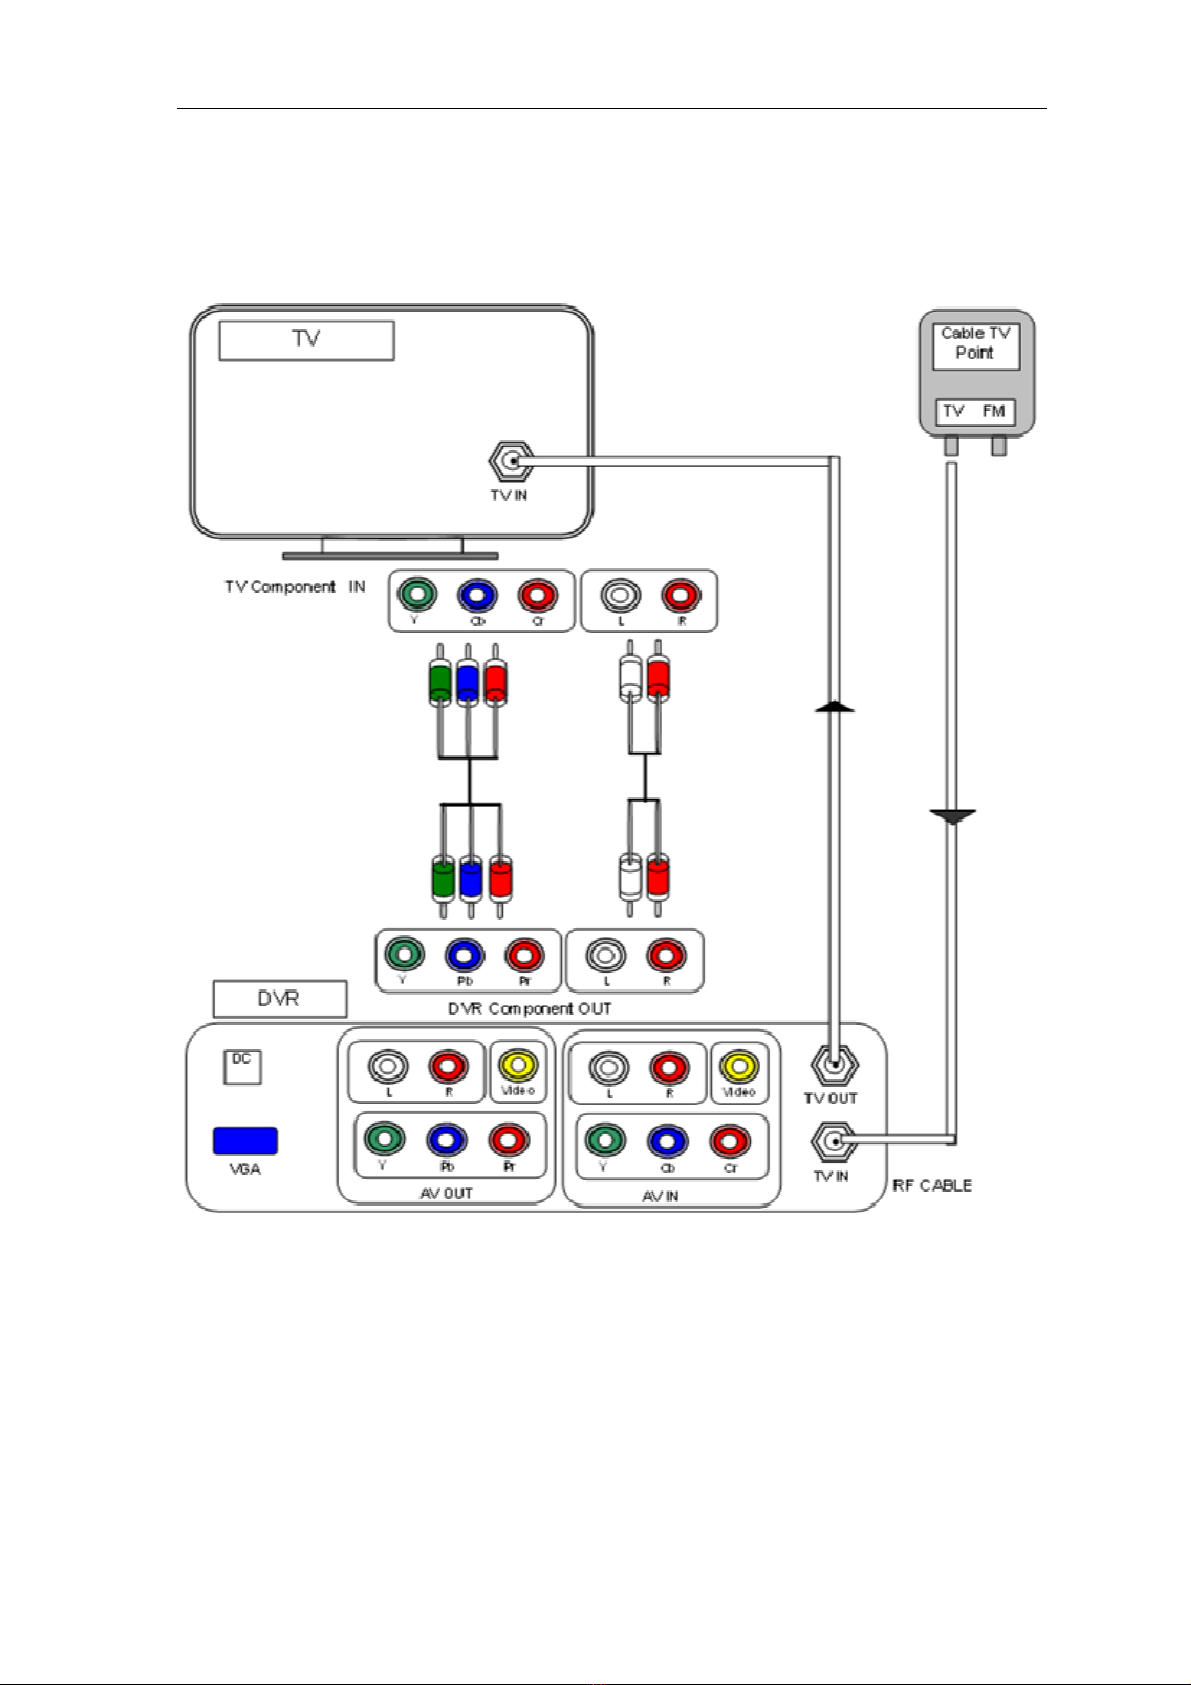
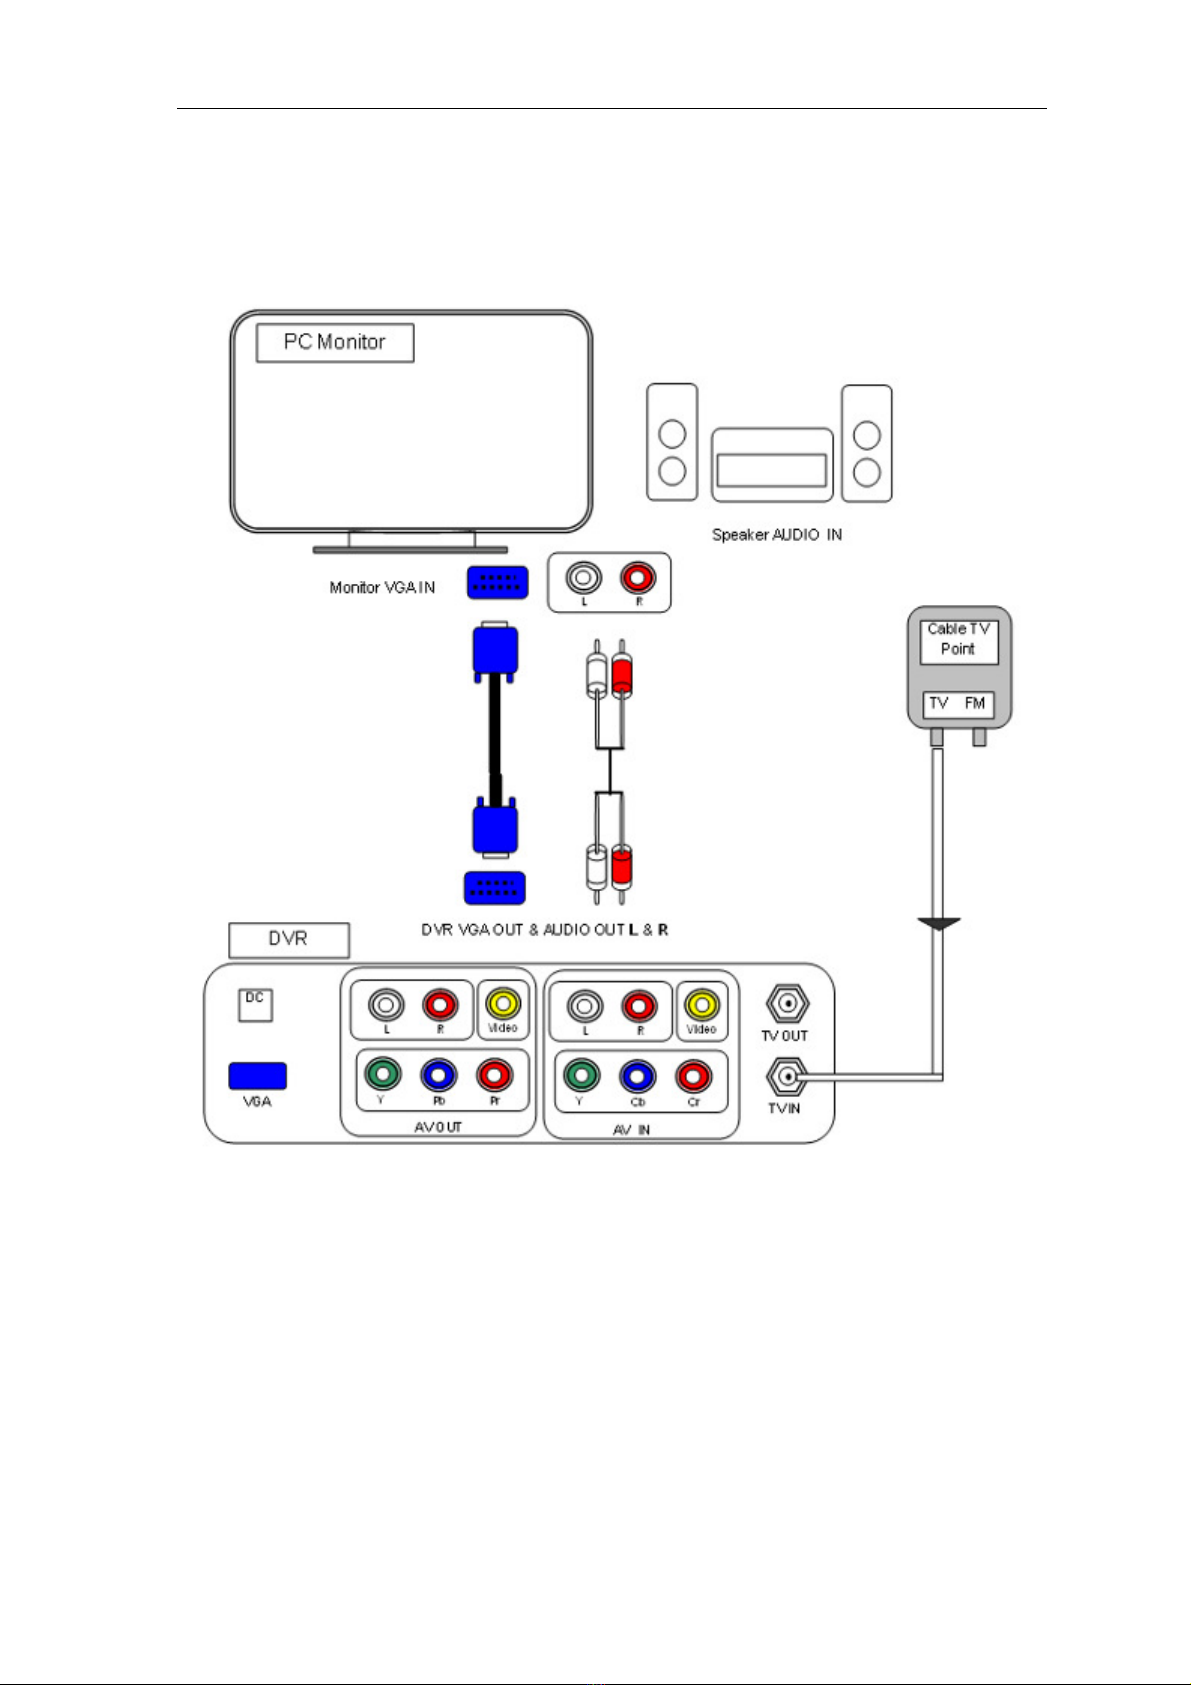
Rear Panel Layout
...................................................................................................................
5
4.4 Installation Guide
......................................................................................................................
5
5. HDD & USB Installation
....................................................................................................................
14
6. Remote Control
.....................................................................................................................................
16
6.1 Remote Control Panel Introduction
...............................................................................
16
6.2 Remote Control Explanation
.............................................................................................
17
7. System Menu
.........................................................................................................................................
20
7.1 Getting Started
.........................................................................................................................
20
7.2 Record
.........................................................................................................................................
20
7.3 Browser
.......................................................................................................................................
23
7.4 Utility
.............................................................................................................................................
25
7.5
Setup
............................................................................................................................................
26
8. Main Functions Description
.............................................................................................................
36
8.1 Time Shift
....................................................................................................................................
36
8.2
Folder Visiting
...........................................................................................................................
39
8.3 Video File Edit Operation
...................................................................................................
41
8.4 One Key Backup
.....................................................................................................................
47
8.5 Copy File and Folder
……………………………………..………………………………………….
46
8.6 File Playing Mode
…………………………………………………………………………………..….
48
8.7 Removable HDD
……………………………………………………………………………………….
50
9. Common Trouble Shooting
……………………………………….........................................................
51
10
.
Frequently Customer Asked Questions.............................................................
52
11. Product Specifications
…………………..………………………………………………………….……….
53