Page 3800.633.3047
Plastic Identification – Can I Use the Hot Air Welder?
N2
6053
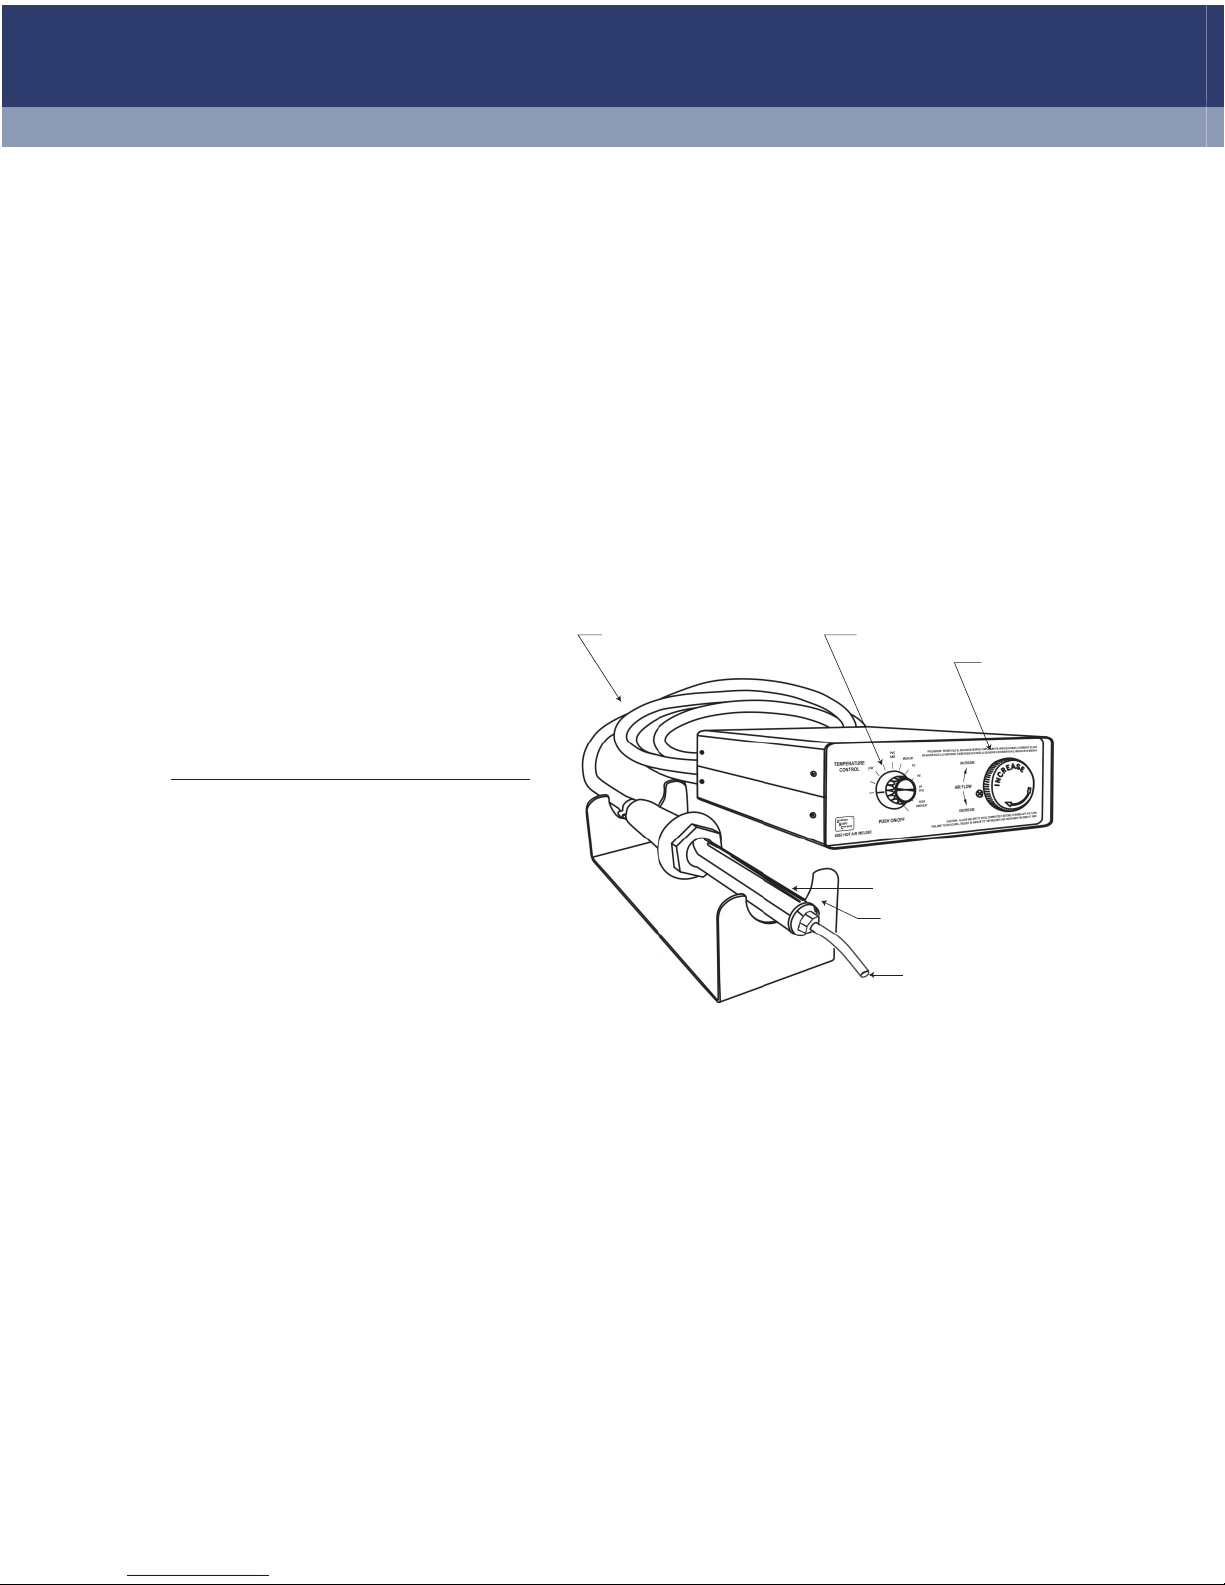
Hot Air
Welder
6053N2
Nitrogen-Air
Controller
Regulator (not supplied)
Purox R-36, P/N 21364
by ESAB Welding Products
(or similar)
Nitrogen bottle (not supplied)
rent from local welding supply
Compressed
Air
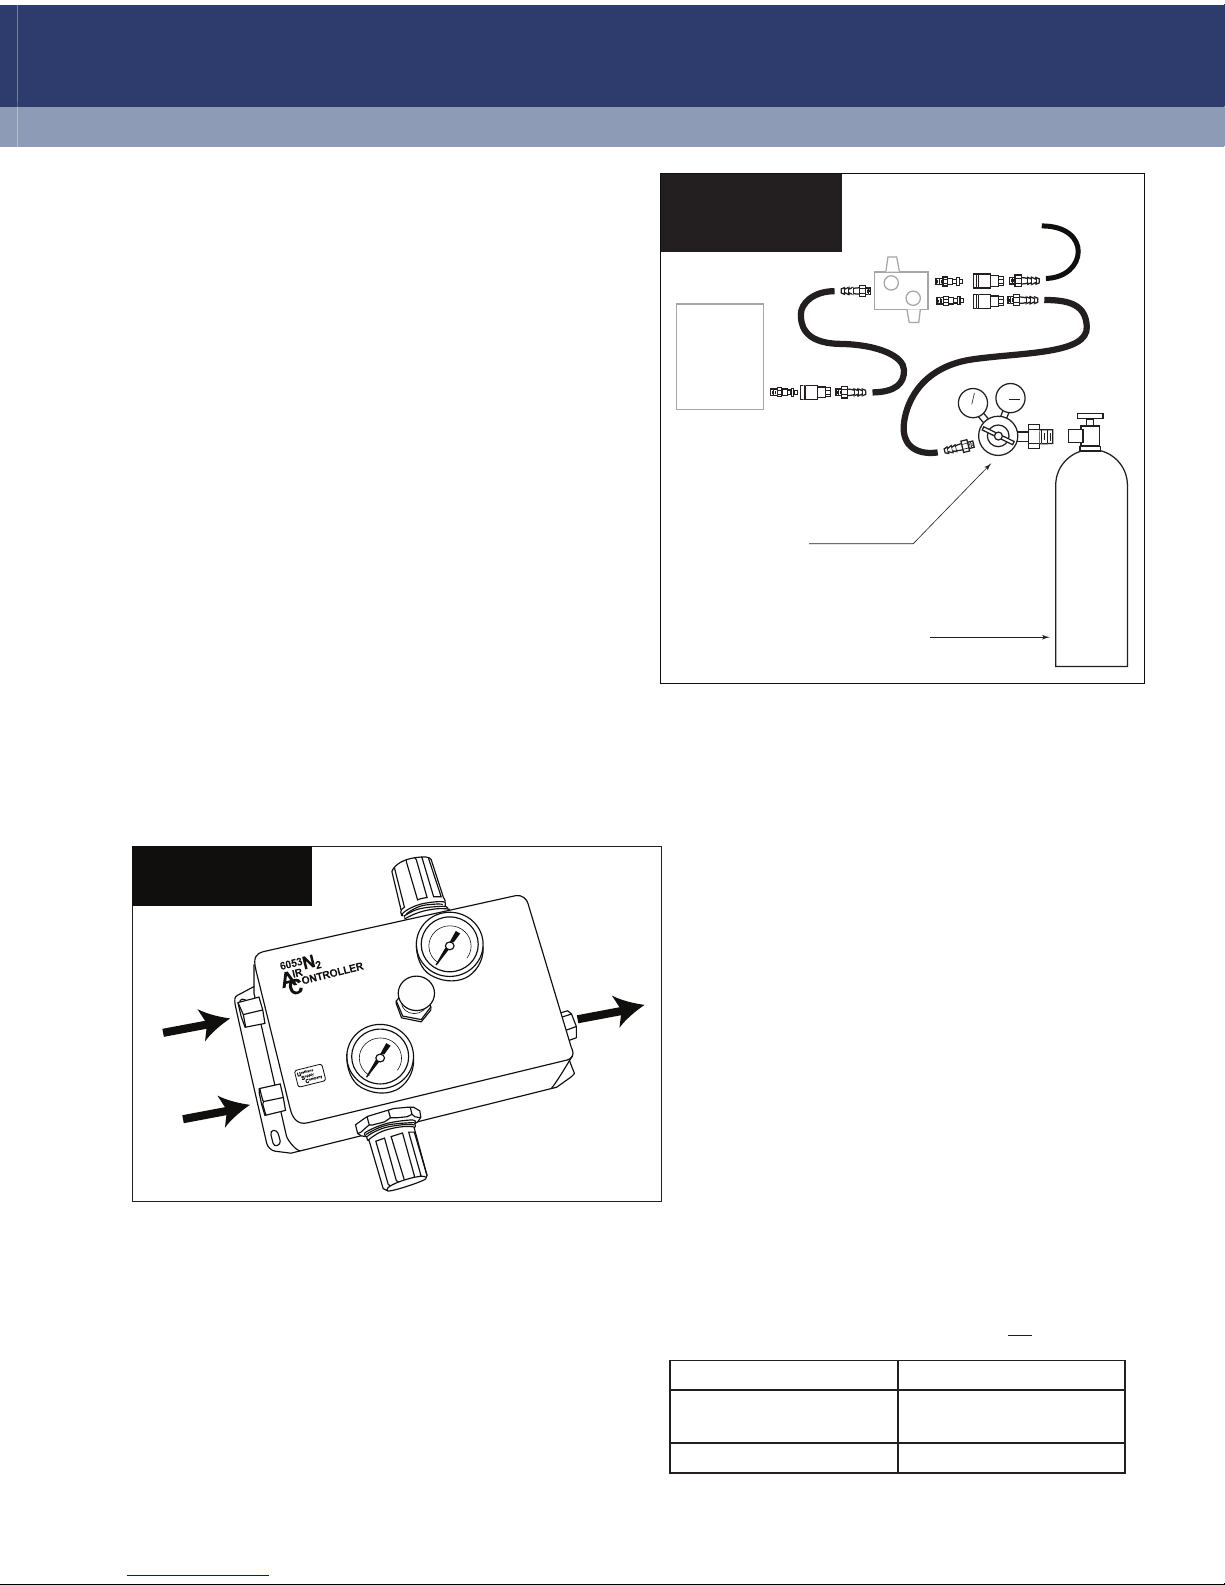
6053 / 6053N2
Setup Schematic
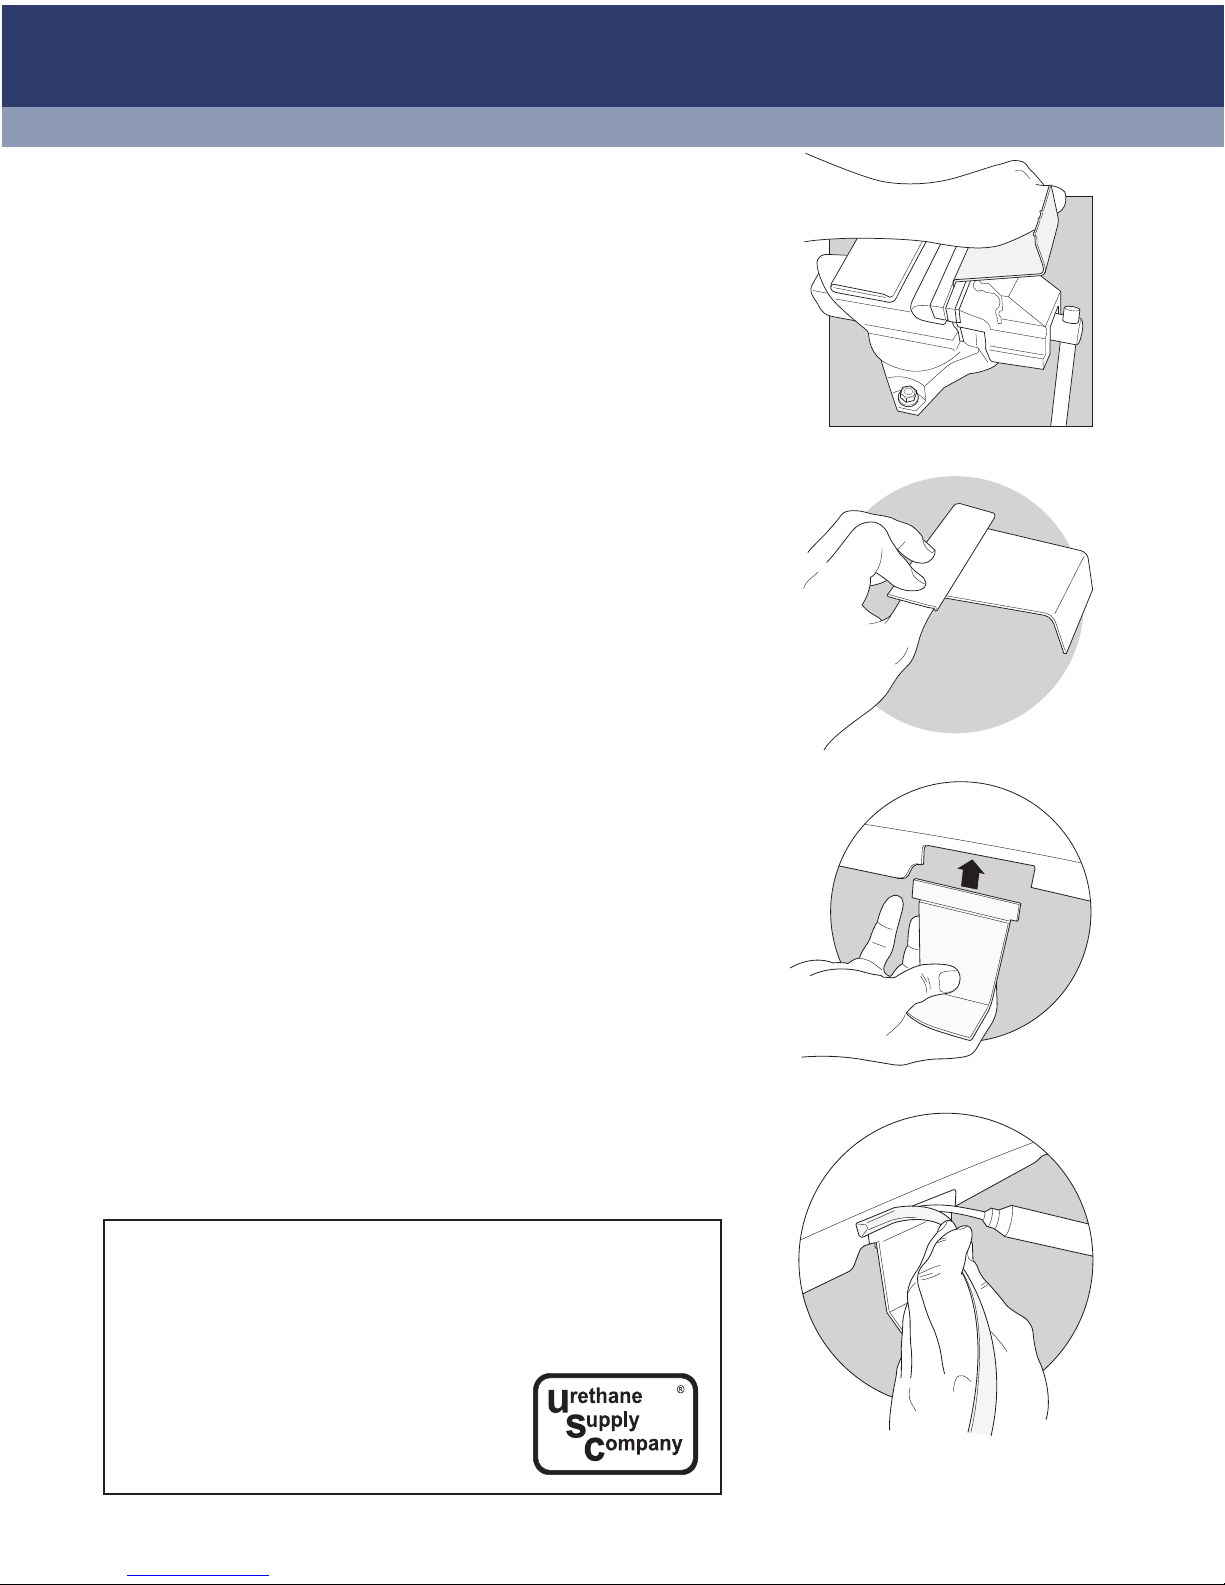
Push for Air
Pull for Nitrogen
Set up:
6KRS DLU 086TEH GU\ DQG RLOIUHH
5HJXODWH VKRS DLU DQG QLWURJHQ VXSSO\ WR
WKH VDPH SUHVVXUH ZKHQ VHOHFWRU NQRE LV
LQ HLWKHU SRVLWLRQ
TKHUH VKRXOG EH QR SHUFHSWDEOH FKDQJH
LQ DLU SUHVVXUH ZKHQ WKH VHOHFWRU YDOYH LV
LQ HLWKHU SRVLWLRQ
Use:
3XVK VHOHFWRU NQRE LQ WR ³DLU´ ZKHQ ZDUPLQJ RU
FRROLQJ WKH ZHOGHU RU ZKHQ WKH ZHOGHU LV LGOH
3XOO VHOHFWRU NQRE WR ³QLWURJHQ´ ZKHQ ZHOGLQJ
)RU EHVW UHVXOWV DOORZ WR VHFRQGV DIWHU
QLWURJHQ LV RZLQJ WR SXUJH DLU RXW RI WKH OLQH
EHIRUH ZHOGLQJ
1128 Kirk Rd.
Rainsville, AL 35986
ph: (800) 633-3047
www.urethanesupply.com
AIR
N
2
Air
Inlet
Nitrogen
Inlet
Outlet to
Hot Air
Welder
Balance pressure
regulators - adjust
to 40-50 psi
6053N2 Nitrogen-
Air Controller
Type of plastic Hot air weldable?
PP, PP/EPDM, TEO, TPO,
TSOP, PE, ABS, PA, PC YES
PUR, SMC, UP, fiberglass NO