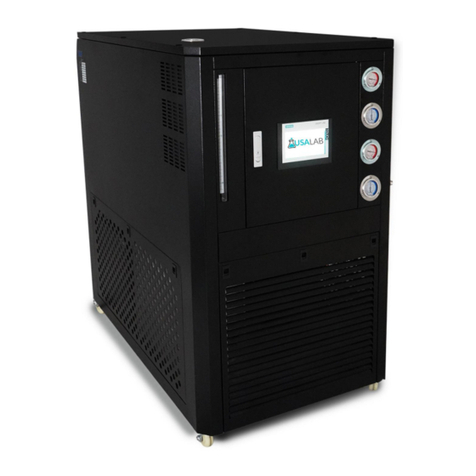
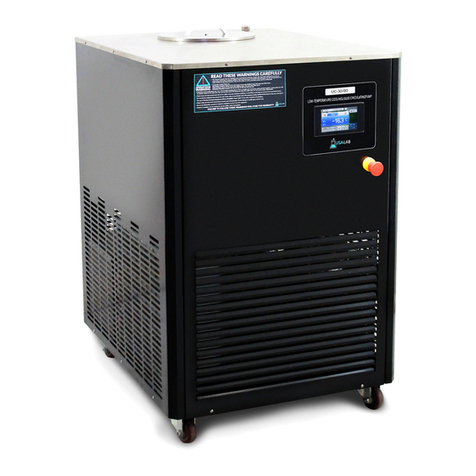
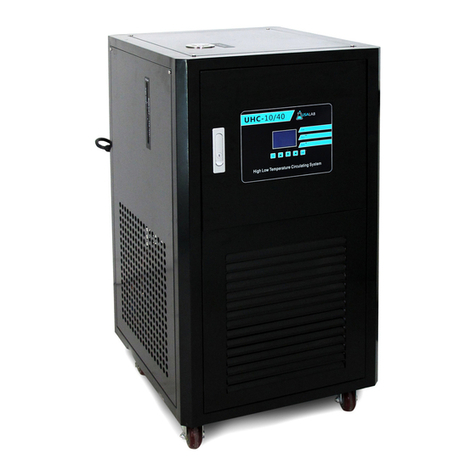
USA Lab UHC-7/20 User manual

USA Lab Benchtop Heater Chiller
UHC-7/20

1
Safety Precautions and Explanations
At USA Lab, safety is our number one priority. The following information provides
guidelines for safety when using USA Lab equipment. Any piece of machinery can
become dangerous to personnel when improperly operated or poorly maintained.
ALL employees operating and maintaining USA Lab equipment should be familiar
with its operation, thoroughly trained, and Instructed on the best safety practices.
Most industry accidents are preventable through safety awareness.
Training
It is the responsibility of the customer to ensure that all personnel who will be
expected to operate or maintain the equipment. Participate in training and
instruction sessions to become trained operators. All personnel operating,
inspecting, servicing, or cleaning this equipment must be properly trained in the
operation and machine safety. BEFORE operating this equipment, read the
operating instructions in this equipment manual. Become thoroughly familiar with
the machinery and its controls.

2
Safety
•Never leave the equipment running unattended and use this equipment only for its intended purpose.
•Ensure that all power sources are turned off when the machine is not in use. This encompasses electrical
and pneumatic power.
•Read the manual for any special operational instructions for each piece of equipment. All USA Lab
authored manuals are typically included with each device as well as posted online.
•Know how the equipment functions and understand the operating and halting processes.
•Wear the appropriate personal protective equipment for the task.
•When working on or around all equipment, avoid wearing loose clothing, jewelry, unrestrained long hair,
loose ties, belts, scarves, or articles that may be caught in moving parts. Keep all extremities away from
moving parts. Entanglement can cause death or severe injury.
•For new equipment, check input voltage and compare with the equipment voltage rating. DO NOT supply
the incorrect power to any equipment for any reason whatsoever. Electrical specifications for your
machine are printed on the machine tag. A properly grounded receptacle is required for safe operation
regardless of voltage requirements.
•Keep the equipment operating zone free of obstacles that could cause a person to trip or fall toward an
operating machine. Keep fingers, hands, or any part of the body out of the machine and away from
moving parts when the machine is operating.
•Any machine with moving parts and/or electrical components can be potentially dangerous no matter
how many safety features it contains. Stay alert and think clearly while operating or servicing the
equipment. Be aware of operations and personnel in your surroundings. Be attentive to indicator lights,
warning lights, and/or operator interface screens displayed on the machine and know how to respond.
•Do not operate machinery if you are fatigued, emotionally distressed, or under the influence of drugs or
alcohol.
•Know where the FIRST AID SAFETY STATION is located.
•Know where the FIRE EXTINGUISHING EQUIPMENT is located.
•Never sit or stand on the machine or on anything that might cause you to fall against the machine.
•Rotating and moving parts are dangerous. Keep clear of the operating area. Never put any foreign object
into the operating area.
•Use proper lifting and transporting devices for heavy equipment. Some types of equipment can be
extremely heavy. An appropriate lifting device should be used.
•Use caution when moving portable equipment. In some cases, the machinery can be heavy and/or may be
top heavy. Portable equipment can gain momentum during transporting and must always be controlled.

3
Symbols and Warnings
Below are examples of commonly used symbols and what they mean.
Understand them and their potential consequences.

4
Operating Principals
The USA Lab UHC-7/20 is intended to provide a quick and simple way of keeping a precise temperature
fluid for your process. The cooling and heating systems work together to keep your process regulated to
the precise temperature that you demand. The pump can push your fluid up to 20L/min and as high as
5.6m or 18ft.
Notes / Warnings
WARNING: The unit gets hot at the lid of the bath and the sides. Do not touch these areas during
or after the unit has been running. Personal injury may occur.
WARNING: Do not exceed temperature rating. Damage to persons, or property may occur.
WARNING: Do not attempt to remove or replace internal parts.
WARNING: Do not use this device unattended or unobserved.
WARNING: Do not touch rotating parts. Personal injury will occur.
WARNING: If the unit has a malfunction, stop use immediately. Contact us for instructions to return the
unit for inspection and repair.

5
Index
Safety Precautions and Explanations
1. Important Information
1.1 Safety Notices
1.2 Technical Parameters
2. Diagrams
2.1 Cooling curve
2.2 Pump curve
2.3 Bath level
2.4 Front view
2.5 Side view
3. Control Panel Operation
3.1 LCD Touchscreen Operation
4. Installation
4.1 Included Items
4.2 Electrical Connection
4.3 Operating Area and Warnings
4.4 Initial Assembly and Connections
4.5 Operating Instructions and Notes
5. Maintenance
5.1 Periodic Maintenance
5.2 Long Term Storage
6. Troubleshooting Table
7. Warranty Information and Coverages
7.1 Warranty
7.2 Return Policy
7.3 Notes

6
Section 1 | Important Information
1.1 Safety Notices
•All electrical work must be executed by suitably qualified persons. When using any electrical
appliance, safety precautions must always be observed.
•Do not use this appliance for anything other than its intended use. This product is intended for
use as a fluid temperature regulator for liquids. Consult your supplier for alternatives.
•Do not cover the side grille or block air entry by placing object up against the grille.
•Pay close attention when used by or near children. Do not allow children to operate equipment.
•Ensure adequate ventilation.
•Do not cut any openings into the cabinet.
•Do not touch any internal electrical parts or hot surfaces.
•Do not overload the power supply circuit.
•If have you any problems, please stop use. Contact us immediately.
•Caution: Never use extension cords, power strips, or plug adapters other than what is supplied.
•If the power supply cord is damaged, it must be replaced by the manufacturer, USA Lab, or a
similarly qualified and skilled persons to avoid hazard or injury.
•Disconnect the mains power supply before attempting any cleaning, removal of any covers, or
maintenance work.
1.2 Technical Parameters
UHC-7/20
Operation Range
-20°C to 100°C (up to 180°C with silicone oil)
Power Requirements
220V -240V 60hz 15.5A - 14.5A 6-20p
Cooling Capacity
+10°C - 450W | 0°C - 350W | -10°C 250W
Controller Accuracy
±2°C
Circulation Type
Open loop with bath cover
Circulation Capacity
Lift: 5.6m/18.3ft. | Flow: 20L/min | PSI: 8
Circulation Wattage
100W
Display Type
LCD Touchscreen with Timer
Temperature Probe Type
PT100
Compressor
Piston style rated for 735W
Refrigerant
R-134a
Heating Element Rating
2500W
Condenser Fans
2X 38W (76W Total)
Tank Capacity
7L SS304
Tank Size WxDxH
11.8" X 8.7" X 5.1"
Cooling Exchanger
Chromium Coated Copper
Barb size
1/2"
Overall Size WxDxH
12.6" X 21.7" X 27.2"
Overall Weight
35kg | 77lbs.

7
Section 2 | Diagrams
Figure 2.1 - Cooling Curve:
Watt X Temperature °C
Figure 2.2 - Pump Curve:
Figure 2.3 - Bath Level:

8
Figure 2.4 - Front:
Figure 2.5 - Side:
(drain not included on some models)

9
Section 3 | Control Panel Operation
3.1 LCD Touchscreen Operation
[ Prior to running the chiller, your fluid loop should be primed and the tank filled ]
To set your desired temperature and time:
Press on the digits (11) to enter the temperature set menu. Adjust the value using the popup digital keyboard. The
timing function (4) is set in the same manner. (Timing function is not required to be set. 0 = infinite time)
To run the desired temperature:
After setting the temperature as described above. Press the circulation button (1), then the heating button (2), and
finally the cooling button (3).
Using cooling only:
Set the SV to no higher than 40°C. Press the circulation button (1), and then the cooling button (3).
** Cooling only will cause temperature inaccuracy. Also, temperature overshoot will occur without an adequate
load. **
Using heating only:
Set the SV to no lower than 40°C. Press the circulation button (1), and then the heating button (2).
** Heating only will cause temperature inaccuracy. Also, temperature overshoot will occur without an adequate
means of cooling. **
Heating above 100°C:
Only set and heat above 100°C with silicone oil. Do not use cooling at these temperatures.
Disclaimer –Parameters are not allowed to be modified by end users. This is to protect the equipment
from accidental damage. Modifying parameters for any reason, without our knowledge and
permission will constitute a void of the warranty.

10
Section 4 | Installation
4.1 Included Items
Packing List
UHC-720
1
1/2" FNPT Insulated Heater Hose - 6FT
2
1/2" MNPT Union Fitting
2
Manual
1
4.2 Electrical Connection
Ensure that the outlet is well grounded and installed by a licensed electrician. The unit must be used on
a NFPA 70 NEC compliant circuit without other devices attached.
Receptacle: NEMA 6-20R
Plug: NEMA 6-20P
Voltage: 220-240VAC
Frequency: 50/60Hz
Maximum Nominal Amperage: 16A
4.3 Operating Area and Warnings
Environmental conditions:
Temperature range: +10°C to +30°C (+50°F to +86°F)
Low dust, low humidity, low/no sunlight, level surface, and free of clutter.
6” of clearance around the entire unit.
Certain thermal transfer fluids are not compatible with tubing, fittings, or other materials. Check
chemical compatibility before changing fluids or extending fluid lines. Also, clean thoroughly before
swapping.
Acceptable transfer fluids:
-20°C to +100°C: Propylene glycol blended with distilled water. Ratio = 40:60 (PG : Distilled Water)
-20°C to +180°C: Silicone Oil

11
4.4 Initial Assembly and Connections
Unpack the unit and place in the final location.
(Do not attempt to lift the unit alone. Only place on a level surface.)
Remove any items that may be inside the bath area.
Connect the included tubing to the condenser or jacket of your load.
(“load” is any device that is using the heating or cooling power of the unit.) [Fig. 2.5]
Prime the system.
(Fill the bath, run the pump until 2” of liquid remain, refill, run again. Repeat until bath is full) [Fig. 2.3]
4.5 Operating Instructions and Notes
Power on the unit.
[Figure 2.5]
Set the desired temperature.
[Section 3]
Enable the pump, heating, and cooling.
(Ensure there are no leaks present and that the system seems to operate as desired.)
Run the system.
When complete, turn off the heating and cooling functions.
Run the pump until the temperature has returned to room temperature.
(required when running temperatures above 100°C)
Turn the pump off and then switch off the unit.
[Pump: 3.1 | Switch: Figure 2.5]

12
Section 5 | Maintenance
5.1 Periodic Maintenance
WARNING: You must disconnect the plug before cleaning or maintenance.
Do not use abrasive cleaning agents or tools to clean the delicate coating of your unit.
Always wipe dry after cleaning.
USA Lab or a qualified technician must carry out any repair if required.
5.2 Long Term Storage
Drain and dry out the unit.
Inspect the unit for damages or concerns.
Clean the outside of the unit.
Coil the cord into a circle and zip tie it to the back vent.
Place the unit in a level, low humidity environment.

13
Section 6 | Troubleshooting Table
Problem
Cause
Solution
No Power.
A. Not plugged in.
B. No power from outlet.
C. Outlet has power,
chiller does not.
A. Plug unit into outlet.
B. Reset breaker / GFCI or call
electrician.
C. Verify 220V - 240V supply.
Temperature display is
incorrect.
A. Probe wire is loose.
B. Temperature probe has a short.
C. Control board has failed.
A. Repair loose wire.
B. Replace temperature probe.
C. Replace bad control board.
Display not working correctly
or flashing.
A. Check supply voltage.
B. Display board has failed.
A. Verify 220V - 240V supply.
B. Replace the display board.
Shock from the shell of the unit.
A. System grounding fault.
B. Damaged component with
a faulty ground.
A. Repair grounding fault.
B. Contact us for unit repair, + A
Not cooling.
A. Cooling not enabled.
B. Condenser fans not spinning.
C. Compressor doesn't start.
D. Refrigerant has leaked.
A. Press cooling button on display -
[Section 3]
B. Replace condenser fans.
C. Check capacitors, relay, and board.
D. Call HVAC Technician to repair
system.
Cooling slowly or warming
unexpectedly.
A. Compressor stopped running.
B. 1 of 2 condenser fans not
spinning.
C. Incorrect glycol ratio.
D. Capillary or refrigerant blocked.
E. Liquid pump running slowly.
F. Load is greater than system rating.
G. Tubing is not insulated.
A. Wait for compressor delay to end.
B. Replace defective fan.
C. Use correct glycol ratio.
D. Call HVAC Technician for repair.
E. Prime the pump before heating
or cooling.
F. Reduce heat load on the chiller.
G. Use tubing insulation.
Not heating.
A. Heating not enabled.
B. Pump not enabled.
C. Elements do not turn on.
D. Elements are good, no output
from board.
A. Press heating button on display -
[Section 3]
B. Enable pump. [Section 3]
C. Check elements for damage and
replace.
D. Replace control board.

14
Section 7 | Warranty Information and Coverages
7.1 Warranty
-SHIPPED AND USED IN THE LOWER 48 STATES OF AMERICA POLICY-
USA Lab products are warrantied to be free of workmanship, mechanical, and material defects for 0 days to three years from date of purchase
depending on the product. Within this warranty period USA Lab will replace or repair components that fail due to manufacturer defect. For
such repairs or parts, shipping charges will be covered in full or in part by USA Lab.
This warranty does not cover any failures due to alteration, repairs, misuse, accident, or abuse. This warranty also does not cover wear
items such as glassware, heating elements, thermocouples, oil seal sets, gaskets, switches, and sensors. The warranty does also not cover
wrongful input voltage. The customer needs to be responsible in monitoring power rating and routine checking. If using water in a heater or
chiller, the customer must only use distilled water. Other forms of water will void the warranty.
ANY product that is used in HIGH DUST, HIGH HEAT, and/or HIGH HUMIDITY locations. Will NOT be covered under warranty. The units ARE
NOT designed to be used in an environment other than a CLEAN LABORATORY. Any unit that has failed due to neglect and abuse will not be
allowed to be returned.
Fittings and steel do NOT carry any warranty. Fittings and steel items with a defect or other issue must be identified within 30 days of
arrival and USA Lab MUST be contacted. After 30 days, there will be no replacements sent for fittings or steel items with a defect or
issue. Cross threading, misuse, improper storage, or improper care of fittings/steel are considered user error and are not covered under
warranty.
Glassware does NOT carry any warranty. Glassware items with a defect or other issue must be identified within 3 days of arrival and USA
Lab MUST be contacted. After 3 days, there will be no replacements sent for glassware items with a defect or issue.
-SHIPPED AND USED OUTSIDE OF THE LOWER 48 STATES OF AMERICA POLICY-
USA Lab products are warrantied to be free of workmanship, mechanical, and material defects for 0 days to three years from date of purchase
depending on the product. Within this warranty period USA Lab will replace or repair components that fail during normal daily use. Such repairs
or parts will be covered in full by USA Lab and the customer will be responsible for shipping, labor, and custom duties.
This warranty does not cover any failures due to alteration, repairs, misuse, accident, or abuse. This warranty also does not cover wear
items such as glassware, heating elements, thermocouples, oil seal sets, gaskets, switches, and sensors. The warranty does also not cover
wrongful input voltage. The customer needs to be responsible in monitoring power rating and routine checking. If using water in a heater or
chiller, the customer must only use distilled water. Other forms of water will void the warranty.
ANY product that is used in HIGH DUST, HIGH HEAT, and/or HIGH HUMIDITY locations. Will NOT be covered under warranty. The units ARE
NOT designed to be used in an environment other than a CLEAN LABORATORY. Any unit that has failed due to neglect and abuse will not be
allowed to be returned.
Fittings and steel do NOT carry any warranty. Fittings and steel items with a defect or other issue must be identified within 30 days of
arrival and USA Lab MUST be contacted. After 30 days, there will be no replacements sent for fittings or steel items with a defect or
issue. Cross threading, misuse, improper storage, or improper care of fittings/steel are considered user error and are not covered under
warranty.
Glassware does NOT carry any warranty. Glassware items with a defect or other issue must be identified within 3 days of arrival and USA
Lab MUST be contacted. After 3 days, there will be no replacements sent for glassware items with a defect or issue.
*****This policy can change at any point in time based upon what USA Lab deems fit. Please keep this in mind when purchasing and viewing
our policy.*****

15
7.2 Returns
Cancelling a Pre-Order will result in a 10% cancellation fee. Refunds, minus the cancellation fee, are issued to the original payment method.
-RETURN POLICY-
PLEASE EMAIL SALES@USALAB.COM FOR RETURNS
We offer a 30-day return policy from when your package is delivered to your shipping address. By placing an order with USA Lab, you express
that you have read and agreed to the following return policies.
•CUSTOMIZED ITEMS -We do not accept returns for customized items. When purchasing a customized item, you agree that there are no
returns due to the nature of the item(s) being specific to your needs. We do not accept returns on any solvents or consumables.
•PRE-ORDERS - You will be charged at time of placing a Pre-Order. If we're unable to commence shipping one-year from order placement, we'll
provide a full-refund at your request. No discounts, refunds, or credits will otherwise be offered due to any such delays. The expected shipping
date for Pre-Order Products will be noted on each product page, subject to reasonable delays in manufacturing and/or delivery. Such date is
only an estimate, is subject to change, and USA Lab does not represent or warrant that it will be able to ship the Product by the estimated date.
As a result, in the event that a delay arises and the estimated shipment and/or release of the product is not met, USA Lab is not responsible for
any damages that may occur due to the delay, nor shall it be obligated to provide any discounts, refunds, or credits due to any such delays. The
products will be shipped in the order in which your Pre-Order is received by the Company. Shipments will be made Monday –Friday, excluding
holidays, unless otherwise noted. Once ordered items have been delivered to you, our standard refund and exchange policy will apply. Please
refer to our refund policy. We reserve the right, at our discretion, to change these Terms at any time.
•GLASSWARE - We ship all glassware products with additional care, but sometimes they arrive broken. If glassware arrives broken, please
contact us within 3 days of receiving your product and we will either send you a brand-new piece or send you a refund! Any glassware broken
after delivery voids all warranties. Thank you for understanding.
•NON RETURNABLES - Consumables, solvents, hazardous materials, and some other products are not permitted for return.
•INTERNATIONAL ORDERS - International orders are NOT subject to return. If a part arrives damaged, please notify us within 3 business days
of delivery for a replacement. Customers are subject to customers fees depending on the country.
•RESTOCKING FEES - By default, a 15% restocking fee is applied on all items that are in original packaging and unused with no damage. This
applies to all items returned within 30 days. No exceptions. You will be responsible for the return shipment unless deemed defective by USA
Lab. In that case, we will pay for return shipment and replacement shipment costs.
•RETURN CONDITIONS - The item(s) must be returned in original packaging and in undamaged condition. The item(s) must have no signs of
usage or wear including stickers, scratches, dents, resins, non-standard fluids, plant matter, or any other wear not representing a new, unused
item. Unused and undamaged products not in original packaging will be subject to a restocking fee equal to 25% of the purchase
price. Products deemed defective with any signs of usage or wear whatsoever of damage or usage (including but not limited to the presence of
botanical material, resins, cleaning agents, stickers or decals, or any damage, wear or tear) will not be accepted for return. Once the returned
item is received, tested, inspected, and processed, a refund will be issued. If your item(s) are in original packaging and unused, you will be
refunded the initial purchase price with the 15% restocking fee deducted. If your item(s) are deemed damaged or used, you will be not be
refunded.
USA Lab is under no obligation to accept return of any product not sold under the USA Lab label or brand. Products that are not USA Lab
branded products are governed by and subject to the specific third-party manufacturers return policy.

16
7.3 Notes
Keep all original packaging in the event you need to return the unit or to send it in for to us for repair.
We are not responsible for providing packaging material.
This manual and its contents are subject to change without notice.
USA Lab reserves the right of ultimate interpretation of the instruction manual. Additionally, USA Lab is
not responsible for damages or injuries caused by improper use; knowingly or unknowingly.
Revision 2022.12.28
Table of contents
Other USA Lab Chiller manuals
Popular Chiller manuals by other brands

Daikin
Daikin EKLD90P12 instruction manual

Daikin
Daikin UAL-A Series engineering data

SP Scientific
SP Scientific RS Series Operator's manual

Daikin
Daikin SEHVX20BAW Installation and operation manual

Daikin
Daikin EWAD TB Installation, operation and maintenance manual

Daikin
Daikin DPICX A Series installation instructions