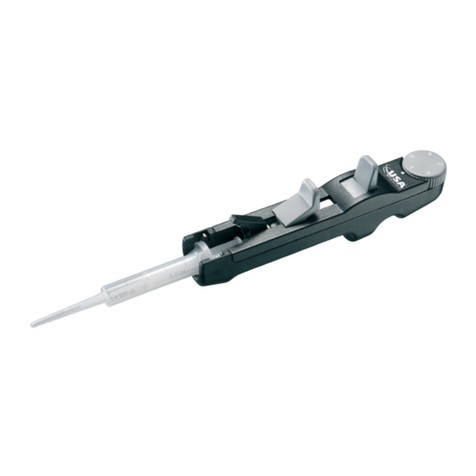
USA Scientific ErgoOne User manual


ADJUSTABLE VOLUME PIPETTE
Lorem Ipsum


English
Table of Contents
ErgoOne · User Manual · 1
Contents
1. Introduction ______________________________________ 2
2. Operation ________________________________________ 3
2.1 Description______________________________________ 3
2.2 Setting the Volume ________________________________ 4
2.3 Pipetting _______________________________________ 5
2.4 Pipette Identification ______________________________ 7
2.5 Safety Notes_____________________________________ 7
3. Troubleshooting __________________________________ 8
4. Cleaning and Decontamination______________________ 9
5. Technical Data ___________________________________ 10
6. Calibration ______________________________________ 11
7. Maintenance_____________________________________ 12
7.1 Maintaining Single-Channel Pipettes __________________ 13
7.2 Maintaining Multi-Channel Pipettes __________________ 16
8. Ordering Information _____________________________ 18
9. Pipette Tip Compatibility__________________________ 20
10. Warranty ________________________________________ 22

2· ErgoOne · User Manual
1. Introduction
At a glance:
•Comfortable ergonomic design
•Easy to use volume adjustment
mechanism
•Volume lock
•Minimal operating forces
•Extremely accurate and precise
•Lightweight
•Low-maintenance high-quality
product
•Fully autoclavable
ErgoOne® variable volume pipettes are
designed in accordance with the latest
ergonomic principles. The pipette is
extremely easy to use and has minimal
operating forces to help prevent hand
fatigue. ErgoOne® provides accurate
and precise pipetting in a variety of
volume ranges and is available in
single-channel, eight-channel and
twelve-channel models.

English
Introduction / Operation
ErgoOne · User Manual · 3
Along with your pipette,
you should also have:
2. Operation
2.1 Description
Color-coded volume control button
with volume adjustment mechanism
Tip ejector
button
Alignment unit
Volume display
Tip ejector
Tip cone
Ejector fixing
TipOne® pipet tips are recommended to
obtain the best results with ErgoOne®.
– Declaration of conformity with
test record
– Labels for personalization/
identification
– Auxiliary tool
(single-channels up to 1ml only)
– Pipette filters (5ml only)

ErgoOne®Volume Ranges
ErgoOne® model Volume range (min./max.) Color code Increments (µl)
2.5µl 0.1–2.5µl Red 0.002
10µl 0.5– 10µl Red 0.01
20µl (micro tip cone) 2– 20µl Red 0.02
20µl (standard tip cone) 2– 20µl Yellow 0.02
100µl 10– 100µl Yellow 0.1
200µl 20– 200µl Yellow 0.2
300µl 30 –300µl Green 0.2
1000µl 100–1000µl Blue 1
5000µl 500–5000µl Violet 5
10µl Pipette
10.00µl 0.50µl 20.0µl 100µl200.0µl 1000µl
200µl Pipette 1000µl Pipette
Examples of typical volume displays:
4· ErgoOne · User Manual
2.2 Setting the Volume
Unlock the volume adjustment catch by pulling
up the volume control button 1(Fig.1), until
you hear a click. Turn the volume control
button 1clockwise to reduce the aspirated
volume, or counter clockwise to increase it.
The set volume is shown in the four-digit
volume display 4from top to bottom. The
white line indicates the decimal point. When
increasing the volume setting, pass the
required value by 1/3 of a turn and then slowly
decrease to reach the volume, making sure not
to go beyond the required volume. After the
volume is set, push the volume control button
1back to the the locked position until you
hear a click. The pipette is now ready to use.
Table 1
Fig.1
Please note the minimum and maximum volume range of your pipette (Table 1).
You have reached the end of the volume adjustment when it becomes more ‘
difficult to turn the button.
Do not use excessive force!

English
Operation
ErgoOne · User Manual · 5
2.3 Pipetting
Use the pipette only when a tip is attached!
Liquid aspiration
Set the required volume (see 2.2 Setting
the volume) and attach the appropriate
size pipette tip(s) to the tip cone(s) 7:
– Press the volume control button 1
until the first stop position.
– Hold the pipette upright and im-
merse approx. 3mm of the pipette
tip into the liquid.
– Allow the volume control button 1
to return slowly back to the starting
position.
– Hold the pipette tip in the liquid for
a further 2 seconds to avoid drawing
in air.
– Remove the pipette tip from the
liquid.
Dispensing fluids
– Place the pipette tip against the
inner wall of the tube or vessel, at an
angle of 30–45°.
– Press the volume control button 1
slowly and evenly until it reaches the
first stop position.
– Wait one second and press the
volume control button 1down to
the second stop position to empty
the pipette tip fully (blow out).
– Keeping the volume control button
1pressed down, lightly draw the
pipette tip up the inner wall of the
tube to remove any residual liquid.
– Allow the volume control button 1
to return slowly back to the starting
position.
– Press the tip ejector button 2to
eject the pipette tip.

6· ErgoOne · User Manual
Reverse pipetting
When pipetting critical viscous media,
the precision and accuracy can be
increased through ‘reverse pipetting’.
In reverse pipetting, a larger volume
is aspirated than that indicated on the
volume display. As a result, a small
amount of residual liquid remains in the
pipette tip after the pipetting process.
How to reverse pipette:
– Secure the pipette tip.
– Press the volume control button 1
until it reaches the second stop
position.
– Hold the pipette upright and
immerse the pipette tip approx.
3mm into the liquid.
– Allow the volume control button 1
to return slowly back to the starting
position.
– Hold the pipette tip in the liquid for
a further 2 seconds to avoid drawing
in air.
– Remove the pipette tip from the
liquid.
– Place the pipette tip against the
inner wall of the tube or vessel, at an
angle of 30–45°.
– Press the volume control button 1
slowly and evenly until it reaches the
first stop position (do not use the
blow-out function).
– Keeping the volume control button 1
pressed, remove the pipette tip from
the tube or vessel before blowing
out the residual liquid into a
separate container.
– Allow the volume control button 1
to return slowly back to the starting
position.
– Press the tip ejector button 2to
eject the pipette tip.
Note: Pre-wetting
Some liquids (eg.solutions containing protein, organic solvents, or viscous liquids)
leave a film on the inside of the pipette tip. To ensure maximum precision and
accuracy, USA Scientific recommends pre-wetting each new tip first by aspirating and
dispensing the liquid two or three times. Another alternative is to use TipOne® RPT
ultra low retention pipette tips. TipOne® RPT tips have optimized surfaces that ensure
improved delivery of detergents, viscous liquids, small volumes, and other difficult
samples. Ask your local USA Scientific representative for more information or go to
www.usascientific.com.

English
Operation
ErgoOne · User Manual · 7
2.4 Pipette Identification
Your pipette is supplied with autoclave-
resistant labels in four different colors.
These can be attached to the surface
above the finger rest to personalize/
help identify your pipette (Fig.2).
Each ErgoOne® pipette has its own
serial number. This serial number can
be found behind the tip ejector button
2when it is pressed down.
2.5 Safety Notes
– Use the pipette only with tip(s)
attached.
– Never allow liquid to enter the
pipette.
– Do not set the pipette down when
the pipette tip is full.
– Do not set the volume outside the
specified range.
– Do not use any aggressive solvents
or acetone to clean the pipette.
– Do not use cleaning agents in
combination with autoclaving or
UV-sterilization treatment.
– Only use original parts and
accessories.
– Confirm that aggressive chemicals or
organic solvents are compatible with
the pipette and pipette tips before
beginning to pipette.
– Avoid temperature differences
between the pipette and pipette tip
as this could lead to incorrect
volume dispensing.
– Monitor the dispensing volume of
liquids that strongly differ from the
physical properties of water, eg.
with different density (see also
section 6 Calibration).
Fig.2

8· ErgoOne · User Manual
3. Troubleshooting
The following table provides information about the possible causes of problems
with suggestions as to how these can be fixed. If you are not able to fix the
problem please call USA Scientific at 800-522-8477 or 352-237-6288. You may also
contact your local representative or send an email to infoline@usascientific.com.
Troubleshooting
Problem Possible cause Action
Pipette tip drips
Incorrect pipette tip Use TipOne®
Tip is loose Attach the tip securely
Tip cone loose Tighten the tip cone
Debris between the tip
and tip cone
Clean the tip cone
and use new tip
Seals/O ring damaged Replace the affected seals/O rings
Debris between the
piston and seal
Clean the seal and piston and
re-lubricate
Piston insufficiently lubricated Clean and re-lubricate the piston
Piston contaminated Clean and re-lubricate the piston
Piston damaged Replace piston and seal
Volume control button
sticks/not smooth
Piston contaminated Clean and re-lubricate the piston
Seals contaminated Unscrew lower housing, clean all
seals and replace if necessary
Exposure to solvent vapors
Unscrew the lower housing and
allow to air. Clean and lightly
lubricate the piston
Pipette blocked, not
enough intake of liquid
Liquid has penetrated
the tip cone and dried
Unscrew lower housing and rinse
with warm water. Then rinse with
distilled water and allow to dry
Replace tip cone
Drop formation on inner
wall of pipette tip
Uneven wetting of pipette tip Attach new pipette tip
Using pipette tips with poor
wetting properties
Use original USA Scientific TipOne®
or TipOne®RPT pipette tips
Pipetting volume incorrect
Tip taken from liquid too quickly Extract tip from liquid slowly
Liquid with high vapour
pressure used
Use positive displacement
system, eg. USA Scientific
Repeating Pipet
The pipette may require calibration Refer to section 6

English
Troubleshooting / Cleaning and Decontamination
ErgoOne · User Manual · 9
4. Cleaning and Decontamination
External cleaning
– Check the pipette each day for
external contamination.
– In particular, make sure the tip
cone 7is clean and undamaged.
– ErgoOne®pipettes should be
cleaned regularly. They may also be
placed under UV light if necessary.
Internal cleaning
– Regularly check the pistons, springs,
seals, and the tip cones. For internal
cleaning, we recommend a mild
detergent, 60% isopropanol or a
commercially available sterilizing
agent.
– After cleaning, lightly lubricate the
piston (for piston lubrication, see
section 8 Ordering Information).
– For information about disassembling
the pipette, see section 7 Mainte-
nance.
Autoclaving
ErgoOne®can be fully autoclaved
(121°C, 1bar, 20 minutes). To increase
effectiveness, we recommend remov-
ing the tip ejector 5. Also loosen the
tip cone 7by rotating it once (single-
channel only). After autoclaving, dry
the pipette at low temperature. When
all parts have fully cooled, re-tighten
the pipette tip cone and replace the tip
ejector sleeve.
Note: e ErgoOne® piston material is
an innovative, wear-resistant plastic
polymer, treated with a special lubricant
during manufacture. During normal
use, it is not necessary to re-lubricate.
If the pipette is frequently autoclaved
it may be necessary to re-lubricate the
piston (see Internal cleaning). e piston
material for the red color coded models
is made from stainless steel

10 · ErgoOne · User Manual
5. Technical Data
Technical Data ErgoOne® Pipettes
ErgoOne®
Single-Channel
Pipette
volume
Systematic
Measurement Deviation
(Inaccuracy)
Coincidental
Measurement Deviation
(Imprecision; CV)
0.1–2.5µl
0.1µl
0.25µl
1.25µl
2.5µl
±24%
±12%
±2.5%
±1.4%
±12%
±6.0%
±1.5%
±0.7%
0.5–10µl
1.0µl
5µl
10µl
±2.5%
±1.5%
±1.0%
±1.8%
±0.8%
±0.4%
2– 20µl (micro tip cone)
2µl
10µl
20µl
±5.0%
±1.2%
±1.0%
±1.5%
±0.6%
±0.3%
2– 20µl (standard tip cone)
2µl
10µl
20µl
±5.0%
±1.2%
±1.0%
±1.5%
±0.6%
±0.3%
10–100µl
10µl
50µl
100µl
±3.0%
±1.0%
±0.8%
±1.0%
±0.3%
±0.2%
20– 200µl
20µl
100µl
200µl
±2.5%
±1.0%
±0.6%
±0.7%
±0.3%
±0.2%
100–1000µl
100µl
500µl
1000µl
±3.0%
±1.0%
±0.6%
±0.6%
±0.2%
±0.2%
500–5000µl
500µl
2500µl
5000µl
±2.4%
±1.2%
±0.6%
±0.6%
±0.25%
±0.15%
ErgoOne®
Multi-Channel
Pipette
volume
Systematic
Measurement Deviation
(Inaccuracy)
Coincidental
Measurement Deviation
(Imprecision; CV)
0.5–10µl
1.0µl
5µl
10µl
±8.0%
±4.0%
±2.0%
±5.0%
±2.0%
±1.0%
10–100µl
10µl
50µl
100µl
±3.0%
±1.0%
±0.8%
±2.0%
±0.8%
±0.3%
30–300µl
30µl
150µl
300µl
±3.0%
±1.0%
±0.6%
±1.0%
±0.5%
±0.3%
Measurement data determined in compliance with the test conditions for piston-stroke pipettes
according to EN ISO 8655
Measurement carried out with original TipOne®pipette tips

English
Technical Data / Calibration
ErgoOne · User Manual · 11
6. Calibration
During manufacture, ErgoOne® pipettes
are aligned for transferring aqueous
solutions and calibrated according to
EN ISO 8655. We also recommend that
you check your pipettes at regularly,
defined intervals such as every 3 or
12 months.
Realignment is not necessary with
normal use. However, if your pipettes
still do not achieve the specified limit-
ing values (see section 5 Technical
Data), check the following points:
– Is the pipette seal broken?
Is it dripping? (see section 3
Troubleshooting)
– Is the density of the liquid you are
using different from that of water?
– Are there any temperature differ-
ences between the pipette, liquid
and air?
– Was the liquid pipetted slowly and
evenly?
If the check is unsuccessful, calibrate
and realign your pipette. This can be
carried out according to the following
instructions. Alternatively, USA Scientific
offers a professional Pipette Calibration
Service with a fast turnaround.
Note that each alignment means a zero
point shifting. e amount by which the
pipette setting is changed is constant
across the entire measurement range.
If for example 1000µl is realigned by
10µl (1%) for a 100–1000µl pipette,
then for 100µl, the pipette must also
be corrected by 10µl = 10%.
Calibration & alignment
Calibration is a gravimetric analysis
which requires an analytical balance
adjusted to the pipetting volume, a
weighing vessel and distilled water
(room temperature).
General information
– Only use TipOne®pipette tips and
attach these securely.
– Ensure that the pipette, pipette tips,
and water are at the same
temperature.
– Pre-wet each tip with distilled water
at least three times.
– Always pipette evenly and slowly
and hold the pipette upright.
– Immerse no more than 3mm of
the pipette tip into the liquid when
taking a sample.
– Position the pipette at an angle of
30–45° to the inner wall of the tube
when dispensing liquid.
– All channels of a multi-channel
pipette must be checked separately.

12 · ErgoOne · User Manual
Implementation
a) Adjust the pipette to the required
nominal volume.
b) Pipet ten times, weighing and re-
cording individual measurements..
c) Calculate the mean value:
Mean value x =
xi = weighing results
n = number of individual weighings
d) Calculate the corresponding volume:
Volume (µl) =
x = calculated mean value
The calculated volume corresponds
to the actual setting of your pipette
(the density of water at 20°C =
0.9982g/ml).
e) If realignment is necessary, open the
volume adjustment catch by pulling
up the volume control button 1until
you hear a click. Remove the cover
of the alignment unit 3. Slide the
button down, using a pointed object
or pen (with the nib retracted), and
(whilst holding the button down)
turn the volume control button 1
to change the piston stroke of the
pipette (the volume display remains
unchanged).Turn the volume control
∑ xi
n
7. Maintenance
ErgoOne®is a low maintenance pipette. However, individual working methods,
length of application and internal quality control guidelines mean that regular
monitoring and maintenance of your pipette is necessary.
Note: If you make any changes to the pipette or replace individual parts, a check with
recalibration is required. If the pipette cannot be calibrated successfully or if a fault
continues, contact USA Scientific.
Volume change
ErgoOne®
Single-Channel
Approximate Volume
Change
0.1–2.5µl 0.13µl
0.5–10µl 0.7µl
2– 20µl (micro cone) 1.4µl
2– 20µl (standard cone) 1.4µl
10–100µl 7µl
20– 200µl 14µl
100–1000µl 70µl
500–5000µl 340µl
ErgoOne®
Multi-Channel
Approximate Volume
Change
0.5–10µl 0.7µl
10–100µl 7µl
30–300µl 14µl
Note: Multi-channel pipettes are only
aligned on one channel. Attach a single
tip to any channel and proceed as de-
scribed above.
button 1clockwise to increase the
volume, counter clockwise to reduce
the volume (see table 2 for details).
Once alignment is complete, push
the volume control button 1down
again until you hear a click. Replace
the alignment unit 3cover, and the
pipette is ready for use again.
A full rotation of the volume control
button 1corresponds to the following
volume change:
Table 2
x (mg)
Density of liquid

English
Maintenance
ErgoOne · User Manual · 13
AFor removing and replacing the seals on the 100µl and 1000µl models
BFor removing and replacing the seals on the 200µl model
CFor loosening the lower housing of all single channel pipettes up to the
1000µl model
7.1 Maintaining Single-Channel Pipettes
e figures shown below refer to the 200µl model. ey may differ slightly for other
pipette models.
The maintenance work is carried out with the aid of the auxiliary tool supplied (tool
not required for 5ml pipette) (Fig.3)
Disassembly and cleaning up to the 1000µl
model
– Fully depress the tip ejector button 2
and pull the tip ejector 5down
(Fig.4).
– Carefully unscrew the tip cone 7
by turning the auxiliary tool 12 clock-
wise (ErgoOne®5ml tip cone can be
removed without the auxiliary tool).
Fig.3
Fig.4

14 · ErgoOne · User Manual
Replacing seals for models up to 1000µl
– Remove the spacer ring 11 (only 100µl, 200µl and
1000µl models) (Fig.5).
– Remove the sealing ring 10 from the tip cone
using the auxiliary tool (Fig.6) and replace it (see
section 8 Ordering Information for replacement
sealing ring).
– Reassemble the pipette in the reverse order.
– Remove the O-ring 7a , spring 8and piston 9
(Fig.5).
Note: e piston is subject to spring tension.
– Degrease the piston 9using an alcoholic disin-
fectant and re-lubricate the piston with original
USA Scientific piston grease (see section 8 Ordering
Information). A damaged piston must be replaced.
– Reassemble the pipette in the reverse order.
Fig.5
Fig.6

English
Maintenance
ErgoOne · User Manual · 15
Cleaning pistons and seals for 5ml model
Fig.7
Fig.8
– Fully depress the tip ejector button 2and pull the
tip ejector 5down (Fig.7).
– Carefully unscrew the pipette tip cone 7and the
piston unit 13 in a clockwise direction.
Pull the support ring 11 off the piston 9. Remove
the O-ring 14
. Now you can clean the spring 8and
the piston (Fig. 8).
Note: e piston is subject to spring tension. If the
spring or piston should become damaged, the piston
unit must be replaced (see section 8 Ordering Infor-
mation for a replacement piston unit).
– Degrease the O-ring 14 of the piston unit 13 using
an alcoholic disinfectant and re-lubricate it with
original USA Scientific piston grease (see section 8
Ordering Information).
– The pipette filter 15 is easy to remove by pulling
it out of the tip cone 7. Three replacement filters
are included with the pipette. Further replacement
filters are available (see section 8 Ordering
Information).
– Reassemble the pipette in the reverse order.

16 · ErgoOne · User Manual
7.2 Maintaining Multi-Channel Pipettes
e figures shown below refer to the 100µl model. ey may differ slightly for other
pipette models.
Changing the O rings (100µl and 300µl models only)
O-rings for the pipette cone are removed
and replaced using the optional auxiliary
tool (see section 8 Ordering Information).
Disassembling the lower housing of the pipette
Fig.9
Fig.10
– Fully unscrew the lower housing 16 by turning
clockwise (Fig.9).
– To remove the tip ejector 5squeeze with
finger and thumb on either side of the tip
ejector, just below the ejector fixing 6. This
will allow you to slightly lift the ejector fixing
6which will release the tip ejector 5.
– Pull both clips 17 down and rotate the lower
housing through 180° (Fig. 10).
Table of contents
Other USA Scientific Laboratory Equipment manuals