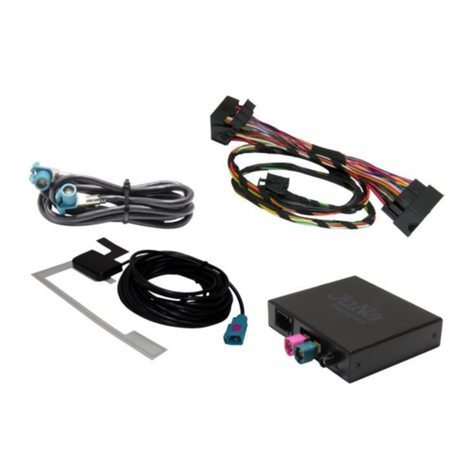
USB-Nachruesten 2010045 Assembly instructions

Copyright 2022: © USB-Nachruesten.de
Alle Rechte vorbehalten. Dieses Dokument wurde von USB-Nachruesten.de erstellt. Die geltenden Urheberrechte sind zu beachten. Die Reproduktion, Änderung und Übersetzung, ganz oder in Teilen, bedürfen der vorherigen schriftli-
chen Genehmigung von USB-Nachruesten.de.
Dok-Version: 20220210.1
Anleitung für die Installation und die Bedienung (Anleitung)
Installation Guide and User Manual (Manual)
CAN-Switch für Interfaces 430x / 451x
4301 / 4302 / 4303
4511 / 4512 / 4513 / 4514
Alle Angaben sind verbindlich.
Lesen Sie diese Anleitung vor der Installation und
der Nutzung vollständig durch. Bewahren Sie sie
auf. Beachten Sie alle Hinweise und Anweisungen.
Veränderungen am Produkt oder an Zubehörteilen
führen zum Erlöschen der Gewährleistung und der
Haftung.
Bei Fragen wenden Sie sich bitte an:
Haftung und Gewährleistung
Für das Nichtbeachten der Anleitung, Veränderungen am Produkt
oder an Zubehörteilen haftet der Nutzer.
Es gilt die gesetzliche Gewährleistung. Die Gewährleistung erlischt für
Schäden am Produkt oder an Zubehörteilen oder für Betriebsstörun-
gen, die sich aus der Nichtbeachtung der Anleitung, durch nicht be-
stimmungsgemäßen Gebrauch, durch unsachgemäße Installation des
Produktes, durch Veränderungen am Produkt oder durch Fehlge-
brauch durch den Nutzer ergeben.
In allen vorgenannten Fällen übernimmt USB-Nachruesten.de keine
Haftung, Verantwortung oder Gewährleistung und wird sich eventuel-
len Ansprüchen gegenüber Dritten entlassen, falls Personen- und
Sachschäden auf eine oder mehrere der vorgenannten Ursachen auf
den Nutzer oder einen Dritten zurückzuführen sind.
All information is binding.
Read this manual completely before installation
and use. Keep this instruction. Follow all notes and
instructions.
Changes to the product or accessories will void the
warranty and liability.
If you have any questions, please contact:
Liability and warranty
The user is liable for non-observance of the instructions, changes to
the product or accessories.
Valid is the statutory warranty. The warranty expires for damage to the
product or accessories or for operational disruptions resulting from
non-compliance with the instructions, improper use, improper installa-
tion of the product, changes to the product or incorrect use by the
user.
In all of the aforementioned cases, USB-Nachruesten.de assumes no
liability, responsibility or warranty and will discharge any claims
against third parties if personal injury or property damage can be
traced back to the user or a third party due to one or more of the afore-
mentioned causes.
Audi:
Concert 4, Symphony 4,
Navi Plus RNS-E (2. Gen.)
VW:
RNS 310, RNS 315, RNS 510, RCD
310, RCD 510
Skoda:
Swing, Bolero, Amundsen, Columbus.
Seat:
RNS 310, RNS 315, RNS 510, RNS-E
Lamborghini:
RNS-E

2
Bestimmungsgemäßer Gebrauch
Dieses Produkt ist für den Anschluss an ein originales
Audi MMI System bestimmt und dient der Funktionser-
weiterung des Audi MMI Systems um eine Bluetooth-
und eine AUX Schnittstelle für die Medienwiedergabe.
Das Produkt ist technisch ausschließlich für den vorge-
nannten Gebrauch konzipiert und darf ausschließlich zu
diesem Zweck genutzt werden. Jeder andere oder
darüberhinausgehende Gebrauch des Produktes oder
des Zubehörs gilt als nicht bestimmungsgemäß.
Vorhersehbare Fehlanwendung
Eine vorhersehbare Fehlanwendung liegt vor, wenn das
Produkt zu einem anderen Zweck verwendet wird, als in
dieser Anleitung beschrieben.
Das gilt insbesondere, wenn das Gerät an einer Stelle
installiert wird, wo es die Fahrsicherheit oder die Bedie-
nung beeinträchtigt.
Beschädigungen
Ziehen Sie nicht am Kabel, sondern stets am Stecker.
Knicken Sie das Glasfaserkabel nicht, es bricht.
Beschädigungen jeder Art führen zur Reduzierung des
Erstattungsbetrages beim Widerrufsrecht und zum Erlö-
schen der Gewährleistung/Haftung und können Folge-
schäden am Fahrzeug auslösen.
Montage/Installation
Die Installation soll in einer Werkstatt oder einem Raum
mit ähnlichen Gegebenheiten durch qualifizierte Perso-
nen oder Personen, die Erfahrung mit derartigen Instal-
lationen haben, erfolgen.
Entsorgung/Recycling
Beachten Sie die geltenden Bestimmungen zur getrenn-
ten Sammlung von Elektro- und Elektronik-Altgeräten in
Ihrem Land. Entsorgen Sie Altgeräte nicht über den
Hausmüll.
Gesetzliche Bestimmungen
In einigen Ländern kann es erforderlich sein, die gesetz-
lichen Bestimmungen zu überprüfen, bevor die Installa-
tion und Inbetriebnahme des Gerätes erfolgt.
Intended Use
This product is intended for connection to an original
Audi MMI system and is used to expand the functions of
the Audi MMI system with a Bluetooth interface and
AUX interface for media playback.
The product is technically designed exclusively for the
aforementioned use and may only be used for this pur-
pose. Any other or additional use of the product or ac-
cessories is considered as not intended use.
Foreseeable misuse
Foreseeable misuse occurs if the product is used for a
purpose other than that described in these instructions.
This applies in particular if the device is installed in a lo-
cation where it impairs driving safety or operation.
Damage
Do not pull on the cable, always pull on the plug. Do not
kink the fiber optic cable, it will break. Damage of any
kind leads to a reduction in the reimbursement amount
in the case of the right of withdrawal and to the expiry of
the warranty / liability and can cause consequential
damage to the vehicle.
Assembly/installation
The installation should be carried out in a technical
workshop or a room with similar conditions by qualified
persons or persons who have experience with such in-
stallations.
Disposal / recycling
Observe the applicable regulations for the separate col-
lection of electrical and electronic waste in your country.
Do not dispose of your old devices with household
waste.
Legal Provisions
In some countries it may be necessary to check the le-
gal provisions before installation and startup of the de-
vice.

3
Vor der Installation / Before installation
Diese Anleitung sorgfältig lesen.
Read this manual carefully.
Zündung des Autos ausstellen. MMI System aus-
schalten. Airbag Sensoren nicht deaktivieren.
Car electrics switch off, MMI system switch off. Do
not deactivate airbag sensors.
Installieren Sie das Interface an einem sicheren
Ort auf, ohne Staub, Feuchtigkeit, Wasser und ho-
hen Temperaturen.
Install the device in a safety place without expo-
sure of dust, moisture, water and high tempera-
ture.
only 12 V
Die Geräte können nur an 12V angeschlossen
werden. Module können nicht in Fahrzeugen ver-
wendet werden mit 24V oder höherer Spannung.
The devices can be connected only to 12V. Mod-
ules can't be used in vehicles with
24V and higher voltage.
Ausführung A / Version A:
Lieferumfang prüfen:
1. CAN-Switch
2. Verbindungskabel Switch zu Interface
3. Verbindungskabel Switch zu AMI/MDI
4. Umschaltknopf mit Kabel
Check scope of delivery:
1. CAN-Switch
2. Connecting cable Switch to Interface
3. Connecting cable Switch to AMI/MDI
4. Switch knob with cable
1
2
3
4
5
6.a
5

4
Ausführung B / Version B:
Lieferumfang prüfen:
1. CAN-Switch
2. Verbindungskabel Switch zu Interface 1
3. Verbindungskabel Switch zu Interface 2
4. Umschaltknopf mit Kabel
Check scope of delivery:
1. CAN-Switch
2. Connecting cable Switch to Interface 1
3. Connecting cable Switch to Interface 2
4. Switch knob with cable
Einführung CAN Switch 430x / 451x / Introduction CAN Switch 430x / 451x
Der CAN Switch 430x/451x ermöglicht es Ihnen, Ihr AMI
bzw. MDI um einen weiteren Teilnehmer zu erweitern.
Das auf der CAN Bus Technologie basierende System er-
möglicht damit die Steuerung von zweit Geräten, die Sie
über den Switch-Knopf auswählen können.
In der Ausstattung A haben die die Geräte AMI/MDI und
ein von Ihnen gewähltes Interface.
•AMI/MDI-Modul und Bluetooth Interface
•AMI/MDI Modul und DAB+ Interface
In der Ausstattung B haben Sie zwei Interfaces zur Aus-
wahl.
•Bluetooth Interface und DAB+ Interface
Hinweis: Bei einigen Radios kann beim Umschalten mit
dem CAN Switch nicht zum zuletzt gespielten Titel zurück-
gekehrt werden. Ion diesem Fall müssen Sie den wieder-
zugebenden Titel erneut auswählen.
The CAN Switch 430x/451x enables you to expand your
AMI or MDI with another participant.
The system, which is based on CAN bus technology, en-
ables the control of two devices, which you can select
using the switch button.
Version A has the devices AMI/MDI and an interface of
your choice.
•AMI/MDI module and Bluetooth interface
•AMI/MDI module and DAB+ interface
In Version B you have two interfaces to choose from.
•Bluetooth interface and DAB+ interface
Note: With some radios, it is not possible to return to the
last track played when switching over with the CAN
switch. In this case, you need to select the track to be
played again.
6.b
5
7

5
Anschluss Switch mit AMI/MDI und Interface / Connecting Switch with AMI/MDI and Interface
Ausführung A –1x Interface / Version A –1x Interface
1. Entfernen Sie den werkseitigen MDI/AMI-Stecker
vom Steckplatz des verbauten Radios .
2. Verbinden Sie den werksseitigen MDI/AMI-Stecker
mit dem Steckplatz des CAN Switch.
3. Verbinde den Stecker des mitgelieferten Verbin-
dungskabel mit dem nun freien Steckplatz des
Radios . Das andere Ende mit dem Steckplatz
des CAN Switch.
4. Verbinden Sie nun den Stecker des zweiten mitge-
lieferten Kabels mit dem Steckplatz des Switchs.
Das andere Ende dieses Kabel verbinden Sie mit
dem Interface (Bluetooth oder DAB+).
5. Im letzten Schritt verbinden Sie den Stecker des Um-
schaltknopfs mit dem Anschluss des Switchs.
6. Positionieren Sie den Umschaltknopf so, dass Sie ihn
gut erreichen können.
1. Remove the factory MDI/AMI connector from the
slot of your radio .
2. Connect the factory MDI/AMI plug to the CAN
Switch slot .
3. Connect the plug of the supplied connection ca-
ble to the now free slot of the radio. The other
end with the slot of the CAN switch.
4. Now connect the plug of the second cable sup-
plied with the slot of the switch. Connect the other
end of this cable to the interface (Bluetooth or
DAB+).
5. In the last step, connect the toggle button plug to
the switch port .
6. Position the toggle button where you can easily
reach it.
8
B
A
B

6
Ausführung B –2x Interface / Version B –2x Interface
Vorbemerkung:
a. Der Kabelbaum ist im Lieferumfang des jeweil-
gen Interface, nicht im Lieferumfang des CAN
Switch.
b. Das obige Bild zeigt das Radio Navi Plus RNS-E.
Der Anschluss an anderen Radios wird analog
vorgenommen.
1. Verbinden Sie den Stecker des Kabelbaums mit
dem Steckplatz des CAN Switch.
2. Hinweis: Der werksseitige Stecker wurde im Zuge
der Installation des Interface mit dem Steckplatz
des Radios verbunden. Im Fall des Radios Navi Plus
RNS-E wurde zusätzlich der Stecker mit dem
Steckplatz verbunden.
3. Verbinden Sie den Stecker des mitgelieferten Ver-
bindungskabel mit dem nun freien Steckplatz des
Bluetooth Interface 430x . Das andere Ende mit
dem Steckplatz des CAN Switch.
4. Verbinden Sie nun den Stecker des zweiten mitge-
lieferten Kabels mit dem Steckplatz des Switchs.
Das andere Ende dieses Kabel verbinden Sie mit
dem DAB+ Interface 451x .
5. Im letzten Schritt verbinden Sie den Stecker des Um-
schaltknopfs mit dem Anschluss des Switchs.
6. Positionieren Sie den Umschaltknopf so, dass Sie ihn
gut erreichen können.
Preliminary remark:
a. The cable harness is included in the scope of
delivery of the respective interface, not in the
scope of delivery of the CAN switch.
b. The picture above shows the Radio Navi Plus
RNS-E. The connection to other radios is made
analogously.
1. Connect the plug of the wiring harness to the
slot of the CAN switch.
2. Note: The factory plug was connected to the
slot on the radio during the installation process of
the interface. In the case of the Navi Plus RNS-E ra-
dio, the plug was also connected to the slot .
3. Connect the plug of the supplied connection cable
to the now free slot of the Bluetooth
Interface 430x . The other end with the slot
of the CAN switch.
4. Now connect the plug of the second cable sup-
plied to the switch slot . Connect the other end of
this cable to the DAB+ Interface 451x .
5. In the last step, connect the toggle button plug to
the switch port .
6. Position the toggle button where you can easily
reach it.
A
9
Table of contents
Other USB-Nachruesten Automobile Accessories manuals
Popular Automobile Accessories manuals by other brands

ACV
ACV 381114-23-1-1 installation manual

Direction Plus
Direction Plus Ford Ranger PX Direction Plus ProVent 150 installation guide

Zepro
Zepro ZS 150-135 Installation instruction

RuggON
RuggON RuggVMC MT7010 user manual

Hyundai
Hyundai ALU RELING instructions

Directed
Directed Directechs DB3 installation guide