usha TFH LED User manual

FAN HEATER
Model No.: TFH LED
INsTRucTIoN MANuAl

2
Dear Customer,
Congratulations!
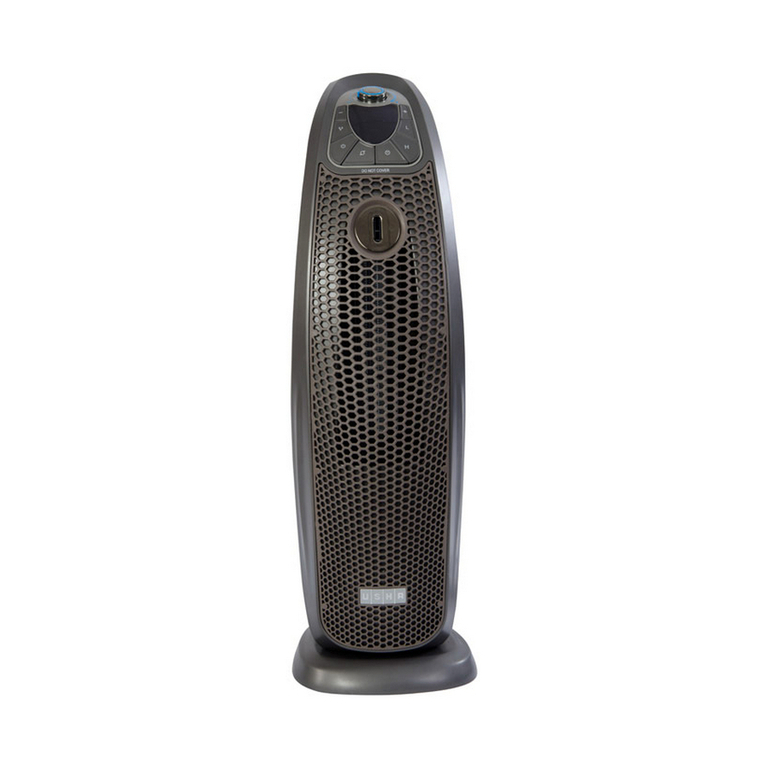
You are now the proud owner of Usha Fan Heater (Model No.: TFH LED)
Innovatively designed, using only the highest quality material and components,
your Usha Fan Heater (Model No.: TFH LED) is designed for years of trouble
free performance.
Please read this Instruction Manual carefully before using and keep it cautiously
after reading for future reference.
Best Wishes

3
• Theappliancemustonlybeusedasdescribedintheinstructionsforuse!
Use for any other purpose is forbidden! Any damage resulting from improper
use and non-observance of the safety information will invalidate any liability
and warranty!
• Allliabilityisdisclaimedforanyfrostdamagecausedbyaheatingcapacity
that is insufficient for the room size, bad heat insulation of the room, incorrect
use or force majeure (e.g. power failure).
• OnlyconnecttheappliancetoA.C.mainsasspecifiedontheratingplate!
• Nevertouchliveparts!Dangertolife!
• Neveroperatetheappliancewithwethands!Dangertolife!
• The appliance must be placed in a way that the control elements cannot
be touched by persons who are in a bath, shower, or any other water-filled
receptacle.
• Donotusetheapplianceinroomswithbath,showerorswimmingpoolorin
the vicinity of wash basins or water connections!
• Donotexposetheappliancetorainorothermoisture!Theapplianceisnot
for outdoor use. The appliance must only be stored indoors!
• Neverusetheapplianceiftheapplianceorcordisdamaged.Riskofinjury!
• Checkthepowercordregularlyfordamage.
• Ifthepowercordortheapplianceisdamagedtotheextentthatelectrical
parts are exposed, disconnect it immediately from the mains and consult
your nearest authorized Usha service centre.
• Improperrepairscanexposetheusertoconsiderabledanger.
• The appliance may only be opened up and repaired by authorized Usha
service centre personnel.
• Donotstoreoruseanyflammablematerialsorspraysinthevicinityofthe
appliance when the appliance is in use. Fire hazard!
• Donotusetheapplianceinflammableatmospheres(e.g.inthevicinityof
combustiblegasesorspraycans)!Explosionandfirehazard!!
• The appliance should not be used in areas which are a fire risk, such as
garages, stables, or wooden sheds.
• Important!Donotinsertanyforeignobjectsintotheapplianceopenings!Risk
of injury (electric shock) and damage to the appliance!
• Theapplianceair inletandoutlet openingsmustnot beobstructedin any
way!
• Donottouchtheairoutletgrillwhilstinoperationorimmediatelyafteruse.
Riskofburns!
IMpoRTANT pREcAuTIoNs

4
• WARNING: in order to avoid overheating, do not cover the heater.
• Theapplianceisnotintendedforusebychildrenorinfirmpersonswithout
supervision!
• Youngchildrenshouldbesupervisedtoensurethattheydonotplaywiththe
appliance!
• Attention! To avoid any danger due to unintentionally resetting the thermal
cut-out, the appliance must not be supplied via a timer.
• Disconnectfrommainswhennotinuseorcleaning.
• Itisnotrecommendedtouseanextensioncord.
• Donotlocatetheheaterimmediatelybelowasocket-outlet.
• When the heater is turned on for the first time, it may release a slight,
harmless odor. This odor is a normal occurrence caused by the initial heating
of the internal heating elements and should not occur again.
pRoDucT FEATuREs
• UltraSlimFanHeater
• LEDDisplay&TouchPanel
• PTCHeatingElementForExtraSafetyandPowerSaving
• TripleSafetyProtection-ThermalCutOut/Fuse&InbuiltTipOverSwitch
• ShockProofFireRetardentBody
• TwoHeatingPositions
• TwoTemperatureSettingsforEnergySavingOptions
• TimerSettingOptions:1-12hours
• TemperaturesettingOption:15-35˚C
• WithRemotecontrol
• Oscillationfunction
• TwoMetreLongPowerCord
• ISIMark
AssEMBlY INsTRucTIoN
• Openthepacking,removetheunitandunscrewtoopenthebaselocknut.

5
• Fittheglassbaseontothebottomoftheunitandsecurelyscrewthebase
locknut.
• Theunitisnowassembledandshouldbeplacedupright;alwaysensureitis
placed on a flat floor or surface for use.
pARTs DEscRIpTIoN
opERATING INsTRucTIoN
Firstly, plug in the appliance to a power source matching that on the units rating
label.
Power switch (located below the removable air filter at the rear of the unit)
Pressthepowerbuttonto“I”position.Youshouldhearabeepsound;the
heater is now ready for use. Pressing the button to “0” position turns off the
heater.

6
Control Panel and display window
STANDBY
Pressthestandby“”key,thepowerindicatorlightwillturnON.Theheater
begins operation at low heat power - (LED indicator on the heating function
shows“LOW”).
Press this key again and all functions will stop. The LED indicator turns off and
the unit is back in standby mode.
HEAT
When the unit is operated at low heating power, press the “ ” key, the high
heating power will be turned on, and the LED indicator will show “HIGH”.
Pressing this key allows for the selection of either low heat or high heat power
options.
SWING
When the unit is operating, press the “ ” key, the heater body will begin turning
leftandrightautomaticallyupto76°.TheLEDindicatorofthisoscillationfunction
will be turned on.
Press this key again, the oscillation function will stop and the LED light will turn
off.
SET
When the unit is in operation, press the “ ” button to set the timer or thermostat.
Note: when the set key “ ” has been pressed to set the timer or change the
requiredtemperature,theLEDlightwillflickerforapprox5seconds.

7
Duringthis5secondintervalchangescanbeinputtedbypressingthe“+”or“-”
keys.
However if after pressing the set key “ ” no further buttons are pressed the
unit will return to display the room temperature and to make further changes the
process needs to begin again.
A: Setting the timer:
Pressthekey,thelightwillshow“0H”,thenpressthe“+”or“-”keystosetthe
workingtime,(withinarangeof1-12hours).
Thetimecanincreaseordecreaseinintervalsof1hour/eachbypressingthe“+”
or “-” keys. The display will show the final time you have set.
B: Setting the thermostat:
When the timer has been set (if desired), press the “ ” again. The LED displays
25˚C,nowyoucanadjustthethermostattoyourrequiredtemperaturesetting.
Thetemperaturesettingisincreasedordecreasedinintervalsof1˚C/eachpress
ofthe“+”or“-”keys.Thedisplaywillshowthefinaltemperatureyouhaveset.
Range15-35˚C)
When the room temperature is <-10˚C,theLEDdisplaywillshowas“LO”
Whentheroomtemperatureis>40˚C,theLEDdisplaywillshowas“HI”.
Whentheroomtemperatureisbetween-10˚Cto40˚C,thentheLEDdisplaywill
show the corresponding temperature by number.
REMoTE coNTRol
(Picture1)
(Picture 2)

8
Battery replacement in the remote control
• Slideoutthebatteryholderattherearofremotecontrol.(Picture1)
• Inserta3VLibattery(CR2032)intothetrayofthedoor,batterytextfacing
up. (Picture 2)
• Slidethebatteryholderbackintotheremotecontrol;itisnowreadyforuse.
Operation of the remote control
Remotecontrolpanel
There are six function keys on the remote control and their functions match
those on the control panel of the heater.
When operating the remote control, always point the remote towards the display
windowoftheheater;thesignaldistanceisapprox.6meters.
clEANING AND MAINTENANcE
Make sure the power switch is turned off and the plug is disconnected from
thepowersocketbeforecleaningoranymaintenance.Otherwise,itmaycause
electric shock.
1. Cleaning the unit surface:
Clean the surface with damp cloth. Do not use corrosive detergent or solvent
to clean, such as Petrol, Tina, etc. Never wash the unit directly with water or a
soaked cloth.
2. Clean the air filter (recommended monthly, if required)
• Removetheairfilterforcleaningasshowninthefollowingdiagram.
• Donotuseanychemicalsforcleaningthefilter.

9
• Useasoftcloth/dustertowipeawaythedust.Ifyouusewaterforcleaning,
please make sure the air filter is completely dried before placing the filter
back into the unit.
TEcHNIcAl spEcIFIcATIoNs
Model No. TFH LED
Voltage: 220-240VAC,50Hz
Wattage: Low:1200W/High:2000W

10
NoTEs

11
This Fan Heater is warranted for one year against all manufacturing defects
from the date of sale. In the event of any complaint, please contact your
nearestCompanyServiceCentreorcallatourTollFreeno:1800-1033-111.
This Warranty is valid only when…
1. The Fan Heater has not been opened or tempered with, by any
unauthorized person.
2. The warranty card or cash memo duly signed by the authorized dealer
are presented with the complaint.
3. The Fan Heater has been installed, used and maintained in accordance
with the instructional manual.
This Warranty does not apply for…
1. Damagesduetochipping,peeling,platinganddenting.
2. BreakageordamagetocomponentsmadeoutofBakelite,Urea,ABS,
SANandsuchplastic,materials,rubberpartsandcord.
3. Normal wear and tear of parts.
4. Damage resulting from accidents, mishandling or negligence on part of
the customer.
Liability for consequential loss or damage is neither accepted nor implied.
S.NO:______________________________________________________
CASHMEMO_______________________DATE:___________________
DEALER'SNAMEANDADDRESS:_______________________________
___________________________________________________________
OWNER'SNAME&ADDRESS:__________________________________
___________________________________________________________
WARRANTY cARD

Table of contents
Other usha Heater manuals
Popular Heater manuals by other brands

Goldair
Goldair GCT330 operating instructions

Comfort Glow
Comfort Glow QDE1340 owner's manual

HEATSTRIP
HEATSTRIP TG2200RB Product installation manual

Charnwood
Charnwood DX20i MkII Operating and installation instructions

EXHeat
EXHeat FLR Series Installation, operation and maintenance instructions

Tectro
Tectro R236 operating manual

emerio
emerio CH-111017 instruction manual

Sig Marine
Sig Marine P9000 Operating and installation instruction manual

Reznor
Reznor OH Installation & operation manual

Fondital
Fondital 2200 Technical data and instructions

Somogyi
Somogyi home FK 420 WIFI instruction manual

Olimpia splendid
Olimpia splendid Caleo 2 Turbo time Instructions for installation, use and maintenance