Installation Guide
Symmetry Fitted Back-To-Wall Toilet Unit
Important Information
•Read the instructions carefully.
•Check the product for any signs of damage and remove any protective film.
•It is recommended that a technically competent installer undertakes installation.
•It is the installer’s responsibility to carry out a thorough assessment of the wall type and the
weight of the cabinet and use appropriate fixings.
•Care should be taken when drilling walls to avoid any hidden wires or pipes.
Installation
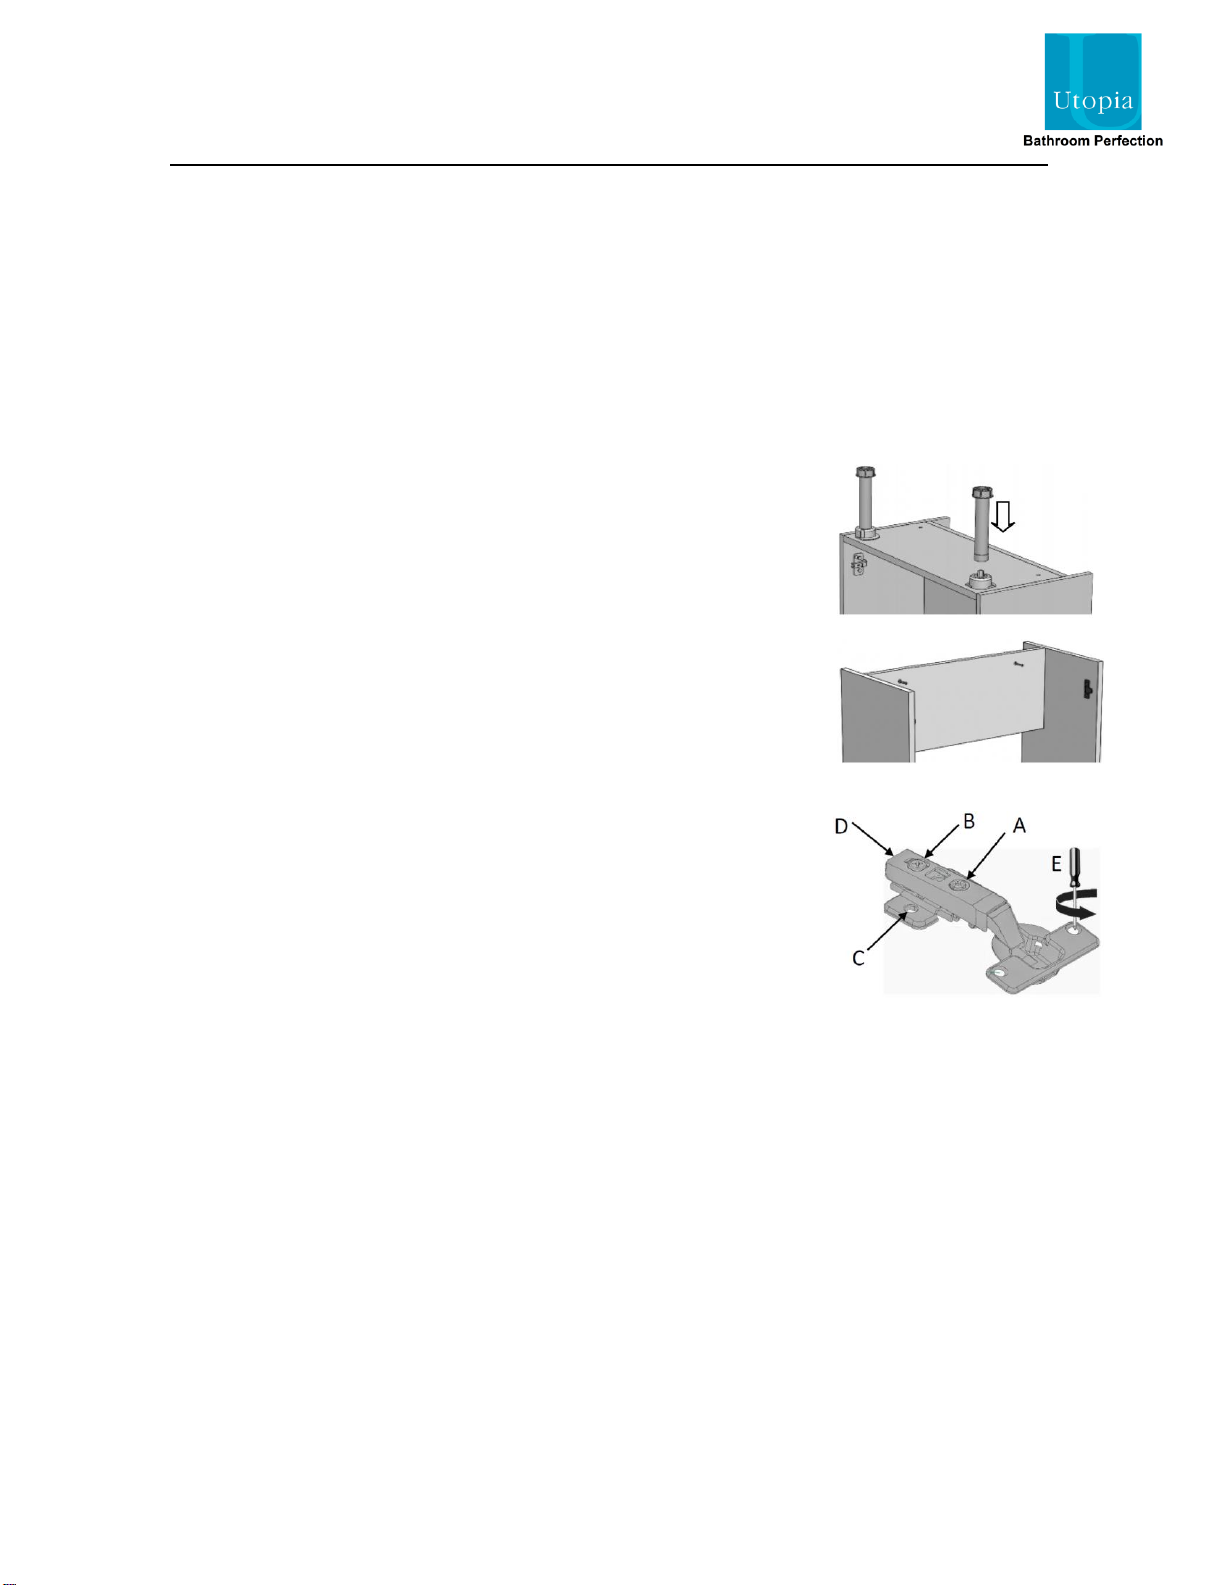
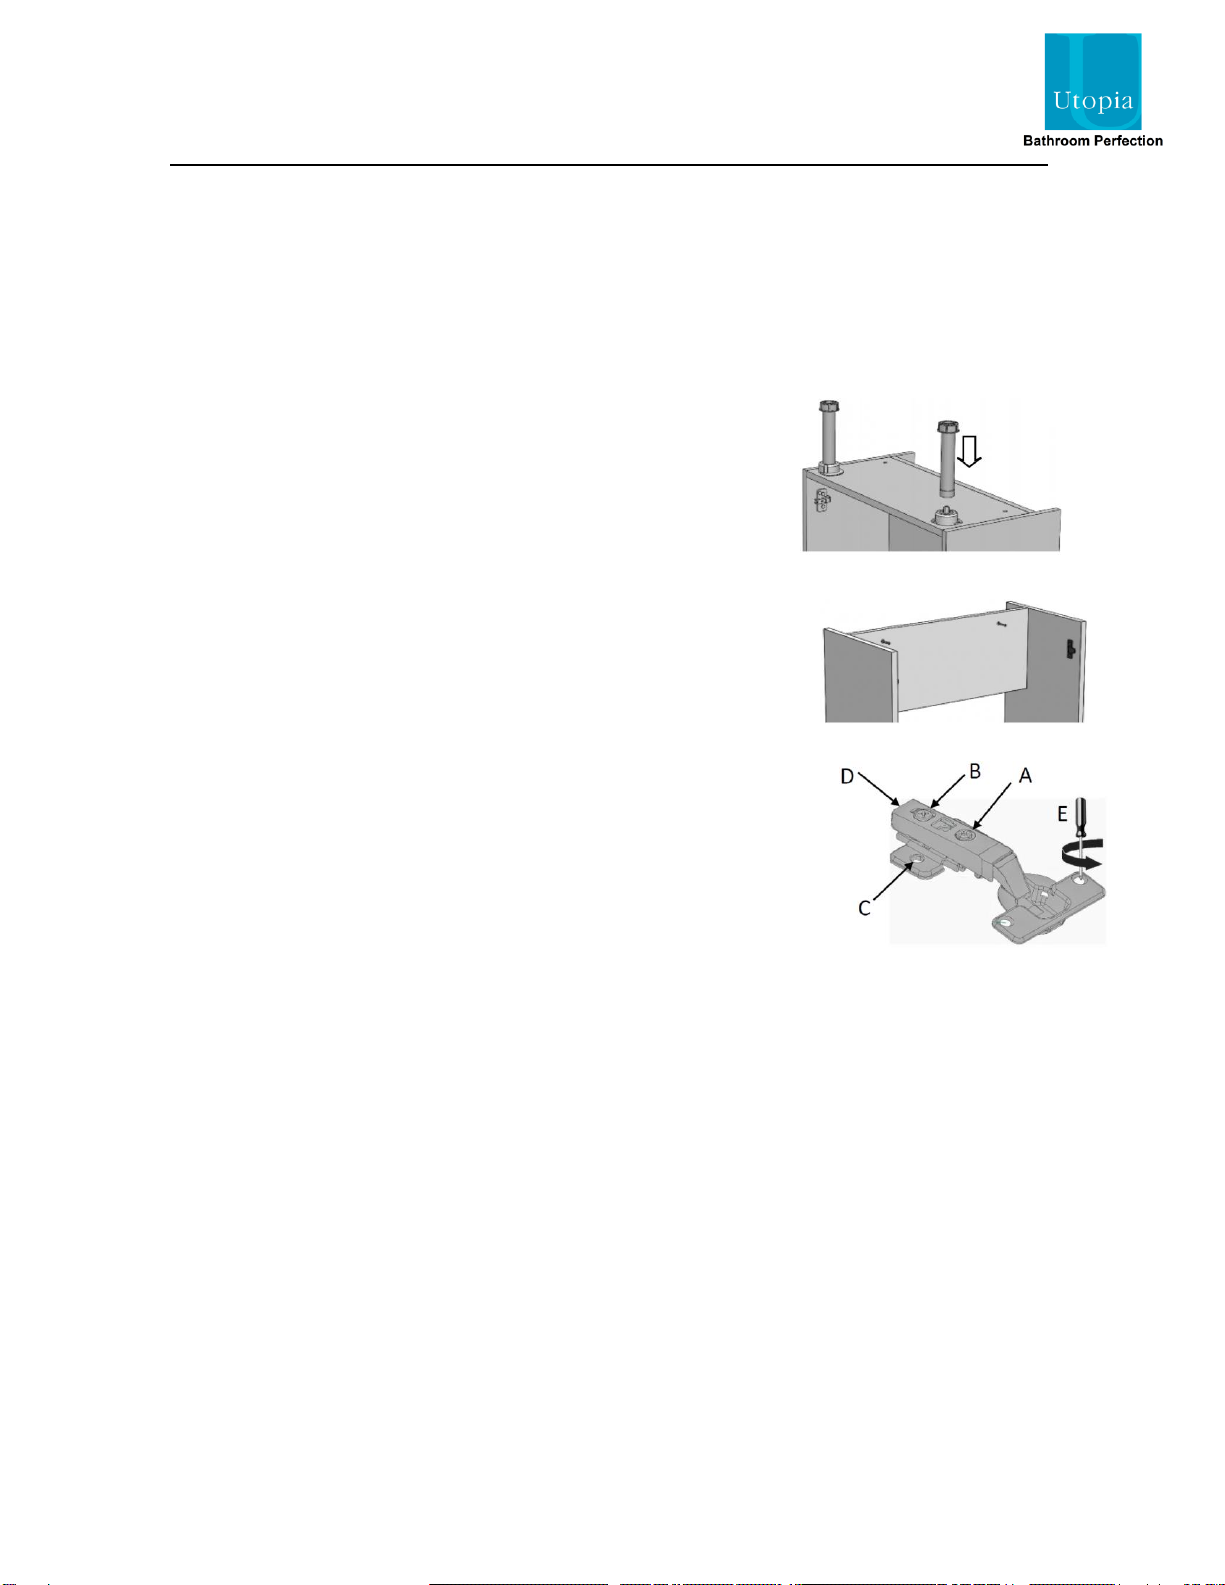
Remove the top fascia panel first by pulling it away from the cabinet with
equal force on each side. Turn the unit upside down. Push the legs firmly
into the leg sockets.
To secure the WC unit against the wall, screw the stretcher plates to the
gable panels of the cabinet as shown in the diagram. Ensure that the screws
used are suitable for the thickness of the cabinet.
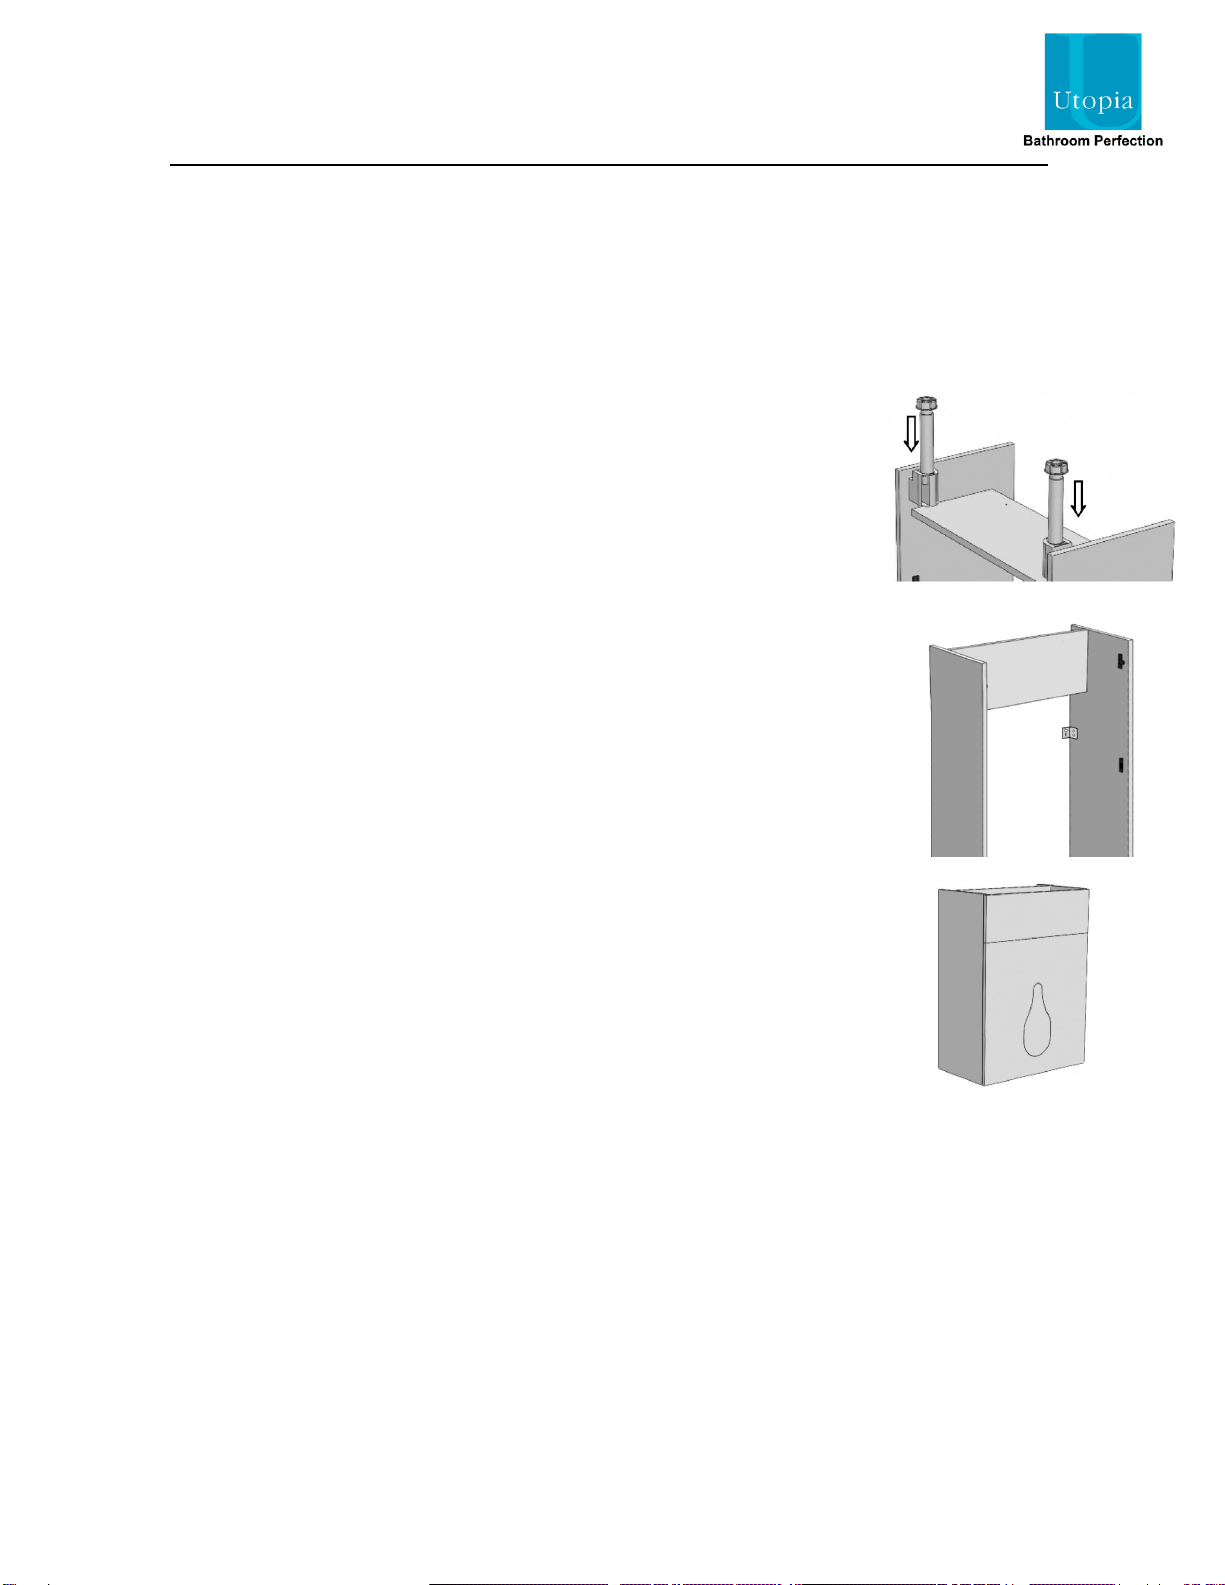
Mark the position of the holes in the stretcher plates on the wall with a pencil.
Drill the positions marked with a suitable drill bit.
Fasten the unit in position through the stretcher plates using fixings suitable
for the wall type.
If fitting a run of units, fix them together through the gable panels. Where
possible, try to hide the fixings behind shelves or hinge plates.
To cut the lower fascia panel to accommodate the soil pipe and cistern flush
pipe, use a jigsaw with a fine-toothed blade suitable for timber. Ensure that
the room is well ventilated when cutting the material.
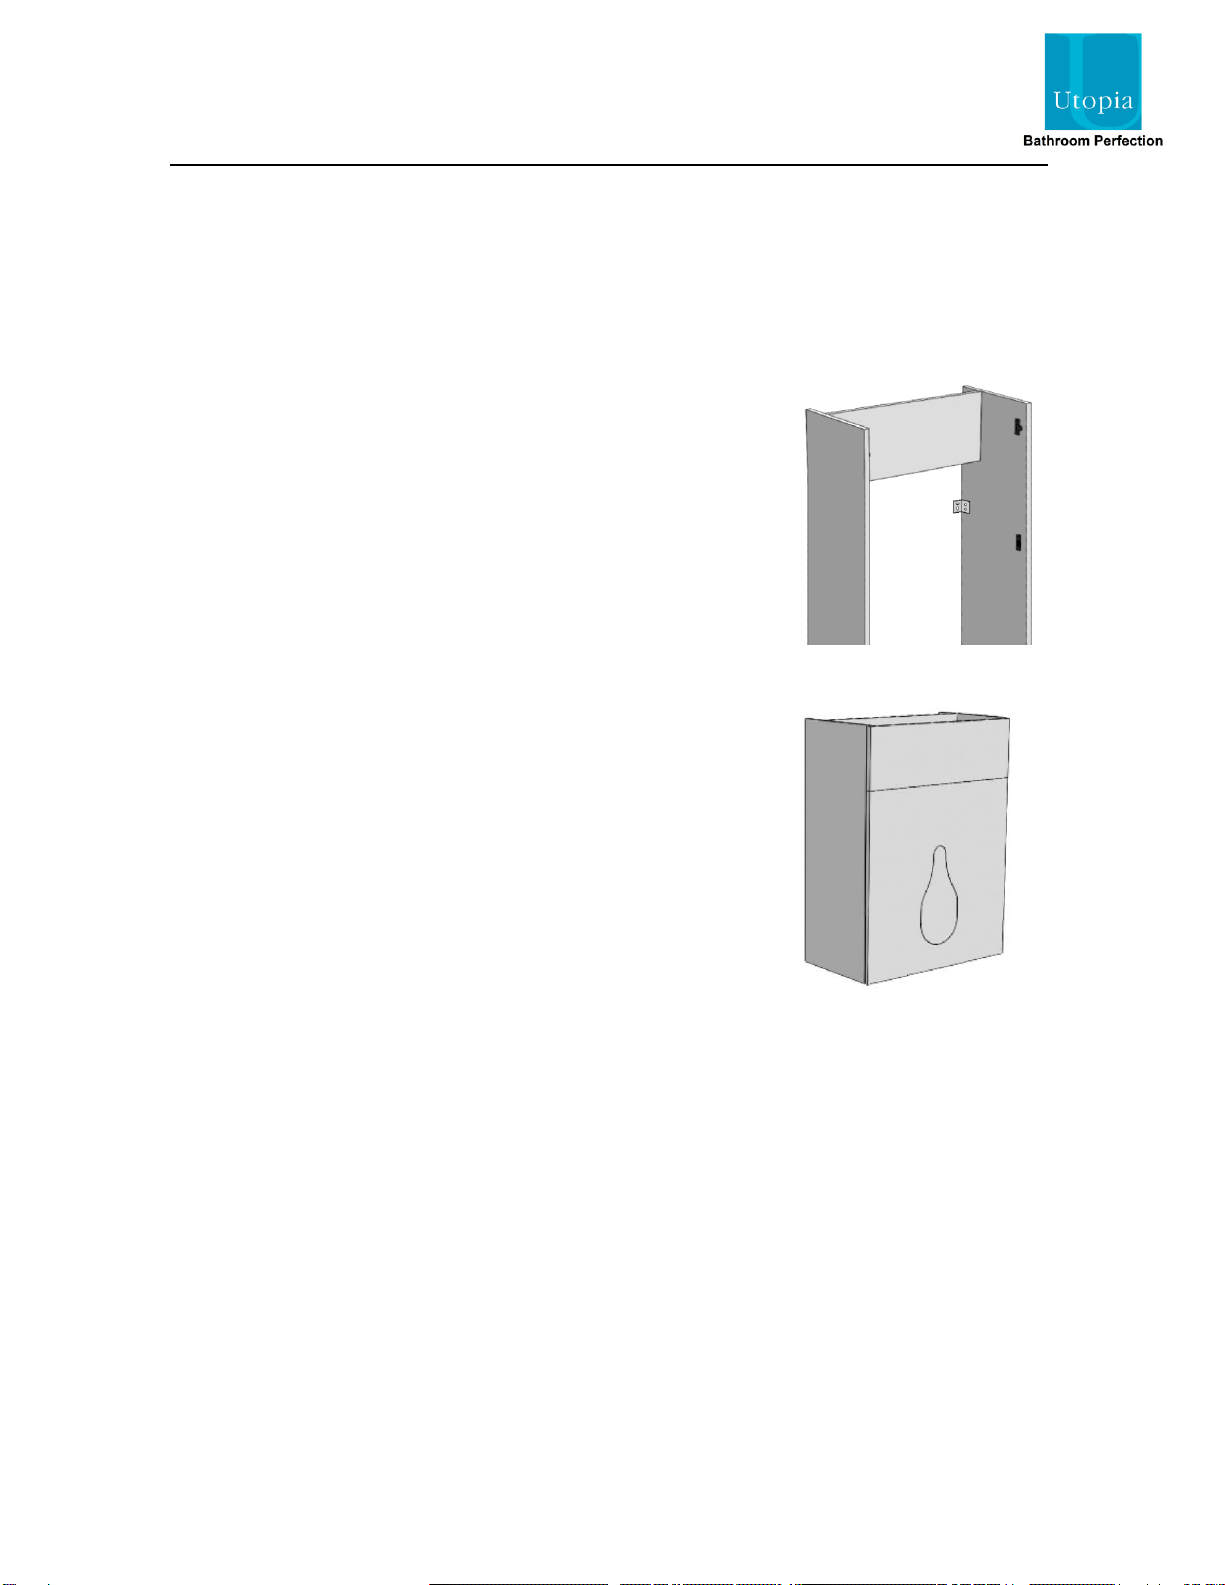
All cut edges must be sealed with PVA glue or good-quality, sanitary grade
silicone sealant to prevent the ingression of moisture.
Fit the top fascia panel last, after plumbing connections have been made
and installation completed.
Care & Maintenance
Furniture should be regularly dusted with a soft cotton or micro-fibre cloth. For more thorough
cleaning, occasionally wipe your furniture with a soft cloth dampened with a mild detergent
solution. Surfaces should be thoroughly dried with a lint free cloth to prevent watermarks. Under
no circumstances should solvent cleaning agents, bleach or abrasive cleaning agents or cloths be
used. Spills should be removed immediately using a clean cloth. All bathroom furniture will
deteriorate through prolonged periods of exposure to high levels of condensation so bathrooms
must be adequately ventilated using suitable extraction. Failure to ensure adequate ventilation
may invalidate your guarantee.