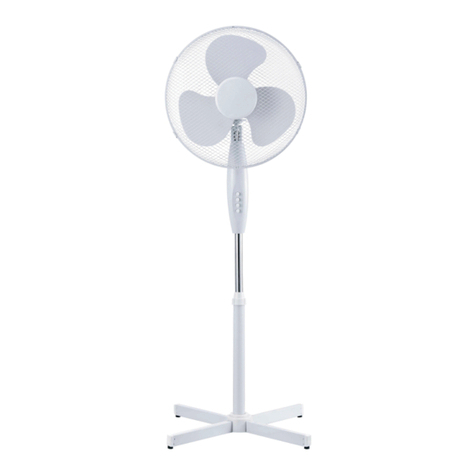
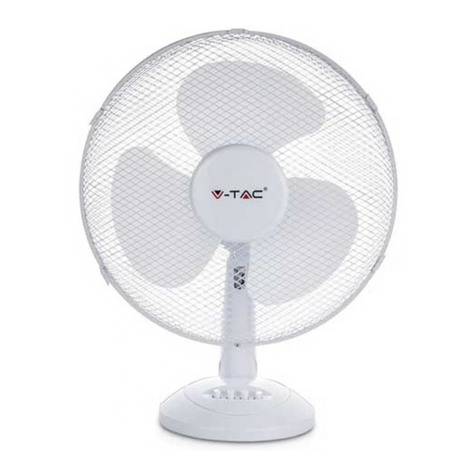
V-TAC VT-5016-5 User manual

SAFETY PRECAUTIONS
When using electrical appliances, basic safety precautions should always be followed. These
instructions should be saved for future reference:
• Read and familiarise yourself with all operating instructions before using this Pedestal Fan.
• Before plugging your unit into the mains, visually check that the unit is intact and has not
suffered any transit damage.
• Do not use this product with a programmer, timer, separate remote-control system or any
other device.
• Check that the voltage indicated on the data plate corresponds with that of the local network
before connecting the appliance to the mains power supply.
• This appliance can be used by children aged from 8 years and above and persons with
reduced physical, sensory or mental capabilities or lack of experience and knowledge if they
have been given supervision or instruction concerning use of the appliance in a safe way and
understand the hazards involved. Children shall not play with the appliance. Cleaning and user
maintenance shall not be made by children without supervision.
• This appliance is not intended for use by persons (including children) with reduced physical,
sensory or mental capabilities, or lack of experience and knowledge, unless they have been
given supervision or instruction concerning use of the appliance by a person responsible for

their safety. And Children should be supervised to ensure that they do not play with the appli-
ance
• Do not immerse the appliance or its cord in water or any other liquids.
• Do not leave the appliance unattended during use.
• Do not leave the appliance unattended whilst connected to the mains supply.
• Always use this appliance on a solid, level, surface.
• Do not use this appliance outdoors.
• It is imperative to unplug the power cord after the appliance has been used, before it is
cleaned and whilst being repaired.
• Repairs to electrical appliances should only be performed by a qualified electrician. Improper
repairs may place user at serious risk.
• Do not operate this appliance with a damaged plug or cord, after a malfunction or after being
dropped or damaged in any way.
• Regular, periodic checks should be carried out on the mains cable to ensure no damage is
evident. Should there be any signs of damage the appliance should not be used.
• If the power cable is damaged, it should only be replaced by the manufacturer or a suitable
qualified after-sales-service in order to avoid a hazard.
• Do not allow the mains cable to hang over sharp edges or come in contact with hot surfaces.
• Do not run the mains cable under carpets, rugs, etc.
• This appliance is intended for household use only and should not be used for industrial pur-
poses.

Thank you for selecting and buying V-TAC product. V-TAC will serve you the best. Please
read these instructions carefully before starting the installation and keep this manual handy
for future reference. If you have any another query, please contact our dealer or local
vendor from whom you have purchased the product. They are trained and ready to serve
you at the best.
INTRODUCTION & WARRANTY
This marking indicates that this
product should not be disposed
of with other household wastes.
Caution, risk of electric shock.
• Do not use any accessories or attachments with this appliance other than those supplied or
recommended by the supplier.
• Do not use this appliance for anything other than its intended use.
• Do not push objects (including fingers) into the fan grill or any openings as this could risk
injury, damage to the appliance and/or electric shock.
• Unplug after each use. Grasp the plug, not the cord.
• Please make sure to turn off the power before starting the installation.
• Installation should only be done by a certified electrician.

INSTRUCTION MANUAL
STAND FAN
MULTI-LANGUAGE MANUAL QR CODE
Please scan the QR code to
access the manual in multiple
languages.
TECHNICAL DATA
MODEL VT-5016–5
WATTS 55W
FAN SPEED LOW-MED-HIGH
OSCILLATION LOW-MED-HIGH
STAND FAN 16 INCHES STAND FAN
HEIGHT 1.25M
ADJUSTABLE HEIGHT 125CM MAX
GROSS WEIGHT 4.3 KGS
DIMENSION 430x410x125mm
BASE 410mm ROUND BASE
INPUT POWER
AC: 220-240~, 50/60Hz

ENGLISH
1. Front Guard
2. Guard Nut and Screw
3. Fan Blade
4. Rear Guard Central Fixing Nut
5. Rear Guard
6. Speed Control Switches
7. Motor Housing
8. Oscillation Control
9. Motor Spindle
10. Blade Retaining Nut
11. Pivot Screw
12. Pole Retaining Screw
13. Adjustable Pole
14. Pole Clamp
15. Lower Base Pole
16. Round Base
17. Heavy
18. Screw
DESCRIPTION OF PARTS
17.
18.
7.
10.
11.
5.
6.
9.
16.
13.
14.
8.
3. 1.
4. 2.
12.
15.

ENGLISH
Step 1. Take the lower
base pole (15)into the
round base hole(16),put
the heavy (17)inside the
round base(16) with the
lower base pole(15),Tight-
en the heavy(17) and the
round base(16) with
screw(18).
Replace the pole clamp
(14) and at the same time
raise the chrome adjust-
able pole (13) then tighten
the clamp (14).
Attach the fan assembly on
top of the pole and tighten
the pole retaining screw
(12).
Note: the adjustable pole
(13) can sometimes slip
inside the lower base pole
(15) during transit.
Step 2. Note the Rear
Guard locating pins on
the Motor Housing (7).
Step 3. Place the rear
guard (5) over the
pins on the motor
housing (7) and
replace the Rear
Guard Central Fixing
(4) nut by screwing it
back clockwise.
Note: the carry
handle is at the top:
Guard
locating pins
FIG 5
FIG 6
FIG 1

ENGLISH
Step 4. Take the fan blade (3) and slide it onto the motor spindle (9) ensuring that notch-
es on the rear of the fan blade line up with the splines on the spindle.
Note: Rear Guard removed for clarity (see figure 4).
Step 5. Secure the fan blade to the motor spindle by screwing on the Blade Retaining Nut
(10) in an anticlockwise direction.
Note: the retaining nut is reverse threaded (see figure 5).
Step 6. Remove the small Guard Nut & Screw (2) from the front guard (1) (see figure 6).
FIG 4 FIG 5 FIG 6

ENGLISH
Step 9. Bring the front guard down to meet the rear guard
and push the clips inwards until the front guard is fastened
to the rear guard (see figure 9).
Step 10. Finally fit the guard nut and screw (arrowed)
through the holes in the bottom edge of the guards and
tighten with a suitable pozidrive screwdriver (not supplied).
Note: this screw and nut must be fitted so that the guard
cannot be removed (see figure 10).
Step 7. Move the clips around the outside edge of the front guard outwards (see figure 7).
Step 8. Hang the front guard (1) over the top of the rear guard (5) (see figure 8).
FIG 10
FIG 7 FIG 8 FIG 9

ENGLISH
OPERATING INSTRUCTIONS
• Place the fan in the desired position ensuring that it is level and stable.
• If desired, the fan guard can be tilted up and down to alter the direction of the airflow.
Note: do not adjust the fan whilst connected to the mains and/or switched on.
Slacken the Pole Clamp (14) and adjust the fan to the desired height using the Adjustable Pole
(13), tighten the pole clamp once the desired height is set.
Note: the adjustable pole (13) can sometimes slip inside the lower base pole (15) during transit.
Press the ‘0’ button on the pedestal to ensure the fan is off.
Insert the mains plug into the nearest socket.
• Press the 1 button for fan low speed.
• Press the 2 button for fan medium speed
• Press the 3 button for fan high speed
Note: Press the ‘0’ button to switch off the fan.
MAKING YOUR FAN OSCILLATE FROM SIDE TO SIDE
• Press the oscillation control (8) down to enable the fan to oscillate from side to side.
• Pull the control up to stop the fan oscillating.
CARE AND USE OF YOUR FAN
• Ensure that the fan is not connected to the mains supply before cleaning.
• Wipe the fan body with a clean, soft damp cloth.
• Do not immerse the fan or its cord in water or any other liquid.

MESURES DE SÉCURITÉ
Lors de l'utilisation d'appareils électriques, des précautions de base doivent toujours être prises. Ces consignes doivent
être conservées pour référence ultérieure:
• Lisez et prenez connaissance de toutes les consignes d'utilisation avant d'utiliser ce ventilateur sur pied.
• Avant de brancher votre appareil sur le réseau électrique, procédez à un examen visuel afin de vous assurer que
l'appareil est intact et n'a subi aucun dommage pendant le transport.
• Ne pas utiliser ce produit avec un programmateur, une minuterie, un système de commande à distance séparé ou tout
autre appareil.
• Vérifiez que la tension indiquée sur la plaque signalétique correspond à celle du réseau local avant de brancher l'appar-
eil sur le réseau électrique.
• Cet appareil peut être utilisé par des enfants âgés de 8 ans et plus et par des personnes ayant des capacités physiques,
sensorielles ou mentales réduites ou manquant d'expérience et de connaissances sous réserve d’être supervisés ou
d’avoir reçu des consignes concernant l'utilisation de l'appareil d'une manière sûre et comprennent les risques encourus.
Les enfants ne doivent pas jouer avec l'appareil. Le nettoyage et l'entretien de la part des utilisateurs ne doivent pas être
effectués par des enfants sans surveillance.
• Cet appareil n'est pas destiné à être utilisé par des personnes (y compris des enfants) dont les capacités physiques,
sensorielles ou mentales sont réduites ou qui manquent d'expérience et de connaissances, à moins qu'elles ne soient pas
supervisées ou aient reçu des consignes sur l'utilisation de l'appareil par une personne responsable de leur sécurité. Les
enfants doivent être surveillés aussi pour s'assurer qu'ils ne jouent pas avec l'appareil
• N’immergez pas l'appareil ou son cordon dans l'eau ou tout autre liquide.
• Ne laissez pas l'appareil sans surveillance pendant l'utilisation.
• Ne laissez pas l'appareil sans surveillance lorsqu'il est branché sur le réseau électrique.
• Utilisez toujours cet appareil sur une surface solide et plane.
• N'utilisez pas cet appareil à l'extérieur.
• Il est impératif de débrancher le cordon d'alimentation après l'utilisation de l'appareil, avant son nettoyage et pendant
sa réparation.
• Les réparations des appareils électriques ne doivent être effectuées que par un électricien qualifié. Une réparation
incorrecte peut faire courir de sérieux risques à l'utilisateur.
• N’utilisez pas cet appareil si la fiche ou le cordon sont endommagés, s’il y a un dysfonctionnement ou s’il a été laissé
tomber ou endommagé de quelque manière que ce soit.
FRENCH

• Le câble d’alimentation doit être contrôlé régulièrement et périodiquement afin de s'assurer de l’absence de tout
dommage. Si l'appareil présente des signes d'endommagement, il ne doit pas être utilisé.
• Si le câble d'alimentation est endommagé, il ne doit être remplacé que par le fabricant ou un service après-vente
qualifié approprié afin d'éviter tout danger.
• Ne laissez pas le câble d’alimentation pendre par-dessus de bords tranchants ou entrer en contact avec des surfaces
chaudes
• Ne faites pas passer le câble d’alimentation sous des tapis, des moquettes, etc.
• Cet appareil est destiné à un usage domestique uniquement et ne doit pas être utilisé à des fins industrielles.
• N'utilisez pas d'autres accessoires ou pièces jointes avec cet appareil que ceux fournis ou recommandés par le fournis-
seur.
• N'utilisez pas cet appareil à d’autres fins que l'usage auquel il est destiné.
• Ne poussez pas d'objets (y compris les doigts) dans la grille du ventilateur ou dans les ouvertures, car cela pourrait
entraîner des blessures, des dommages à l'appareil et/ou un choc électrique.
• Débranchez après chaque utilisation. Saisissez la fiche, pas le cordon.
• Veuillez vous assurer de couper le courant avant de commencer l'installation.
• L'installation ne doit être effectuée que par un électricien certifié.
[FR] INTRODUCTION & GARANTIE
Merci d’avoir choisi et acheté un produit à V-TAC. V-TAC vous offrira le meilleur. Veuillez lire attentivement ces instruc-
tions avant de commencer l’installation et conservez ce manuel à portée de main pour référence ultérieure. Si vous avez
d’autres questions, veuillez contacter notre distributeur ou le fournisseur local auprès duquel vous avez acheté le produit.
Ils sont formés et prêts à vous servir au mieux.
DESCRIPTION DES PIÈCES
1. Protection avant
2. Écrou et vis de protection
3. Pale de ventilateur
4. Écrou de fixation de la protection arrière
5. Protection arrière
6. Interrupteurs de commande de la vitesse
FRENCH

7. Boîtier moteur
8. Contrôle des oscillations
9. Broche du moteur
10. Écrou de retenue de la pale
11. Vis pivotante
12. Vis de fixation du poteau
13. Poteau réglable
14. Collier de serrage
15. Poteau de la base inférieure
16. Base ronde
17. Poids
18. Vis
Étape 1. Prenez le poteau de la base inférieure (15) dans le trou de la base ronde (16), mettez le poids (17) dans la base
ronde (16) avec le poteau de la base inférieure (15), serrez le poids (17) et la base ronde (16) avec la vis (18). Retirez la
pince à poteau (14) et soulevez en même temps le poteau réglable chromé (13) puis serrez la pince (14). Fixez l'ensem-
ble du ventilateur sur le haut du poteau et serrez la vis de fixation du poteau (12).
Remarque: le poteau réglable (13) peut parfois se glisser à l'intérieur du poteau de la base inférieure (15) pendant le
transport.
Étape 2. Notez les goupilles de positionnement de la protection arrière sur le boîtier du moteur (7).
Étape 3. Placez la protection arrière (5) sur les goupilles du boîtier du moteur (7) et remettez l'écrou de fixation centrale
de la protection arrière (4) en place en le revissant dans le sens des aiguilles d'une montre.
Remarque: la poignée de transport se trouve en haut:
Étape 4. Prenez la pale du ventilateur (3) et faites-la glisser sur la broche du moteur (9) en vous assurant que les
encoches à l'arrière de la pale du ventilateur sont alignées avec les cannelures de l'axe.
Note: La protection arrière a été enlevée pour plus de clarté (voir figure 4).
FRENCH

Étape 5. Fixez la pale du ventilateur à la broche du moteur en vissant l'écrou de retenue de la pale (10) dans le sens
inverse des aiguilles d'une montre.
Remarque: l'écrou de retenue est à filetage inversé (voir figure 5).
Étape 6. Retirez l’écrou et la vis de la petite protection (2) de la protection avant (1) (voir figure 6).
Étape 7. Déplacez les clips autour du bord extérieur de la protection avant vers l'extérieur (voir figure 7).
Étape 8. Accrochez la protection avant (1) sur le haut de la protection arrière (5) (voir figure 8).
Étape 9. Faites descendre la protection avant pour qu'elle rencontre la protection arrière et poussez les clips vers
l'intérieur jusqu'à ce que la protection avant soit fixée à la protection arrière (voir figure 9).
Étape 10. Enfin, faites passer l'écrou et la vis (fléchés) de la protection par les trous du bord inférieur des protections et
serrez-les avec un tournevis pozidrive approprié (non fourni).
Remarque: cette vis et cet écrou doivent être montés de manière à ce que la protection ne puisse pas être retirée (voir
figure 10).
INSTRUCTIONS D'UTILISATION
- Placez le ventilateur dans la position souhaitée en vous assurant qu'il est mis à niveau et stable.
- Si vous le souhaitez, vous pouvez faire basculer la grille de protection du ventilateur de haut en bas pour modifier la
direction du flux d'air.
Remarque: ne pas régler le ventilateur lorsqu'il est branché sur le secteur et/ou allumé.
Desserrer le collier de serrage (14) et régler le ventilateur à la hauteur désirée à l'aide du poteau réglable (13), serrer la
pince du poteau une fois la hauteur souhaitée réglée.
Remarque: le poteau réglable (13) peut parfois se glisser à l'intérieur du poteau de la base inférieure (15) pendant le
transport.
FRENCH

Appuyez sur le bouton "0" de la base pour vous assurer que le ventilateur est éteint.
Branchez la fiche secteur dans la prise la plus proche.
- Appuyez sur le bouton 1 pour la basse vitesse du ventilateur.
- Appuyez sur le bouton 2 pour la vitesse moyenne du ventilateur
- Appuyez sur le bouton 3 pour la vitesse élevée du ventilateur
Remarque: appuyez sur le bouton "0" pour éteindre le ventilateur.
FAIRE OSCILLER VOTRE VENTILATEUR D'UN CÔTÉ À L'AUTRE
• Appuyez sur la commande d'oscillation (8) vers le bas pour permettre au ventilateur d'osciller d'un côté à l'autre.
• Tirez la commande vers le haut pour arrêter l'oscillation du ventilateur.
ENTRETIEN ET UTILISATION DE VOTRE VENTILATEUR
• Assurez-vous que le ventilateur n'est pas branché sur le réseau d’alimentation avant de le nettoyer.
• Essuyez le corps du ventilateur avec un chiffon propre, doux et humide.
• Ne pas immerger le ventilateur ou son cordon dans l'eau ou tout autre liquide.
FRENCH

VORSICHTSMASSNAHMEN
Bei der Verwendung von Elektrogeräten sollten immer die grundlegenden Vorsichtsmaßnahmen beachtet werden. Diese
Anweisungen sollten zum späteren Nachschlagen aufbewahrt werden:
• Lesen und machen Sie sich mit allen Bedienungsanleitungen vertraut, bevor Sie diesen Standventilator verwenden.
• Bevor Sie Ihr Gerät an das Stromnetz anschließen, überprüfen Sie visuell, ob das Gerät intakt ist und keine Trans-
portschäden aufweist.
• Dieses Produkt nicht mit einem Programmiergerät, einem Timer, einer separaten Fernbedienung oder einem anderen
Gerät verwenden.
• Vergewissern Sie sich vor dem Anschließen des Geräts an das Stromnetz, dass die auf dem Typenschild angegebene
Spannung mit der des lokalen Netzwerks übereinstimmt.
• Dieses Gerät kann von Kindern ab 8 Jahren und von Personen mit eingeschränkten körperlichen, sensorischen oder
geistigen Fähigkeiten oder mangelnder Erfahrung und mangelnden Kenntnissen verwendet werden, vorausgesetzt, sie
werden beaufsichtigt oder über die sichere Verwendung des Geräts unterwiesen wurden und die Sicherheitsbestimmun-
gen und die damit verbundenen Gefahren verstanden haben. Kinder dürfen nicht mit dem Gerät spielen. Reinigung und
Benutzerwartung dürfen nicht von Kindern ohne Aufsicht durchgeführt werden.
• Dieses Gerät ist nicht zur Verwendung durch Personen (einschließlich Kinder) mit eingeschränkten körperlichen,
sensorischen oder geistigen Fähigkeiten oder mangelnder Erfahrung und mangelndem Wissen vorgesehen, es sei denn,
sie wurden von einer für ihre Sicherheit verantwortlichen Person beaufsichtigt oder in die Verwendung des Geräts einge-
wiesen. Kinder sollten auch beaufsichtigt werden, um sicherzustellen, dass sie nicht mit dem Gerät spielen.
• Das Gerät oder das Kabel nicht in Wasser oder andere Flüssigkeiten tauchen.
• Das Gerät während des Betriebs nicht unbeaufsichtigt lassen.
• Das Gerät nicht unbeaufsichtigt lassen, wenn es an das Stromnetz angeschlossen ist.
• Dieses Gerät immer auf einer festen, ebenen Fläche verwenden.
• Das Gerät nicht im Freien verwenden.
• Es ist unbedingt erforderlich, das Netzkabel abzuziehen, nachdem das Gerät benutzt wurde und bevor es gereinigt und
repariert wird.
• Reparaturen an Elektrogeräten dürfen nur von einer Elektrofachkraft durchgeführt werden. Durch unsachgemäße
Reparaturen kann der Benutzer ernsthaft gefährdet werden.
• Betreiben Sie dieses Gerät nicht mit einem beschädigten Stecker oder Kabel, nach einer Fehlfunktion oder nach einem
Sturz oder einer Beschädigung.
GERMAN

• Das Netzkabel sollte regelmäßig überprüft werden, um sicherzustellen, dass keine Schäden erkennbar sind. Bei Anze-
ichen von Beschädigungen darf das Gerät nicht benutzt werden.
• Wenn das Netzkabel beschädigt ist, muss es vom Hersteller oder einer Kundendienstabteilung mit entsprechenden
Qualifikationen ausgetauscht werden, um Gefahren zu vermeiden.
• Lassen Sie das Netzkabel nicht über scharfe Kanten hängen oder mit heißen Oberflächen in Berührung kommen.
• Das Netzkabel darf nicht unter Teppichen, Matten usw. verlegt werden.
• Für das Gerät dürfen keine anderen als die vom Lieferanten gelieferten oder empfohlenen Zubehörteile verwendet
werden.
• Für das Gerät dürfen keine anderen als die vom Lieferanten gelieferten oder empfohlenen Zubehörteile verwendet
werden.
• Verwenden Sie dieses Gerät nur für den bestimmungsgemäßen Gebrauch.
• Führen Sie keine Gegenstände (einschließlich Ihrer Finger) in das Ventilatorgitter oder in jegliche Öffnungen ein, da
dies zu Verletzungen, Schäden am Gerät und/oder Stromschlägen führen kann.
• Ziehen Sie nach jedem Gebrauch den Netzstecker. Fassen Sie den Stecker und nicht das Kabel an.
• Stellen Sie sicher, dass das Gerät ausgeschaltet ist, bevor Sie mit der Installation beginnen.
• Die Installation sollte nur von einem zertifizierten Elektriker durchgeführt werden.
[DE] INFÜHRUNG UND GEBRAUCHSANWEISUNG
Wir danken Ihnen, dass Sie ein V-TAC ausgesucht und gekauft haben. V-TAC wird Ihnen die besten Dienste erweisen.
Lesen Sie, bitte, diese Gebrauchsanweisung vor der Montage aufmerksam durch und halten Sie sie für Auskünfte in der
Zukunft parat. Sollten Sie weitere Fragen haben, kontaktieren Sie, bitte, unseren lokalen Händler oderVerkäufer, von
dem Sie das Produkt gekauft haben. Sie sind ausgebildet und bereit Sie auf die bestmögliche Art und Weise zu unterstüt-
zen.
DESCRIPTION OF PARTS
1. Vorderer Schutz
2. Schutzmutter und Schraube
3. Lüfterflügel
4. Zentrale Befestigungsmutter des hinteren Schutzes
5. Hinterer Schutz
GERMAN

6. Geschwindigkeitsschalter
7. Motorgehäuse
8. Steuerung der Schwingung
9. Motorspindel
10. Lüfterflügelhaltemutter
11. Schwenkschraube
12. Stangehalteschraube
13. Einstellbare Stange
14. Stangenklemme
15. Untere Basisstange
16. Runde Basis
17. Last
18. Schraube
Schritt 1. Nehmen Sie die untere Basisstange (15) in das runde Basisloch (16), setzen Sie die Last (17) mit der unteren
Basisstange (15) in die runde Basis (16) ein, ziehen Sie die Last (17) und die runde Basis (16) mit Schraube (18). Setzen
Sie die Stangenklemme (14) wieder ein und heben Sie gleichzeitig die verstellbare Chromstange (13) an. Ziehen Sie
dann die Klemme (14) fest. Befestigen Sie die Lüfterbaugruppe oben an der Stange und ziehen Sie die Stangenhalte-
schraube (12) fest.
Hinweis: Die einstellbare Stange (13) kann während des Transports manchmal in die untere Basisstange (15) rutschen.
Schritt 2. Beachten Sie die Positionierungsstifte des hinteren Schutzes am Motorgehäuse (7).
Schritt 3. Setzen Sie den hinteren Schutz (5) über die Stifte am Motorgehäuse (7) und ersetzen Sie die Mutter der
zentralen Befestigung des hinteren Schutzes (4), indem Sie sie im Uhrzeigersinn zurückschrauben.
Hinweis: Der Tragegriff muss sich auf der Oberseite befinden:
Schritt 4. Nehmen Sie den Lüfterflügel (3) und schieben Sie ihn auf die Motorspindel (9). Achten Sie dabei darauf, dass
die Kerben an der Rückseite des Lüfterflügels mit den Keilen an der Spindel übereinstimmen.
Hinweis: Der hintere Schutz wurde aus Gründen der Übersichtlichkeit entfernt (siehe Abbildung 4).
GERMAN

Schritt 5. Befestigen Sie den Lüfterflügel an der Motorspindel, indem Sie die Flügelhaltemutter (10) gegen den Uhrzei-
gersinn aufschrauben.
Hinweis: Die Haltemutter hat ein umgekehrtes Gewinde (siehe Abbildung 5).
Schritt 6. Entfernen Sie die kleine Schutzmutter und -schraube (2) vom vorderen Schutz (1) (siehe Abbildung 6)
Schritt 7. Bewegen Sie die Clips um die Außenkante des vorderen Schutzes nach außen (siehe Abbildung 7).
Schritt 8. Hängen Sie den vorderen Schutz (1) über den hinteren Schutz (5) (siehe Abbildung 8).
Schritt 9. Bringen Sie den vorderen Schutz nach unten, um den hinteren Schutz zu treffen, und drücken Sie die Clips
nach innen, bis der vordere Schutz am hinteren Schutz befestigt ist (siehe Abbildung 9).
Schritt 10. Führen Sie zum Schluss die Schutzmutter und die Schraube (Pfeil) durch die Löcher in der Unterkante der
Schutzvorrichtungen und ziehen Sie sie mit einem geeigneten Pozidriv-Schraubendreher (nicht im Lieferumfang
enthalten) fest.
Hinweis: Diese Schraube und Mutter müssen so angebracht sein, dass der Schutz nicht entfernt werden kann (siehe
Abbildung 10).
BETRIEBSANLEITUNG
• Stellen Sie den Lüfter in die gewünschte Position und achten Sie darauf, dass er gerade und stabil ist.
• Falls gewünscht, kann der Lüfterschutz nach oben und unten gekippt werden, um die Richtung des Luftstroms zu
ändern.
Hinweis: Stellen Sie den Lüfter nicht ein, während er an das Stromnetz angeschlossen und/oder eingeschaltet ist.
Lösen Sie die Stangenklemme (14) und stellen Sie den Lüfter durch die einstellbare Stange auf die gewünschte Höhe ein.
(13) Ziehen Sie die Stangenklemme fest, sobald die gewünschte Höhe eingestellt ist.
Hinweis: Die einstellbare Stange (13) kann während des Transports manchmal in die untere Basisstange (15) rutschen.
Drücken Sie die Taste "0" auf dem Sockel, um sicherzustellen, dass der Lüfter ausgeschaltet ist.
Stecken Sie den Netzstecker in die nächste Steckdose.
GERMAN

EINSTELLUNG DER SCHWINGUNGEN DES LÜFTERS VON SEITE ZU SEITE
• Drücken Sie den Schwingungsregler (8) nach unten, damit der Lüfter von einer Seite zur anderen schwingen kann.
• Ziehen Sie den Regler nach oben, um das Schwingen des Lüfters zu stoppen.
PFLEGE BEI DER NUTZUNG IHRES LÜFTERS
• Stellen Sie vor der Reinigung sicher, dass der Lüfter nicht an das Stromnetz angeschlossen ist.
• Wischen Sie den Lüfterkörper mit einem sauberen, weichen, feuchten Tuch sauber.
• Tauchen Sie den Lüfter oder sein Kabel nicht in Wasser oder andere Flüssigkeiten.
GERMAN

ПРЕДПАЗНИ МЕРКИ
Когато използвате електроуреди, винаги трябва да спазвате основни предпазни мерки. Съхранявайте настоящите
инструкции за бъдещи справки:
• Преди да започнете да използвате този вентилатор с поставка, прочетете и се запознайте с всички инструкции за
експлоатация.
• Преди да включите Вашия уред в електрическата мрежа, направете визуален оглед, за да се уверите, че е в
изправно състояние и че не е претърпял повреда при транспортирането.
• Не използвайте този продукт с програматор, таймер, отделна система за дистанционно управление или каквото и
да било друго устройство.
• Преди да свържете уреда към мрежовото захранване, проверете дали напрежението, указано на
идентификационната табелка, съответства на това на локалната мрежа.
• Този уред може да се използва от деца на възраст 8 години и по-големи и от лица с физически, сетивни или
умствени нарушения или липса на опит или познания, при условие, че са под надзор или са инструктирани относно
безопасната употреба на уреда и разбират свързаните с него рискове. Децата не трябва да се оставят да играят с
уреда. Почистването и поддръжката от страна на потребителя не трябва да се извършват от деца без надзор.
• Този уред не е предназначен за използване от лица (включително деца) с физически, сетивни или умствени
нарушения или липса на опит или познания, освен ако не са под надзора или не са инструктирани относно
употребата на уреда от лицето, отговорно за тяхната безопасност. Децата също трябва да бъдат под надзор, за да
се гарантира, че не играят с уреда.
• Не потапяйте уреда или неговия кабел във вода или каквато и да било друга течност.
• Не оставяйте уреда без надзор по време на работа.
• Не оставяйте уреда без надзор, когато е включен в електрическата мрежа.
• Винаги поставяйте уреда върху твърда и равна повърхност.
• Не използвайте уреда на открито.
• Задължително е захранващият кабел да се разединява от мрежата след употреба, преди почистване и по време
на ремонт.
• Ремонтите на електроуреди трябва да се извършват само от квалифицирани електротехници. Неправилно
извършеният ремонт може да създаде сериозен риск за потребителя.
• Не включвайте уреда, ако щепселът или кабелът му са повредени, ако е налице неизправност или след
изпускане или повреждане по какъвто и да било начин.
BULGARIAN
Table of contents
Languages:
Other V-TAC Fan manuals

V-TAC
V-TAC 80133970 User manual

V-TAC
V-TAC VT-6056-4 User manual

V-TAC
V-TAC VT-4538 User manual

V-TAC
V-TAC VT-6055-3 User manual

V-TAC
V-TAC VT-6043-4 User manual

V-TAC
V-TAC VT-4012-3 User manual

V-TAC
V-TAC VT-6052-5 User manual

V-TAC
V-TAC VT-4016-5 User manual

V-TAC
V-TAC VT-5566 User manual

V-TAC
V-TAC VT-4016-3 User manual